Over time, cracks can form in the masonry of a brick oven. This is due to a number of reasons:
- the influence of temperature difference
- uneven heating of refractory bricks bonded with chamotte clay
- poor quality putty used in the construction of the furnace
- furnace slump
- improper oven drying
- poor quality work in finishing
- condensation formed on the walls of the stove
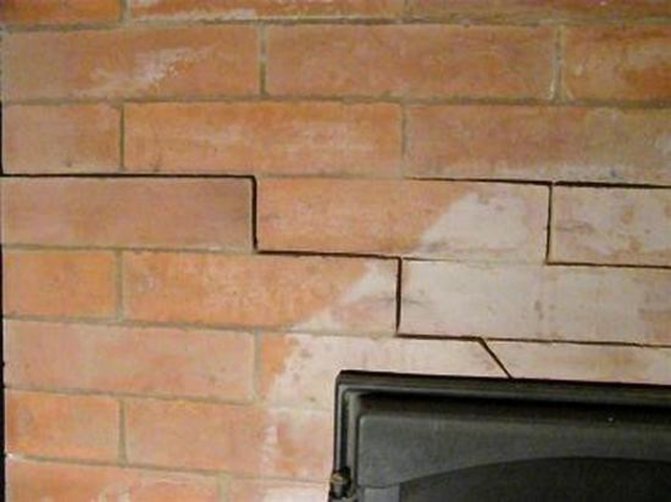
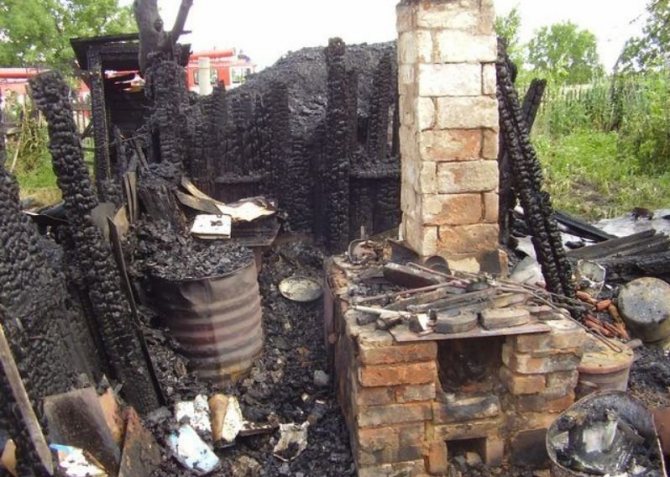
Deep cracks pose a threat of collapse of the structure, as well as penetration of poisonous carbon monoxide, dangerous to human health and life. A natural question arises - how can you cover up the stove so that it does not crack? If only installing a new foundation will help to get rid of cracks resulting from the sinking of the furnace, then in other cases you can get rid of them.
How can you cover up the stove so that it does not crack
If the damage is small, superficial, you can remove the old finish from the bricks to re-plaster. If the damage is through, you will have to dismantle the damaged area and restore it.
Several options for what you can cover up the stove so that it does not crack:
- chamotte clay composition
It is a widely used material for restoring oven surfaces. Before use, fireclay clay should be kept in water for about two days.
- clay and sand composition
The cheapest option of the material, often used due to the ductility and viscosity of the mixture, as well as the durability after firing. For a high-quality solution, you will need any clay, the main thing is that it does not contain any impurities. You can prepare it as follows:
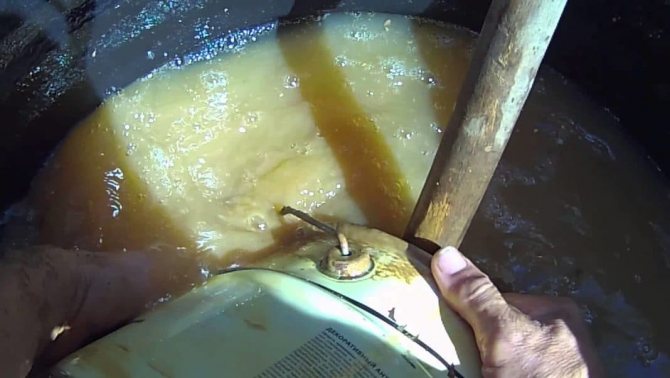
- Clay is poured with water in a ratio of 1 to 3, after which it is infused for at least a day.
- After it has been infused, it must be mixed with the addition of water. Then strain through a fine sieve and let it brew again.
- A properly prepared mixture should have a thick consistency.
- Mix clay and sand in a ratio of 1 to 2.5.
After mixing the solution, you can check its readiness by rolling a small ball. If it cracks, then there is not enough liquid in the solution. To increase the strength of the clay mortar, you can add asbestos, cement or gypsum to it.
Stove mix
- oven glue
This material can be purchased at the store and is durable and flame retardant. The composition of the kiln glue includes fireclay powder and refractory cement. It is of two types: solid and plastic mixture. The first type is rubbing the entire surface of the furnace, the second one is used to putty the seams and cracks. To prepare the glue solution, you need to dilute it in small portions, because it dries up quickly. For 1 liter of plastic mixture, 5 liters of solid must be kneaded. A plastic mixture is applied to the wetted bricks, all defects are repaired. Then a finishing coat is applied in the form of hard oven glue.
- special compounds for grouting ovens (you can purchase or make yourself).
If it is not possible to purchase a ready-made oven grout, you can prepare it yourself. For this, as in the first two cases, it is necessary to soak the clay, let it brew for 24 hours. Then add sand in a ratio of 1 to 4 and stir thoroughly. In the process of stirring, it is necessary to gradually add finely chopped straw, at the end add a pack of salt.
How to cover the stove with clay so that it does not crack?
All existing cracks must be knocked out with a chisel, the brick must be cleaned. If the surface is completely plastered, the seams must be cleaned to a depth of about 1 cm.Before covering up the stove so that it does not crack, it is necessary to moisten all cracks, seams and cracks abundantly with water or a primer.

Stove
Before you coat the stove with a solution of clay, you need to heat it up to such an extent that its surface warms up a little. Then the stove is covered with a thin layer of liquid clay solution, left to dry for a while. Then the surface is reinforced: burlap or a thin metal mesh is applied, this will strengthen the plaster. The burlap is glued with an overlap, starting from top to bottom, and the mesh is attached with nails in the seams between the bricks. This sequence of actions is the same both for plastering the entire surface area, and when it is necessary to cover up individual areas.
Next, two layers of plaster, 5 mm thick, are applied. Too thick layer will be uneven and uneven. When the surface is dry, it is rubbed, and after complete drying, it is covered with a lime mortar. If you do not plan to whitewash the stove, you can add a little lime at the stage of mixing the clay solution, the clay will become lighter.
After the coating is completely dry (this will take at least 7 days), you can start heating it, but not earlier, otherwise it will continue to crack.
How to cover up cracks and plaster the stove?
In order not to crack the furnace, you need to competently approach its construction and operation. But if cracks do appear, they must be eliminated as quickly as possible. Regardless of the type of mixture, the structure must be prepared before restoration. The surface is cleaned of dirt and debris, and cracks deepen and widen. If there are bumps and rushes on the base, they are knocked down.
Remember! If the oven begins to crack due to insufficient shrinkage, let it sit completely. Otherwise, after repair, the structure will again be covered with cracks.
The hearth must be heated before coating. Due to the high temperature, the furnace materials will increase in volume. This will avoid re-cracking immediately after the post-restoration firing.
If there are few "seams", they are sealed locally before plastering. Otherwise, a holistic coating is used - the entire surface is covered with a liquid heat-resistant putty.
Scheme of work
In general, the procedure is as follows:
- clean the base and perform other additional work;
- cover the surface in a thin layer with a liquid mixture and allow the putty to dry;
- reinforce the base (or slots, if the repair is local); for this, a metal mesh with small meshes is used; fix the reinforcement with nails or dowels; as an alternative to the mesh, you can use burlap soaked in putty; it is preferable to patch up cracks with it;
- after the starting layer has dried, the hearth is plastered; the oven is coated in two layers - the thickness of each layer is not more than 5 mm.
The next steps are at the discretion of the oven owner. The structure is covered with whitewash or decorated in some other way.
Alternative ways
A more radical way to get rid of cracks is to install an aluminum frame or other metal. This requires two metal sheets, scissors for cutting metal, as well as corners. The size of the sheet is measured along the height and length of the surface to be repaired, cut out and applied to the furnace. On top and on the sides, the sheet is fixed with metal corners. After installation, the frame can be painted.
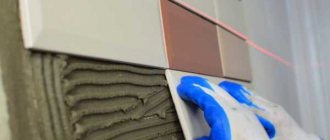
In addition, you can make ceramic tiles on the stove surface. It can also be attached on top of the frame, but if the cladding is of poor quality, cracks will still appear on the stove, only under the tiles.
How to cover up the stove folk putty for the stove
In building materials stores, you can find a lot of putties and mixtures, but the prices for them are rather big.And if we are talking about a summer residence, then you need to cover up the stove, which is rarely used. In any case, folk methods are no worse than newfangled methods, and you can find materials for putty according to folk “recipes” right there, near the dacha.
The most famous kiln putty is a clay and sand mortar. Sometimes asbestos is added there, sometimes a little lime, and some even recommend salt such a solution! However, for a start, you can try the classic composition of stove putty, proven for centuries.
Elimination of cracks on a metal surface
If a metal stove begins to crack, welding will be the best solution for repairing it. If it is impossible to use this option, you can prepare a heat-resistant mixture for sealing defects:
- Clay-based mortar with the addition of metal filings, manganese dioxide, salt and borax in a ratio of 30 to 4: 2: 1: 1
- A mixture of liquid glass and magnesite in a ratio of 3:10. Also, on the basis of water glass, a mixture of two parts of manganese oxide, zinc white and borax is made in one part. The glass is added until the desired consistency is obtained. Whitewash is used dry.
- Colloidal sulfur, metal filings and ammonium chloride are mixed in a ratio of 1.5: 96: 2.5.
- Based on natural drying oil: you need graphite, lead, manganese oxide in a ratio of 5 to 1 to 1. Lead is used in the form of a calcined oxide. Another solution with graphite, lead and chalk is diluted in a ratio of 12: 4: 3. Elimination of cracks on a metal surface
Why do cracks appear
There are several reasons why the stove can crack:
- Previously, poor quality putty was used;
- Violation of finishing technology;
- Improper drying;
- Drawdown.
And if you can cope with the first three reasons on your own by covering up the stove, then in the latter case you will have to completely shift it from the foundation to the chimney.
However, cracks are not always the reason for the penetration of carbon monoxide. A smell of smoke or gas may occur if:
- Chimney is clogged;
- Blockage in the stove riser;
- The inside of the oven is not folded correctly;
- Hypothermia of the riser.
The blockages will need to be removed, the supercooled riser can be heated with a burning newspaper. If the furnace was folded in violation of the technology, major repairs will have to be done.
Video: Clay mortar for furnace repair
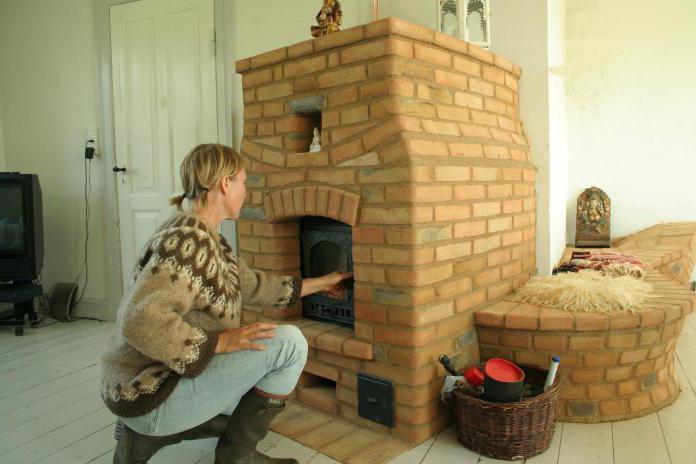
Inspection of the oven
To analyze the state of the furnace, you do not need to have the professional skills of a builder or stove-maker. The main thing is to find all the cracks and estimate their size. If there are no large defects on the masonry, then it will be enough to remove the old plaster and apply a new one. In addition, you need to remove some of the mortar between the bricks in the place where the crack is formed. After these procedures, the masonry is covered with a solution so that no patches are noticeable.
In the case of large defects, you will have to dismantle some of the bricks and replace them with new ones. The danger of a crack can be determined by the characteristic burning smell from the cracks and the emission of smoke. Repairing large cracks is a painstaking and time-consuming process. It is best to entrust such restoration to a professional.
The stove is cracked - we determine the reasons!
Cracks and cracks, like a spider web, stretch along the surface of the stove, especially if you heat it on frosty days. The problem is not new, so there are plenty of solutions, but you just need to choose the right one, depending on a particular situation. First you need to understand the causes of cracks. By and large, there can be three of them - poor-quality putty, hasty finishing of the furnace without observing the standards and the sinking of the furnace itself.
The stove may sag due to an improperly laid foundation or poor-quality bricks. The most radical way to solve the problem is to disassemble the stove, strengthen the foundation, and fold it back down.However, one should act in this spirit if the drawdown is really significant, smoke pours out of the cracks during the furnace, the doors cease to close tightly, and the brick inside the stove itself is crumbling. With such "symptoms" it is necessary not only to disassemble it, but also to assemble it from completely different materials.
However, if we are talking about small cracks, there is still no need to rush - the sinking of the new furnace in the first few years is permissible. What should not be done immediately after laying the stove is to tile it. Of course, this is beautiful and practical, but when, as a result of a subsidence, it starts to fall off, you are unlikely to enjoy sweeping the fragments and glueing it all over again. Therefore, do not rush - let your stove warm up properly for a year or two, and if cracks do not appear, then lay the tiles.
Tiling is often recommended as a solution to cracking problems. But at the same time, summer residents forget that the stove can crack under the tiles. And in appearance everything can be fine, only through these cracks the smoke will penetrate into the room, and this is already fraught with consequences. Therefore, the tile is good only in those cases when the stove is checked and certainly will not crack.
The causes of cracks
- Many minor cracks, which are not visible on a cold oven, are formed due to the different thermal expansion of brick and masonry mortar. They do not pose a threat: they can be plastered.
- If one part heats up more than the other, a gap in the masonry appears at the transition point, which can be repaired with a new mortar.
- The reason may be non-observance of the operating rules. Having melted the still damp masonry, cracks cannot be avoided. They can be repaired with new mortar and plastered.
- If the house has not been heated for the whole winter, not only the stove, but also the walls will become wet and crack from temperature changes. Then you should thoroughly heat the house, prepare the mortar and seal all the cracks.
There are more serious reasons. A crack can appear if the physical characteristics of the material from which it is composed are not taken into account. Red, refractory, refractory bricks and stones expand differently when fired.
Without a margin in the heat seams, the masonry on cast-iron appliances will begin to break. In other cases, the foundation does not match the dimensions of the furnace or shrinks unevenly. Then the oven will have to be shifted over time.
Caring for your stove

Stove maintenance
Now you know how you can cover the stove so that it does not crack. You should take care of your stove in a timely manner in order to prevent the formation of large cracks. Firstly, small defects are easier to cover up, and secondly, this will help prevent the formation of large defects and protect the operation of your furnace.
We suggest that you familiarize yourself with What kind of mortar is needed for laying a stove: clay masonry mortar, clay for stove masonry
As with any repair work, repairing cracks on the stove will take time and investment. But everyone can cope with this matter, because it does not require special qualifications, special tools and materials. The experience gained in sealing cracks in your furnace may well be useful in its further operation.
Crack plastering
The oven must not be plastered over the cracks. First, you need to process the defects in one of the ways described above, and then apply the plaster. The composition can also protect the oven from improper heating and cracking.
In the process of restoring the stove, the plaster is always removed where defects have formed. You also need to remove the decorative trim.
Before any restoration, the masonry is abundantly moistened with water, this increases the adhesion of the compound to the working surface. If you skip this step, the solution may simply fly off.
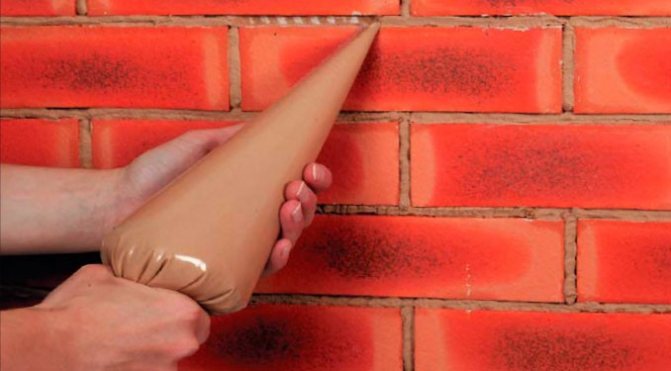
When working with crevices, it is most convenient to apply the mass with your fingers, this will allow you to feel the direction of the putty and its amount.For convenience, the composition is best applied with rubberized gloves.
After processing all defects, the oven is left to dry for 7-10 days. Only after this period can the first furnace be carried out.
Fireclay
Filling cracks with clay mortar is the easiest and most economical way to restore a stove. At the same time, the quality of the repair will be no worse than with the use of newfangled and expensive materials.
For these purposes, you can take absolutely any clay, the main thing is that it contains as few impurities as possible. High-quality raw materials after soaking should become oily, homogeneous and plastic. Before covering the stove with clay (so that the surface of the hearth does not crack in the future), pay attention to the peculiarities of the preparation of this solution.
Mixing the mixture is carried out in several stages.
1. Before mixing clay with sand, soak it in warm water for at least 12 hours.
2. The wet solution should be thoroughly mixed and any lumps formed should be broken. In this state, the clay combines much better with the sand.
3. To prepare the working mixture, it is recommended to take 4 parts of clay and 2 parts of sand. The last component should be as clean and pre-sieved as possible. The volume of the liquid depends on the degree of humidity of all components.
4. If you do not plan to whitewash the oven, add lime to it at the stage of mixing the solution. All components are kneaded until the consistency of sour cream. The finished mixture is covered with plastic wrap and left for 12 hours.
5. The settled solution is re-mixed. To check if there is enough water in it, hold the putty in the palm of your hand and roll it into a ball. If it starts to crack when squeezed, add more water.
6. The oven should be slightly heated, pour water over the cracks, after which you can start covering.
7. To prevent the appearance of new cracks in the clay, you can add to the straw, but the use of a plaster net is considered a more reliable method. If you apply a clay solution to a furnace upholstered with such a material, you can forget about cracks for a long time.
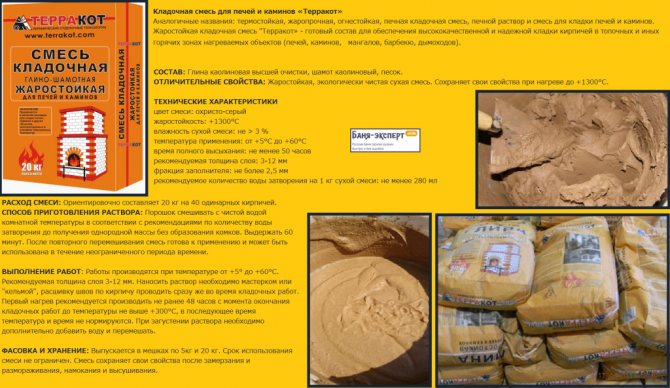
Chamotte clay is often used to restore old furnaces. This material is characterized by fire resistance, therefore, furnaces finished with it are reliable and durable.
You can buy this type of clay in any construction market. It is sold in 20 kg bags and is not expensive at all. The working solution is made strictly following the instructions on the package.
The solution can be made by yourself or you can buy a dry mix in the store.
The furnace belongs to the category of building structures that regularly change the temperature, so the working mixture must meet the requirements.
We suggest that you familiarize yourself with How to make a door for the stove with your own hands
Mixtures for smearing ovens are divided into types:
- simple formulations of two or more natural components;
- ready-made dry mixes of industrial production.
The materials for the solution are cleaned of accompanying impurities, the sand is passed through a sieve. The clay is rubbed through a fine grate to separate small stones and roots.
Types of solutions:
- Lime. Take sand and lime dough in a concentration of (1 - 2): 1.
- Clay. Chamotte clay and quarry sand are used in a ratio of 1: (1 - 1.5).
- Lime-clay. Lime paste, clay, local sand in cumulation of 0.2: 1: (3-5) is used.
- Cement-clay. Take cement, oily clay, quarry sand in a concentration of 1: 4: 12.
The first type is suitable for coating the plane next to the firebox, since it does not withstand strong heating. Clay is suitable for filling gaps and for coating the first layer. Secondary treatment is done with a solution of clay and slaked lime, which has some plasticity and prevents the appearance of breaks.
Clay solution
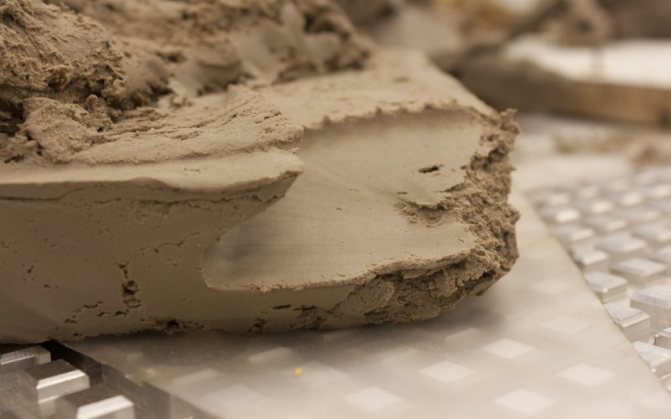
Fireclay is the strongest and most durable material for stove putty
The material is suitable for oven smears, but its properties change depending on the grade of the raw material. The preferred type is chamotte. For the solution, the same volume of components is taken, sometimes a little more sand is mixed (for the initial layer). The plaster is mixed with greasy clays to increase adhesion. Choosing a too fatty grade increases the volume of sand.
The rule for mixing the solution:
- The clay is soaked in water for 5 days, the absorption is monitored. If the material is highly wetted, add liquids. It turns out a mixture similar to sour cream.
- Dry the sand before kneading.
- Lime is added to the composition if it is necessary to increase the adhesion to the surface. The component accelerates the setting and drying of the layer.
- Cement M400 is used for furnaces. With the addition of the material, the solution sets after 20 - 25 minutes, and hardens within 4 - 5 hours. The layer gains full strength in 2.5 - 3 days.
Balls should not crack when dried
The mortar is tested for cracking. Balls are molded from the gruel, dried and examined. The material is suitable if cracks have not appeared on the samples. The test is tougher for mixtures operating under harsh conditions, for example, at high temperatures. Dry specimens are dropped from 1.5 m and the surface is inspected for damage.
A wooden shovel serves as an indicator of the concentration of the mixture. If the mortar sticks to the tool while stirring, the addition of sand is required. Chopped straw, fiberglass or asbestos are added to the plaster. Reinforcement additives increase tensile strength. The stove is finished with a solution, which contains natural components, so that when the temperature rises, no toxic substances are released into the air.
Ready mixes
Dry commercial solutions are kneaded in small portions
The industry produces powder mixtures that contain the required ingredients. The materials are sold viscous and hard. Sealants with increased heat resistance and asbestos fiber for cracking are available for sale.
The procedure for using dry formulations:
- the bucket is filled with water;
- the volume of powder calculated according to the instructions is poured;
- a nozzle for an electric drill (mixer) is used to obtain a homogeneous composition without lumps;
- after the first stirring, the solution is left for 4-6 minutes and stirred a second time.
Powder mixtures set quickly after mixing with water, therefore they are used immediately and mixed in medium portions. The composition includes sand, clay, cement, additional components are introduced. The manufacturer guarantees the quality of the layer if the work is carried out according to the technology.
Masonry compounds for plastering fireplaces, hearths and stoves contain plasticizing additives, therefore they work for a long time after drying. Ready-made powders are used to seal small cracks without removing the finish, if the surface is lined with tiles or decorative types of bricks. The solution prevents the reappearance of cracks.
The ready-made mixture for application retains moisture well inside, therefore it does not require preliminary wetting of the wall surface. This position reduces the drying time of the oven and saves working time. The layers are made thinner due to plasticity, so the material is preserved.
How to plaster a stove - step by step diagram
It is believed that not every clay is suitable for making stove putty. However, practice shows that any clay is suitable for these purposes, if only without impurities. Good clay after soaking will be like butter, homogeneous, plastic. You will need 4 measures of clay (4 buckets or 4 handfuls - it depends on the amount of work) and 2 measures of clean, sifted sand.
It is highly advisable to pre-soak the clay in warm water for at least 12 hours.After it gets wet, stir it with a shovel or with your hands (if the volume is small) to break up any lumps. Prepared clay will be much easier to mix with sand. If we act according to tradition, then we will interfere in an old-fashioned way - to stomp on the solution with our feet.
Stir this mixture again. To check the quality of your putty, roll a ball in the palm of your hand - if it cracks when compressed, then there is little liquid in the solution. Previously, straw was also added to such a mixture so that it contained the appearance of new cracks, but today you can use a special mesh, which is used for plastering.
We offer you to familiarize yourself with the Stone oven for the Russian bath
Remember to heat the stove a little to keep the surface a little warm. Moisten the cracks with water, take small lumps of solution and, as it were, push it into the cracks, and spread it over the surface from above. If everything is done correctly, and the stove is strong, then you can forget about the cracks for a long time. Do not heat the stove until the putty is completely dry!
Before preparing a solution for plastering the stove, heat it thoroughly so that it crackles where it should be and warm up the walls. This rule should not be violated even in summer, despite the heat.
Use a broom and a brush to brush over the oven surface thoroughly to remove accumulated dust and residual styling mortar. To improve adhesion, it is better to clean and slightly deepen the cracks in the brickwork, but no more than half a centimeter.
Dampen the stove surface with water and apply a thin layer of liquid clay with a bristle brush. Let it dry a little.
Step 4: Reinforcement
If you decide to use burlap for reinforcement, this step is for you! The fabric, previously cut into the desired pieces, should be soaked in a liquid clay-sand solution and glued onto the stove from top to bottom, like wallpaper is glued. You can also combine the pieces end-to-end, but it is better to have an overlap of at least 5 cm.
Remember that the thickness of each of the plaster layers should be no more than 5 mm, and the total thickness of the facing layer should not be more than 1 cm. The mortar should be applied from top to bottom, in an even layer, so that the facing dries evenly. Once the plaster has set well, it should be rubbed with a wooden float, in a circular motion.
After completing the process, do not rush to melt the stove, let the plaster layer dry completely. If cracks form during drying, they should be slightly widened with an ordinary knife, moistened with water and rubbed with the same solution. If, over time, you notice new cracks on the surface of the furnace, analyze your actions - the stove may peel off and crack due to shrinkage, due to excessive layer thickness or improper bandaging of brick rows. In addition, cracks can also appear due to overheating.
Sequence of work
The method of applying the sealer depends on the type of grout. To repair cracks using a home-made clay and sand mixture, the work will not cause much difficulty.
- First, the brick should be cleaned of the old facing building materials and plaster.
- Then the stove needs to be warmed up a little and all cracks should be sprayed with warm water. This must be done without fail so that the dry masonry does not absorb liquid from the covering compound. Otherwise, it will lose its qualities along with moisture.
- Now you can already start the main work. To begin with, the agent must be tightly driven into the cracks, the remaining mixtures that have emerged should be smeared evenly over the surface. These actions can be performed with hands without construction gloves, since home putty is an absolutely harmless building material.
- The final stage is masonry plastering. Keep in mind that you can use the stove after the putty is completely dry!
Consider the option of covering the stove so that it does not crack in the future with heat-resistant glue specially designed for this purpose.The process of restoring the heating object is similar to the previous one. The difference lies in the fact that upon completion of the elimination of cracks with the help of an elastic composition, the surface of the stove is covered with a solid fire-resistant adhesive mixture. The glue dries quickly enough, in no more than 30 minutes. Therefore, the decoration of the stove can be carried out on the same day.
In this story, we discussed how and, most importantly, how to restore the furnace structure so that in the future neither it will be damaged nor its lining. In conclusion, I would like to note to you: even high-quality refractory and expensive means cannot protect the stove from cracking. The main thing here is not the quality of the covering material. The technology of erecting a heating structure and its repair is what must be strictly observed. If you build a stove according to the rules, slowly and thinking over every step, it will serve you for many years.