The principle of operation of room thermostats
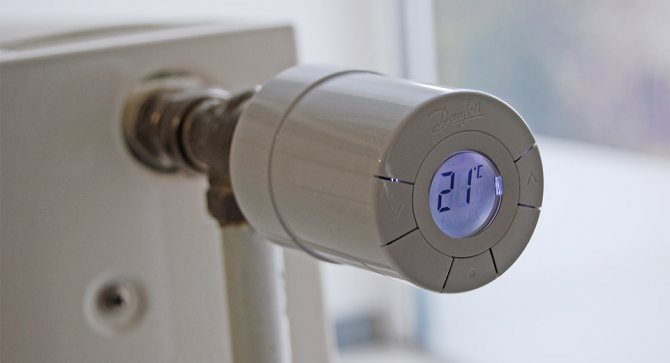
Thermostats with temperature sensor
The room temperature controller works as follows:
- A sensor built-in or removed from the thermostat housing measures the air temperature in the room;
- The sensor transmits information to the actuator;
- The actuator, depending on the temperature value, turns on or off the heating devices and air conditioners connected to the regulator;
- When the room temperature drops to the value that was taken as the minimum during the device settings, the device turns on the heater again.
Thus, this control equipment does not function constantly, but cyclically, turning on and off the heating at the minimum and maximum value of the air temperature in the room. For electromechanical and mechanical thermostats, this range is very small, while for electronic models it can be much wider.


Application area of temperature controllers
Temperature controllers are used in almost all modern industries to control various temperature processing processes:
- hot water supply systems, heating, ventilation, air conditioning of buildings and premises,
- drying chambers, industrial ovens for various purposes,
- refrigeration units,
- fire protection and alarm systems,
- heat treatment of various materials: injection molding machines, vulcanizers, welding equipment and much more.
Many controllers, in addition to temperature sensors, can work with other types of measuring instruments: pressure sensors, flow sensors, moisture meters, current sensors, gate valve position sensors, angular position, etc.
This allows the use of temperature controllers in the metallurgical industry, mechanical engineering, the production of machine tools and equipment, the food industry, agriculture, housing and communal services, mining and processing industries.
Varieties of thermostats
Programmable thermostat W1209
Depending on the design and principle of operation, these devices are of three types: electronic, electromechanical and mechanical.
Electronic
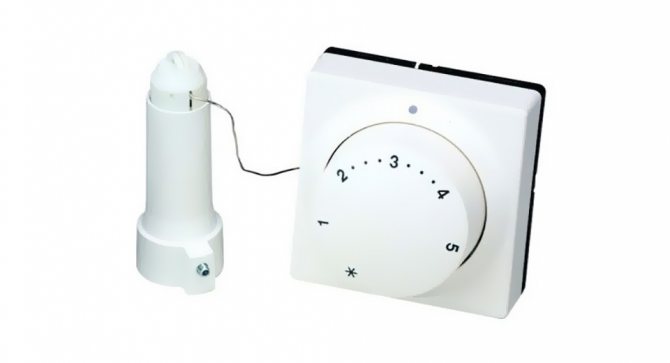
The simplest electronic thermostat is a device consisting of the following parts:
- The controller is a printed circuit board with a microcircuit. This is the key part of the thermostat that receives information from the external temperature sensor, processes it and sends the appropriate signal to turn on or off the heater, air conditioner;
- Monochrome liquid crystal display and control buttons - used for setting and programming the thermostat to maintain the required temperature background in the room;
- Remote temperature sensor connected to the controller using a flexible thin cable;
- Contact group - clamps in which the conductors of the cable connecting the thermostat with a heater or air conditioner are fixed.
Such a device works quite simply: an analog signal arrives from the sensor via a cable to the controller, which is decoded by its microcircuit, correlates with the set temperature value, after which the controller decides to turn on or off the heating equipment.
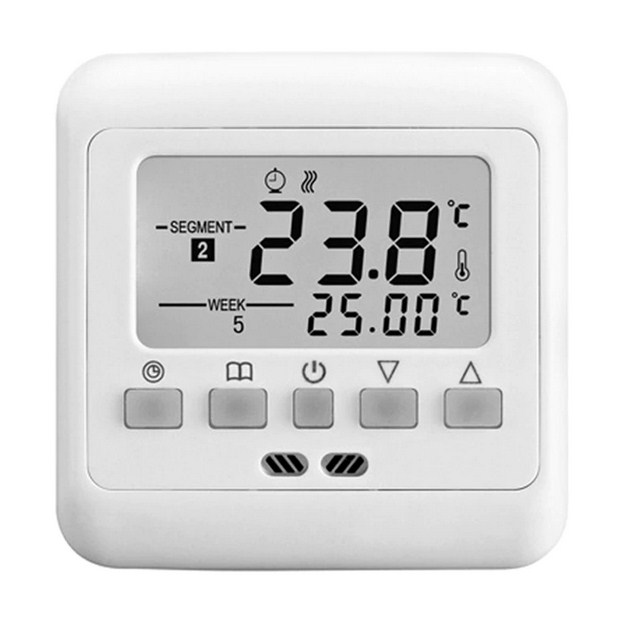
Electronic thermostat
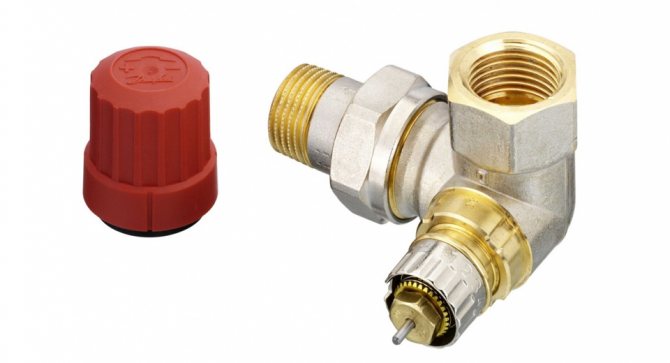
Electromechanical
Occupying an intermediate position between electronic and mechanical such thermostats are of two types:
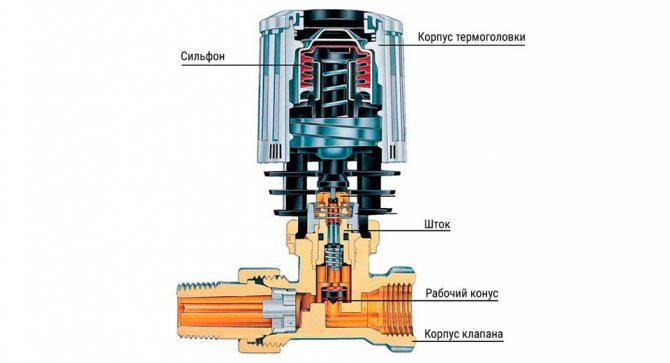
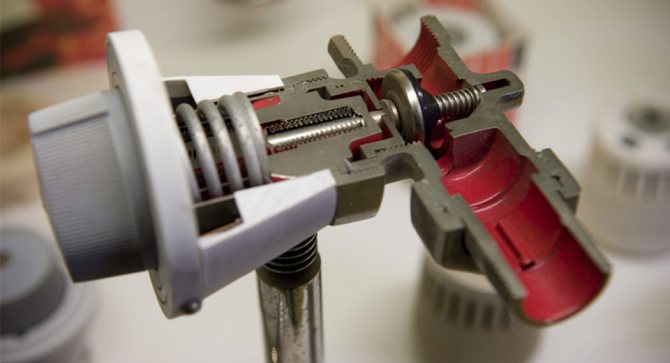
- With a bimetallic plate and a contact group - a plate is located inside such regulators, which, when heated to a certain level, bends, opening the circuit contacts that feed the heating equipment. When cooling down, the reverse process takes place: the plate straightens, closes the contacts, and the heater turns on. The adjustment of the inclusion of this device is carried out using a rotating dial with a pusher that changes the distance between the plate and the fixed contacts closed by it.
- With a capillary tube - the design of such a device is the same as that of analogues used in water heaters and boilers.
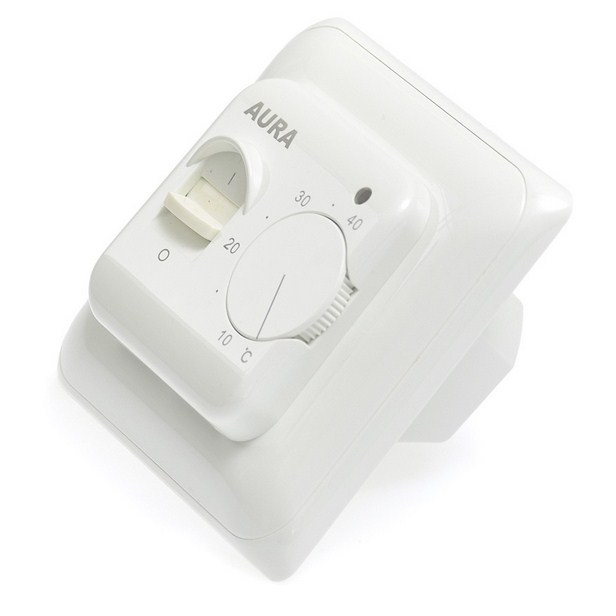
Electromechanical room temperature control
Mechanical
The main elements of this device are a gas-filled membrane that responds to changes in the air temperature in the room, and a control mechanism consisting of two moving contacts.
The thermostat works as follows:
- As the temperature rises, the gas filling the membrane expands;
- A pusher located on one of the outer walls of the membrane opens the contacts of the control mechanism circuit, thereby disconnecting the heater connected to the device.
Regulation in such a thermostat is due to a rotating dial (wheel) that changes the distance between the membrane and the control mechanism.
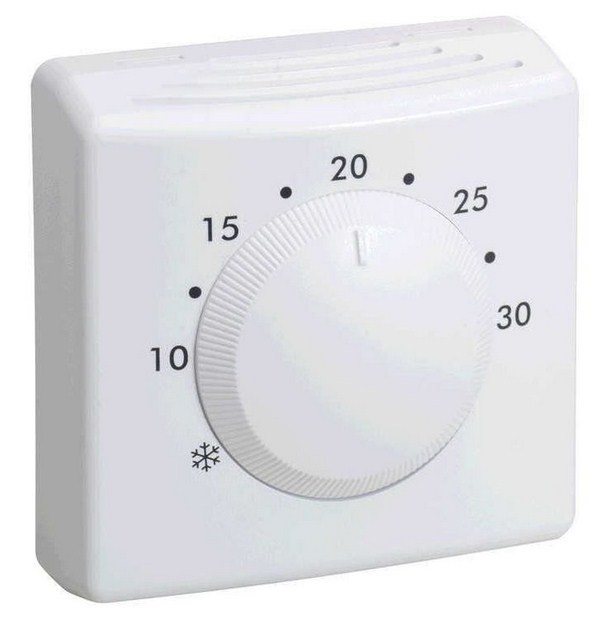
Mechanical type thermostat
Purpose of temperature controllers
Thermostats provide various temperature processes: heating, cooling, maintaining a given parameter, etc. Temperature controllers are built into automatic control systems and regulate the set parameters by controlling the executive equipment.
Also, controllers can work with other types of sensors, for example, pressure, current, humidity and others, to control the relevant parameters of technological processes.
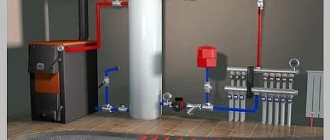
Boiler control
The principle of operation of the thermostat
A gas boiler or electric boiler can be controlled by a thermostat installed in the living room, as well as a more complex regulator of the temperature background - a programmer. Depending on the boiler design, there are three options for connecting such control devices:
- To special connectors on the boiler control board (for wall-mounted volatile models);
- In series with a boiler thermostat with a mandatory connection to a gas valve (for non-volatile floor-standing models);
- Instead of a boiler thermostat (for floor-standing boilers).
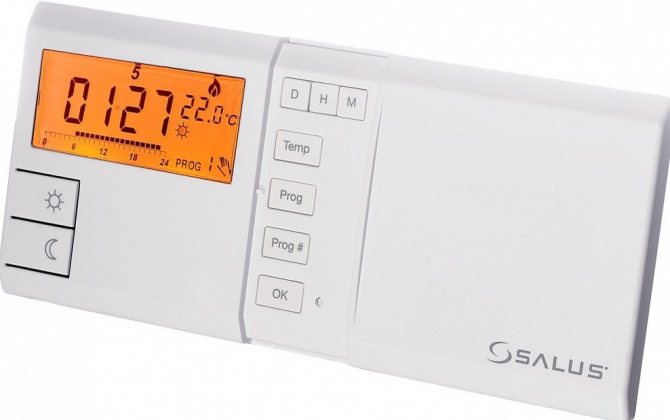
Modern wired programmer for gas boiler
Important! For the installation of such regulators, the most distant rooms from the boiler are chosen: the bedroom, the hall.
Symptoms of a malfunction of the refrigerator temperature sensor
The following ghosts indicate a problem with the sensor.
The refrigerator works and does not turn off
The operability of the thermostat is checked in this case without removing it. For this you need:
- Unplug the plug from the socket.
- Free cameras from food.
- Set the knob to the maximum cold position or start the fast freezing mode, if available.
- Place a thermometer on the middle shelf of the refrigerating chamber (not freezing!), Preferably so that it can measure the subzero temperature.
- Turn on the refrigerator with empty chambers.
- After a couple of hours, remove the thermometer. It should be showing 6 - 7C. If the indications are different, the thermostat will have to be replaced.
So that the check does not take much time, you need to get to the thermal relay and move the plate located near the pin on which the handle is put on. If during its movement there are no clicks or it does not move, the thermostat changes.
The refrigerator does not turn on
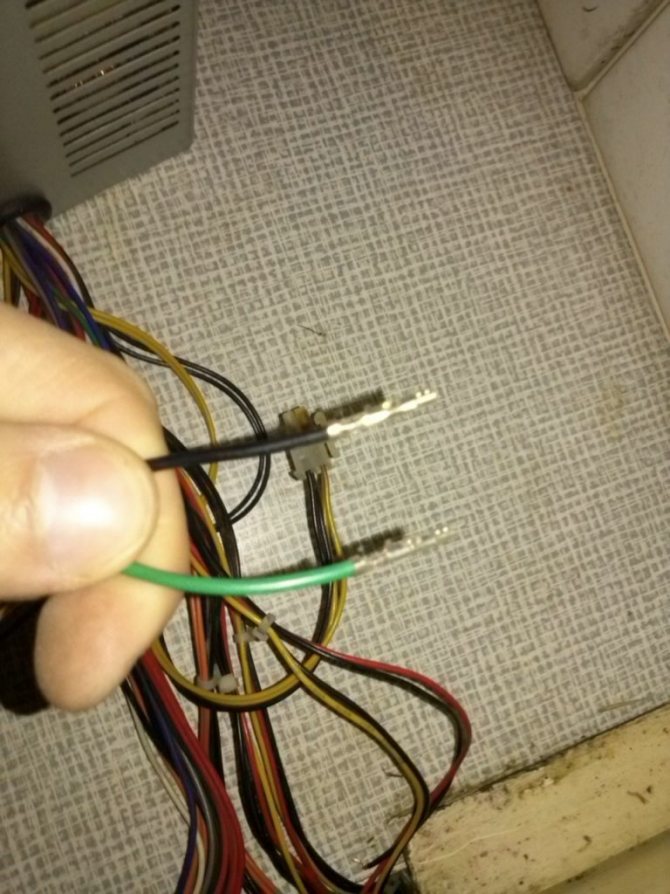
The cause of this malfunction may be not only a thermal relay, but also a burned-out compressor motor or a breakdown of the start-up relay. But before calling the master, you should check the health of the thermal relay. To do this, you need to remove the casing, having previously disconnected the unit from the power supply, and sort out the wires.
In older models, only a pair of wires fit the thermal relay terminals. They are removed and short-circuited with a piece of wire or even a paper clip, bending it appropriately.
The wires were closed among themselves - the compressor started working. It means the thermostat is defective. And if, when closed, the compressor does not start, then the start-up relay is faulty or the engine burned out. Therefore, one cannot do without a master.
In modern units, 4 multi-colored wires are connected to the thermostat:
the wire from the compressor motor is orange, red or black;
- from the plug - brown;
- from the signal light - white, yellow or green;
- the ground wire is yellow with a green stripe.
You need to close the first 3 wires, and then as indicated above.
Professionals find it more reliable to check with a multimeter, which can also be done by a home craftsman. The thermostat will have to be removed. If the multimeter, the analog switch is set to the position of measuring low resistances, and the arrow with closed probes is set to "0" with the wheel on the left side. On a digital device, the switch is set to "200".
In order for the check to be carried out in conditions as close as possible to the working conditions, the end of the bellows tube is placed in ice water for a couple of minutes. Then the resistance between the terminals is measured. If the arrow goes off scale on the analog multimeter, and “1” is displayed on the digital one, the thermostat is sent to the landfill.
The appearance of ice on the walls of the refrigerator
This phenomenon is observed with other malfunctions, but the check should begin with the thermostat. To do this, you need to perform the actions specified for the non-shutdown unit. When the thermometer reads 5 - 7 C, the temperature setting knob is turned to the left until the compressor stops.
If the compressor stops, the thermostat is good. Otherwise, it is changed. When turned off, the unit is left to work with empty shelves for 5 - 6 hours. At this time, the time between starting and stopping the unit is measured. In normal operation, the intervals are approximately 40 minutes. At lower values - turning the knob to the right adds coldness. If this does not help, change the thermostat.
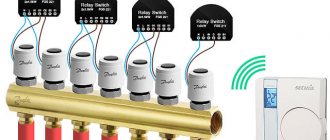
Installation and connection
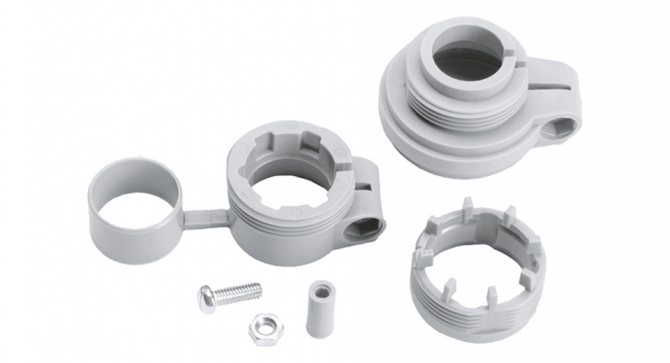
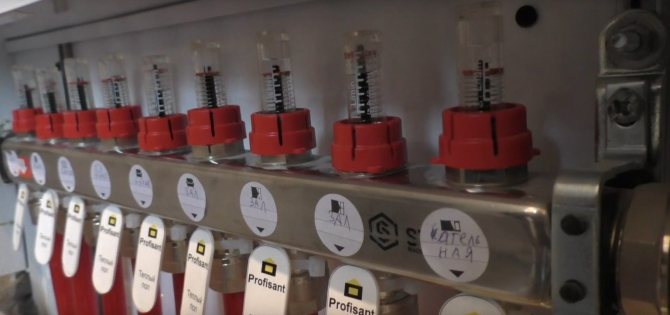
Installation of a room temperature controller is carried out in several stages:
- Mounting the regulator on the wall at a height of 150-160 cm away from heating radiators, various heaters, places that are exposed to direct sunlight;
- Connection to the contact group of the cable regulator - the bare and preferably soldered ends of the cable are inserted into special connectors and fixed with screws;
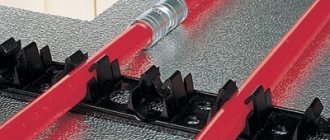
- Laying the cable from the thermostat to the heating equipment in plastic cable ducts;
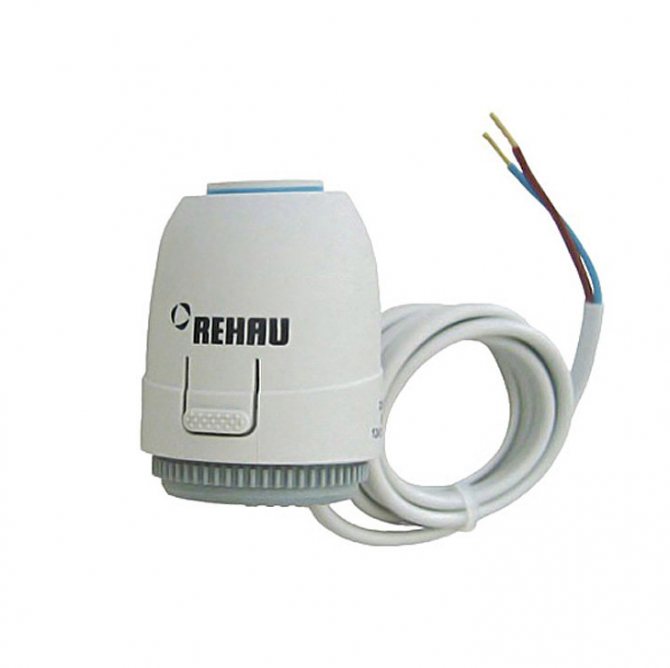
- Connecting the cable to the corresponding terminals on the boiler control board, the three-way valve actuator on the radiator.
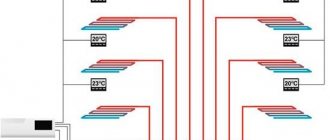
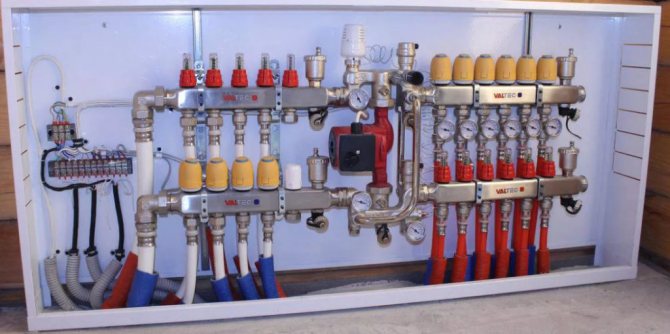
Hot water floor: temperature control
The temperature control of the collected water floor depends on what equipment was used in the room when installing the heating system. There are several ways of regulation. The main ones are:
- manual regulation;
- individual;
- group;
- complex.
Below we will take a closer look at each of them.
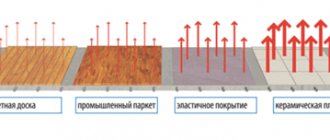
Manual adjustment
The whole process, with this method of floor heating, takes place in manual mode. At the same time, the final conclusions about the temperature are made only on the basis of their own feelings.Of course, with such measurements, inaccurate data is no exception. For this reason, the procedure for regulating a warm floor should be carried out according to the following list:
- When operating such a floor with a parquet or laminate type of coating, special thermal heads are used, which are installed on 2 pipelines: both supply and return. The adjustment is carried out manually: the feed is either increased or, on the contrary, decreased.
- The floor temperature is set only when each loop of the system is filled with water (make sure that there is no air during filling).
- In the process of filling the pipelines, it is necessary to control that water is in the rest of the heating system. This is done by opening: the taps, which give the heat carrier access to the entire system, and the return manifold valve. And only after these actions can the pipes (forward and backward) of one loop be opened to completely fill them. In this case, check and prevent the ingress of air (by releasing it into the air duct).
- Next, to move water in the pipeline, the pump is started. The degree of heating is determined by hand to the touch and the loop is closed with warm pipes.
- When all the loops are full, the valves must be turned to open. The water supply to each loop can then be adjusted by manually determining the temperature.
- The temperature indicators of water in pipes are affected by their length. Therefore, it is advisable to install them the same size.
It is important to take into account that with this option for temperature regulation of the water floor, all its stages must be carried out with a mandatory 2-hour break in order to understand well the effectiveness of each action.
Advantages of using a thermostat
The main advantages of temperature controllers are:
- The ability to maintain a comfortable temperature background in the living room;
- Saving energy carriers used for various types of heating equipment: gas or electricity;
- Increasing the service life of heating equipment - the use of a thermostat significantly reduces the time for switching on and operating the boiler, which extends its service life;
- Low cost and high return on investment;
- Easy to install and use.
Thus, room temperature controllers are very simple, convenient and reliable devices. Maintaining a comfortable temperature background in living quarters, they allow not only to significantly save gas, electricity, but also increase the service life of expensive boilers and other heating equipment.
How to properly adjust the refrigerator thermostat
The thermostat has manual control, and the thermostat is automatic. In electronically controlled models, the optimum temperature is set in degrees. In the refrigerating chamber - from +4 to +6 ° C, in the freezer - -18 ° C. In mechanically controlled units, the handle is set to a position from 2 to 3.5, which corresponds to the optimal mode.
Sometimes it is necessary to customize the thermostat. When, for example, a unit has been in operation for many years, the temperature at the evaporator rises due to a number of reasons (wear of the compressor, aging of the thermal insulation, etc.). As a result, the ratio of working hours of equipment increases. Or, after replacing the thermostat, the refrigerator does not freeze enough. It is not recommended to set up the device yourself; it is better to entrust the adjustment to specialists, since this is a long and complicated process. So, the procedure in a 2-chamber unit takes about a day, in a 1-chamber unit - 2 times less.
Let's figure out how to set up the refrigerator thermostat. There are two adjusting screws on the body of the device.
They are responsible for the range of switching on and off by temperature and for the response differential. Adjusting one screw shifts the temperature range.So, if, with the factory settings, the thermostat is triggered at -10 ° C and + 3.5 ° C, then during rotation they move, for example, to the position -5 ° C and + 8.5 ° C. After adjusting the second screw, restoring the factory settings is almost impossible. Self-adjustment of the thermostat can lead to damage to the part.
Let's consider how to adjust the thermostat of a 2-chamber refrigerator using the example of Danfoss 25T65. First, the control handle is placed in the middle position. If you tighten the central adjusting bolt, the technique will shut down. If you unscrew it a little, the duration of the unit will increase. A bolt located on the outside adjusts the downtime of the household appliance. If you unscrew it, the refrigerator will stand longer, if you screw it up - less.
Important! Since the bolts are energized, the adjustment screwdriver must be well insulated.
Video: adjust the thermostat on the refrigerator
Video: how to set up the K59 thermostat
Safety rules to follow when checking
A refrigerator is a large household appliance that requires high voltage to operate. There are three main threats that potentially arise if you decide to renovate your refrigerator:
- electric shock (high voltage appears on the contacts of the relay, thermostat, on the compressor windings);
- electric shock (short circuit inside the electrical wiring of the refrigerating device, due to the ingress of open parts of the wiring on the metal case);
- frostbite due to contact with the skin of the refrigerant.
Anyone who decides to repair the thermostat (or any other component of the refrigerator) must take serious precautions. Do not work while the refrigerator is plugged in: be sure to de-energize the device.
As a result (or in the process) of carrying out repair work, wiring contacts are formed, which should be connected to each other. All connections must be properly insulated. It is necessary to continuously check the presence of voltage on all surfaces capable of conducting current - the case, internal elements of the refrigerating chamber, etc.).
All tools (screwdrivers, pliers, multimeter terminals) must have insulated handles.
When replacing the thermostat in the refrigerator, minor changes may occur in the operation of the thermostat, namely, the refrigerator or freezer may give out insufficient cold... The reason for the poor performance of the refrigerator here may be the only thing - the thermostat is not adjusted.
What is a thermostat and why is it needed
When the device ceases to function adequately, the symptoms may be as follows:
- the motor runs continuously, the refrigeration device does not turn off;
- a "snow coat" (deposits of ice and frost) is found on the walls of the chamber, the injection is too active, the circulation of freon is increased and the refrigerator freezes too much;
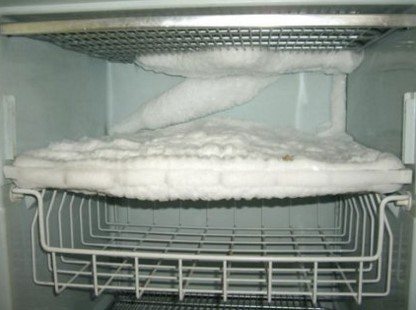
Snow coat: a sure sign of a problem
- it is warm in the refrigerating chamber, the more items you load inside, the worse the space is cooled.
- after shutdown, the motor does not start immediately (it keeps the temperature for a long time and does not restart).
To remedy the situation, you should turn off the device from the mains, perform a full defrost. The contents of the chambers should be removed, then turn on the refrigerator and switch the temperature in the regulator to the full maximum (minimum temperature). A thermometer should be placed inside the refrigerator (do not use liquid, electronic is best). If the thermostat is functioning, then as soon as the thermometer reads that you set, the refrigerator will turn off. If, after reaching the temperature, the motor continues to work and cool the chambers, then the thermostat is defective.
In conditions of constant adjustments, the temperature inside the chamber is constantly changing, the rate of these changes depends on the sensitivity level of the thermostat.
Temperature controllers for all refrigeration systems (including household appliances) are gauge-type devices. They function due to changes in filling pressure. The pressure changes due to temperature differences. Some modern refrigerators contain an electronic thermostat - a much more advanced device that allows more accurate temperature changes and turns on / off the compressor relay.
Thermostats are mechanisms containing a lever system and a set of contacts through which they are included in the general wiring of the device.
The temperature controller is based on the so-called bellows - an element sensitive to temperature changes, which, with the help of a spring, acts on the general electrical circuit. Thus, when the temperature changes, the bellows transmits a signal to the spring, the spring to the lever, the lever to the main mechanism, and the mechanism acts on the overall electronic system. Of course, the regulator also contains a special gasket that acts as an insulator of the internal components of the thermostat from the external environment (primarily from humidity). The regulator is also filled with a special liquid (chloromethyl) inside.
The most basic, and where to start work, is checking the thermostat. A sign of a malfunction or impending breakdown is excessive freezing of the refrigerator, or, conversely, the device has completely stopped heating. This means that the regulator “does not understand well” the temperature, i.e. it may work, but the range in which it detects temperature has changed. You set the refrigerator to 4 degrees, and it turns off at + 15? This means that the thermostat "thinks" that +15 is 4 degrees and therefore a false signal appears on the refrigerator. There are two ways to check:
Method number 1 - directly
Leave the thermostat inside the refrigerator. Finding the two wires that go into it, disconnect them carefully (so that you can easily return them to their place later) and connect them together. Be careful! There is a high voltage on the wires. All operations with wires should be done only with the motor turned off.
Two wires coming from the regulator
This method is good if the refrigerator won't turn on. He completely checks the thermostat, since all temperature limits are no longer valid.
Method number 2: checking the bellows
This method allows you to check the regulator without having to remove and disassemble it. However, some basic knowledge of component design is required. Near the small axis, on which the adjustment knob itself is attached, you should find a plate, you need to move and click it.
Safety rules to follow when checking
A refrigerator is a large household appliance that requires high voltage to operate. There are three main threats that potentially arise if you decide to renovate your refrigerator:
- electric shock (high voltage appears on the contacts of the relay, thermostat, on the compressor windings);
- electric shock (short circuit inside the electrical wiring of the refrigerating device, due to the ingress of open parts of the wiring on the metal case);
- frostbite due to contact with the skin of the refrigerant.
Anyone who decides to repair the thermostat (or any other component of the refrigerator) must take serious precautions. Do not work while the refrigerator is plugged in: be sure to de-energize the device.
As a result (or in the process) of carrying out repair work, wiring contacts are formed, which should be connected to each other. All connections must be properly insulated. It is necessary to continuously check the presence of voltage on all surfaces capable of conducting current - the case, internal elements of the refrigerating chamber, etc.).
All tools (screwdrivers, pliers, multimeter terminals) must have insulated handles.
From a technological point of view, the design of the refrigerator is a combination of such units as a thermoregulation system, a starting relay and an injection compressor.
All nodes may be faulty, while different reasons may have the same symptoms. Very often, when a starting relay is suspected during repairs, the reason turns out to be a breakdown of the thermostat. To understand how to check the standard thermostat of a conventional refrigerator.
Thermostat with spiral sensor