Highlights of commissioning a warm water floor
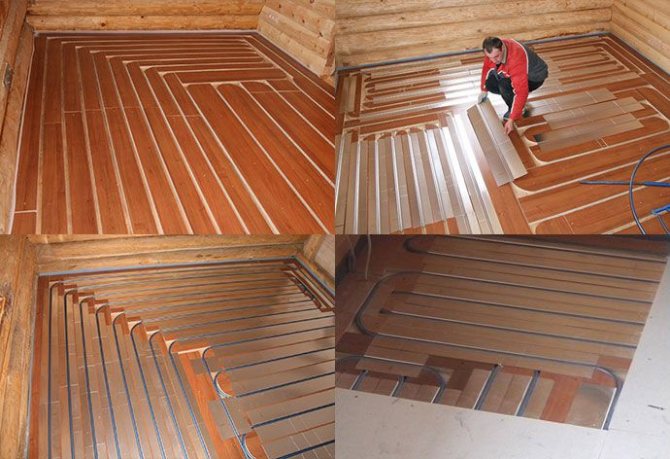
The timing and mode of the first launch of a warm water floor depends on the type of underfloor heating itself. If the underfloor heating is on a wooden base or a flooring system, then after filling the system with a coolant, you can immediately set up and bring it to the operating temperature mode. If you have just such a gender, then this article will still be useful to you, because below we will talk about the main points of filling and general system settings.
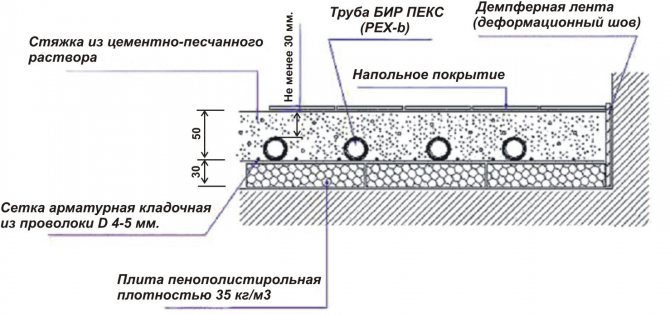
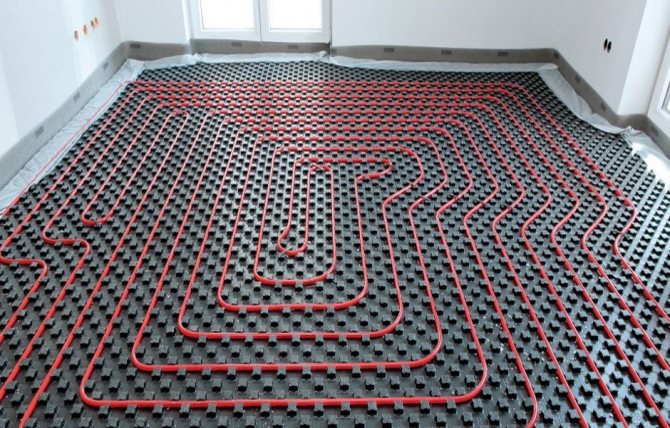
If you become the proud owner of a water floor based on a concrete screed, then the launching steps will be different. By the time of the first start-up, the floor screed must finally gain strength and the main part of the moisture must evaporate from it. This is about 30 days from the moment of its filling.
Types of self-leveling floors
The self-leveling heat-insulated floor after drying has a flat and smooth surface. It does not have to be covered with a decorative coating. She looks good by herself. Due to this feature, self-leveling floors are called liquid linoleum. The composition of the building material includes polymer fillers, which give the solution plasticity and an attractive appearance after drying.
There are several types of self-leveling floors on the market. For industrial or warehouse premises, experts recommend using formulations. They have increased strength and are resistant to mechanical damage. Abrasion resistance is also worth noting.
For residential premises, epoxy or polyurethane compounds are suitable. They have a lower pricing policy than methyl methacrylate. At the same time, it is worth noting their environmental friendliness. The compositions have sufficient strength and wear resistance. Unlike epoxy, polyurethane compounds are applied in a fairly thin layer.
The procedure for commissioning a warm water floor
The first start-up of a warm water floor can be divided into three stages:
- Filling the system with coolant
- Setting up the underfloor heating system
- Heating and drying the floor screed
Filling the underfloor heating system with heat carrier
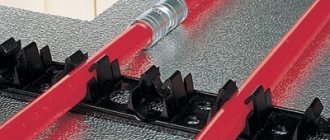
If you followed all the recommendations of our website, then you should remember that the process of installing a warm floor involves crimping the system before pouring the floor screed or flooring (if it is a wooden or decking floor).
If you do not know what it is about, we advise you to read it. So, one of the methods of crimping is crimping a warm water floor with water. Therefore, if you followed this method, then, in principle, you have already half the work done. The floor pipe system is filled with water, it remains to fill the rest of the heating with water, which includes the boiler and radiators, if any. Another question is when pressure testing was carried out with air, or it was not performed at all, or instead of water, it is planned to use a special non-freezing liquid for heating as a heat carrier. In the latter case, you will have to drain all the water from the underfloor heating used for crimping.
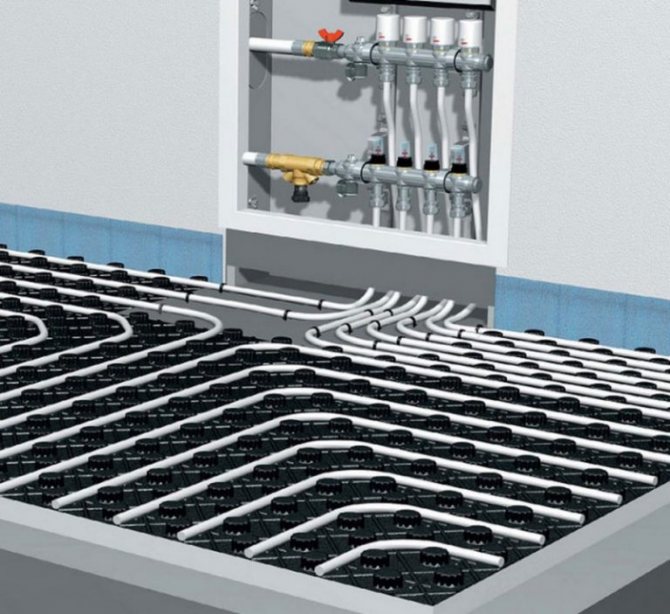
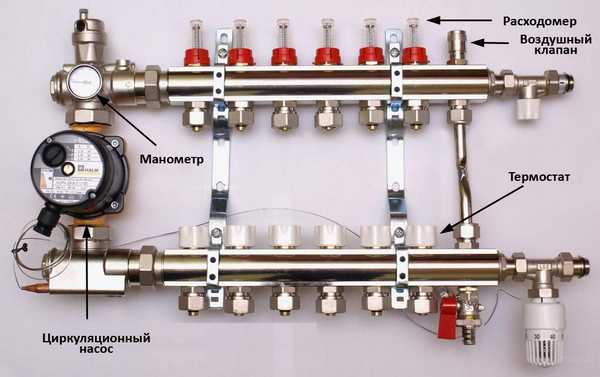
Before filling the warm floor with heat carrier, all taps that must be open during the operation of the heating must be opened. This includes:
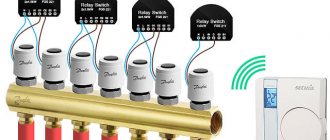
- Circuit valves, or flow meters that are on the manifold
- Manifold flow and return shut-off valves
- Three-way valve for underfloor heating mixing unit
- Automatic air vents on the manifold and other heating areas
If a thermostatic head is installed on the three-way valve, set the readings on it to the maximum value. If it is absent, unscrew the valve to the maximum.
Further actions depend on what you plan to pour into the system, water or antifreeze, as well as what kind of open or closed heating system you have.
Consider the option of filling a closed type of heating, which is fed from the water supply system.
Filling underfloor heating with a closed heating system
To do this, as already mentioned, we open all the valves of the underfloor heating comb and the valve for making up the heating from the water supply. At the same time, you will hear the sound of moving water through the pipes and the release of air from the automatic air vents. Wait until air stops coming out of the auto-removers. After the cessation of all sounds, turn on the underfloor heating circulation pump. The air vents will start to work again, the sound of air passing through the circulation pump will be heard. In this mode, run the pump for a few minutes until the bulk of the air leaves the system.
Next, close all valves or flow meters (depending on your manifold) except one. This is necessary in order to concentrate the main pump head in one loop and pressurized air out of the open loop loop. Run the loop until the bubbles stop audible. Once this has happened, open the valve of the next loop and close the previous one. So "pump" all the available contours. After completing the pumping of the last loop, you can open all the previous ones. If the heating system has radiators without automatic air removers, be sure to bleed the air from them using the existing special Mayevsky valve on the radiator.
On this, the heating system, which includes a water heat-insulated floor, is considered full and the underfloor heating can be put into operation. But more on that below. First, we will consider more options for filling the warm floor and the entire system under other circumstances.
Filling underfloor heating with an open heating system
An open heating system is considered when the system has an open-type expansion tank at the highest point of all heating, where the coolant is constantly added as it evaporates.
To fill such a system, you need to have at least a drain valve at the lowest point of the heating system. Filling is done through it, using a hose coming from the water supply. But the correct option would be to first fill the warm floor through special taps on the manifold designed to fill and drain the system, again using a hose.
Filling the contours of the underfloor heating is carried out according to the same technique as in the closed type. Only here you can immediately push the system until water appears in the expansion tank. As the air leaves the warm floor and the system as a whole, it is necessary to turn on the water from time to time, as its level will fall. Remember to extract air from radiators, if any.
Filling the heating system and underfloor heating with antifreeze
Antifreeze in the heating system has one good advantage. It will not freeze at negative temperatures indoors. What becomes especially important in case of intermittent living in a room, for example, this is a country house where the owners come for the weekend, and between arrivals they turn off the boiler, or the boiler is solid fuel, which requires constant fuel storage. If there is also a warm floor in such a house, this becomes even more relevant. If you simply drain the water from a conventional pipe or radiator system, then from a warm water floor this is a kind of problem.
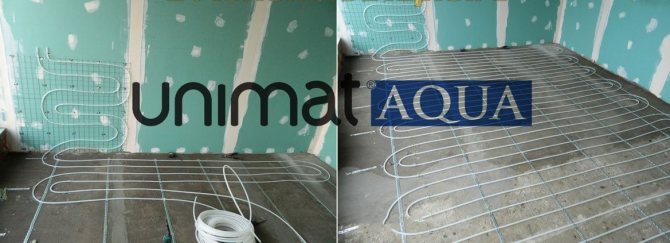
Characteristics of "Unimat Aqua"
Floor heating from "Unimat Aqua" has a different concept. If in XL Pipe the coolant is antifreeze or propylene glycol, then for Unimat Aqua only distilled water is used.
There is no cable in the pipeline. The heat carrier is brought to a certain temperature using a heating element. The system is assembled simply by hand. What is included in the Unimat Aqua electric water heating kit?
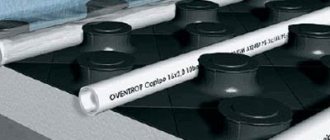
- Line made of thin propylene pipes. They are laid on a heated platform. The "warm floor" system from "Unimat Aqua" is also called capillary.
- The tubes are led to the control unit. It contains a small pump and a heating element.
- The block contains a thermostat that allows you to set the heating mode.
- The set includes 2 tees made of heat-resistant plastic, metal bushings and connecting clamps. The installation kit is used to connect the floor circuit to the control system.
We recommend: How to choose a boiler for an underfloor heating?
A control unit is installed on the wall. At the top there is an inlet through which distilled water is introduced into the line. At the bottom there are openings for the coolant to exit into the liquid circuit and for its return to the heating element.
- Capillary heating tubes are placed on the rough base.
- Using a tee and metal bushings, the circuit is connected to the control system. The bushings are rigidly secured with clamps.
- The square tube connection elements are connected to the water outlet on the block.
- Electrical connection of the control unit to the network is carried out.
- When the thermostat is turned on, an alarm is heard. It means that there is no coolant in the floor line.
- Distilled water is introduced into the liquid system through an inlet at the top of the unit. The alarm is canceled.
- The temperature regime is set on the thermostat and the thermal regime is tested.
- Close the tubes with a coupler 5 cm deep.
When switched on, water begins to circulate in the floor circuit. The heating medium flows through a heating element in the control unit. The water temperature rises in a few seconds.
The liquid flows along the main line and gives up its thermal energy to the screed and floor covering. A small pump, which is built into the unit, pumps the cooled liquid back through the heating element. The coolant circulates through the pipeline.
The maximum length of one electric-water circuit should not exceed 66 m. If necessary, several heating circuits are brought out in the room. A control unit is installed for each system.
The liquid electric water heating system is a good alternative to other types of heating. It does not require access to the central pipeline, so it is installed not only in country houses, but also in city apartments. A permit from the housing department is not required. The heating is autonomous, it will save the cost of electricity and water radiator heating.
YouTube responded with an error: Access Not Configured. YouTube Data API has not been used in project 268921522881 before or it is disabled. Enable it by visiting https://console.developers.google.com/apis/api/youtube.googleapis.com/overview?project=268921522881 then retry. If you enabled this API recently, wait a few minutes for the action to propagate to our systems and retry.
We recommend: How to install the underfloor heating film?
- Similar posts
- Features of the system "combined heating: warm floor and radiators"
- What is National Comfort underfloor heating?
- How does the floor heating automation work?
- How to make a solution for underfloor heating screed?
- How to install underfloor heating under a laminate on a wooden floor?
- Can underfloor heating be used as main heating?
Where and when to fill the coolant
The method of supplying the coolant depends on the structure of your system. If the use of tap water is provided, there is a special tap that opens the supply. To fill in other liquids in the supply part of the collector, there must be a special tip with a shut-off valve, to which a special pressure testing device is connected, which can also be used for filling the coolant. These devices are manual and automatic. In principle, the device can be rented in a specialized store instead of buying. But if you use water as a heat carrier, then you will have to use it annually (you need to change the water in warm floors before each season), so in this case you can think about buying.A video in which a representative of one of the companies talks about crimping machines is located at the bottom of the page. If you're interested, take a look. To lower the system, there must also be a special valve on the outlet manifold.
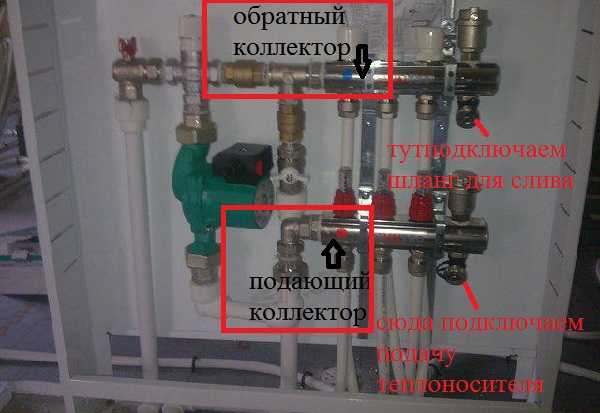
Regardless of whether the supply manifold is at the top or bottom, we supply the coolant through the supply shut-off valve
Installation work
After preparing the mixture, you can start pouring the base. Such a solution, unlike a sand-cement screed, does not need to be leveled. It spreads over the surface on its own, forming a flat surface. The consistency of the solution must be sufficiently liquid.
Care must be taken to ensure that no air bubbles form when pouring the solution. To do this, the composition must be rolled with a special needle roller.
All subsequent work can be carried out only after the solution has completely dried. The drying time is indicated on the packaging. However, it can change depending on external conditions (temperature, humidity level). As a rule, it takes 12-20 hours for the solution to dry. It is necessary to ensure that there are no drafts in the room.
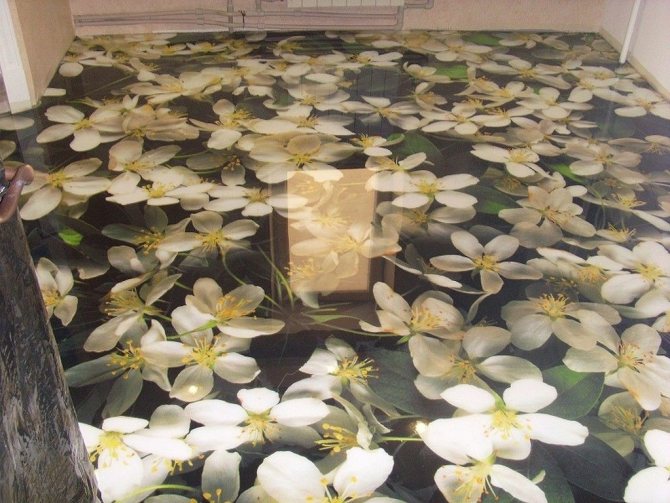
The next step is to open the surface with varnish. In this case, transparent paints and varnishes are used. After the paint and varnish products have dried (20-24 hours), the self-leveling heat-insulated floor is ready for use.
A pattern printed on a special material can be placed under the paintwork. It is even possible to create a 3D base on top of a water system. But, you need to understand that the image will be 3-dimensional only from some angles. From the rest of the angles, it will be flat, moreover, slightly distorted. But if you approach everything with a certain amount of creativity, you can get a great result.
Test run of the water floor or pressure test
After the system is assembled, before pouring the screed, the water floor must be checked for operability. So it will be possible to eliminate the shortcomings that could have been made during the installation. To do this, first, the pipes of the water floor must be rinsed, drained well, then filled with the coolant that will be used.
It is not necessary to drain the system before the screed: the solution is laid with filled pipes so that they take "working" dimensions.
There are three methods for checking system performance and detecting installation flaws:
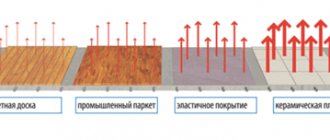
- bring to operating temperatures and leave in work for several days;
- test on a cold heat carrier at high pressure;
- to pressurize warm floors with air.
Before pouring a screed or laying slabs of a rigid base, the underfloor heating system is tested under pressure - pressed
It's up to you, but starting the system at elevated pressure without a screed can cause pipes to rip out of their sockets. This is if you used mounting tapes or single fasteners. To prevent this from happening, you can install the screed beacons before the test launch, fix them with small sections of the solution with a certain step. It is necessary to carry out crimping after the mortar holding the guides has set. You will get a kind of frame that will hold the pipes, so they will not break out of the nests. Will the guides interfere with troubleshooting? Not. If the pipes were not bent during laying, the bay was rolled out, then you have whole pipes and there will be no problems in this part. If leaks can occur, then at the junction of the pipes and the collector, in the boiler piping.
It is necessary to make a frame if self-focusing fastening systems were used. If the pipes were tied to the grid, there are no problems.
Now let's talk about how to test the system with each of the methods.
The first way is running at operating temperatures... It is necessary to bring the system to operating temperature gradually, starting from 20 ° C. After a few hours, raising it by 5 ° C.All this time, you need to monitor the joints, connections, contours. If leaks are found, stop the system, drain, troubleshoot, refill and test. After reaching the design temperature of the coolant, leave the system for 2-3 days. If no damage is found, the screed can be poured (after pre-cooling the coolant).
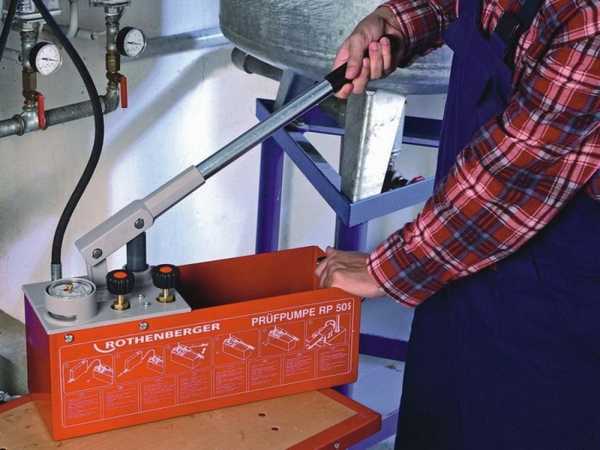
Manual device for pressure testing of water supply systems, with the help of which the coolant is pumped into the underfloor heating system
Second way: with overpressure... Here everything is somewhat simpler: filling the system with a "working" coolant, create a pressure 1.5-2 times higher than the working one and leave it for a day. If in a PERT or PEX system the pressure drop during this time does not exceed 1.5 Bar, there is no leak - you can fill the floor. If there are shortcomings, everything is exactly the same as when reaching the temperature: stop the system, drain, fix breakdowns, fill, test.
The third method of dry pressure testing is used if it is impossible to fill in the coolant for some reason or for special cases. Then with the help of a compressor pump air into the system... But in this case, you will have to create a pressure that is 2-3 times higher than the working one. This method is not entirely reliable, especially if you use the warm floor with antifreeze. "Non-freezing" are characterized by increased fluidity. Therefore, it is advisable to check the system before pouring the screed with the working fluid. Moreover, it is necessary to fill the screed on filled pipes, and the air is poorly suited for this.
When testing with a pressure higher than 4 bar, the air vent valves must be closed, because after a while water or heat carrier will begin to come out of them.
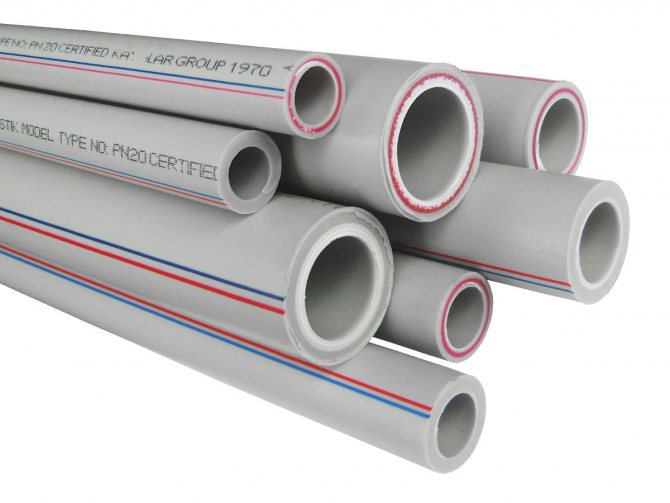
More about which test method is used with which pipes. For reinforced-plastic pipes, it is recommended to test with cold water at an increased pressure (6 Bar). If the pressure in the system has not dropped in a day, then the system is reliable and you can fill in the solution or lay base sheets when using flooring systems.
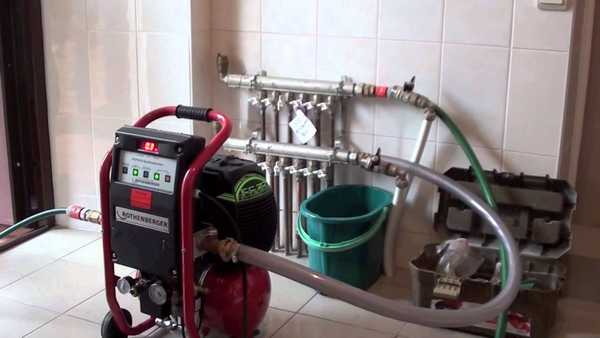
An automatic crimper does everything himself, you just need to control
Crimping a XLPE system is different. First, the system is tested three times with cold water at high pressure. The test pressure is twice the working pressure, but the lowest is 6 bar. Bring the pressure in the system to 6 bar, after which it starts to drop. Leave the system for half an hour, then raise the pressure to 6 bar again, and after half an hour again (3 times in total). After that, raise the pressure to the pressure test (twice the working pressure) and leave it for a day. If during this time the pressure drop is insignificant (less than 1.5 bar) and there are no signs of leaks, the test was passed successfully.
But that is not all. According to German standards (this country has the most stringent safety requirements for building technologies and materials), after pressure testing in cold water, the system needs to be run at operating temperatures. Bring the system smoothly to operating temperature and leave it for several days. After successfully passing all the tests, we can confidently say that the system is reliable.
How to fill the coolant
Before pouring the warm floor, close all the valves of the manifold assembly, connect the hose to the inlet nozzle. If you are going to flush the system, then it is also better to attach a hose to the outlet tip, the other end of which should be brought into the sewer, container or drain pit.
Start pouring from one loop. On this circuit, the valves are opened (all the others are closed), it is filled, air is released (the air vent valves hiss). Turn on the pump for a short time. The air vents begin to hiss again, the pump is turned off. We waited until all the air was released, then turned on the pump again.Repeat until the air stops coming out, then start filling the next loop.
How to start a warm floor
The warm floor is brought to the operating temperature of the coolant in a few days. First, set the supply temperature to 20-25 ° C. Then, every day, raise it by 5-10 ° C. You can increase the temperature by 5 ° C if antifreeze is used, by 10 ° C - when using water. Also, the rate of temperature increase depends on the size of the heated area. If the area is small and the screed array is small, then you can reach the specified mode faster. But this is the case when it is better not to rush: with uneven and rapid heating, the screed can crack, and when using non-freezing liquids, they can overheat, which will immediately lead to system failure.

How to drain water from circuits
The peculiarity of a water-heated floor is that, if installed correctly, it does not have a bottom point and there is no tap there either. Therefore, you will have to use a compressor to drain the system. It connects to the input (supply) collector (do not confuse it, it is to the input). If your manifold assembly is factory-assembled, then there are special devices on it that prevent the coolant from flowing back. And if you connect the compressor to the "return" manifold, then do not let the coolant drain, but you can damage the unit.
So, on the supply manifold, on a special valve for filling water, remove the air vent, and, screwing the adapter in its place, connect the compressor outlet. On the return manifold, connect a hose to the drain valve, which you put into a bucket or sewer.
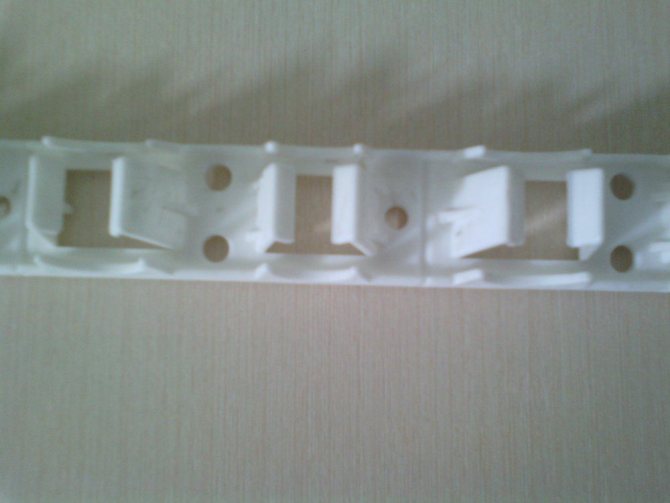
What do the elements of the collector look like, which will need to be manipulated when draining / filling the coolant
Leave the shut-off valves of only one floor heating loop open. Turn on the compressor, water starts to come out under pressure (hold the drain hose). Leave the compressor on until the airborne suspension comes out. Then you turn it off, close the valves of the drained circuit, open the shut-off valves of the next one and turn on the compressor again. So, alternately opening the shut-off valves, drain the water from all circuits.
Since the length of the circuits is significant, a significant amount of liquid remains on the walls. It needs to be removed again. That is, repeat the procedure after a few hours. Only then can we say that the heat carrier of the warm floor is completely drained.
Characteristic "XL Pipe"
The XL Pipe electric-water floor system is installed both in large cottages and in country houses with a small heated area. It consists of the following elements:
- a pipe made of heat-resistant polymer, inside which there is a heating element;
- the coolant in it is heated by an eight-core cable; it connects to the network;
- underfloor heating fluid is introduced manually; use propylene glycol or antifreeze;
- when heated, the coolant expands, therefore, a pressure absorption chamber is provided in the tube;
- the inlet end is closed with a silicone cap; it has holes for an electric cable;
- the ends of the cable are placed in a chamber with insulating material;
- the line fits under the screed with a depth of 4-5 cm.
We recommend: How to make a warm water floor in a private house with your own hands?
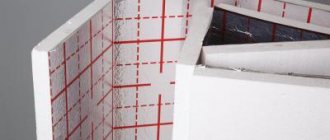
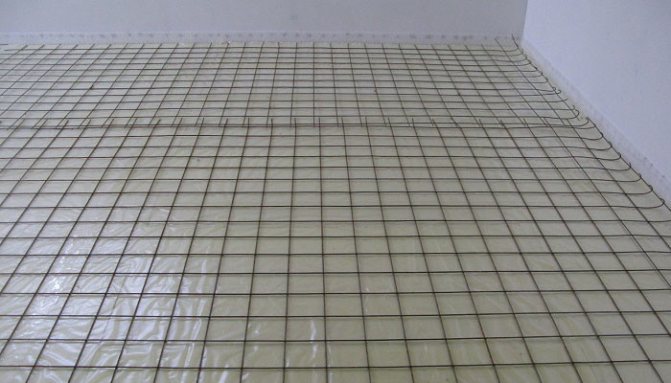
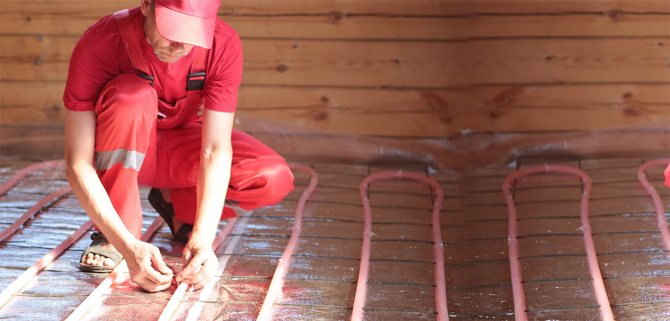
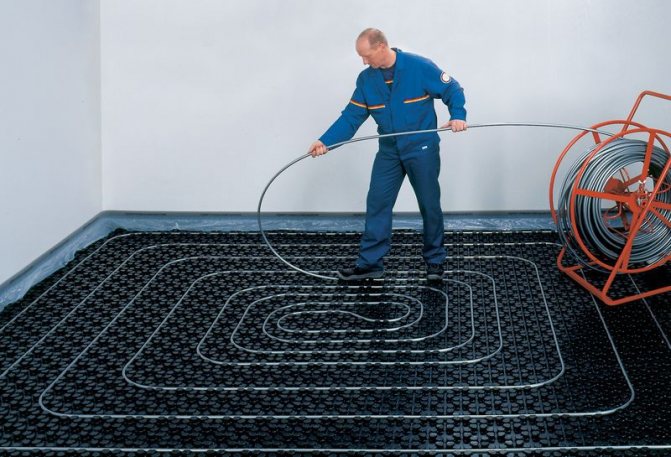
Before installing the line, preparatory work is carried out: level the floor surface, lay waterproofing, insulation. A damper tape is reinforced along the lower perimeter of the wall. If mats for "warm floor" are not used, then a reflective screen and a reinforced mesh are placed on the insulation. The liquid circuit is strengthened on it.
All preparatory work is done by hand. To connect the liquid line, it is recommended to contact a specialist.
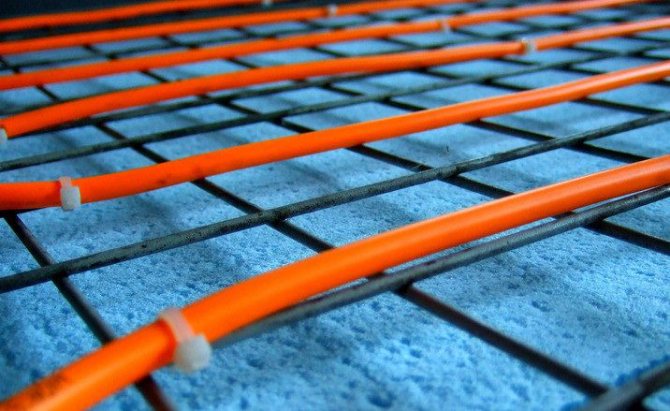
Pipes are laid "snail" or "snake". The end of the pipe is not returned to the connection point. It is placed in any convenient place on the floor.
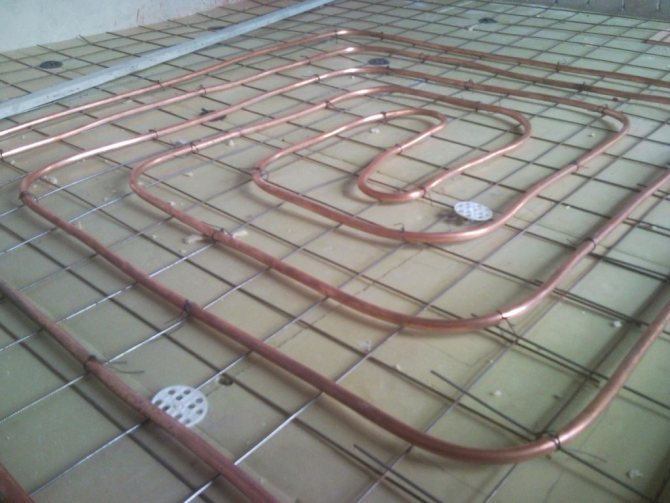
When forming a screed, the mesh is an additional reinforcement. Copper wire is attached to the armature; bring out the ground.
A thermal sensor is placed between the cable turns. It is placed in a protective cover. All wires are checked for resistance, connected to the network, placed in a junction box, which is located on the floor. It is closed with a screed.
A cable is led out of the box to the thermostat. It is installed at a distance of 70 cm from the floor. The end of the temperature sensor and the heating system is connected to it. The thermostat controls and operates the heating system.
Outcomes
Operating a water heating system is not difficult, but time consuming. All that is required is to "fill" the floor with the selected heat carrier and gradually bring the system to operating temperatures. The frequency of changing the coolant depends on its type: if water is poured, it needs to be replaced every year (before the start of the season), if an anti-freeze liquid was used, then replacement (draining, flushing and filling) is performed once every 3-5 years.
How to fill a warm floor with water
Before filling the warm floor with water, you need to make sure that the circulation pump is in good working order, check the operability of the shut-off and control valves, and also perform some other actions, which will be described below. In fact, the first launch of a warm floor is not so difficult, and for its implementation, you do not need to contact specialized services.
Underfloor heating launch
The launch of a warm floor can be conditionally divided into a number of separate activities, the implementation of which should be carried out in a special sequence. This process looks like this:
- Filling underfloor heating with water or other heat carrier, such as antifreeze;
- Setting the optimal parameters of the warm floor;
- Drying and warming up the entire system.
If the performance of underfloor heating has not been impaired since the last heating season, then it will not be difficult to launch underfloor heating. The situation is completely different in cases where the warm floor was repaired due to any damage.
Then, even before filling the warm floor with water, you should check the pump-mixing unit and the comb for the absence of unconnected circuits and the absence of shut-off valves. If everything is in order, then you can run underfloor heating in accordance with the recommendations specified in the second part of the article.
How to fill a warm floor with water
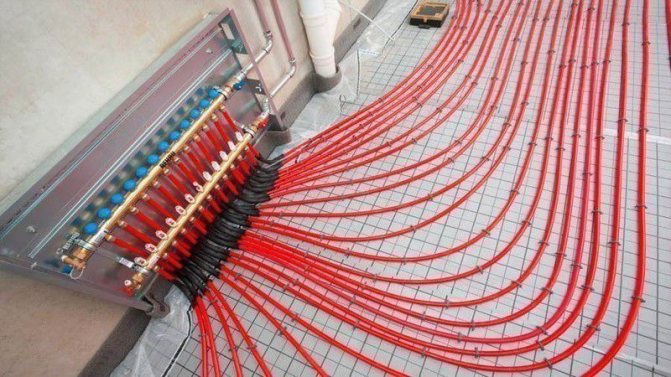
As a rule, when installing a warm floor, a special pumping and mixing unit is installed, which consists of a collector (manifold), shut-off and control valves, and a circulation pump. To begin with, in order to start the warm floor with water, you need to open the taps that are connected to one end of the comb.
In this case, the taps on the collector itself, it is better to open one at a time. Thus, the warm floor will not become airy, and all the work on its launch will be completed much faster. If it turns out that the warm floor is airy, then you can read about how to remove air from the warm floor system in an article specially written about this.
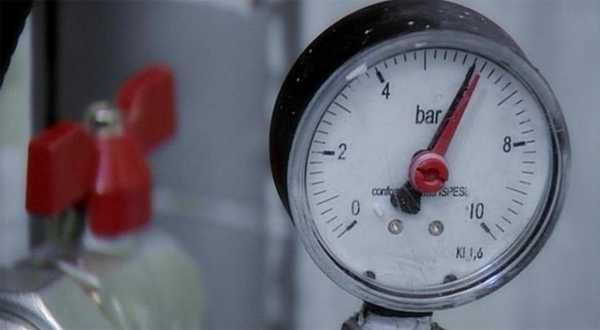
So, after the main taps on the comb are open, you can turn on the heating system feed tap and start each of the underfloor heating circuits one at a time. However, this is not all, and after the pressure on the underfloor heating pressure gauge becomes within 1-1.3. Atm., You should check if the circulation pump is working.
To do this, unscrew the plug in the center of the pump with a flat screwdriver, then slightly push the impeller with a screwdriver. By screwing back the plug, you can turn on the pump.
You should know that at first in the underfloor heating system, it is still possible to have some amount of air.This will be heard when the circulation pump is running, in the form of increased noise and gurgling of air. In this case, it is important not to forget to open the automatic air vents on the floor comb so that the air can finally leave the system after a while.

Effective building solution
Warm self-leveling floors have many advantages and are rightfully considered an effective building solution. For you, this is an opportunity to provide a comfortable environment in the house at any time of the year and not spend money on expensive thermal insulation materials. Now you know for sure whether it is possible to make warm self-leveling floors, and you will definitely use the offer from Visper, the leader in the installation of polymer floors in Russia.
Follow our recommendations, consult with specialists and feel free to order the flooring installation service!