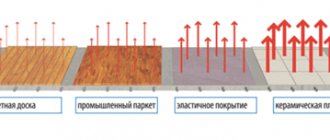
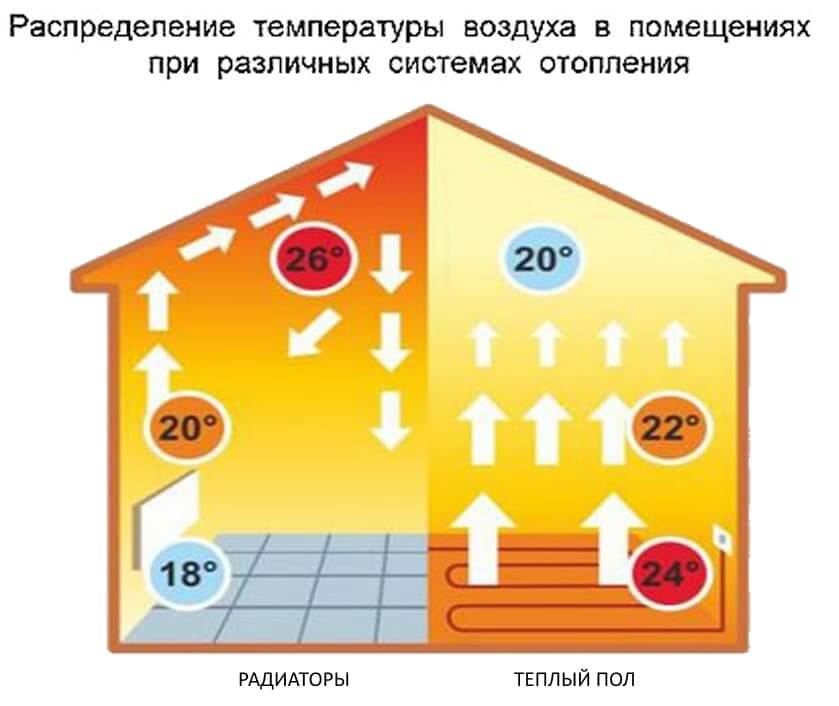
Water underfloor heating device
At its core, a hydraulic floor is pipe systemthrough which a liquid of a certain temperature circulates. Heating is carried out by a boiler, the design of which can include pump... Otherwise, it can be output separately. The pump is used to pump cooled water into the heating device.
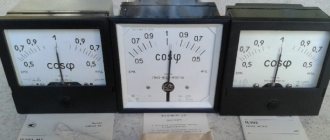
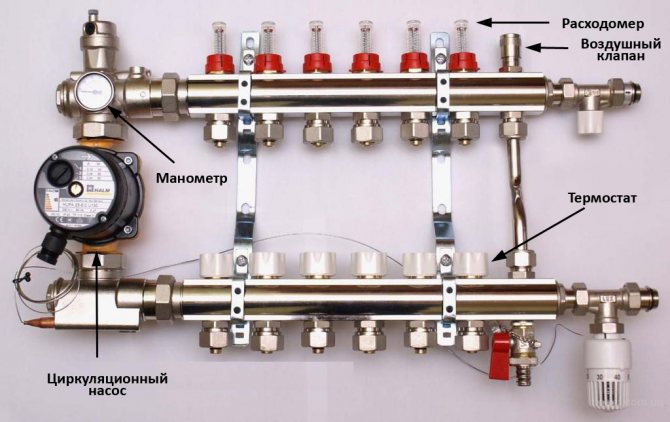
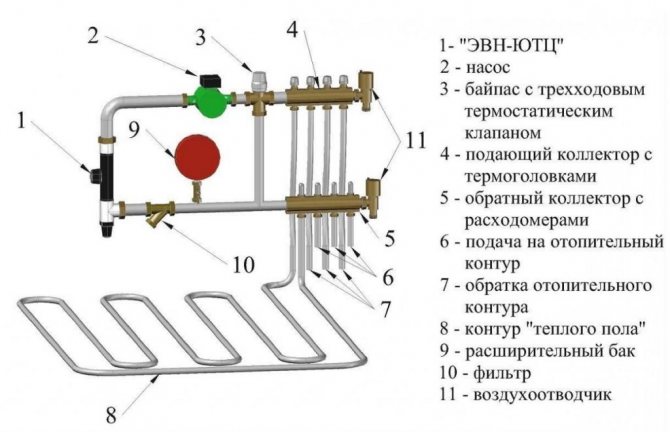
At the entrance to the boiler, it is mandatory to install pressure gaugeallowing you to control the pressure in the heating system. Hot water enters the piping system through collector... It also serves to drain the liquid.
The collector is a piece of pipe with two types of splitters: for hot and cooled water. The manifold includes emergency drain systems, adjustments and settings of the system operation, valves that prevent the reverse flow of liquid.

Floor mounting systems for warm water floors
Polystyrene and wood-modular furnishing systems
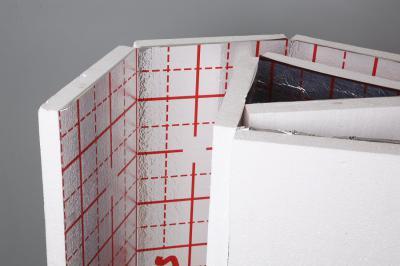
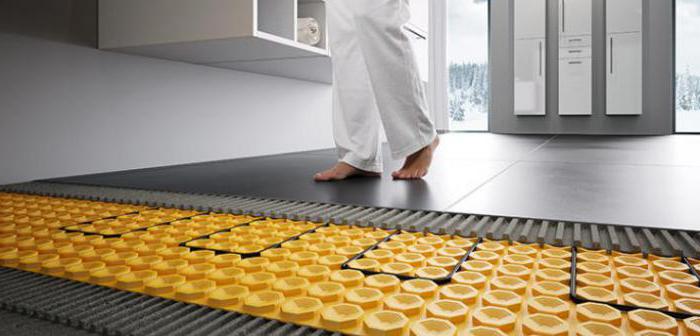
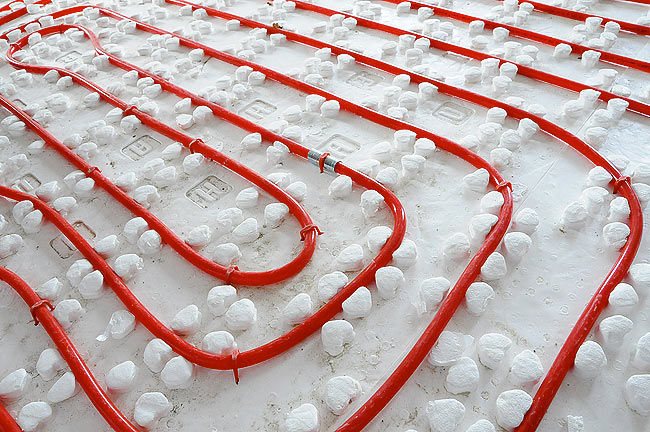
When using a polystyrene system for arranging underfloor heating, there is no need for a concrete screed. Themselves polystyrene plates combine thermal insulation and fastening functions. Due to the factors described above, the floor height is significantly reduced and by reducing the total weight, the load on the base is reduced. Therefore, the use of this method is recommended in rooms with low ceilings and where the floors have insufficient strength.
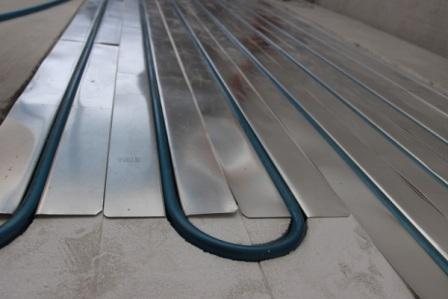
Aluminum plates with special grooves are attached to the expanded polystyrene plates, into which heating pipes are laid. The plates have excellent thermal conductivity and provide uniform heating of the surface. Gypsum fiber sheet (GVL) is laid on top. Under the parquet board, one layer of gypsum fiber is quite enough, but if laminate, linoleum or ceramics are used for finishing the floor, it is recommended to lay an additional layer of gypsum fiber board.
The wood-modular underfloor heating system is mounted on bases made of wood. The modules are made of chipboard with special cutouts for aluminum plates and pipes. The further sequence of actions is identical to that described above.
Rack mounting system
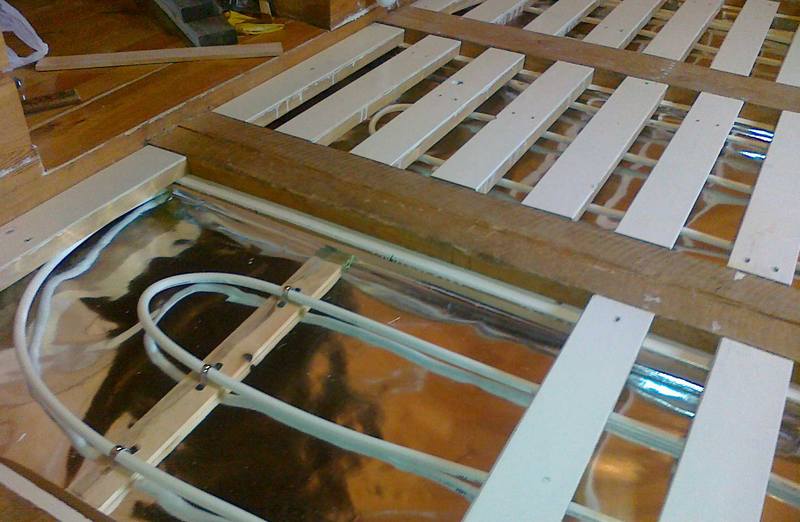
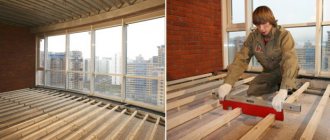
When installing underfloor heating on the second floor of a wooden house, it is most practical to use a rack system. The gaps between the lags are filled with insulation - for example, expanded polystyrene or basalt wool. A board thirty millimeters thick is laid across the lag; a gap of a little more than two centimeters must be left between the boards. In these grooves, aluminum plates are mounted, respectively, pipes are attached to them. Gypsum fiber sheets are placed on top and the floor is finished.
Collector installation
The endings of pipes from all heating circuits are brought together in one place, where the distribution manifold is installed. The manifold cabinet is installed so that the distance to the circuits is approximately the same, or it is located closer to a larger circuit. The collector is selected taking into account the number of connected circuits.
Experts strongly recommend installing a distributor with control valves - this option is more expensive than an unregulated device, but it allows you to regulate the water circulation and the temperature of each loop separately, which significantly increases the efficiency of the system. A drain outlet and an air valve are mandatory installed on the collector.Particular attention is paid to the mounting height of the manifold box and the direction of the pipe outlet - if it is fixed below the floor heating level or the pipes are pulled up, the air removal system will not work.

The boiler for space heating must be selected with a built-in water pump, or the pump must be installed separately. The power of the heating boiler must exceed the total power of the underfloor heating by twenty percent.
A warm water floor is a practical way to heat rooms of any size. And having a basic understanding of the technology of installing water floors, it is possible to carry out work on the construction of the system yourself.
(88 voice., middle: 4,70 out of 5)
How to connect a sink: plumbers recommendations
How to make ventilation in the bathroom
Similar posts
System mounting technology
Self-styling includes several stages: screed (or leveling), laying heat-insulating and waterproofing layers, distributing pipes, installing a floor heating collector, installing a water heater (boiler), installing pipes, pouring a screed.
All types of work must be carried out in compliance with sanitary standards and safety rules.
Each component structure must have appropriate pressure resistance indicatorsexposed to liquid or steam.
At every stage, it is necessary tightness test and the durability of all devices.
Each scheme of a water heated floor can have its own distinctive features, depending on the type of room chosen (bath, balcony, living room), as well as the main material of the floor covering (tile, wood, plastic, concrete screed).
These nuances and detailed descriptions of each stage of installation are presented below.
Don't know how to glue non-woven wallpaper with your own hands? Read the detailed instructions.
Details on how to level the walls with putty can be found here.
How to apply latex water-based paint for walls, read this address: https://ru-remont.com/materialy/kraski/lateksnaya-vodoemulsionnaya-kraska.html
Negative sides of the system
If we talk about the shortcomings that a water-heated floor (in an apartment) has, then the following facts can be attributed to them:
• due to a sufficiently large layer of screed (about 10 cm), the height of the room is noticeably reduced;
• if poor quality materials were used during the installation or mistakes were made, there is a high probability of a breakthrough, which entails a lot of problems;
• since a water-heated floor is laid in a screed, its installation can be carried out only at the stage of building a building or during a major overhaul;
• work on the arrangement of the system is very laborious, so not all owners are able to independently carry out its installation.
Base leveling
The leveling process required in the presence of irregularities is always accompanied by complete removal of the old screed, cleaning of dirt, dust from construction debris.
For horizontal differences exceeding 10 mm, the procedure is mandatory.
The procedure can be performed Dry and Wet way. In both cases, the first step is getting rid of holes and cracks with the help of concrete mortar or other construction mixture intended for this.
With the "dry" method, the following works are carried out:
- On high 20 cm from the existing floor level, a mark is made around the entire perimeter of the room.
- Polyethylene and cellulose paper are laid on the floor with a wall 5-6 cm above the mark. If the material is a strand rather than a solid sheet, it must be placed with an overlap 15-20 cm. Along the perimeter, it must be attached to the wall with an edging tape, planted on double-sided tape.
- A reinforced mesh is placed on the waterproofing material.
- Expanded clay is poured onto polyethylene, consisting of stones of different diameters. It is leveled with guides and compacted. The control of the uniform distribution of bulk material over the surface can be carried out using beacons or wooden slats.
- At the end of the work, the protruding polyethylene is cut off with a clerical knife.
You need to start alignment from the far corners, moving to the front door. If during the work projections or depressions are found, you can get to them with the help of "construction islands" - sheets of GVL.
When using the "wet" method, after removing the old screed, a primer is poured onto the floor and leveled with foam rollers. It takes up to 5 hours to dry. The next procedure is similar to the "dry" method, the only difference is the use of water when compacting expanded clay.
Device
For each room, it is necessary to select the optimal floor heating system. And, as you know, there are three of them.
- Installation using a concrete screed.
- Installation without concrete screed - floor technology. Here it is a little more complicated, since the flooring (linoleum, tiles, laminate, etc.) is laid through additional waterproofing (foamed polyethylene, cardboard) on aluminum sheets.
- The last type is wooden. This is the installation of a warm water floor on floor slabs or on wooden blocks - logs.
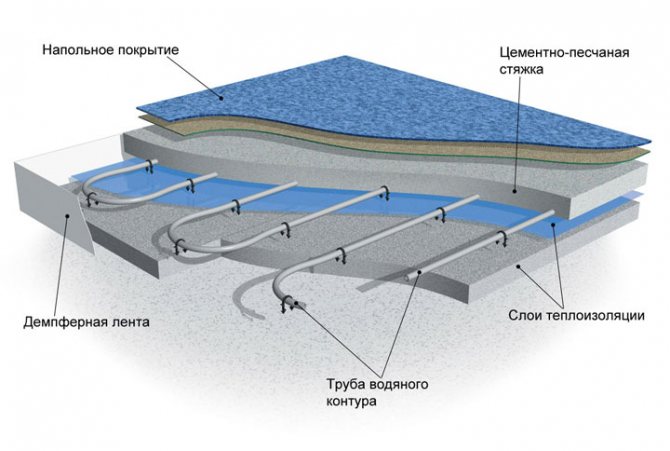
The complete set of a warm floor looks like this: a flooring made of heat-insulating material, metal-plastic or polymer pipes, fasteners, a set of couplings, locknuts for a connection, a pump that creates pressure and circulation, and a concluding element - a concrete screed and the floor itself.
How pipes are laid
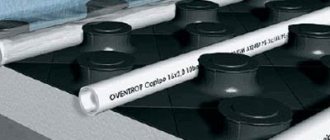
Polystyrene boards are laid on the leveled floor surface. They serve for thermal insulation and prevent the spread of heat in all directions.
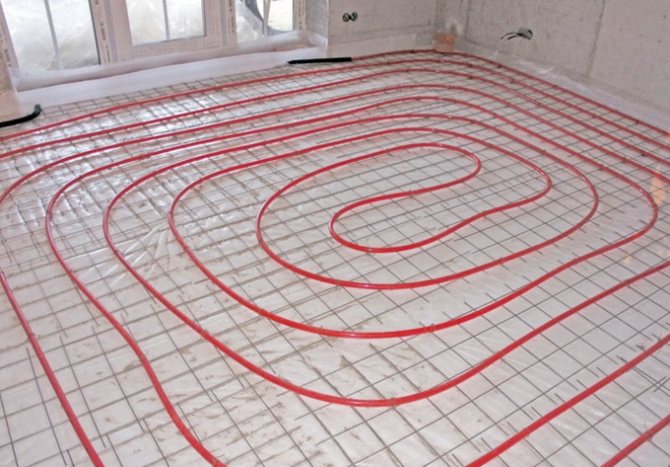
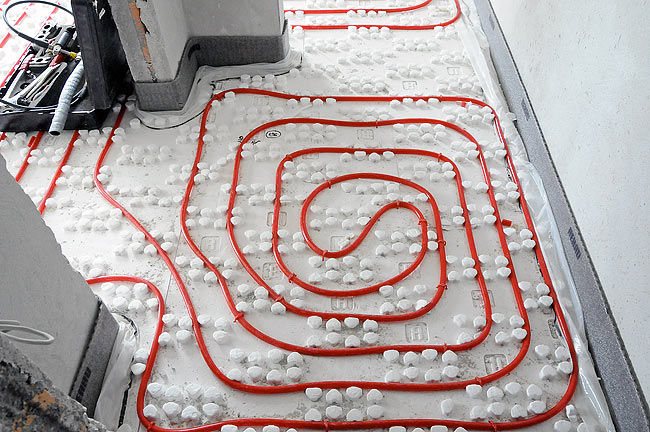
The actual pipe laying is carried out in two main ways: bifilar (parallel rows) and meander (spiral).
The first variety applies when there is a slope of the floors, there is no need for strictly uniform heating. The second - requires a lot of effort and accuracy, is used when using pumps of lower power.
The number of contours depends on the size of the heated room. The maximum area for placing one contour - 40 sq m. The laying step can be either uniform throughout its entire length, or vary depending on the need for enhanced heating in certain areas. Average stride length is 15-30 cm.
Since the pipes experience strong hydraulic pressure, when installing a water-heated floor, it is unacceptable to connect them using couplings. Only one coupling can be used for each circuit.
It is recommended to use one circuit for heating each room, including a bathroom, a loggia, a pantry, a barn. The smaller the contour, the higher its heat transfer, which is especially important for corner rooms.
The choice of pipes for underfloor heating
The choice of pipes used for laying a warm floor in an apartment is determined by the fact that the planned service life of such a floor is from 50 to 100 years. During this entire period, the pipes must withstand the effects of both the aggressive medium of the coolant and the no less aggressive screed. Modern manufacturers offer a variety of suitable materials. Long gone are the days when people puzzled over how to make a water-heated floor from black steel pipes on threaded joints.
Perhaps the best pipes for today are metal-plastic pipes.
| Aspects | Characteristics |
| Materials. | They are made of aluminum, outside and inside they have a protective layer of polymer. |
| Dimensions. | They are produced in coils with a pipe length of up to 100 meters. |
| Installation. | Products bend easily. |
| Exploitation. | They have an acceptable coefficient of thermal expansion, provide high resistance to aggressive environments. |
The only drawback is the risk of acquiring a "left" pipe, manufactured with serious violations of technology. Such pipes do not look different from real ones, but they can withstand only a few years of operation. In no case, do not purchase a metal-plastic pipe for a warm water floor in the construction market for unaccounted "cash". Find a reputable supplier with a history, write the proper paperwork, pay through the checkout, issue a guarantee.
An alternative to metal-plastic is a corrugated pipe made of alloy stainless steel with an inner plastic coating.
The disadvantage of this pipe is that the corrugation makes high demands on the purity of the coolant. Dirt and rust, which are quite possible when the underfloor heating is supplied from the central heating of a domestic apartment building, will clog the pipe, reducing the clearance of the coolant working circuit. Part of the problem will be solved by the input filters. So when choosing a corrugation, remember: repairing a warm floor with dismantling the screed is a monstrously troublesome and expensive business.
Collector installation
The manifold must contain a sufficient number of outputs to connect all circuits.
The same goes for return manifold. In its simplest form, it contains only the valves required for one-way water flow.
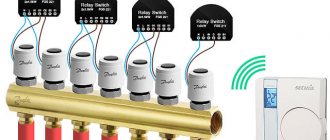
Availability servos allows the opening or closing of valves.
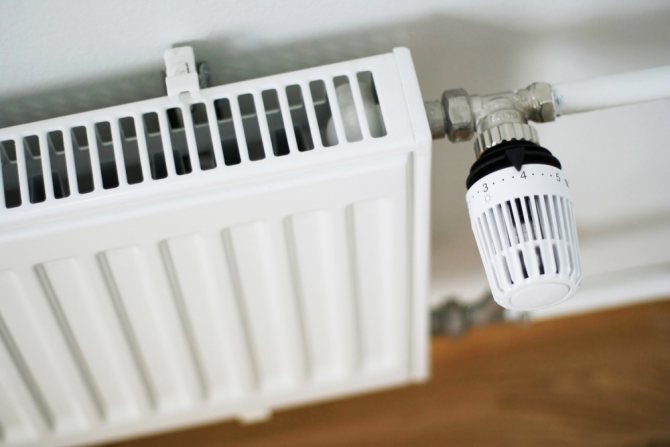
The thermostat makes it possible to set a certain temperature and subject it to regulation. It is connected to the valves by means of controllers and is brought out to a place accessible to users by the system.
Place the thermostat away from drafts, cold or hot air currents for adequate information transfer.
The collector is installed at a height 50 cm on a wall bracket or in a special box mounted in the wall. The pipes fit into the corner clip and are secured with Euro cones.
To install the thermostat, you need a 1.5-3 m cable and presence of an outlet nearby with its location.
Not sure how to calculate the consumption of water-based ceiling paint? We will help.
You can see various options for lighting the ceiling in the kitchen here.
Photos of examples of a white kitchen with a black countertop are at this address: https://ru-remont.com/kuhnya/stoleshnitsy/stoleshnitsy-dlya-kuhni-foto-obzor.html
Hydraulic pressure testing of the system
After connecting the pipes into a single system it is necessary to check their strength and tightness. To do this, they are completely filled with water and air is released. The working capacity of all valves is monitored, pipes are visually checked for leaks.
Re-pressure testing is carried out after connecting the pump and barometers.
After the floor is filled with concrete, the pipes will be under pressure up to 30-40 MPa. Pressure testing is carried out under pressure, in 1.5 times the working, which is 60 MPa.
For this shut off all manifold valves and pump air or liquid into the pipes. The pump is pumped with water for 30 minutes, the pressure is controlled several times in the period from 1 to 2 hours with the pump turned off. A drop in the indicator is acceptable in 2 hours at 20kPa.
Types of installation and pipes used
There are two options for the technology of installing a warm floor - concrete and floor.
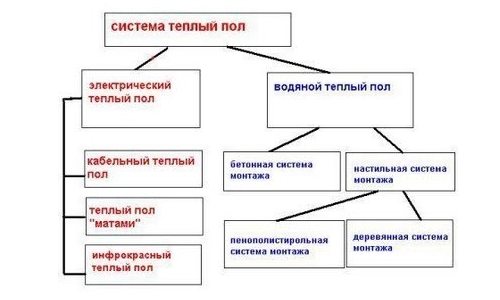
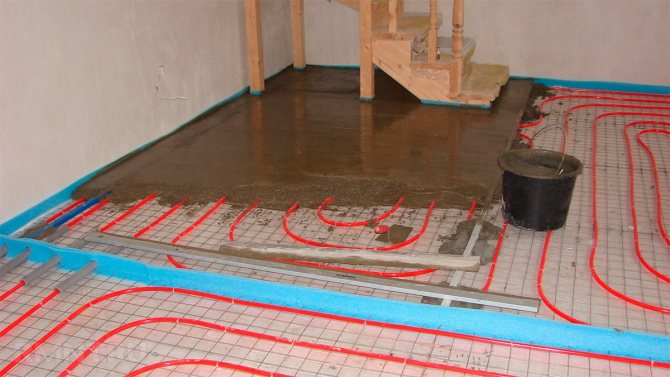
When using the concrete method, all heating pipes are located inside a monolithic concrete screed. This option is the most common due to its relative simplicity and low cost, but it requires much more time and labor.
Using the flooring method, the entire installation is carried out with ready-made materials, which are laid in several layers.
Depending on what material is used, the flooring technology is divided into polystyrene, wooden modular and wooden slatted.
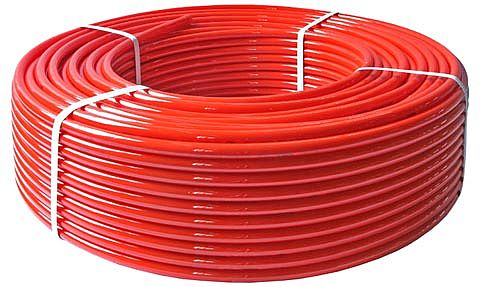
Pipes are used in XLPE or PP. Polyethylene pipes are practically not subject to thermal expansion, due to which they are the most common in use. Polypropylene, even reinforced with fiberglass, expands quite strongly when heated, so it is much more difficult to use such pipes. The most suitable pipe diameter is from sixteen to twenty millimeters, with a temperature limit of 95 degrees Celsius and a working pressure of up to ten atmospheres. Such a pipe can serve for a long time without creating problems during operation.
Do-it-yourself installation and connection of a gas boiler and a pump for underfloor heating
A standard boiler, operating on gas and serving to supply hot water and space heating, has 5 outlets arranged in series from left to right:
- Hot water outlet to the heating system.
- Hot water outlet to the water supply system.
- Gas supply.
- Cold water inlet for heating and supply.
- Cold water inlet from heating (return).
Connections of all pipes to the heating element detachable, are installed using couplings and nuts.
The heating system is controlled separately from the water supply, which makes it possible to connect independently.
In the boiler from the collector of a warm water floor must be suitable two tubes. One will supply cooled water, and the other will supply hot water to the heating system.
The pump is included in most modern boilers. If it is absent, it is necessary to install it in series with a manifold and a heater.
It is recommended to place the pump between return system collector and pipe inlet to the boiler. It is possible to install separate pumps for each circuit.
Installation of a water floor
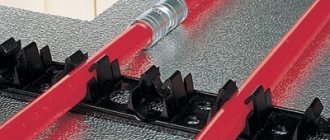
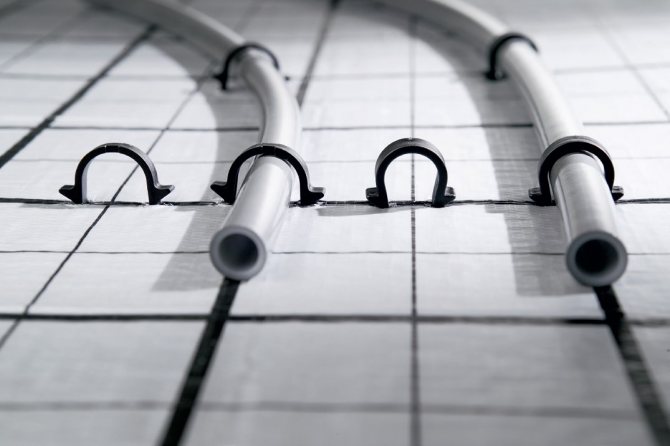
Usually, the installation and installation of a water-heated floor with your own hands begins with fixing the mounting profiles, which have special sockets for pipes. It is very important not to pinch the pipes during installation, as the system simply will not work and can lead to damage to your property.
The ends of the pipes must be brought to the collector and connected using the Euro-cone system. When pipe-laying is complete, you need to diagnose and run the system for verification. If everything goes well, then you can fill in the concrete screed and install the floor covering. Of course, you must first wait for the screed to dry completely.
Thus, you can install a water-heated floor in a bathroom, in a nursery, in a bathhouse or in a bedroom very quickly and at minimal cost. The main thing is to carefully follow the instructions and follow the recommendations of specialists! We sincerely hope that we were able to answer your question on how to make a warm water floor with your own hands.