Advantages and disadvantages of liquid sound insulation
Like any other material, liquid sound insulation has its own advantages and disadvantages. Speaking about the advantages of the material, the following should be noted:
- The treated surface, in addition to soundproofing qualities, also improves the thermal insulation of the apartment, which will help to save on heating in the winter.
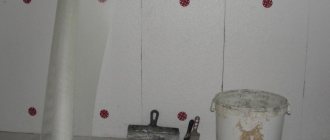
- Due to the structure of the material after application, it penetrates into crevices and pores, effectively isolating the room. Often this material is used to treat window and door openings where cracks can form.
- The foam has high adhesion rates to various surfaces, which makes it possible to apply sound insulation even without preliminary surface preparation. At the end of the work, there is a minimum of debris and waste.
- With the use of polyurethane foam, you can make an absolute sealing of the apartment, which will improve the soundproofing qualities of the room. When the material is applied to the walls and ceiling surface, a monolithic layer is formed, which will clog all the cracks on the surface.
- Using foam, it turns out to save space in the apartment. If the sound insulation has a layer of three centimeters and to this add the parameters of the drywall sheet, it turns out that the complete sound insulation will have a thickness of four centimeters. Liquid insulation is the optimal solution for small-sized housing.
- The weight of the material is very light, so the structure is not subjected to additional stress.
- The structure of the material allows for effective sound insulation at different wavelengths.
@zhidkaya_shumoizolyatsia
Speaking about the disadvantages of polyurethane foam, the material has few of them, and the main one is the difficulty of dismantling. Despite the duration of operation, which is more than fifty years, you will still have to change the sound insulation, and it will be difficult to wipe it off the wall. This is, perhaps, all the negative aspects of liquid sound insulation.
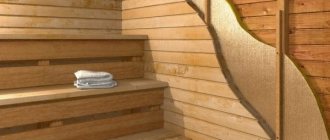
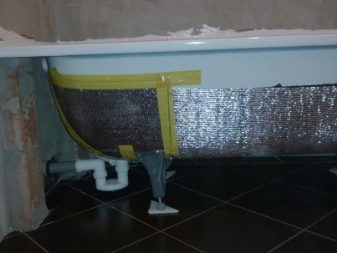
Methods for soundproofing a metal bath
For the comfortable use of steel equipment, soundproofing of the bathtub is required, and it can be done in one of several ways.
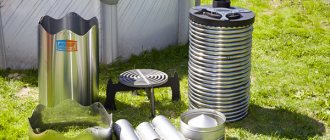
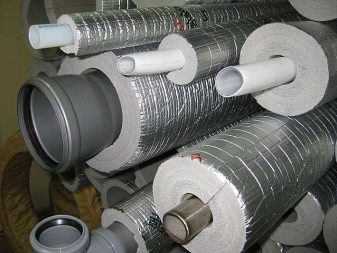
Foamed polyethylene insulation ↑
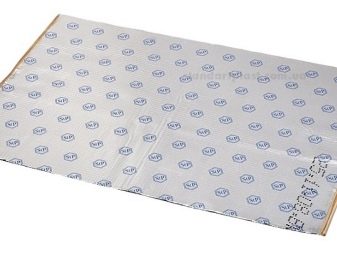
Foamed polyethylene is an excellent hydro, heat and sound insulator. The material is a closed polyethylene cell filled with air. This structure provides excellent insulating properties. An improved coating with a metallized or foil layer is also available. However, ordinary material is suitable for sound insulation. It will be easier to work with self-adhesive mats. If not, stock up with a suitable adhesive. The coating is applied to the back of the bath with glue inward and pressed firmly. This covers the entire surface.
Foamed polyethylene is an excellent sound insulator
Soundproofing with a technical plug ↑
This is a rather laborious method. However, for many, it is very important that soundproofing a metal bath with a technical plug allows you to get an environmentally friendly result. The product will not emit toxic fumes even when the bathtub is filled with hot water. In addition, the cork is highly resistant to moisture, which is important for a bathroom. The cover is glued to the back of the equipment strictly according to the instructions, which are usually attached to the packaging with the material. The time required for the glue to freeze is sure to be maintained.
Sound insulation with polyurethane foam ↑
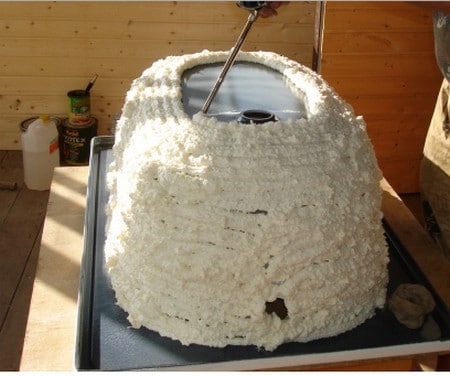
One of the easiest and cheapest ways to arrange sound insulation. For its implementation, you will need ordinary polyurethane foam.It is better to choose a summer one, which has great resistance to high temperatures. In addition, it swells better, allowing a wider insulating layer to be obtained. Competent soundproofing of the bath with your own hands includes the following stages:
- Training. The equipment is tipped upside down on a lined polyethylene or other material that protects the floor from dirt. The bath is fixed to the surface so that it does not slip during operation. The areas of connection with the drain pipes are pasted over with masking tape, the legs are screwed on.
- Sealant treatment. For a more reliable fixation of the foam, a thin mesh of sealant is applied to the surface of the bath.
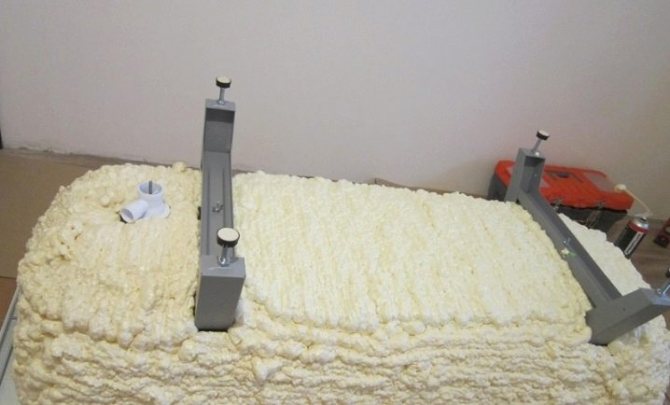
In the process of work, you should take short breaks so that the foam dries up and fixes on the surface of the bath
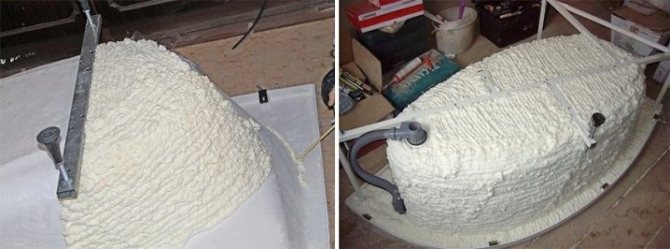
- Application of polyurethane foam. The operation is carried out very carefully and rather slowly. The foam jet must be regulated so that the layer is uniform. The material is applied in a circular motion from the edge of the bath upward. From time to time, you should stop, waiting for the foam to dry.
After the foam has completely dried, the equipment is ready for installation. It should be remembered that when moisture gets on the polyurethane foam, mold and mildew begin to develop here, which leads to the destruction of the coating and the appearance of an extremely unpleasant odor. This must be taken into account when finishing.
DIY installation
Having familiarized yourself with the types of materials, you can proceed to work on eliminating noise from the metal bath.
Polyurethane foam
The simplest and most understandable way to soundproof a bath is to treat the bottom with polyurethane foam. According to Internet users, this technology helps to insulate the walls of the product and improve its strength. Before starting the process of heat and sound insulation, it is necessary to turn off the water supply and dismantle the bath. To do this, disconnect the siphon, and put the product on its side.
First you need to clean the surface of the bowl from dirt and dust, and then degrease it
It is important to protect the drain and overflow holes with masking tape. To achieve adhesion of the steel alloy with the foam, you need to make a mesh on the outside of the bath with a silicone sealant
Then, gently and evenly apply the foam. It is believed that for home sound insulation it is better to use "summer" foam. It has better performance properties and, unlike conventional foam, polymerizes better and expands faster.
Foamed polyethylene
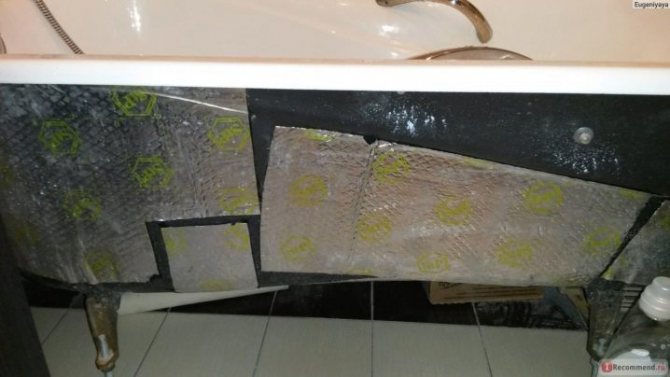
Before starting work, the bath is disconnected from the water supply and turned upside down. Then it is cleaned of dirt and dust. For a better fit, the polyethylene mats are cut out. After that, the protective film is removed from the cut parts, they are carefully and accurately glued to the product. In this case, the material must be smoothed to prevent the formation of bubbles.
At the end of the work, it is necessary to return the bath to its normal position, connect the siphon and connect the water supply. In order to save on the consumption of mats, you need to glue them only in the area of the bottom around the drain hole and the sides of the bath.
Vibroplast
The process of soundproofing a steel bath with this material does not require turning off the water supply and disconnecting the siphon. Pieces of the required size are cut out of the vibroplast, after removing the protective film from them, it is necessary to glue the surface of the product. In this case, you need to align the pieces for a snug fit, and roll with a roller.
Liquid acrylic
Before treatment with liquid acrylic, the metal bath is cleaned with sanding paper and an active cleaning agent. Then, dirt and dust is washed off from the bowl. For high-quality painting, it is necessary to degrease the product with a solvent and let it dry.In order not to stain the surrounding objects and the floor, you need to remove the siphon and close everything around with plastic wrap. It is necessary to apply acrylic in bulk to the entire inner area of the bowl, processing it in a circle.
Using a special brush, you will need to paint the inside of the bath, and then use rubber spatulas to level the acrylic layer. Acrylic dries for a long time. Therefore, it is best to leave the device to dry for 2-3 days to get the best result.
Thanks to the large selection of soundproofing materials, owners of steel bathtubs have a choice. It should be remembered that processing the product with vibroplast or other insulating material requires further decoration of the bowl. In order for the bathtub to adhere more tightly to the wall, you need to use liquid nails or special silicone.
For information on how to make a steel bath soundproofing yourself, see the next video.
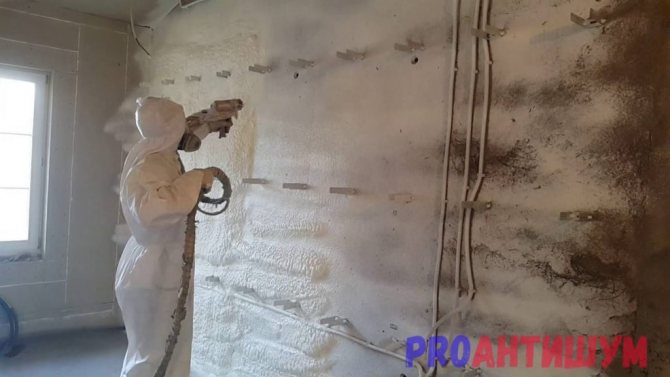
Installation of soundproofing
Most residents of panel houses are familiar with the problem of poor sound insulation. When you can clearly hear how neighbors are walking or their children are running, and the sound of a working drill keeps the whole house in suspense. Taking care of the soundproofing of your apartment in advance, you can forget about these unpleasant moments forever. Below we will give some simple tips on how to do this.
Currently, the market is replete with various acoustic materials and building acoustics technologies that are able to increase the sound insulation of an apartment. This includes floating floor structures, installation of soundproofing for a false ceiling, and special soundproofing wall claddings using soundproofing fasteners.
Undoubtedly, all of the above methods of installing sound insulation give a good result, but one should not forget about decent financial investments in the necessary materials and services of specialists. Not everyone has extra money and free time for expensive repairs. In addition, in many cases it turns out to be enough to eliminate the elementary defects of the builders.
There are a number of effective home remedies that can be taken. The tips and tricks outlined below are superficially very simple to implement. At the same time, their implementation will help to significantly increase the acoustic comfort in a conventional apartment building.
1. Soundproofing of sockets
An electrical outlet installed on a wall between apartments is one of the most likely sources of noise from neighbors. To check this, it is enough to put your ear to the outlet (observing safety rules so as not to get an electric shock). It turns out that in many reinforced concrete wall slabs, through holes for the installation of electrical accessories are provided at the production stage. This is not the fault of the builders. They only install sockets in adjoining apartments, leaving the through channel hollow, any sounds through which freely enter your room.
Advice:
Remove the socket and back box. Do not forget about compliance with electrical safety rules. It is quite possible that you will be able to see the bottom of the neighbor's outlet. Carefully insert a thick mineral wool “gasket” into the hole. You can also use asbestos cloth or basalt cardboard. Seal the hole itself with plaster putty or cement mortar, leaving enough space for mounting your socket. We recommend using the services of a professional electrician to carry out this operation.
Note: To seal the hole, use polyurethane foam without subsequent plastering. Polyurethane foam does not have sound insulating properties. In addition, its flammability is very high.
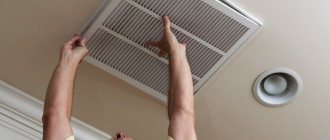
2. Noise insulation of electrical installation boxes
Most often, junction boxes for soldering electrically conductive cables are located under the ceiling in the center of the apartment. Usually they are covered with wallpaper, but they are easily detected by the “tapping method”. Often, such boxes are mounted in through holes in the plates and then closed with plastic lids.
Advice:
It is recommended to carry out noise insulation of installation boxes by analogy with sockets. With the obligatory involvement of an electrician. Self-twisting electrical cables is unsafe.
3. Insulation of heating and water supply systems
Guided by building codes, the laying of risers of heating and water supply pipelines should be carried out through the floors using vibration-insulated sleeves. To do this, it is necessary to mount a metal pipe with a diameter larger than that of the riser into the ceiling. The gap between the pipes must be filled with sound-absorbing and non-combustible material and then sealed with a non-hardening sealant. In practice, this is not the case. Builders either do not close up the gaps in the liner with mineral wool or do not use liners at all, mounting the riser directly into the ceiling, filling everything with cement mortar. During operation, gaps inevitably appear between the riser and the floor slab. Noise from neighbors will freely enter your home through such leaks. Often, in addition to unwanted noise, other odors penetrate through such gaps.
Advice:
If the riser is located in the sleeve, it is necessary to seal the gap between the sleeve and the riser with silicone sealant (always heat-resistant). If the riser passes through the ceiling without using a sleeve, it is necessary to clear and remove the disturbed section of the cement mortar around the pipe as deep as possible (avoiding penetration into the adjacent apartment). Further, the base of the pipe must be wrapped with sound-insulating material (it can be Vibrostek fiberglass or asbestos fabric) or the damaged area of the floor or ceiling must be cemented. The excess insulating material is then trimmed and the joint is sealed with silicone sealant.
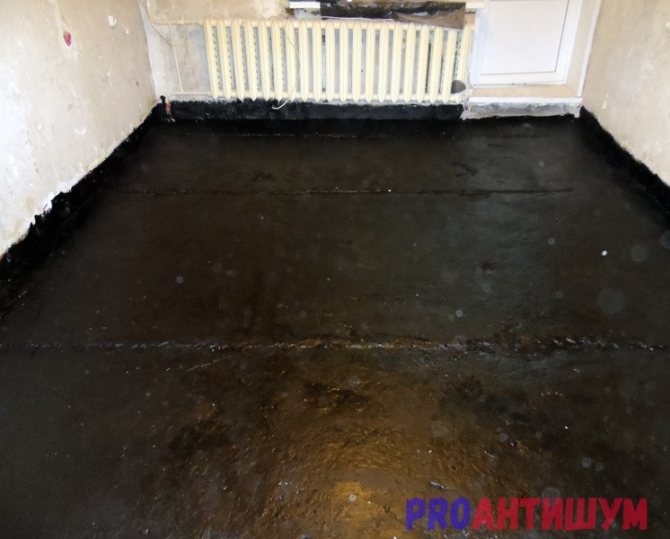
4. Noise insulation of joints between floor and wall slabs
Deep cracks often appear at the junctions between the floor and the wall. This is due to the low quality of the construction joints and poor quality floor screed. Over time, cracks and cavities form that can conduct sound from an adjacent apartment.
Advice:
Remove all skirting boards around the room. If possible, using a chisel or hammer, make a seam in the floor along the perimeter of the walls to the full depth of the screed, 30-50 mm wide. Fill the resulting joint with cement mortar. After the mixture has dried, it is recommended to seal the joint with a non-hardening silicone sealant. If there is parquet in the apartment and it is impossible to dismantle the screed, it remains to carefully fill the gap between the wall and the edge of the flooring with silicone sealant. And put the skirting boards back.
5. Sound insulation of wall-to-wall and wall-to-ceiling joints
Over time, in any panel houses, deformation cracks form between the concrete slabs of the walls and floors. They are "life companions" of almost all residents of panel houses. Often these cracks are hidden behind the wallpaper and do not spoil the appearance of a residential apartment. But this does not prevent them from serving as a source for the penetration of noise from neighbors.
Advice:
Remove old wallpaper. Sew the joints between the panels yourself. Fill the resulting cavities with plaster putty or fresh cement mortar. Once dry, seal all wall-to-wall and wall-to-ceiling joints with acrylic sealant. Remove excess of it. Now you can apply new wallpaper or paint.
6. Sound insulation of windows
From the window opening, as a rule, not only street noise gets into the commander, but also loud sounds from the neighboring apartment.This problem can be easily solved by replacing old wooden windows with new metal-plastic ones. But often, even a simple modernization of an old window can bring a better result. It happens that after replacing wooden windows with plastic ones, individual sounds inside the house are heard more clearly. This can be explained simply: the effect of masking many sounds by street noise disappears.
Advice:
To improve the sound insulation of the old window, you can replace the existing glass with thicker (5-6 mm). Before installing the new glass, carefully coat the installation places of the window sash along the entire contour with a neutral silicone sealant. Better if it is transparent. Press the glass firmly into the sash. Next, mount the glazing beads and cut off the excess silicone.
In each window, along the entire contour of the porch, glue a rubber seal with a “D” -shaped section. In hardware stores, it will not be difficult to find a sealant for every taste and wallet. If, after sealing the porch, the window closes too tightly, you will have to resort to the services of a carpenter. These tips are suitable for older windows where the sash has not been deformed much over time.
If you decide to install metal-plastic windows, remember that double-glazed windows do not provide better sound insulation compared to single-chamber windows of the same width and the same total thickness of two glasses.
Note: It is not recommended to use drywall sheets for leveling window slopes. Resonant phenomena in the air can significantly reduce window insulation. Cement-sand plaster is the most reliable material for finishing slopes.
7. Noise insulation of entrance doors
It is worth noting that improving the soundproofing performance of the entrance door will not be able to reduce the noise from the movement of the elevator and the elevator winch. These sounds propagate through the building structures. But it will help to get rid of unnecessary noise from a neighbor's apartment, the sound of closing elevator doors, the sound of heels on the stairs and other noises.
Advice:
It is recommended to design the entrance to the apartment in the form of a vestibule. Moreover, the outer door must have anti-burglary properties, and the inner one can only be decorative. To ensure good sound insulation, it is important that the doors, when closed, do not have gaps and leaks between the door leaf and the frame. To comply with this condition, the door frames must be with a threshold, and a sealing gasket must be laid along the entire perimeter of the porch. Profile rubber seals are ideal for the gasket, the section of which resembles the letter "D" in shape. The soundproofing quality of the doorway due to the threshold can increase by 10-15 dB. Quite often, builders fill the mounting gap between the door frame structure and the opening in the wall with mounting foam, which does not have sound insulation properties and easily lets noise into the apartment from the staircase. To remedy the situation, it is recommended to clear the gap from the polyurethane foam and fill the existing voids in the box with fresh cement mortar. After the cement mixture has dried, it is necessary to carefully treat the junction of the door frame and the wall structure with silicone sealant. This will allow avoiding the appearance of deformation cracks in the future.
8. What not to do
Quite often, to improve sound insulation, builders recommend sticking sheets of foam plastic on the walls and ceilings, which will need to be plastered in the future. In reality, such "soundproofing technology" does not increase at all, but on the contrary is able to reduce (!!!) the level of soundproofing of the fence. This is due to the nuances of the resonance phenomenon in the foam structure in the speech frequency range. Let's look at an example.If such a cladding is placed on both sides of a massive concrete wall, then the decrease in sound insulation properties can be 10-15 dB!
It should be noted that the use of not only foam, but also materials such as cork, polyethylene foam, polypropylene foam, etc., can lead to the opposite result.
Do not trust the stories of sellers about some thin and "super effective" soundproofing materials that need to be fixed to the surface of walls or ceilings. If their thickness is less than 5-10 mm, most likely you are being misled.
Do not trust advice that promises good sound insulation with a total structure thickness of less than 15-20 mm.
The main thesis exposing such advice is the very fact that there is a problem of sound insulation. If such thin and effective soundproofing materials existed in nature, then the issue of noise protection would be decided at the initial design stage and would be reduced only to the choice of a specific type and cost for such materials.
Today, the minimum required thickness of a soundproof structure is 40-50mm. Only in this case the effect will be obvious and tangible.
We hope that the above tips will help to improve the comfort of living in panel houses without much financial investment and time.
Rubber-bituminous mastics
as a waterproofing, rubber-bitumen mastic is used. Due to the chemical composition of the substance, the mastic can be used to treat various surfaces. Of course, mastic can be used as sound insulation only in a car, and as for an apartment, it is not necessary, but if it is necessary to carry out work to protect the surface from aggressive environments, it is one of the best.
@zhidkaya_shumoizolyatsia
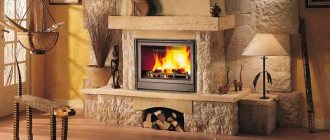
With the use of rubber-bitumen mastic, external sound insulation can be carried out. Quite often, rubber-bitumen mastic is used for different types of roofs. Due to its characteristics, the material provides hydro and sound insulation, but it concerns - this is mainly the upper floors and apartments.
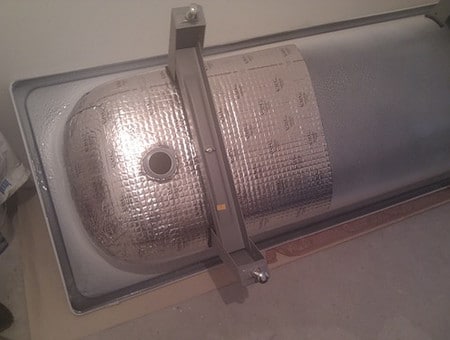
Real view when fully disassembled
Read on to the end, as the most effective methods are shown at the end of my review!
So, the first step is to start with the external elements, which play an important role. On the bottom side, plastic shields are installed along the entire length of the car, which also dampen a lot of noise from tires and the road.
From the engine compartment, the sound is hindered by the small thickness of the black felt, and it looks like this:
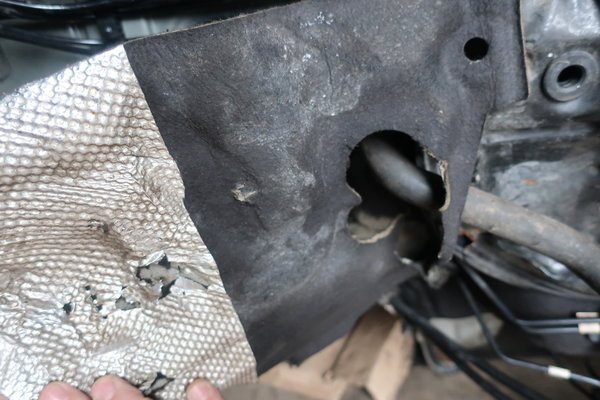
You will not see anything surprising here, since there are similar areas even on the cheapest cars, up to our VAZs. But the following points are already inherent in more expensive models and we are talking about fenders.
Of course, they are not plastic, but already made of a soft material such as felt, which also helps to keep sound in the arches and prevent it from getting into the cabin.
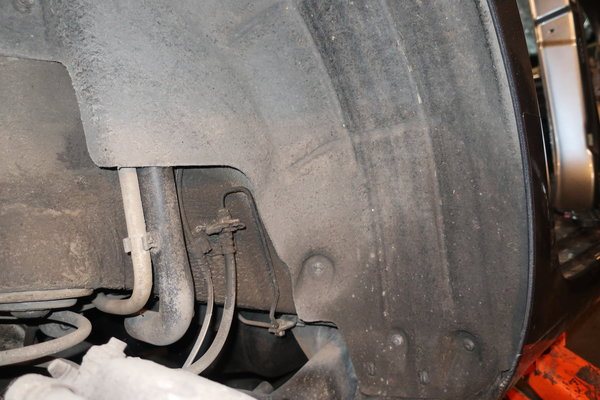
Lockers of this type are definitely used both on the Octavia A7 and on the Jetta 6, unfortunately I have no information on the rest of the models.
Now we go further and it is worth paying attention to the internal sound insulation of the body. On the floor, as expected, molded insulation is laid, which also absorbs a lot of unnecessary sounds:
The front of the panel is also pretty well equipped with a sound absorber, and looks something like this:
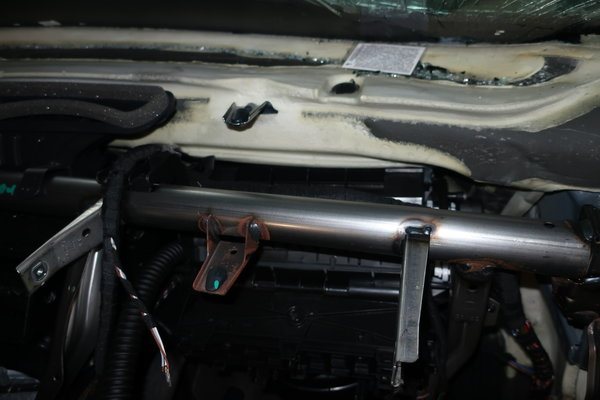
This thick layer is literally on top of the heater, which certainly reduces the noise from the stove fan. If you think that this is ineffective, I suggest listening to the operation of the motor without any "protection".
Now we move further through the cabin and look at the roof, or rather the inside, and we also see rather thick sheets of Shumka, which on the same Jetta are no longer in that amount:
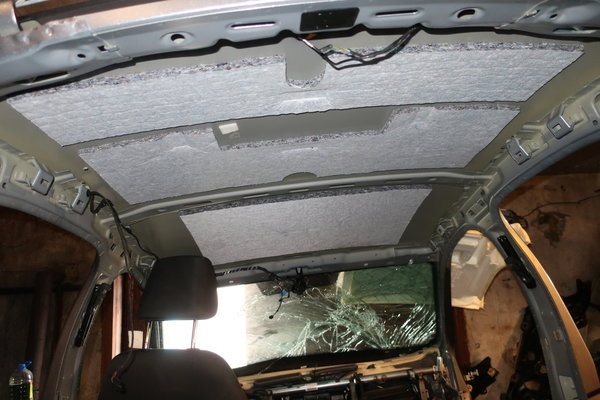
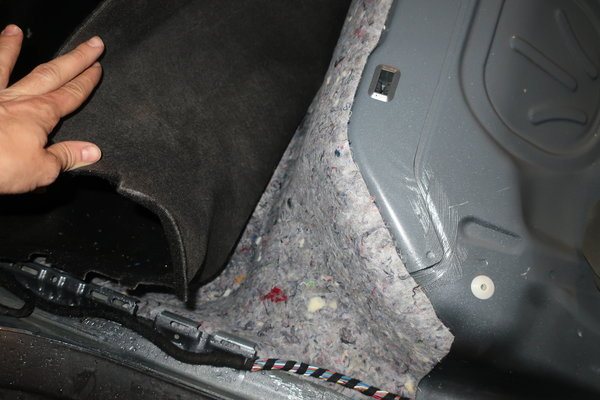
In the luggage compartment on the floor there is also our usual "cotton wool", which is a decent noise insulator according to the experience of most car manufacturers.
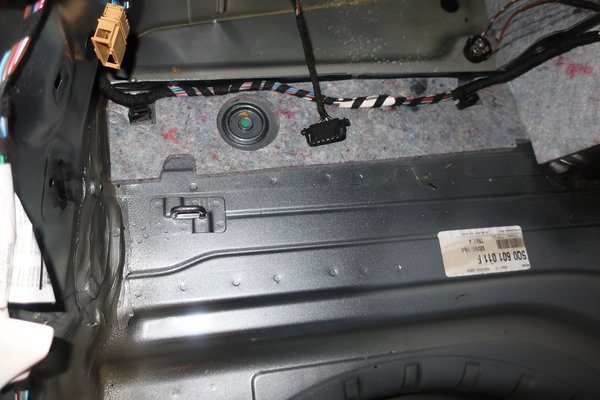
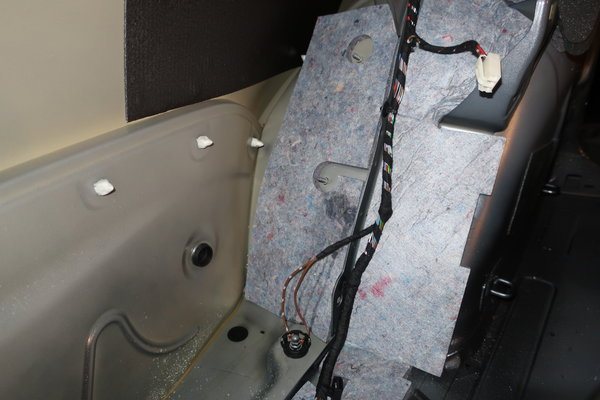
And on the arches it is already a little more than on the floor, as you can see for yourself:
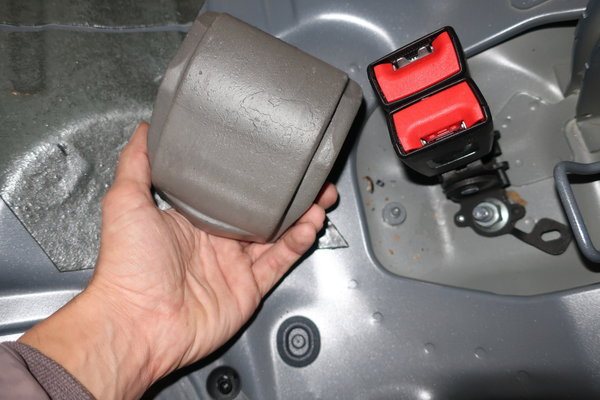
Another nice thing that pleases the eye - even the seat belts are protected by special covers, which are also designed to reduce noise during the operation of the inertial coils.
And the most interesting thing, as promised, is the noise absorbers in the thresholds, from where the sound from outside is the strongest. They are foamed inside and, in fact, filled with a porous compound that is most effective at dealing with noise.

People who are unenlightened in this matter may think that this is the result of a collective farm repair of bodyworkers, but rest assured that this is factory-made and for VAG this is the norm, although I do not exclude that other manufacturers also foamed thresholds.
As for the doors, it should be said that no special layers were found, but plastic plugs on every technological hole do their job.
Complex sound insulation with liquid materials
It is possible to create optimal noise protection in an apartment only in an integrated approach. Provided that the external and internal walls are treated with liquid soundproofing materials, an optimal result can be achieved.
Of course, the complex execution of work requires certain costs, however, given the operational characteristics of the materials, it is safe to say that your house will have comfortable conditions for at least fifty years, which, in principle, is quite a long time. High-quality sound insulation will protect the house, creating the necessary coziness and comfort from all types of noise.
Soundproofing materials
All materials for isolating an apartment from extraneous noise can be divided into 2 types:
Soundproofing is a barrier that prevents sound from entering or spreading in a room. Sound absorption, in turn, is carried out by converting sound energy into heat and reducing its intensity.
The materials used for such procedures are different. For sound insulation, it is necessary to choose products with a large mass and density, and the sound absorption itself is carried out using soft and porous coatings.
There are the following options for sound absorbing materials:
- Slabs made of fiberglass or mineral wool. They have good protection efficiency, but at the same time they have a large thickness of 3 cm. Their installation is carried out inside the plasterboard or gypsum fiber cladding. Frameless soundproofing of the walls will help to significantly reduce the noise level in the apartment.
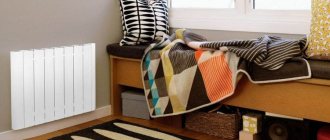
- Foamed polyurethane cover. Fasteners are made with glue; preliminary leveling of the surface is not required. The thickness of the product ranges from 3.5 to 10 cm, and the height is from 2 to 7 cm.