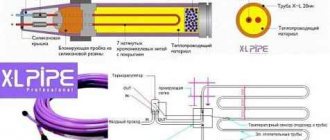
The principle of operation of the IR system
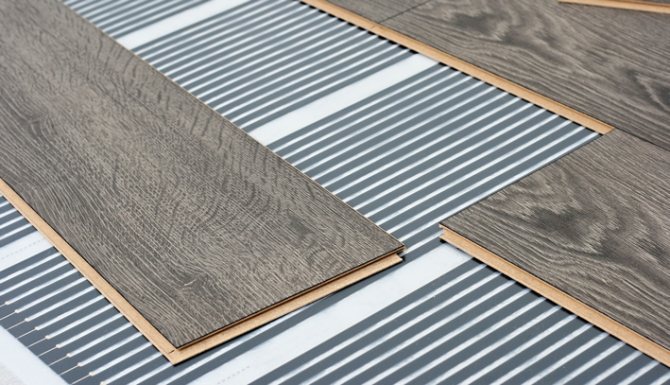
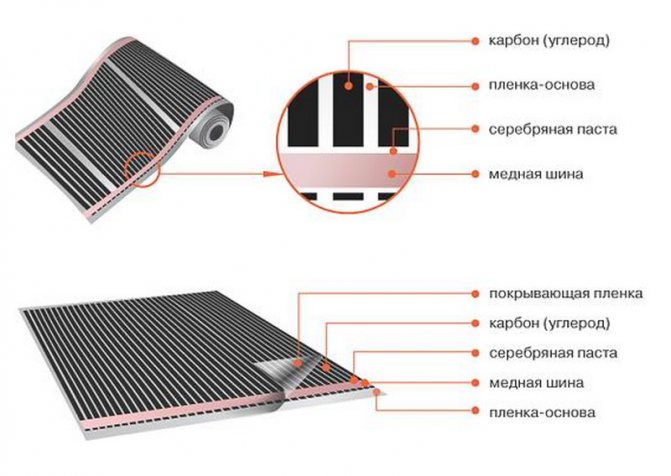
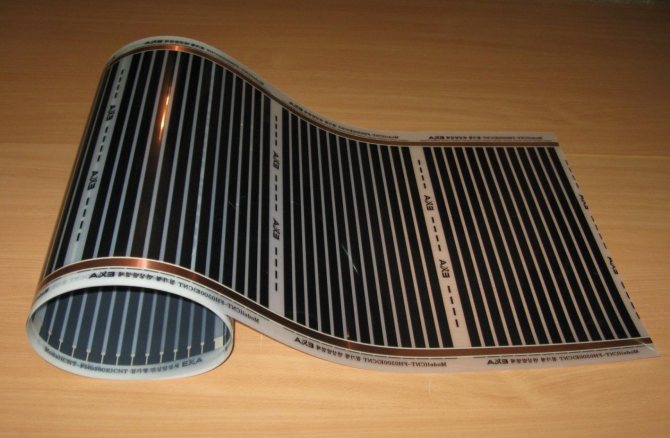
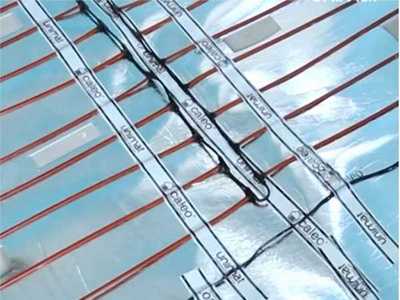
The structure of the infrared underfloor heating, in addition to the main coating, includes copper or silver strips that conduct current, a carbon emitter and a film layer. In addition, the warm coating system itself is equipped with a thermostat, a temperature sensor, special clips and clamps, and a cable for connecting to the network.
Carbon paste, which is applied in parallel stripes, creates rays under the action of an electric current. They, in turn, having reached a dense coating, heat it up. The system is designed in such a way that the air receives heat from the heated laminate. In this case, part of the rays passes through the coating and heats the objects in the room.
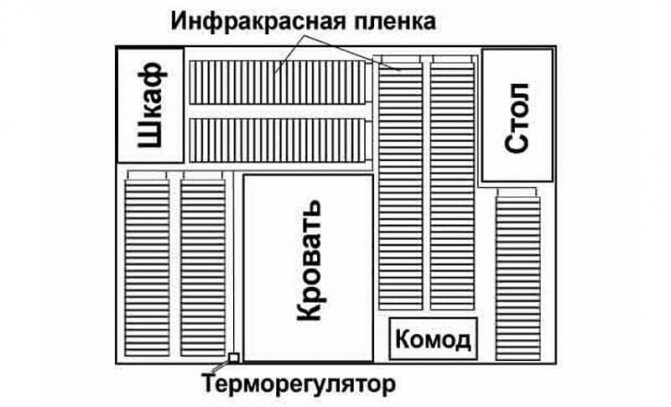
To avoid overheating of the film element, it is not recommended to install an IR warm floor under large furniture.
For installation, film materials with a capacity of 150 to 440 W / sq. Are used. meter. For laminated boards, films with a minimum indicator (150 W / sq. Meter) are used. This power is enough to warm the floor up to 40-45 degrees. An infrared heating system is considered rational, since its installation allows you to create optimal heating conditions.
Warm floor Ru
Infrared underfloor heating is a modern development that requires a minimum of time and skills for installation and connection.
Installation of infrared film is within the power of everyone.
You do not need to be an expert to install and connect an infrared heated floor, just follow the simple instructions that are attached to each order.
Installation instructions for underfloor heating under tiles are here ..
Attention! At the request of buyers, we will cut the thermal film to size and crimp the terminals.
By purchasing infrared warm floors from us, the buyer receives the maximum complete set of his order, which provides a simple and not labor-intensive installation of a warm floor under a laminate, parquet board, carpet or linoleum.
For your convenience, we publish detailed instructions for installing infrared film on the floor.
Following it, you can easily mount a warm floor under laminate, parquet, linoleum or carpet.
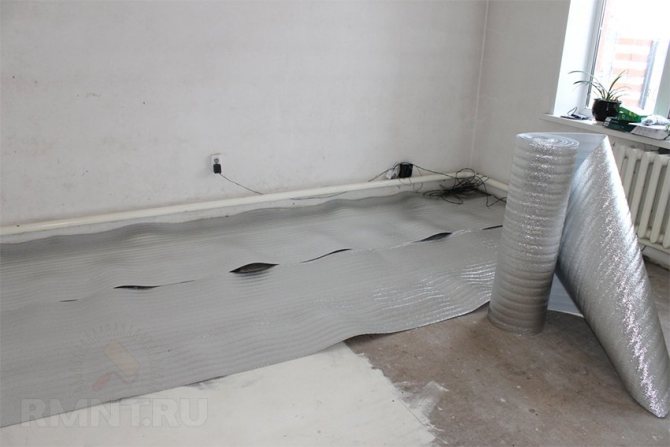
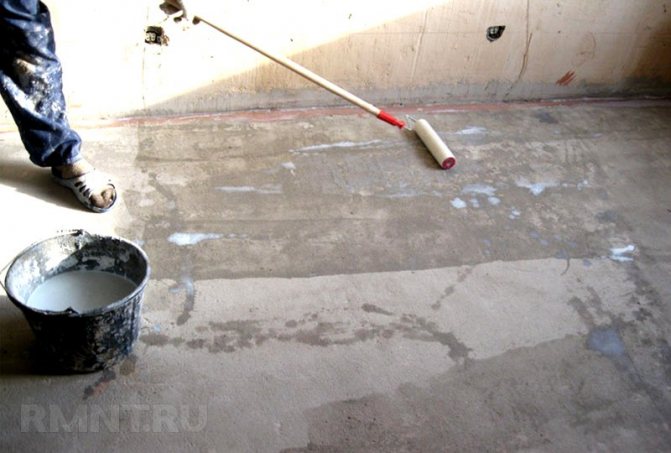
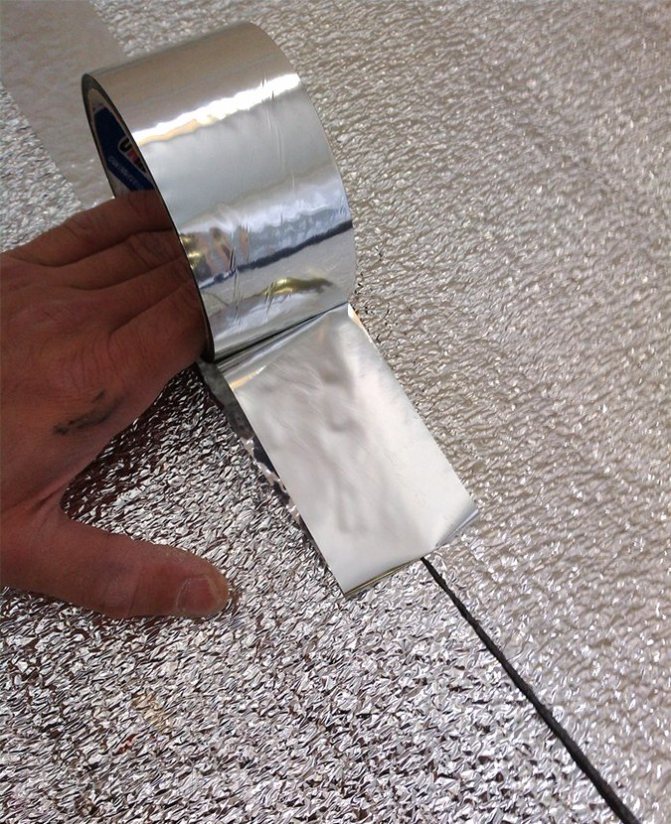
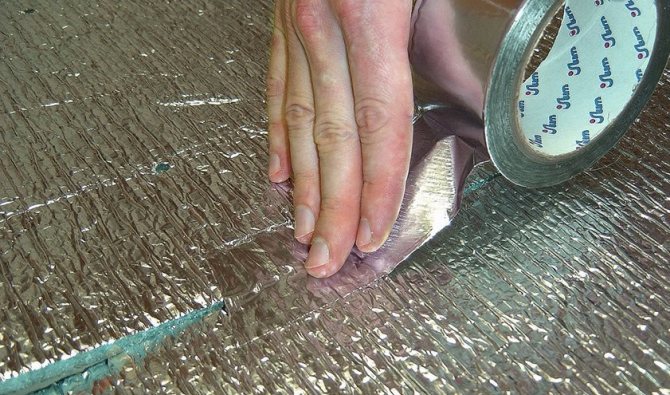
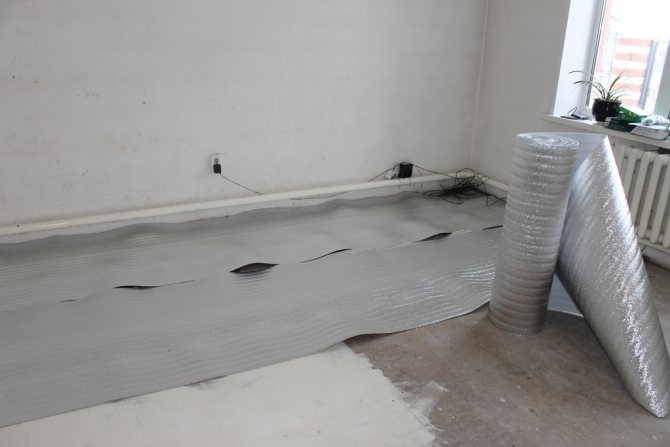
1. First you need to clean the surface and lay a roll of heat-reflecting material.
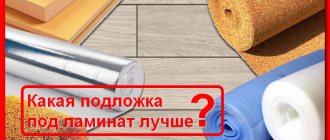
- As a heat-reflecting material for an infrared warm floor, it is recommended to use a foil material covered with a metallized polypropylene or polypropylene film. Original materials by Aluf PE, as well as analogue megaizol, polyfom, infraflex, energoflex and the like with a thickness of 2 to 5 mm. You can also order heat-reflecting material in our online store, as well as purchase it in any construction market.
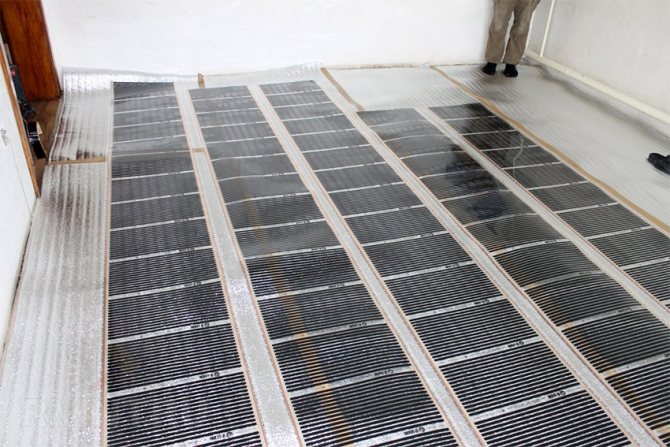
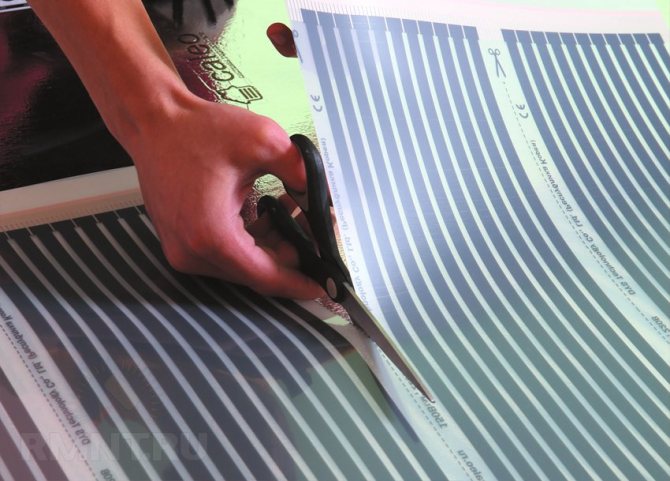
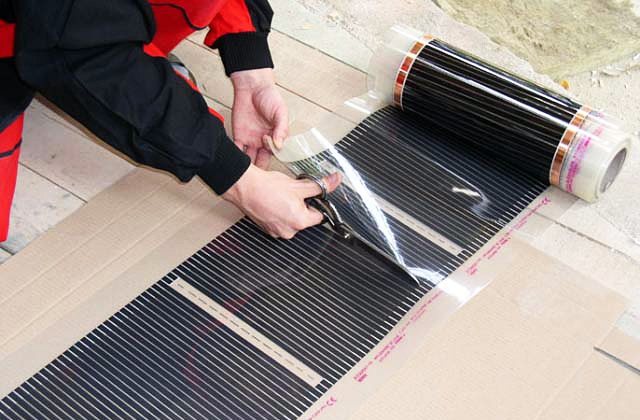
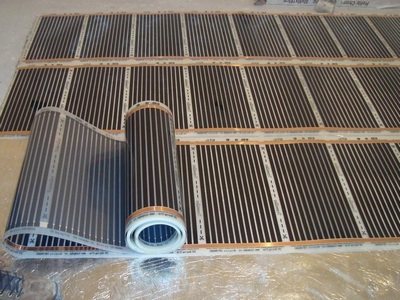
2. Then cut the infrared heating foil into strips of the desired length and lay them face up (copper bar underneath).
- According to the manufacturer's recommendation, it is sufficient to cover 70-80% of the total floor area with infrared heating film, retreating along the perimeter of the room, counting on furniture, household appliances, etc.
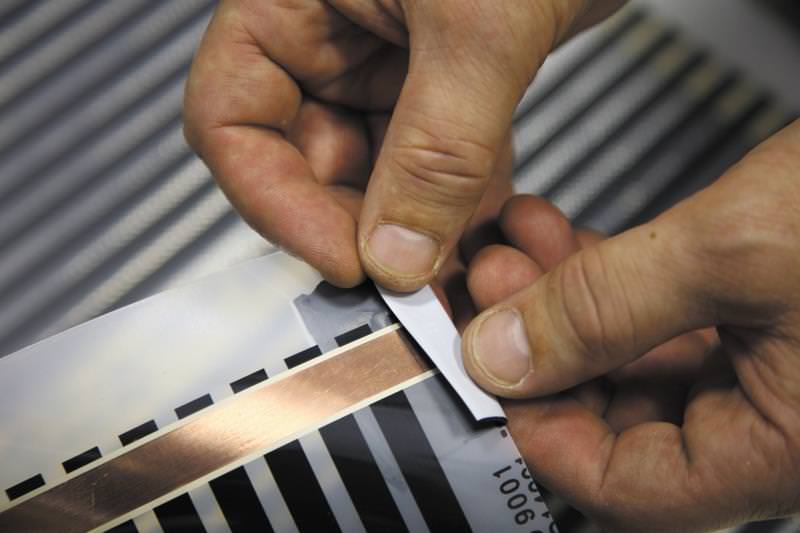
- It is allowed to cut the heating foil only in places marked with a special sign -
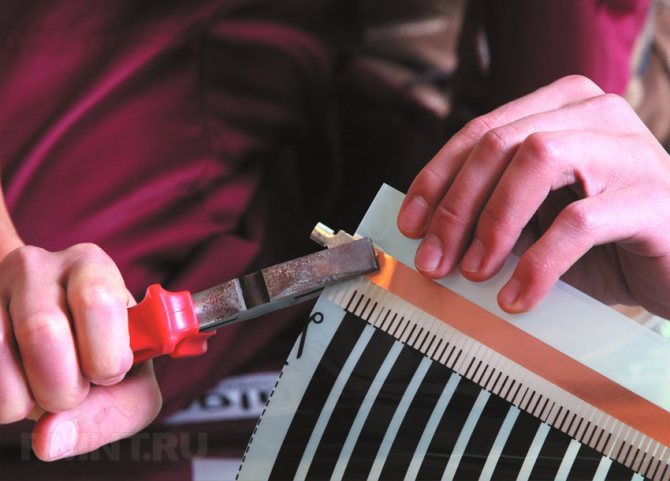
3. Attach electrical terminals to each strip of copper bus.
- It is necessary to punch holes in the copper bus using a hole punch or punch.
- Insert the terminal between the layers of infrared film.
- Rivet the terminal with a rivet.
The connection of the terminals to the copper bus of the heating foil is also possible by soldering. For soldering, we recommend using the traditional POS30 and POS40 solder and rosin as a flux.
Attention! At the request of buyers, we cut the thermal film to size and crimp the terminals free of charge.
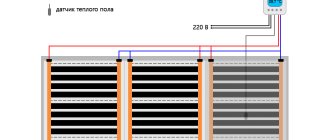
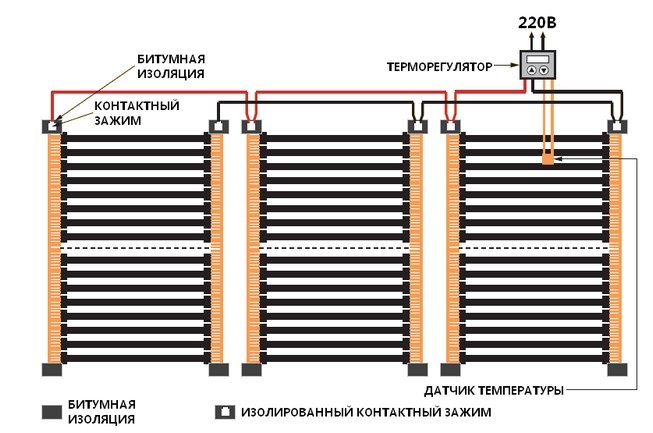
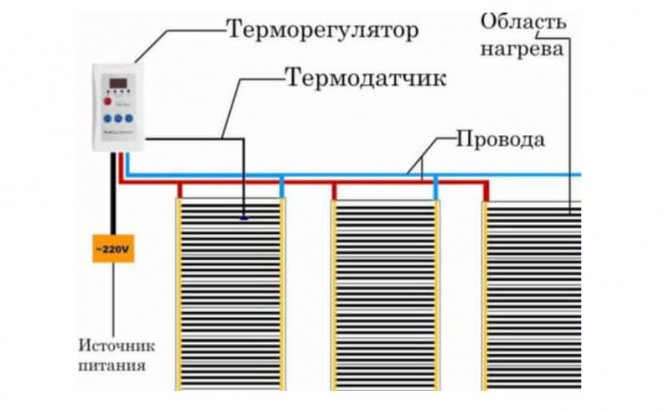
4. Connect the electrical wires in accordance with the connection diagram supplied with the underfloor heating set.
- Crimp the wires securely in the terminals using a special crimp.
- Insulate the terminals on both sides with electrical insulating tape (mastic) supplied in the ready-made underfloor heating kit.
- Also apply another layer of electrical insulation using special electrical tape.
- Use the same insulating tape to insulate the copper bus itself.
- Next, place a thermal sensor under the infrared heating film and connect the thermostat. Attention! The total power of the heating foil must not exceed the permitted power of the thermostat.
- Then check the performance of the warm floor by connecting it to a 220V network.
- Finally, lay your flooring - linoleum, carpet, laminate, parquet and so on.
- If linoleum will be used as a floor covering, we recommend to additionally lay a material such as plywood, fiberboard (hardboard) or an additional layer of a regular substrate under the laminate, 1-3 mm thick, on top of the thermal film.
Laying an infrared warm floor under parquet, laminate, carpet or linoleum will take you a minimum of time, and everyone will be able to figure out the simple connection scheme.
The wiring diagram for connecting an infrared heated floor and a thermostat is also extremely simple.
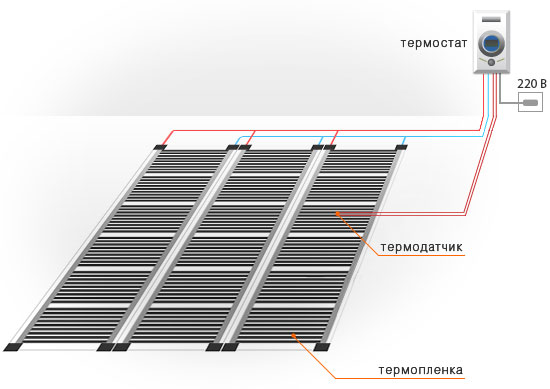
Warm floors for laminate, linoleum or carpet using infrared heating films are a clear demonstration of the favorable price-quality ratio.
The affordable cost of such a warm floor for laminate and linoleum is complemented by the simplicity and advantages of using the heating film.
Ease of use is due to the clear concept of the principle of operation of such a coating for adhesive-free finishing floor coverings.
Such a film evenly emits infrared rays, which are completely safe for human health:
- They do not cause allergies and do not harm joints with constant walking on a warm floor.
- The one who steps on the floor feels not only warmth, but also comfort.
In addition to the safety of use, the film underfloor heating under the laminate:
- Heats not only the floor covering, the radius of the comfortable range of radiant heat up to 2.5 m
- has high reliability
- characterized by a long service life
- allows you to save about 20% of heat compared to other types of electric heaters
- does not affect the rise of the floor level of the room;
- ionizes the air and removes unpleasant odors (detergents, paint, cigarettes).
Significant savings in electricity entails financial benefits, so we can confidently talk about the rationality and cost-effectiveness of using infrared films.
The height of the room, when installing a film underfloor heating under a laminate, linoleum or carpet, will remain practically unchanged, since the film has a thickness of about 0.3 mm, which does not affect the characteristics of a room in a house or apartment.
Even taking into account the use of 2-3 mm of heat-reflecting material or a regular substrate under the topcoat, the floor height will retain its parameters.
The undoubted advantage of using a warm film floor is the absence of dry air in the room, which can be observed when electric heaters are turned on.
In tandem with air ionization, this property of an infrared film to maintain the level of humidity in a heated room can even have an anti-allergenic effect.
Heating under linoleum
The infrared underfloor heating used under the linoleum provides the smooth and uniform heating necessary for such a coating.
Competently calculated power of the warm floor will be the key to effective heating, as well as preserving the appearance of linoleum.
Infrared underfloor heating under linoleum will prevent:
- change in the color of the coating;
- linoleum lag from the base;
- the release of harmful substances that can appear with strong heating in other ways;
- the appearance of ruptures due to softening.
As an interlayer, which is mounted between the film and linoleum, you can use ordinary fiberboard or a substrate for a laminate.
Additional benefits
When installing film warm floors under linoleum, material savings are also achieved.
This is due to the fact that such a coating is mounted only in the area free from furniture and other heavy interior items of the space.
A high-quality and reliable warm floor under carpet, laminate and linoleum in the form of a film will serve for a long time if properly used.
This is achieved due to the fact that it does not corrode and degrade. Laminating film can last longer than flooring.
By the time the linoleum or carpet needs replacing, the infrared warm floor will retain its original appearance.
Pros and cons of infrared heating
The modern method of IR heating at home by installing a film system has both advantages and disadvantages. The canvas with a carbon carrier is laid not only under the laminate, but also under the tiles and linoleum. These coatings accumulate heat well and transfer it to the room. The infrared heating method is appreciated for a number of advantages:
- The film layer is mounted only in places where people are present. This saves material and energy consumption.
- The system, including an IR interlayer, can withstand temperatures down to -70 degrees. Therefore, it can be safely left to spend the winter in an unheated cottage.
- IR radiation is absolutely safe for humans, since its spectrum is completely identical to the sun's rays.
- Installation of the entire system does not require any special skills. Infrared underfloor heating for laminate, tile or linoleum can be assembled by yourself.
- In the event of a failure of a separate strip, the structure remains operational, since a parallel connection is used.
- The warm base can be easily dismantled when it is necessary to repair and replace a failed element.
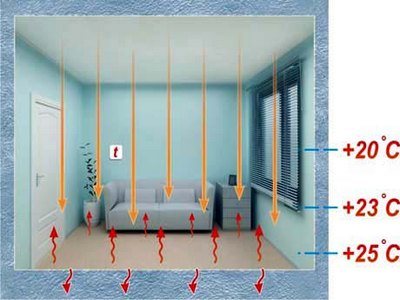
- During the operation of the system, the lower layers of the air remain warm, that is, the space where the person is located is warmed up first.

An objective assessment of infrared underfloor heating requires consideration of the cons. Such a system, with all its advantages, is energy-intensive. That is why it is considered impractical to mount IR-film throughout the house. Most often it is used when arranging the floor in small rooms where it is necessary to create especially warm conditions: a bathroom, a nursery. At the same time, in order to save money, the system is connected only during the operation of the room. Warming up of carbon takes a few seconds.
The second disadvantage is the high risk of short circuit, fire and electric shock. Third, the system is power-dependent. Therefore, with frequent power outages, the floor does not perform the heating function assigned to it. Another negative point is associated with the possible rearrangement of furniture in the room. Since the film is not placed under bulky items, in the event of interior redevelopment, you will have to dismantle the coating and re-grind the film material.

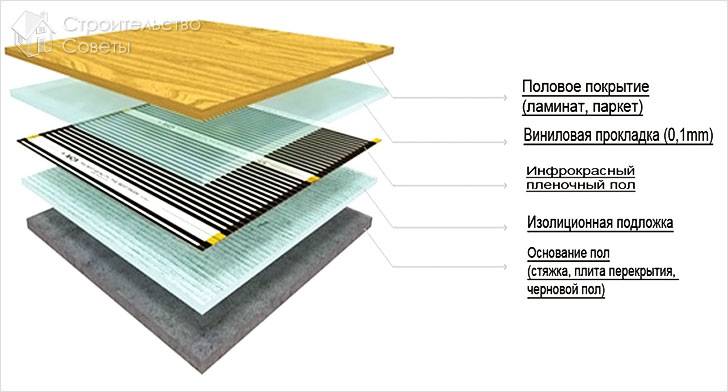
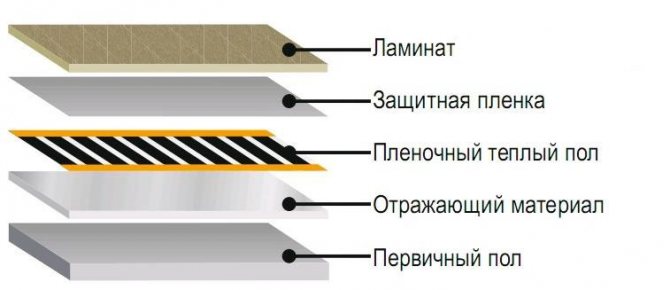
Product device
Infrared underfloor heating under the laminate has its own system, which includes the following elements:
- Wiring;
- IR film;
- Heat-reflecting material;
- Temperature sensors and regulator;
- Film insulation or waterproofing;
- Fastening clamps;
- Installation instructions are also included.
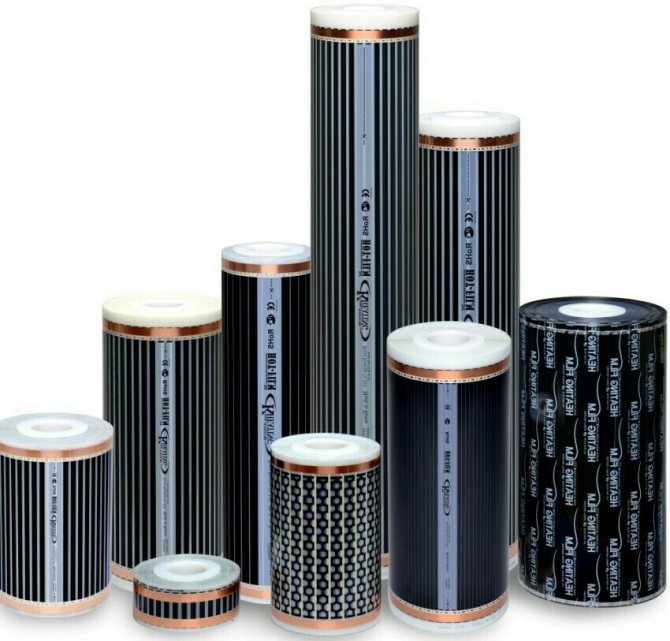
Films usually have various lengths and widths of 50 or 100 cm.There is a special cutting line on them, along which you can cut the material of the required length. In other places, the film cannot be cut.
The power of such a system can be different - 150, 220 or 440 W / m2, but for a laminate, an option is used that has an indicator of no more than 150 W / m2.
IR floor heating - is it expensive?
There is an opinion that the purchase of materials and components for the installation of an infrared floor is very expensive. In reality, only expensive models require significant expenses. The price of high-quality film starts at 650 rubles / sq. meter. A full set of service equipment, including sensors, a thermostat, bitumen tape, wires, costs about 2,000 rubles. The one-time costs also include the payment for the installation of the heating elements and the assembly of the floor. However, these works are easy to do with your own hands, so you can save money at this point of the estimate. As a result, it turns out that the total cost of a floor heated by infrared rays is relatively small.
Prohibitions during the operation of infrared floor
When working with thermal film, it is important to adhere to the entire technology and sequence of work, which is described above. So, you can get better results without qualified help. But in this work, there are several features, non-observance of which can lead to disastrous results:
- It is not allowed to lay film heating in frankly damp rooms. Its operation is allowed only in dry rooms.
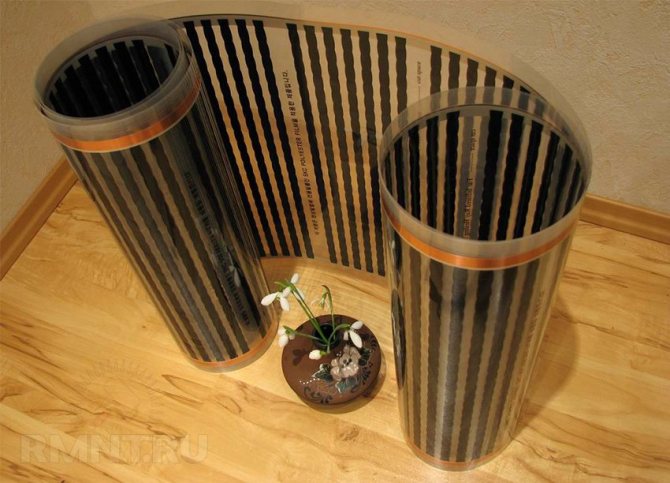
- Do not bend the film, but only twist it into a roll.
- It is not allowed to make holes in the canvas.
- Carry out installation without grounding.
- One whole piece of film should not exceed 15 m.
- Do not lay film heating near heating devices, for example, a fireplace, stove, stoves and others.
So, as we saw, it is possible to build floor heating using a film IR floor with your own hands. When starting heating, do not rush to turn on the thermostat to the maximum. At first, add the temperature gradually and only after a short time, heat the floor to a temperature that is comfortable for you. We are confident that thanks to this article, you will be able to figure out how to make floor heating using infrared heating. If you already have experience in performing such work, then write comments at the end of this article.
Is it possible to put underfloor heating under a laminate
Since laminate flooring is a common floor covering in apartments, the issue of its compatibility with thermal foil is relevant. For the device of a warm base, a carbon film, an electric cable or pipes with a thermal carrier are used. At the same time, infrared film is the most optimal choice for laminate flooring. This is due to the technical characteristics of the coating and the IR-emitting film material.
Laminate has a higher heat capacity compared to other flooring materials (for example, ceramic tiles) and a lower thermal conductivity. Strong heat can negatively affect the quality of the lamellas. The carbon film ensures optimal floor heating and does not cause problems with the operation of the laminate. Another reason is the character of the finishing floor heating. Of all types of warm systems, infrared provides an even distribution of heat energy over the entire surface. This eliminates the appearance of cracks, squeaks, drying out of individual lamellas.
How the infrared floor works
Immediately after switching on, the heating film begins to emit anions (ions with a negative charge) and infrared rays. In contact with the laminate, the rays heat the latter, which, in turn, gives off heat to the entire room.
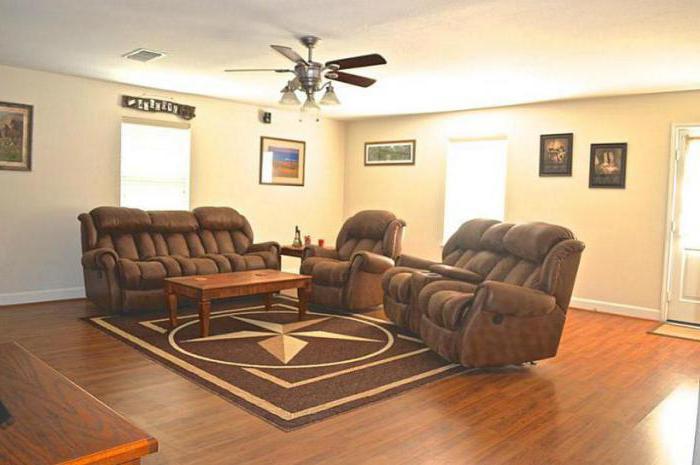
Many ordinary users note the high level of comfort provided by such a system.
Heated wood gives off very soft heat.Rising upward, the heated air ensures an even temperature throughout the room - both near the floor and under the ceiling.
In this way, warm floors compare favorably with classic radiators - when using them, you can often observe a drop of several degrees.
Some experts confidently compare the warm air rising from the floor to the warm air coming from the ground when heated in the sun. Exactly repeating the natural heating familiar to humans, the system has a beneficial effect on the well-being of the inhabitants.
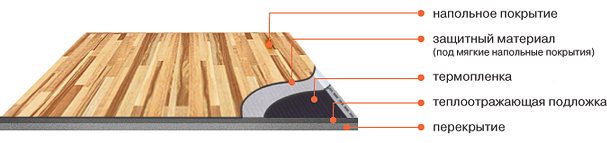
Important! To increase the efficiency of the infrared film under the laminate, the heating element is placed on top of a special heat-reflecting pad. Thanks to it, all the heat goes up, heating your apartment, and not the floor slabs.
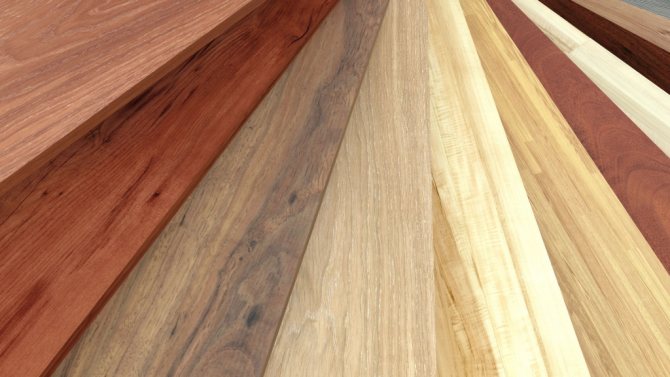
Which laminate is suitable for IR underfloor heating
To get the maximum effect from the laid film and the assembled floor, it is necessary not only to carry out the installation technologically competently, but also to choose the right laminate. The shelf life of the finished floor, its environmental friendliness, heat-conducting properties depend on this. If you put a laminate that does not correspond to the type of heating equipment, then formaldehyde may be released, lamellas deform and other problems may appear. Laying laminate is suitable if it:
- Supplied with a padlock. The glue method of assembling the lamellas is undesirable, since the glued continuous coating breaks during temperature changes.
- Conducts heat efficiently. This quality is determined by the coefficient of thermal resistance: the lower the better. The optimal limit is considered to be 0.05-0.10 m2 x ° K / W.
- Has a thickness of 8-9 mm. The lock of thinner lamellas does not withstand temperature fluctuations. And thickened products conduct heat weaker.
- Belongs to class E0 or E1. A floor made of such a laminate does not exude formaldehyde when heated to 27-30 degrees.
- On the basis of wear resistance, it is classified at least 3 classes. The higher grade guarantees a long life for the floor.
Types of infrared films
The modern market for heating equipment offers different types of underfloor heating under the laminate. Each of them has certain advantages and disadvantages. Therefore, you need to seriously study all the available options in order to make a decision, which you will not have to regret later. The greatest demand is for film and rod.
We will tell you in more detail about each of them, so that you can decide which is the best warm floor to install under the laminate.
Foil
This option is the most demanded. There are many reasons for this.
The main one is the ease of installation - if necessary, you can cope with all the work yourself, without using the services of specialists. This means that the new heating will cost much less than any others.
In addition, the power consumption when using it is about 20-30% lower than that of analogues.
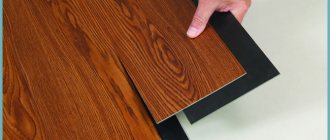
It is also important that when choosing this option, you do not have to arrange a screed. This is important - if you are not planning to do a full-scale renovation in the room, then you can simply lay it on the floor. Laminate or any other material is laid directly on the underfloor heating film - except for tile and carpet.
Attention! If you have chosen laminate flooring as a finishing material for floors, then make sure that the floors do not heat up to temperatures above +28 degrees Celsius. Otherwise, the laminate can be damaged.
Outwardly, it looks like carbon strips interconnected by copper busbars and covered with polyester for electrical appliances. Low energy consumption is made possible by the working method. When turned on, it heats up to the set temperature, after which it goes into economy mode.
Rod
The well thought out design and the right materials have resulted in an excellent self-regulating system. The core warm floor consists of two layers: reflective material and carbon mat.
It is laid on a solid and even base, after which it is poured with a screed, on top of which a laminate can be mounted.
One of the advantages of a core underfloor heating is the small thickness of the concrete screed - no more than 3 centimeters.
Heating elements are made of composite materials. With a decrease in heat transfer, an increase in the temperature of the heating elements follows, and this leads to the expansion of the material. The distance between the graphite grains that make up the rods increases. As a result, the power decreases and the resistance increases.
No need to use expensive sensors and equipment control systems - everything is automatically controlled.
It is important that the temperature in different areas can vary. For example, if you install a cabinet on the floor in a place where core heating is laid, then the temperature will rise here, which will lead to a decrease in power. This means that there will be no overheating of equipment breakdown.
Therefore, many experts, when clients are interested in them, which warm floor is better for laminate, recommend the core one.
Infrared floor installation technology under the laminate
Installation of the floor heating structure is carried out strictly according to a certain technology. If it is decided to do the work with your own hands, then the sequence of laying the layers and observing the rules for connecting the film to the power grid should be taken with full responsibility.
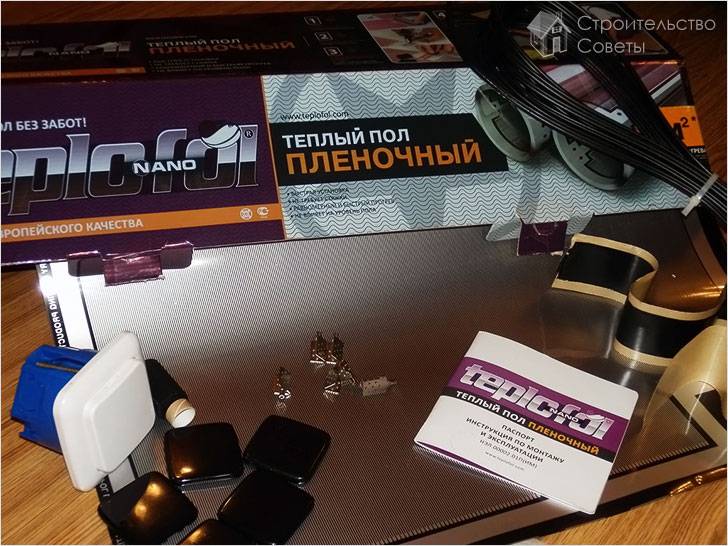
What materials and tools are needed
Before starting the installation of an infrared underfloor heating in a cottage or apartment, you must prepare all consumables and tools. The main part of this list is the foil floor kit. In addition to the IR film itself, it includes electric wires, clips for fastening the film, contact clips, bitumen-based adhesive tape. Canvases of carbon film for a heated floor can be 0.5 m, 0.6 m, 0.8 m or 1.0 m.In addition to the film, you will need to work:
- thermal sensor;
- thermostat;
- foil backing;
- polyethylene film;
- insulating tape;
- stationery or masking tape;
- scissors or knife;
- pliers;
- roulette;
- pencil.
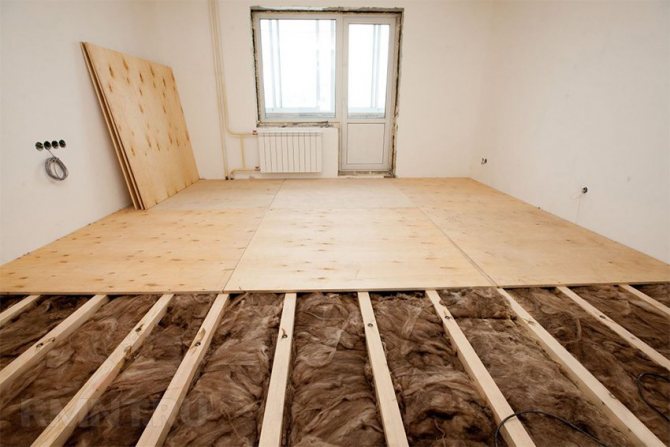
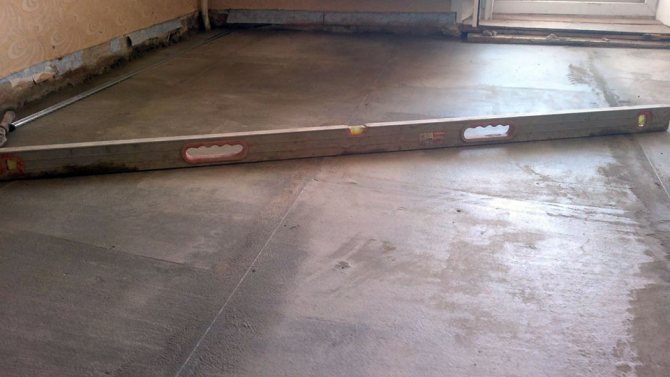
Preparation of the base
The film material with carbon paste is very sensitive to any mechanical damage. Therefore, before laying it out, the surface must be carefully leveled and cleaned. If the floor does not have a screed, then it is prepared in a standard way. After the concrete has completely hardened, its surface is freed from debris and dust. It is most convenient to use a vacuum cleaner - even small damaging particles do not remain after it.
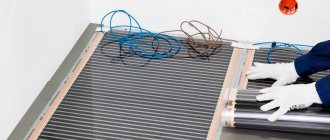
A foil substrate is spread on the screed. For laying an infrared underfloor heating, a 3 mm thick substrate is sufficient. The joints between the individual strips are glued with adhesive tape (stationery, foil or construction tape). After that, a "window" for the temperature sensor is cut out in the laid substrate.
The shiny side of the metallized substrate must face upward so that the radiated heat is not absorbed by the substrate.
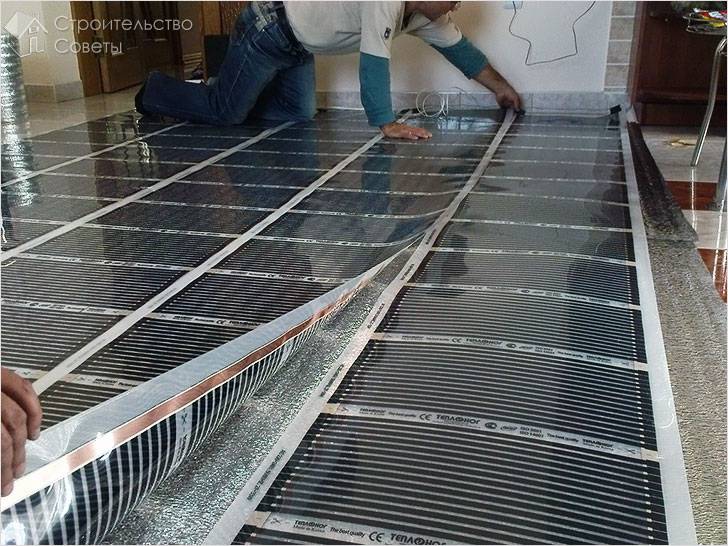
Laying IR foil
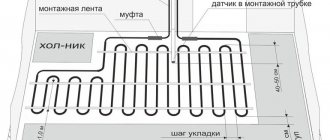
Before opening the heating element, make a layout diagram. To do this, mark the location of large furniture (wardrobes, beds, sofa) on the plan of the room. For free space, calculate the length and width of the film strips. The heating strips are planned to be placed so that they lie along walls or long aisles. In this case, the number of points of connection to the network is reduced. Next, determine the location of the sensors and the procedure for connecting the wiring.
The infrared film is cut along the marked lines according to the intended length. Cut lines are located on the film every 20-25 cm.This work is performed very carefully, since damage to the conductive or carbon element leads to damage to the strip and it must be shortened.
The cut strips of the film are laid at a distance of 0.25-0.30 cm from the wall. The distance between adjacent strips should be 5 cm.
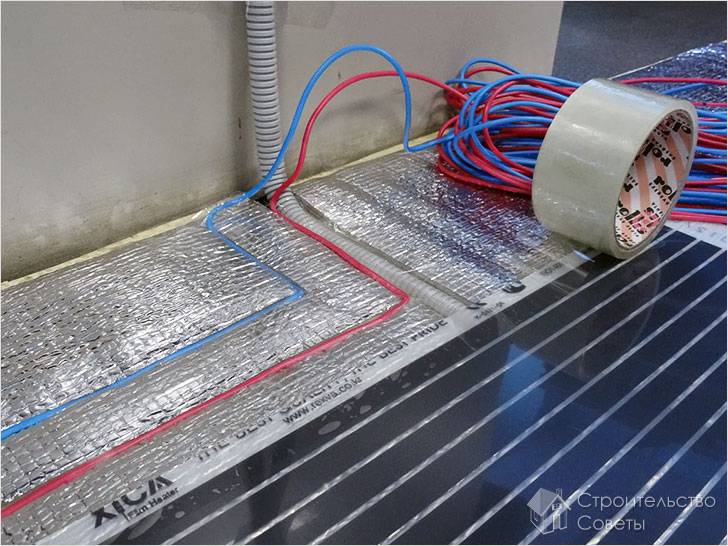
Thermal foil contacts, which will not be involved in the connection, are insulated with bitumen tape, which is included in the infrared floor kit. The silver or copper contact, which remains open after cutting the film, is also covered with insulation.
The prepared strips are spread around the room according to the plan, leaving standard gaps. In this case, the metal strips should point downward. After that, the film is fixed to the substrate using masking tape.
The edge of the film strip, which is not connected to the network, is rolled up. A temperature sensor is attached to the back of the film on a carbon strip. It is fixed with bitumen tape. The installation of the thermal sensor is done in the place where a depression was previously made in the foil heat insulator. The wire from the device is buried in the substrate, making a cut in it. After that, the film is laid back on the floor and the free edges are fixed with tape.
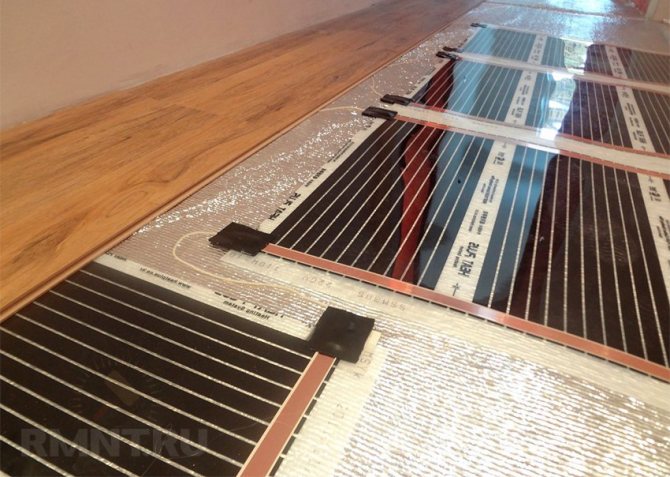
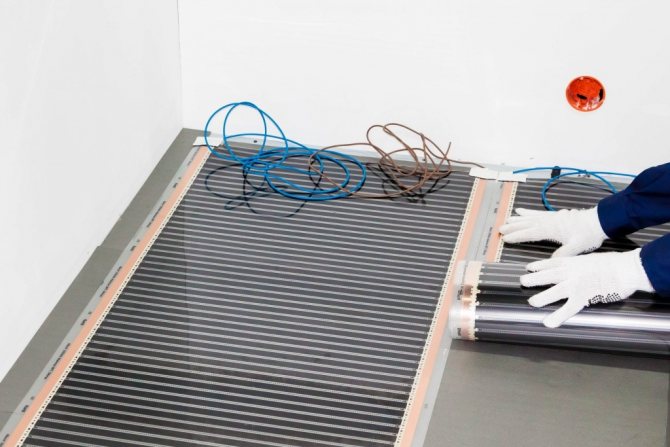
Electrical connection
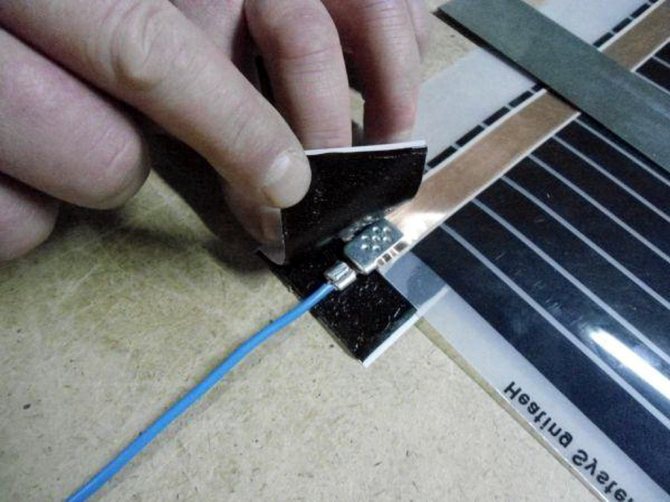
The next step in assembling an infrared underfloor heating under a laminate is to connect the heating elements to the electrical network. For this, terminals are attached to the conductive strip. There is a technological cut on the film, into which one part of the clamp is inserted. The second part of the clip remains on the outside from the bottom of the film. After that, the terminal is crimped using pliers. The ends of the wires are stripped and inserted into the clip.
Two pieces are cut from the bituminous tape. One is put on top of the terminals, the other - from below, the pieces are firmly pressed. Thus, the point of contact of the wires with the conductive element is insulated. After the system is switched on for the first time, the bitumen mass will melt and take the form of a terminal, ensuring complete sealing. To prevent the clips from protruding above the surface, a small cut is made in the substrate.
Electric wires coming from the infrared floor are connected through special terminals to the thermostat. In the installation, a special protective device (RCD) must be used. Direct connection of the heating deck to the outlet is strictly prohibited due to safety rules.
It is important to correctly calculate the power of the RCD, therefore, in the absence of the necessary knowledge and skills in this matter, it is worth contacting the professionals.
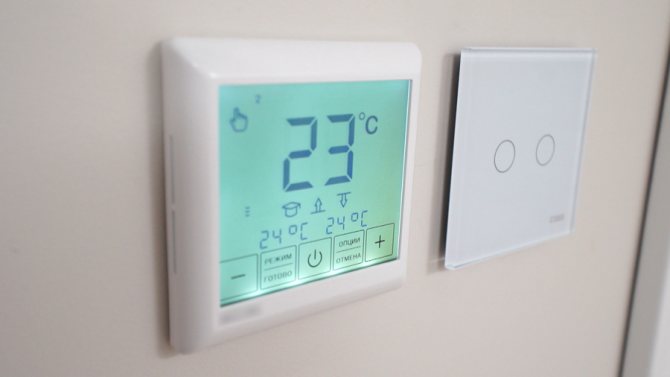
Installing a thermostat
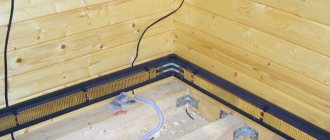
In accordance with the previously drawn up layout of the elements, a place for the thermostat is determined on the wall. Two grooves are made to this point in the wall for wiring. One branch leads to the switchboard, the second to the floor for connection to the heating foil.
The thermostat is fixed on the wall, cables are connected to it. The groove channels are sealed with putty and leveled with the wall surface. In some cases, internal wiring can be dispensed with to reduce the amount of dirty work. The wires are laid along the wall in plastic cable ducts. When the installation and connection of the infrared underfloor heating is completed, a test run is made. If everything is in order, proceed to the final stage: laying the coating.
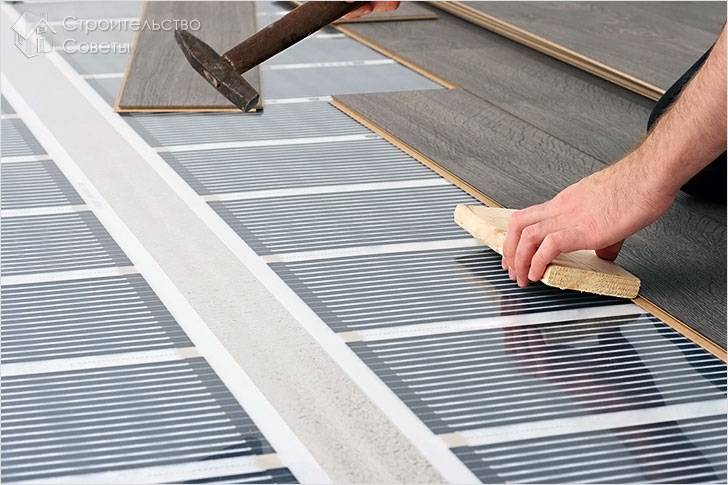
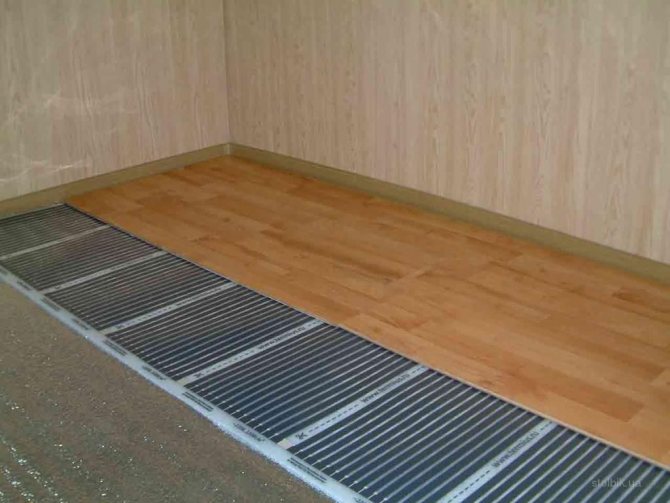
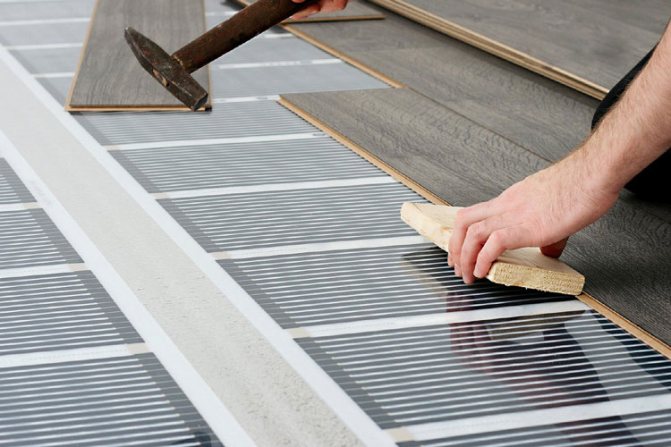
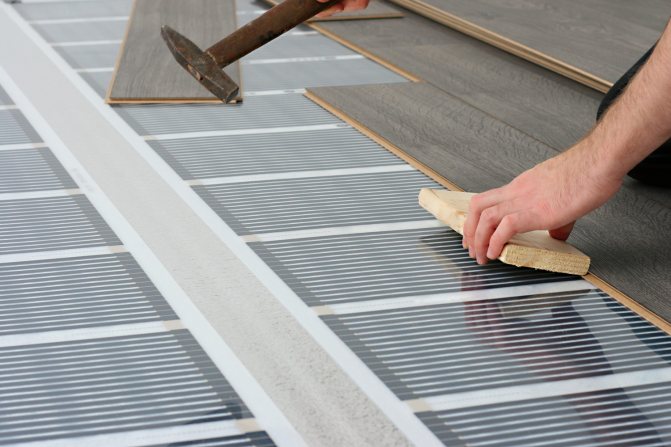
Laying laminate on an infrared warm floor
The finished film IR layer is covered with polyethylene for additional protection from water. The optimum polyethylene film thickness is 150-160 microns. It is spread with an overlap (at least 10 cm), leading to the walls by 15-20 cm. The joints are glued with tape. The assembly of the lamella floor is carried out according to the standard instructions. The main feature in the work is accuracy, since the IR-film is very easy to damage.
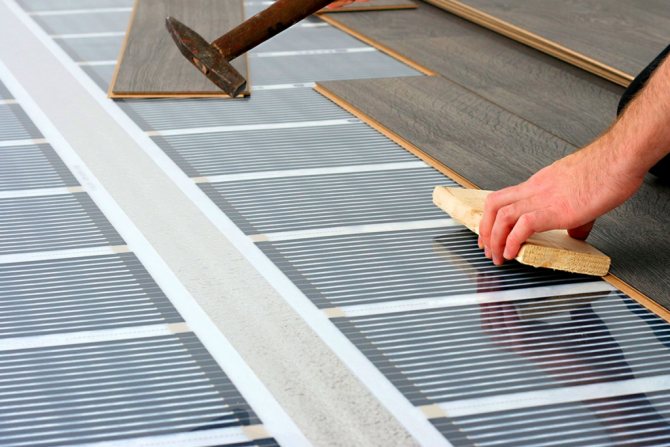
Before assembling the finishing flooring, it is necessary to determine the location of the lamellas so that at the end of the layout there is no narrow gap along the wall. A slot less than 50 mm is difficult to close so that the lock snaps into place.
When the entire floor structure is installed, it is gradually put into operation. First, a gentle warm mode is set - 15-20 degrees. Then 3-4 degrees are added every day and gradually brought to operating temperature.
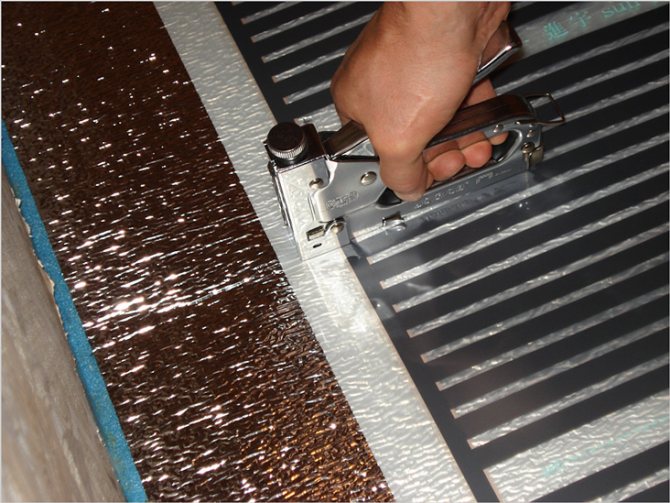
Installation of film heating
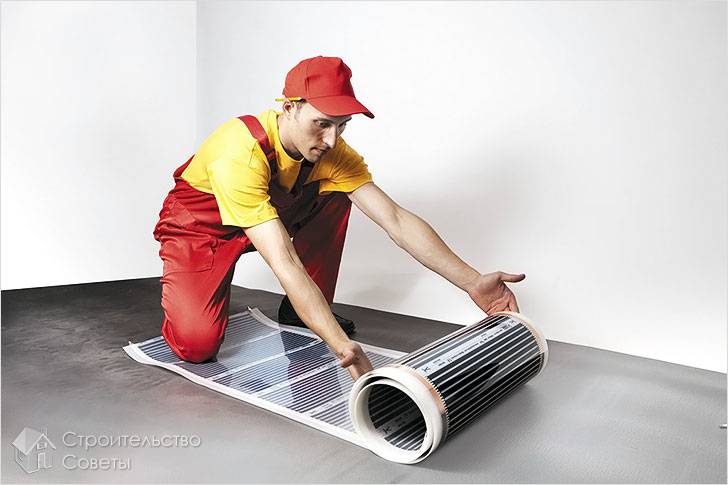
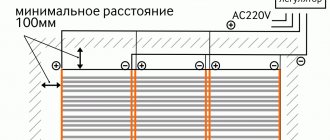
The first step is to have an infrared underfloor heating on top of a heat-reflecting film. Make sure the copper strips are facing down. If it is necessary to cut, then do it in a clearly indicated place - the dotted line. When laying, make an indent from the wall up to 100 mm. Further, connection and isolation are carried out. This process is very important and responsible. Therefore, below we offer step-by-step instructions for this process:
- Each section of the copper bus must be insulated with bitumen insulation. It must completely cover the silver contacts that connect the heating strips to the copper bus.
- Now install the terminals on the wire connection points.
- Use a pair of pliers to clamp the contacts onto the copper bar.
- In order not to displace the film in the process of subsequent work, fix it with tape to the heat-reflecting film.
- Next, put bare wires into the clamps, which are similarly fixed with pliers.
- Each connection point should be insulated. You should not rush here, since all cuts and contacts must be covered with bitumen insulation. Check it several times, and only then move on to the next piece of film.
- Place the temperature sensor under the thermal film. It is also secured with bitumen insulation. Make a small cut under the sensor so you can avoid bumps when laying the laminate. To prevent the wires from moving and not getting out anywhere, fix them with tape.
- Finally, mount the thermostat at the planned location and connect the wires according to the diagram shown on the back of the device. It is recommended to connect to the power supply through a separate machine on the meter in the panel.
When installing the terminals, one side of it should be on top of the copper strip, and the other inside the film.
Installer tips
In order for the installation to proceed quickly and without problems, the masters recommend not only strictly observing the technology, but also remembering some working nuances. They relate to the installation itself and the conditions of the room in which it is carried out:
- The assembly of the infrared underfloor heating and the laying of the laminate must be carried out at a humidity of at least 60% and a positive temperature.
- Thermal film material is allowed to be connected to the mains only in fully expanded form.
- If the carbon layer was damaged during operation, then the place of the defect must be covered with insulation on both sides.
- The place of connection of the temperature sensor is chosen so that in case of repair it can be easily replaced.
- If an accident occurs in the house, and the floor is flooded with water, then the IR system must be urgently disconnected from the network.