

Underfloor heating malfunctions
A malfunction of the infrared floor heating system is an unlikely event, but a possible event. The most common reason for this is a mistake made during installation. In this article, we will look at ways to find the cause of a malfunction.
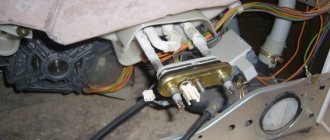
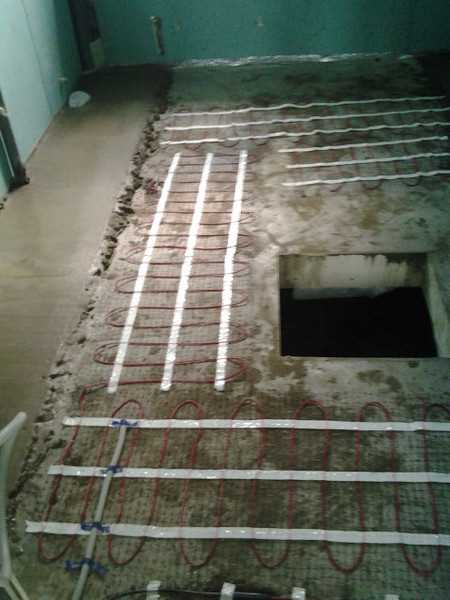
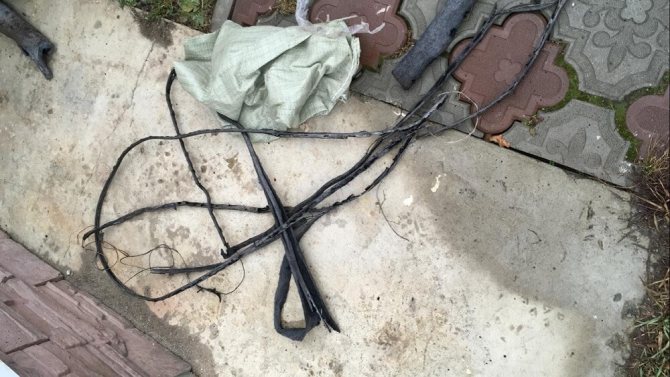
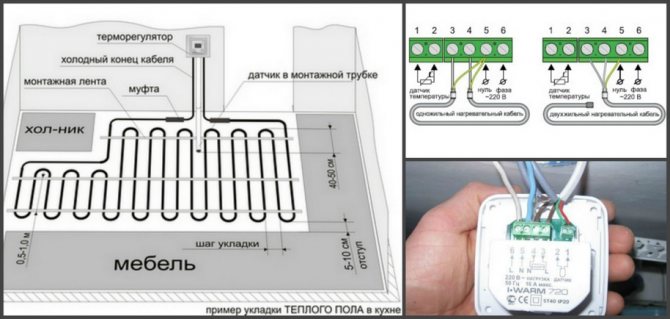
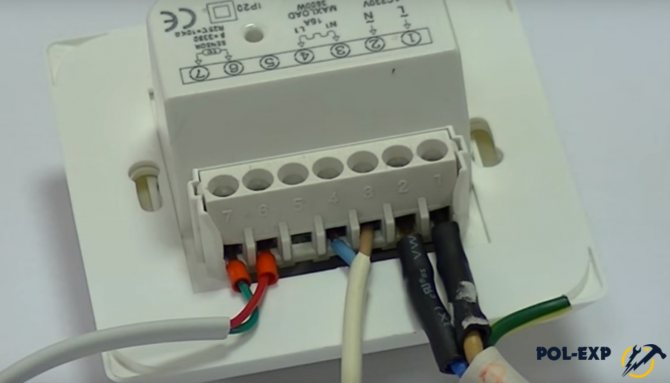
First of all, it is necessary to identify the faulty item. The main elements that may be incorrectly connected or fail are the heating element itself, connecting wires, thermostat and temperature sensors.
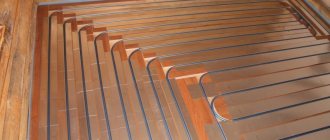
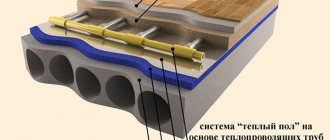
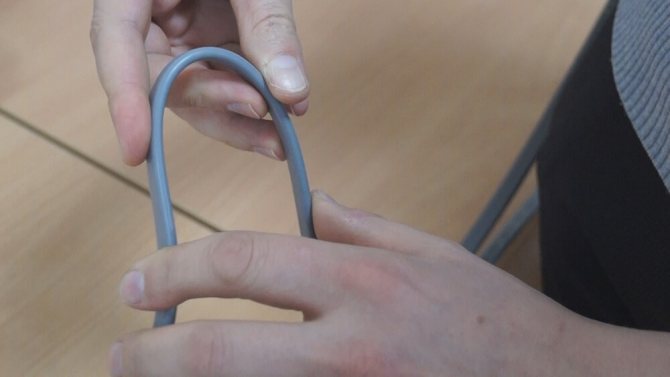
The main elements of the heating system of the film warm floor
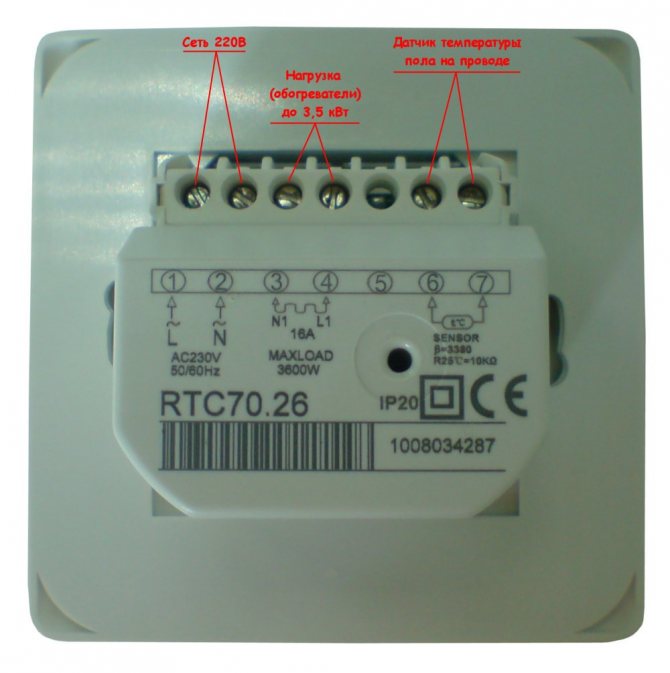
Make sure the thermostat is powered and configured correctly. If power is on, but there is no effect, the next step is to check if the wires are connected to the thermostat correctly. Refer to the instruction manual or the pin markings on the back of the thermostat to make sure all pins are connected correctly. If everything is in order here, then we proceed to check the heating elements themselves.
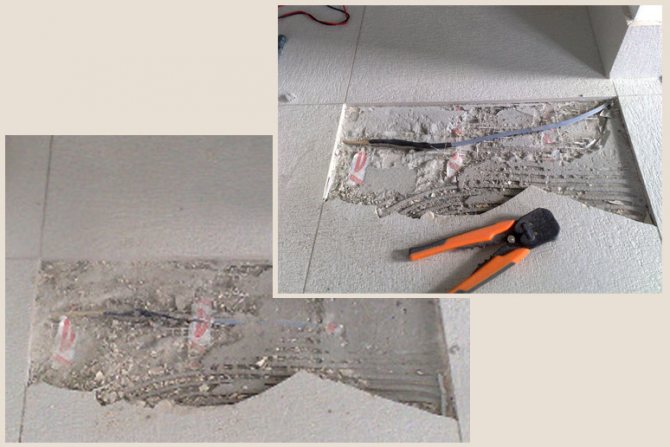
In most cases, the heating film breaks down due to improper installation. This may be an error in connecting the wires to the film, their break during laying, or an incorrectly calculated cross-section.
There are two ways to check the health of the heating foil.
Resistance measurement
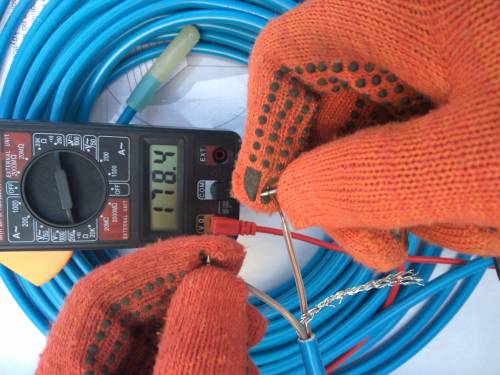
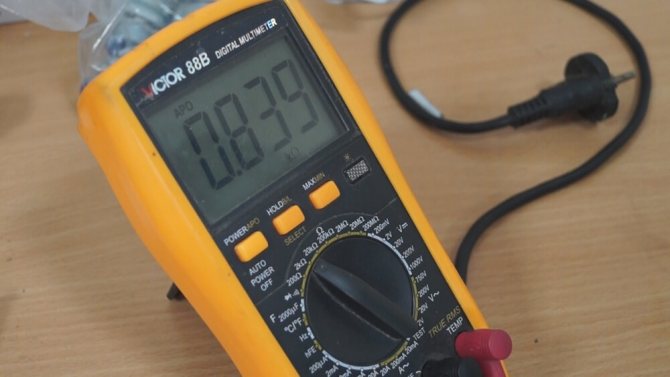
The first method is to measure the resistance of the floor and compare it with that indicated in the passport. The resistance value can be calculated using the formula R = U / P. When using multiple heating elements, the resistance of each can be checked separately.
Signs of malfunction of the film underfloor heating:
- If the reading is zero, the system is most likely short-circuited.
- If the reading is equal to infinity, the heating element may break in the system.
In any case, if the measured resistance does not correspond to the passport, the cause of the malfunction lies in the film. It is necessary to check the integrity of the wires and the correctness of their connection to the heating elements.
Heating foil connection
The second way is to connect the power supply to the warm floor directly, bypassing the thermostat. If the film starts to heat up, then the problem is in the thermostat. Otherwise, it is necessary to check the film and the wires connected to it.
Attention!
All work is carried out with the power supply disconnected! The contacts on the thermostat may differ, follow the instructions for use and markings on the thermostat.
Connecting the film to a network without a thermostat for a long time can lead to its failure. If, when connecting the heating film, the machine directly knocks out, a short circuit or a malfunction of the machine is possible, in this case it is necessary to measure the resistance of the heated floor, it should not tend to zero.
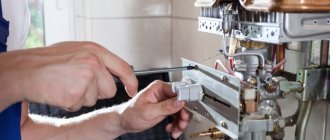
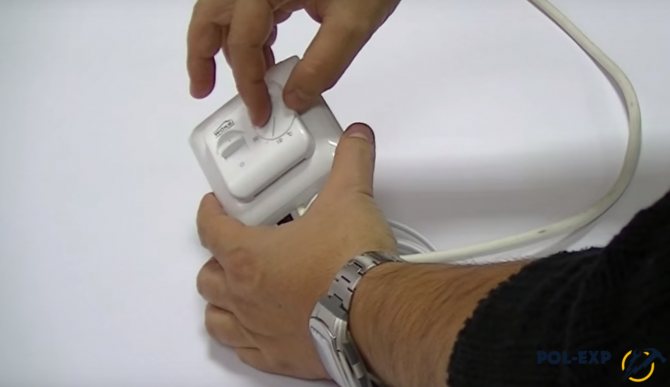
How to check the performance of the thermostat
Thermostat malfunctions can be associated with both the device itself and the remote temperature sensor.
If the thermostat fails, the relay or capacitor is most often to blame. Considering the cost of repairing it, it is more advisable to purchase a new thermostat. To check the functionality of the thermostat, you must:
- set the minimum temperature on the thermostat,
- apply voltage to the thermostat and measure it (should be 220 V),
- turn the toggle switch to the ON position,
- set the maximum temperature on the thermostat. When the temperature rises, a click is heard at a working thermostat (the relay switches).The voltage at the load contacts (wires going to the heating elements) should be 220 V.
- when the thermostat is set to the minimum temperature, the relay re-activates, disconnecting the voltage supply to the load contacts.
Temperature measurement sensor test
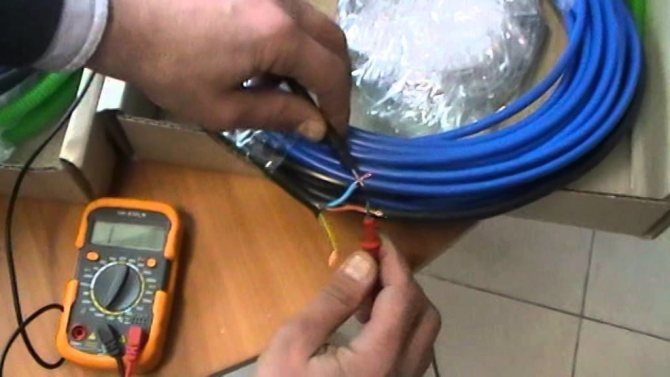
To check the health of the floor temperature sensor, it is necessary to measure its resistance using a multimeter. Each sensor has a declared factory resistance indicated in the passport. When the temperature sensor heats up, its resistance decreases. If the resistance differs by more than 5 kΩ, or is equal to 0, then the sensor is faulty and requires replacement.
Note
In programmable thermostats, in the event of a temperature sensor malfunction, a corresponding message is displayed on the panel.


Sensor malfunctions
The sensor works in conjunction with a thermostat, measures the temperature of the warm floor. If the floor heating turns off quickly or there is severe overheating, then the sensor should be checked.
A visual preliminary inspection of the sensor can reveal the presence of:
- burnt contacts;
- no power to the system.
You can also determine the voltage level indicator at a specific section of the circuit. The sensor is a resistor with its own resistance. Values obtained from a test with a multimeter can provide valuable information about a breakdown.
With their help, you can determine which of the sensor elements (relay and capacitor) is out of order or inaccurate connections.
Diagnostics with the device is carried out after inspection. To do this, turn off the thermostat, remove the panel from the front side, then the installation block. Connect both 220 W terminals to the thermostat.
In the document for the thermostat, the resistance indicator of the device is indicated, usually it ranges from 5 kOhm to 120 kOhm, which depends on the body temperature of the sensor. When 5 ⁰C, its value will be about 22 kOhm, and at 40 ⁰C, it will be 6 kOhm.
The multimeter is set to ohmmeter mode. If the indicators coincide with those declared by the manufacturer, then the sensor is serviceable.
Therefore, self-checking of the warm floor is possible with a multimeter.
In a household with warm floors, the owner needs to have a device to check the performance of the sensor and thermostat with heating cables.
Modern thermostats are equipped with touch displays, they are able to independently show the breakdown of the sensor.
- Similar posts
- How to lay underfloor heating under linoleum?
- Do you need a warm floor in the house?
- How to install underfloor heating under a laminate on a wooden floor?
- How to choose a wire for a warm floor?
- How to install a warm floor in a bath?
- How to set up an underfloor heating?
Answers from experts
Sergey Popov:
In no case. The foreman obviously bred you. The warm floor heats up immediately. If the floor is electric, then the open circuit or the controller does not work.
Agonda:
Warm floors are different. The electric one immediately starts heating. Watery longer. On our large area (the entire first floor, about 100 sq. M.), A water heated floor turned on for the first time was heated for the day. And that's a lot. A cheater is your foreman or a clumsy one. He screwed up, most likely, he is now thinking how to get rid of and dump. I don’t want to fix it at my own expense ...
Evolutionary:
Well, about the moisture, he bent it. What is your gender (cable or mat)? If the cable is in a tie, then it can really heat up for a long time. And check: you can disconnect the wires of the floor itself from the thermostat and measure the resistance with a tester or by email. counter. Disconnect all email. appliances, and then turn on the floor email. the counter should start "spinning".
Andrey:
The foreman claims that to check the correctness of the work, you need to wait a month, says that there is still moisture under the tiles and it interferes with heating ....you need to trust people, we do not live in the forest for tea, support this holy man and tell me that it interferes not only with warming up, but also with paying for all his work, he himself suggested waiting a month, so go to meet this absolutely honest man ....
Winds:
I support Andrey. Offer to either fix the malfunction or get money when the floor works.
Any electrical appliance. Generates heat, if it works, regardless of humidity. And if the foreman himself said that he laid the cable on a damp base or a laminate on a wet bulk, demand money from it and for damaged materials, a violation of technology
Dmitry Ostankov:
You need to check two indicators: 1) the resistance of the heating core of the mat (using a multimeter). It must correspond to that indicated in the passport for the product. permissible deviations: + 10% / -5% of the specified indicator. The multimeter terminals are connected to the leads of the heating conductor at both ends. 2) insulation resistance (using a megohmmeter). Between the leads of the heating vein from both ends of the mat, the megohmmeter should show "0", that is, K / Z. , since these veins are closed. Between any of the cores and the screen, the device should show "infinity" - "8" on the side. This is the main indicator. It indicates the integrity of the mat insulation. This indicator is especially important after filling. And do not trust the electricians who only checked the resistance with a Chinese tester and say that everything is in order.
Andrey Volkov:
They check it in the store with you, when you buy it. - they look at the resistance with the device And it is better to roll it into the screed
And glue the tiles on a flat surface - under a comb so that there are no voids under it
Alexander Bakushev:
you can turn it on for a few seconds, if it gets warmer, it means a worker!
Stas Shabanov:
Check with a tester, it should show 60-70 Ohm ..
Temperature measurement sensor test
To check the health of the floor temperature sensor, it is necessary to measure its resistance using a multimeter. Each sensor has a declared factory resistance indicated in the passport. When the temperature sensor heats up, its resistance decreases. If the resistance differs by more than 5 kΩ, or is equal to 0, then the sensor is faulty and requires replacement.
Note
In programmable thermostats, in the event of a temperature sensor malfunction, a corresponding message is displayed on the panel.
Temperature / Resistance Ratio of 10 kΩ Floor Sensor
| Temperature, ° С | Resistance, Ohm |
| 5 | 22070 |
| 10 | 17960 |
| 20 | 12091 |
| 30 | 8312 |
| 40 | 5827 |
Still have questions?
Check out our other articles on film underfloor heating. In them you will find useful tips, reviews and answers to popular questions.
You can also get a free consultation on underfloor heating, help in calculating and selecting the necessary components by phone or e-mail.
How to check a warm floor with a multimeter?
The photo and video below shows a step-by-step check of the warm floor.
We will also tell you how to ring an electric floor heating without a multimeter.
When purchasing electric underfloor heating (underfloor heating under tiles, underfloor heating in a screed), remember that the floor (heating cable, heating mat or thin heating cable) is included in the network only after installation and complete drying of the screed or tile adhesive.
Infrared floor heating can be switched on immediately after installation.
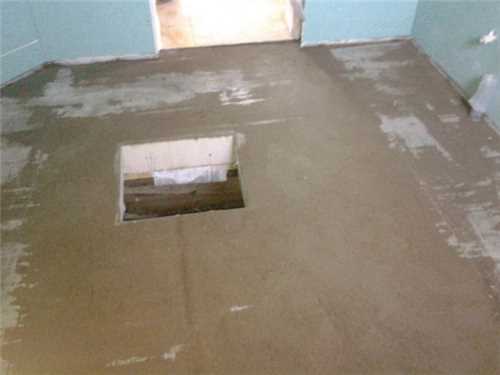
It should be noted that the complete hardening and drying of the cement-sand screed occurs within four weeks.
It is necessary to check the serviceability of the purchased products at several stages.
POWER OF HEATED FLOOR PER SQUARE METER
Regardless of whether it is mats or a cable, a warm floor is usually chosen so that for each square meter of the heated surface there is, on average, 150 W of electrical power. Depending on the purpose of the room and the purpose of the installation, this value can vary:
- from 100 - 130 W, when it is enough just to make the temperature of the coating on the surface comfortable, for example, floor tiles in the bathroom or in the kitchen;
- from 130-180 W, when it is necessary to supplement the main heating system, it is most often used. It can heat up the flooring quite strongly, thereby additionally warming up the room during cold periods;
- from 180 - 250 W, when the warm floor is used as the main source of heating, or, it is a full-fledged part in the general heating system of places where it is especially cold, for example, a balcony;
- On average, the power of a running meter of a heating cable for a warm floor is 10 - 20 W / m.p .;
Thus, after measuring the resistance, you must estimate the approximate installation area and proceed with the calculations:
Example: Let's say you have a corridor in an apartment in which about 6 square meters are heated. By measuring the resistance of the heating cable with a multimeter, you got a result of 55 ohms. It remains to calculate how much this is enough for such an area:
First of all, we determine the total power:
P = U2 / R = 220 2/55 = 880 W
Then the power of 1 square meter:
Psq.m. = 880/6 = 146.7 W / sq.m. - which, taking into account the error, corresponds to the standard, most common power of electric floor heating. If the calculated value is too low or high, then you will understand that it is the heating cable that is the cause of the malfunction, and you can repair it.
As you can see, measuring the resistance of an electric underfloor heating cable is the main diagnostic method. Heating mats or cables, after they are installed in a screed or tile adhesive, cannot be reached and inspected without complete dismantling. And to measure its resistance with a multimeter in everyday life is available to everyone and is not an impossible task. Having learned that the floor conductors are not broken, do not short-circuit and have sufficient power to heat up, you can continue to look for the cause of the malfunction in other components.

The method of checking the warm floor for performance
To determine the malfunction of the heating system, two methods can be used: visual and the method of measuring the main parameters. And if in the first case the consumer can only rely on external signs (blackening, insulation melts, etc.), then the second option gives a more accurate assessment of the damage to the system.
Checking underfloor heating with a multimeter
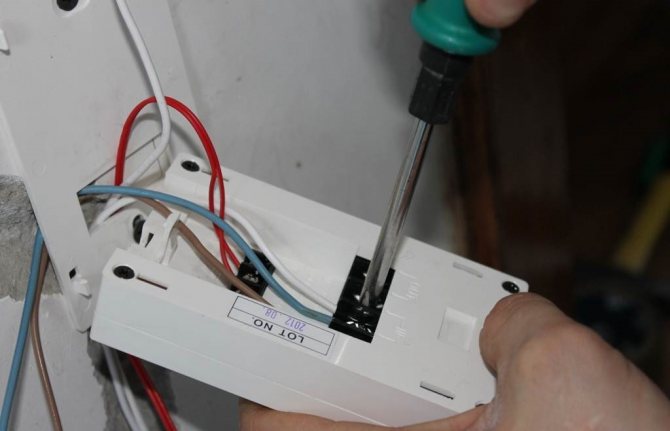
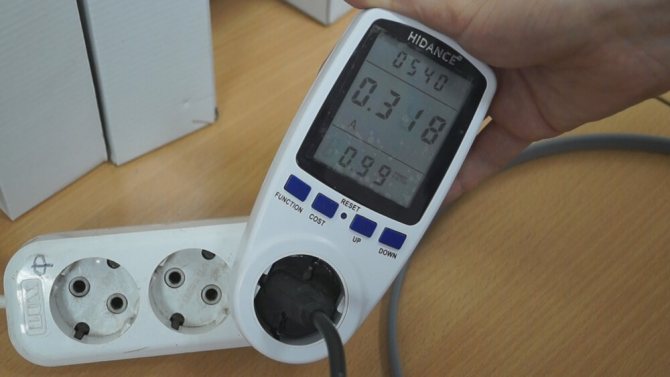
The first step is to make sure that there is a supply voltage at the terminals of the thermostat. For this, by moving the multimeter to the position for measuring alternating voltage, you must make sure that the network is available. You must first remove the protective cover from the temperature controller.
The next step is to measure the resistance of the heating cable (film). For this, the entire system should be de-energized and, having moved the multimeter to the position for measuring resistance, apply the probes of the device to the terminals of the heating elements (after disconnecting them from the terminals of the thermostat).

Resistance values may vary depending on the power of the device. Well, in order to accurately determine the correctness of the measurements (knowing the power of your warm floor), you can use the following relationship:
P = U2 / R,
And then, substituting the available values, you can determine the correctness of the measurements.
For example, if the multimeter showed a resistance value of 100 Ohms, then the power of your warm floor according to the given formula will be P = 2202/50 = 480W.
By the way, if there are no passport data for a warm floor, then the average power of the heaters can be taken in the ratio of 150W per 1 square meter of floor area.
By comparing the measurement results with the available characteristics, it will be possible to find out about the quality of the heater. If the measurement results differ significantly from the passport data (more than 10 - 15%), then we can talk about damage to the heating element.
Exceeding resistance - short circuit of the circuit;
Reduced (zero) resistance values - cable break.
Of course, further repair of the warm floor will require the involvement of specialists for dismantling and subsequent installation of heating elements.
Thermistor check
In case the heaters are intact, the next thing to look out for is the thermistor. Its integrity can also be checked with a multimeter.
However, it should be understood that the value of electrical resistance for a given element can vary significantly depending on the ambient temperature. And the same sensor will show 20kΩ or more at t = + 5⁰С and 5kΩ at t = + 35⁰С. At this point, you should pay attention and additionally check the process of changing the resistance when the temperature sensor is warming up.
As mentioned above, replacing a thermistor is a very simple undertaking. And if necessary, the consumer will be able to perform the specified procedure on his own.
How an OTDR works
The OTDR sends an electrical impulse to the cable connected to it. The impulse travels through the cable to the point of failure, where it is reflected back to the OTDR. In this case, the device measures the time it took for the impulse to reach the fault and come back. The time value is converted into distance readings, which are shown on the OTDR display.
OTDR setup

For the correct recalculation of the time of the pulse travel to the fault and back, and to increase the accuracy in measuring the distance to the fault, it is necessary to set the propagation coefficient corresponding to the type of heating cable to be diagnosed. For this:
- Completely turn off the power supply to the thermostat of the "warm floor" system, and disconnect the heating system from it.
- Press the power button on the TS-90 reflectometer, in case of using the Sidekick analyzer, switch the analyzer mode switch to the TDR position.
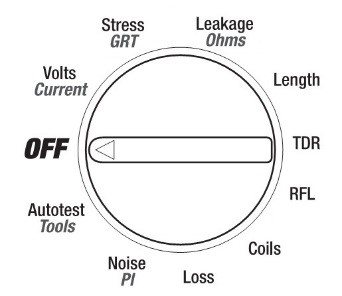
- Go to the "Setup" mode
- Use the up / down keys to select the required cable from the list.
- Connect the supplied alligator clips to the meter, observing the indicated color coding (black to black, red to red).
If the characteristics of the "Heat-insulated floor" system cable are unknown, you can determine them yourself, for which you will need a similar cable of known length. For this:
- Attach one of the OTDR test leads to one of the conductors of a similar heating cable of known length.
- Attach another test lead to the metal sheath of the heating cable (cable must not be connected anywhere)
- Adjust the NVP spread so that the cable length displayed by the OTDR matches the actual cable length.
If there is no cable with such a spreading factor in the instrument's manual, it is necessary to write it down. This will be useful in the future for diagnosing similar cables.
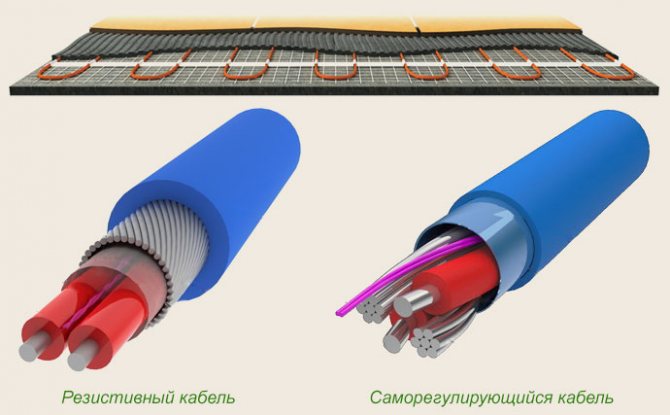
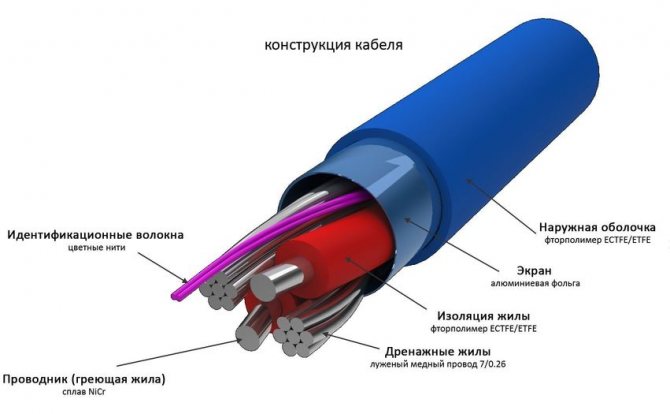
Cable designs and location
According to the principle of operation, the cable in the construction of a warm floor can be:
- self-regulatory;
- resistive.
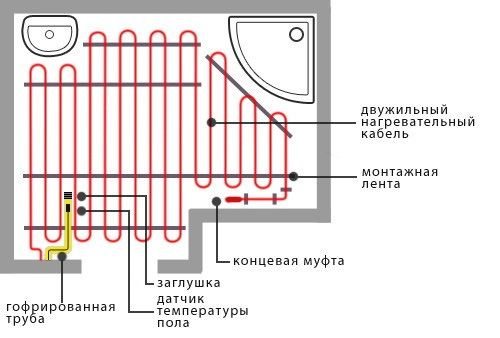
Self-regulating cable in operating mode changes its resistance with temperature drops. The resistance value of the resistive cable is independent of temperature. If the work on the installation of the cable is carried out in compliance with all requirements and recommendations, then the cable will not be damaged by temperature. The main requirement for cable laying is a certain length of time. If the cable turns out to be long during laying, it must not be shortened, as this will cause a change in the current characteristics and heating, which will lead to the destruction of the insulation. In practice, 2 types of heating cables are most often used:
- single two-core;
- 2 single cores in parallel.
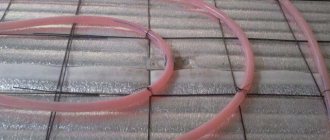
A single two-core cable is a wire mesh, plugged on one side. Such a cable is mounted in a concrete screed. The selection of the mesh is carried out strictly according to the area of the room, free of plumbing and furniture, since it cannot be cut.
The parallel arrangement of 2 separate cores of the cable is also mounted in a screed, but differs from the previous cable in that its length can be changed without fear of insulation.
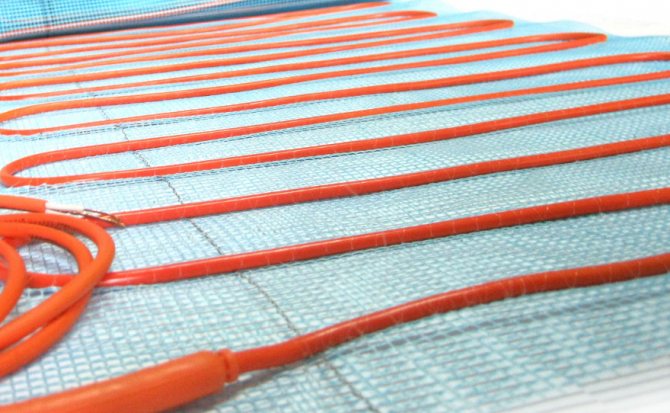
A film floor based on infrared heating differs from cable structures in that it is a chain of active resistances. The advantage of the film is its low thickness and the possibility of using it with almost all floor coverings. It is allowed to change the area of the film, but only according to special marking marks.


What should be the resistance of an electric floor heating
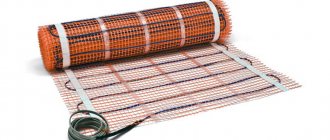
Underfloor heating is most often produced in the form of a heating cable or mats:
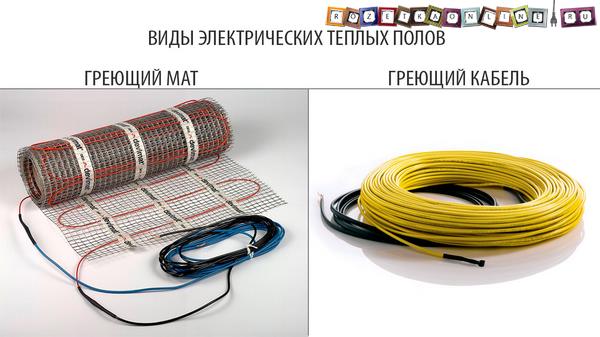
Heating mats represent a heating cable laid in a certain way and fixed in this position. In addition to the fact that this option has a much simpler installation, it has a fixed power per square meter, which does not change.
But the power per square meter of a floor made with an ordinary cable can vary greatly, depending on how it is placed on the surface, with what density, how many turns are made and what is the distance between them.
If you know what the power of the kit is, by measuring its resistance, it will not be difficult for you to check its serviceability and efficiency:
It is enough to use Ohm's law, namely the following formula:
P = U2 / R, where P, Watt - power; U, Volt - mains voltage, usually 220 Volts are taken into account; R, Ohm - Resistance;
Example: Thus, knowing that a heating mat with a total power of 800 W is flooded in the screed, and the multimeter showed a resistance of about 60 Ohm, you can check how the actual indicators correspond to the declared ones:
P = 220 2/60 = 806.7 W - which is very close to the nominal value, which means the floor is in good order.
If you do not know the power of the installed electric heating system, you only roughly understand the surface area that it heats and where it is installed, diagnostics should be carried out as follows:
too much resistance
Posted by shatl on Feb 28, 2020 in Underfloor heating (electric)
Create an account
Register in our community. It's very easy!
Already have an account? Sign in.
Or sign in with one of these services
Google recommends
Our recommendations
What is it for?
Phoenix posted a topic in Tools and Equipment, Jan 15, Topic
I propose to warm up, who is interested.
Who has any guesses about what this is for?)
Birch suvel
Sano posted a blog post in Slab Furniture, Jan 23, blog post
Here is a cut of birch suveli brought to the workshop, while we are planning to make a coffee table in advance.
The procurement of such material itself was not the easiest thing, not only was it found in the forest, it was also taken with difficulty, then the suvel was cut into pieces, but after that, using a special technology, it was cooked for a couple of weeks, and then dried for a couple of years.
In general, this is a whole epic, and in view of the fact that so much has been done only for the workpiece, and based on the size, the price of such material is already becoming very high. And this is not the table itself.
It is necessary to carefully approach the work, and make a flat tabletop with minimal losses in the thickness of the workpiece.
Yin and yang ceilings
ramon posted a topic in Our works, December 12, 2008, topic
One of our first works supported the oriental theme with a branch of sakura
Slab table. Hoffmann swallows
Sano posted a blog entry in Slab Furniture, Sunday at 20:28, blog entry
I make a table to order, I make a table top from elm slabs or, in other words, elm.
In one of the slabs there is a rather extensive and in places through crack.I cleaned it and also filled it with epoxy, it will seal the crack, and also level the surface of the countertop.
As an additional blockage against crack opening, Hoffmann's swallows are embedded, which not only enhance, but also create a decorative effect.
Someone will say that they spoil the appearance, and they should have been placed on the back side of the countertop. But the fact of the matter is that they just cannot be put there because of the peculiarities of the table top.
I personally like these swallows, and besides, their presence was approved by the table customer.
They were made from scraps of the same table top, two dark swallows lay on the light half, and one light one was cut into the dark half of the table top.
A brief excursion where this furniture element came from. For me, this Homfan did not invent anything, but simply took what has been used for centuries in carpentry and not only art. In fact, this is the same dovetail connection.
Let's leave it on the conscience of the author, besides, this name is a swallow or a Hoffmann butterfly stuck to this type of connection, as, for example, all copiers are called Xerox.
In 1985, while still a student at Harvard University, Thomas Hoffman developed a system for joining parts made of wood and chipboard (MDF and chipboard), which was named "Swallow Hoffmann" and was soon adopted throughout the woodworking industry.
Common malfunctions of warm floors
The reason for the breakdown of the underfloor heating can be incorrect installation of equipment, or the exit from standing of individual elements of the system.
Thermostat
As mentioned above, it is responsible for maintaining the floor temperature in a given range. And also it is a switching link on which all the circuits of the heated floor are assembled (power supply, load, temperature control).
And if all connections are made according to the diagram, then the reason for the malfunction of the thermostat lies in its element base. Of course, you can try to restore the specified block. But as practice shows, most often the repair of a thermostat comes down to replacing it.
temperature sensor
Refers to easily replaceable elements, due to the fact that it is located in the corrugation (laid in the floor screed). The durability of this element directly depends on the quality of the materials from which it is made, as well as on its correct location relative to the heating cable (see the manufacturer's recommendations).
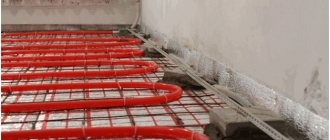
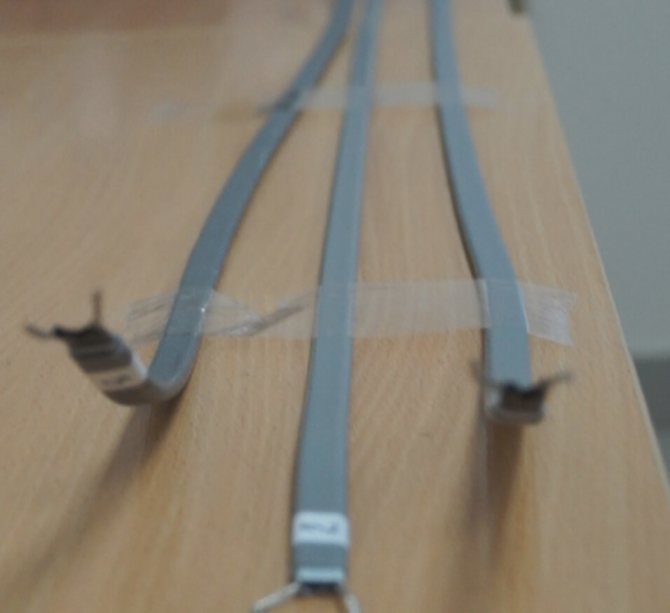
Heating cable
A fairly reliable element of the system, which most often fails due to improper installation. Moreover, the most "problematic place" of the heating cable is the connecting sleeve (through which the power is supplied)
In view of this, with self-repair, first of all, you should pay attention to this particular unit.
By the way, the method of choosing a heating cable for a warm floor can be found here.
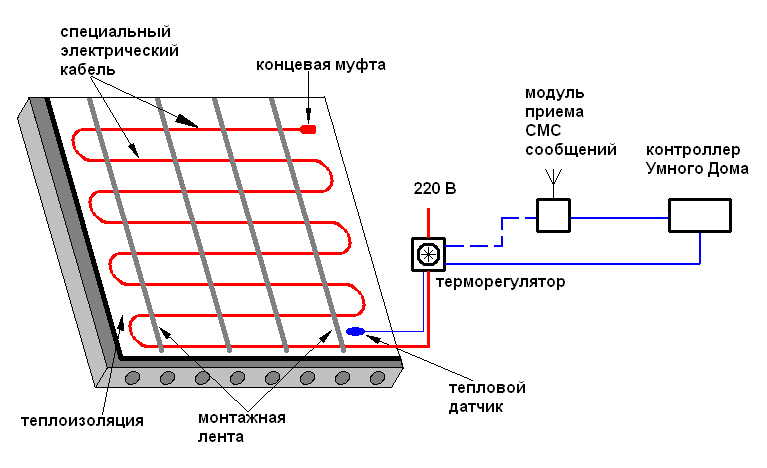
System design features
We have already talked about how to lay a warm floor on your own. In view of this, it is enough to consider only the main design features of electric underfloor heating.
So, a warm floor includes the following elements:
- Heating elements (heating cable or infrared film);
- Temperature sensor (for temperature feedback);
- Thermostat (responsible for maintaining the floor temperature in a given range).
In addition, users should be aware that 2 types of heating cables can be used in underfloor heating: resistive or self-regulating (which can independently change the level of heat generation depending on environmental conditions).
It is important to remember that when self-laying an electric underfloor heating, a strict requirement is to comply with all the manufacturer's recommendations. This applies to cutting the heating elements, their location and fixing.
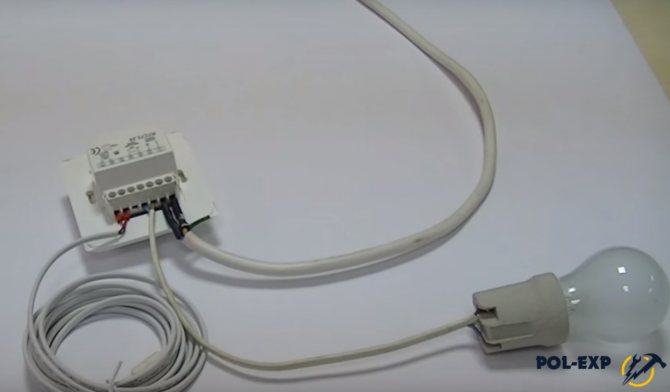
How to check the performance of the thermostat
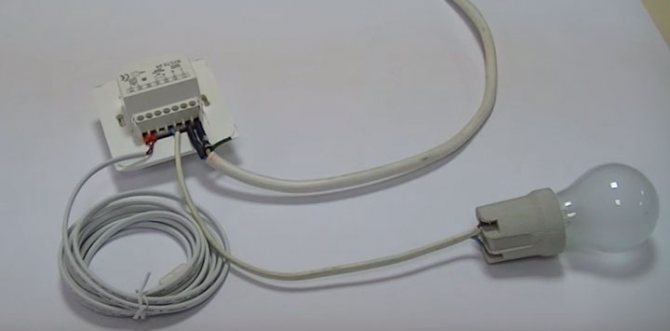
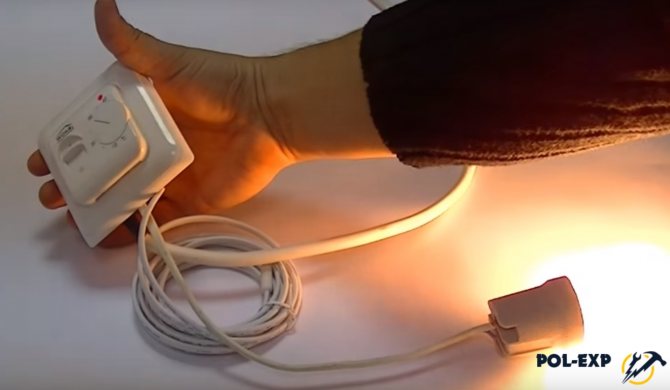
Let's look at an example of how you can check if the thermostat is working using a regular light bulb.
Step 1. The thermostat is connected to the network in compliance with all the rules. That is, the phase wire is connected to terminal L, and the zero wire is connected to terminal N. The temperature sensor and an ordinary light bulb screwed into the socket are also connected. It will be a load indicator.
Step 2. The thermostat connected to the network is turned on with a toggle switch.
Step 3. The lever responsible for increasing the temperature is set to maximum.
Step 4. If the thermostat is working properly, the lamp will light up.
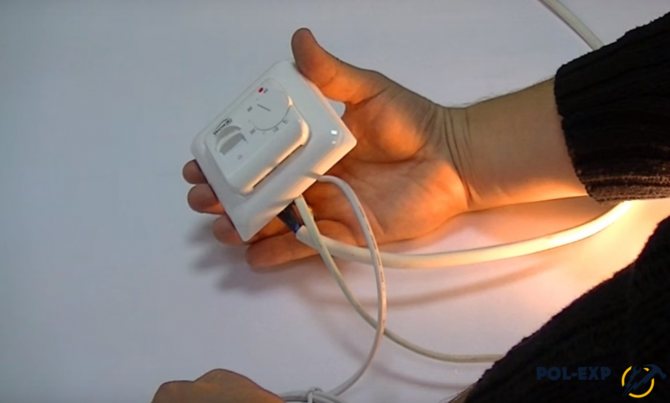
Step 5. Using this circuit, you can check the temperature sensor. To do this, it is taken into the hand, and the temperature controller is set to an average value.
Step 6. The temperature regulator is again turned to higher values. The light will turn on again. But when the sensor heats up to the temperature of the human body, it will go out.
Step 7. After that, the system can be left alone. After a while, the light will turn on again when the temperature sensor cools down and gives a signal to the thermostat.

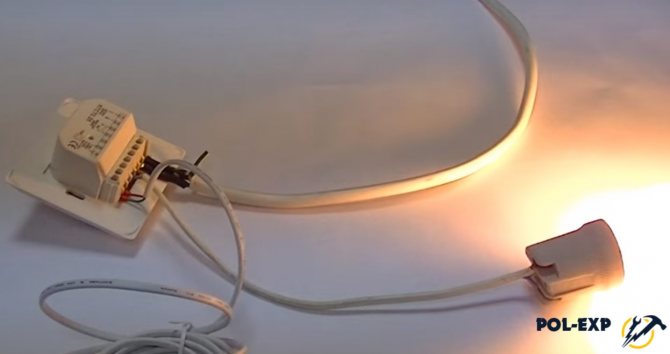
Diagnostics of the thermostat using a light bulb
You can diagnose the operation of the thermostat using a simple light bulb.
For this, the following actions are performed:
- the N terminal with the zero cable of the thermostat is connected to the network, and the L terminal to the phase one;
- connect a light bulb to the sensor, which will serve as an indicator;
- having set the maximum heating, turn on the device. If after that the light comes on, it means that the regulator is working properly.
There is another way to check the performance of a warm floor:
- turn off all the electricity in the room by snapping off the plugs on the dashboard;
- connect the wires of the heating system bypassing the thermostat with the electrical panel;
- turn on the power supply, wait 25-30 minutes, whether the floors are heating.
If, with such a direct connection, the floors become warm, then this proves a malfunction of the thermostat.
To check the health of the heating cable, you need to measure its resistance with a multimeter.
We recommend: How to choose a plasticizer for a warm floor?
Repair of thermostats
It's no secret that sometimes thermostats fail, and at the most inopportune moment. There are several reasons for this sad event. The most common is incorrect installation: an error in the wiring diagram (such as: mixing up wires and terminals, too much load), painting the installed thermostat with paint, installing the thermostat in a damp room. With such errors, the thermostat either immediately fails, or its service life is significantly reduced. Have the thermostat installed by a professional electrician.
The second reason is related to the design features of the thermostats. The fact is that basically their power supplies are built according to a transformerless circuit with a ballast capacitor (almost all regulators from such companies as: OJ Electronics, Eberle, Raychem, some DEVI), or according to a key stabilizer circuit such as Devireg D530, Devireg D535 , Veria B45, Veria T45.
Such thermostats are sensitive to impulse noise on the power supply, which occurs when devices such as a welding transformer, a hammer drill or an electric lawn mower are turned on next to the regulator, which is often the case in country houses. In such conditions, it is better to use regulators with transformer power supplies that do not allow impulse noise (for example, NTC100 Busch Jaeger regulator).
If your regulator is out of order, do not rush to throw it away. In most cases, the regulator can be repaired.
Our company carries out warranty repairs of thermostats purchased through our network of stores or through our dealers, as well as non-warranty repairs of any regulators.
The cost of such repairs is fixed - 1000 rubles.
Underfloor heating does not work! What to do?
A typical customer case! You decided to make a warm floor at home, and the builders who are doing the repairs say “That from early childhood they put the floor. More than 1000 warm floors have been installed and everyone is happy. Why put there? ”As a person who sincerely trusts your builders, for fear of showing doubts about their professionalism, you entrust them with the installation of a warm floor. From this moment on, the headache begins! The builders completed the repairs and left for their homeland. The burned-out tiles have been laid, the cold has come, and the warm floor does not work! We proceed to search for the cause of the malfunction.