What is grout for?
This building material is used in the last stage of working with tiles. When all the details are laid out and the glue is dry, you can proceed to the aesthetic design of the joints between the tiles.
Grout serves as a kind of barrier against moisture and dust. By sealing the joints with this material, you guarantee the safety of the tiled surface.
If in the process of work the seams turned out to be sloppy or have different widths, you can easily fix this defect with the help of a rubbing compound. It is enough to choose a tone as close as possible to the color of the tile and imperfections will not be conspicuous.
And if you are planning to make an unusual design, grout will also help with this one. You need to choose a shade of the product that will differ significantly from the color of the tile. Thus, you can achieve an unusual design in the interior.
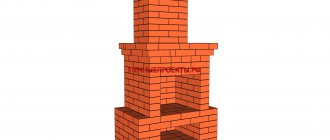
Do-it-yourself stove cladding
The technology of lining stoves with tiles provides for the choice of a laying method, and the course of work will differ accordingly. In this case, in any case, laying is carried out from the bottom up and on a heated (at least up to 30 °) oven.
6.1 Cladding the oven with tiles in straight rows or offset
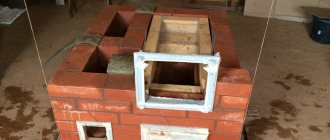
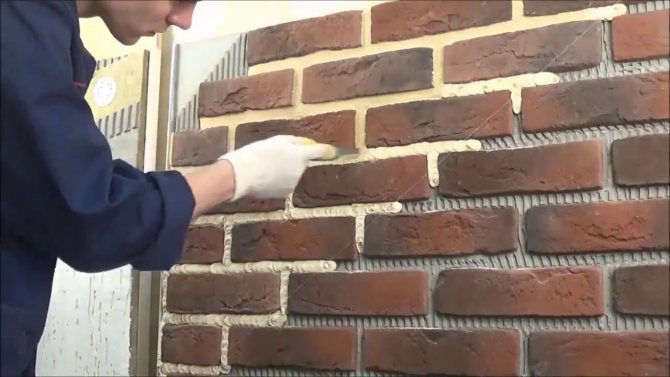
Installing the first row. The clinker, terracotta or porcelain stoneware cladding of the stove starts from the corner of the stove. The corner pieces are installed first.
It is worth noting that if the cladding work is done before the floor is laid, a gap must be left. In this case, the first row will not be supported by the floor, but by the rail nailed to the surface of the furnace. The support rail only needs to be fixed to the oven, as the floor can deviate from the horizontal. To draw the horizontal line, you need to mark the upper border of the first row and lay the tiles with a cut from the floor side. With this approach, subsequent rows will be laid out in accordance with the level.
Note. A technological gap of 5-10 mm is left between the floor and the tile. Its presence will compensate for the expansion of the material when heated.
Please note that the majolica lining of the stove starts at the corner and continues as it is laid. If a whole strip hits the corner, great. If pruning is required, then work should be started from the second row. Pieces of tiles are installed last. It looks more beautiful if the whole tiles are located in the corners, and the cut fragments are hidden in the places where they are adjacent to the wall.
Next, an adhesive solution is applied to the prepared tile.
How to apply adhesive to tiles
The adhesive is applied in two ways:
- with a notched trowel. This method is suitable for a flat surface. Then the adhesive spreads on the tile surface evenly and air pockets are excluded;
Note. Air pockets or bags are dangerous because the air in them heats up faster than tiles or glue and expands. As a result, tiles may peel off.
- using a trowel. The method is used when the surface has plane deviations. In this case, glue is applied to the corner of the tile, which is pressed against the surface in a circular motion. The glue fills in all the irregularities, and its excess goes beyond the edges of the tile. If you are having difficulty putting the tiles back in place, you may not want to hit them hard with a rubber mallet.
Some craftsmen recommend applying the glue not to the tiles, but to the surface of the stove. This method is suitable for any surface quality.
The thickness of the adhesive is specified by the manufacturer and is 2-7 mm.To level the unevenness, it is allowed to apply glue up to 10 mm thick, but after laying the tiles, work must be stopped so that the glue can dry evenly.
How to glue tiles on the stove - tips
- Before applying the glue to the porcelain stoneware, it should be wetted. To do this, draw over the surface with a brush or moisten in water. In no case should the tile be completely submerged in water.
- The heavier the tile, the thicker the adhesive layer and the greater the distance between adjacent tiles.
- It is possible to level the tiles on the surface within 10-15 minutes. after styling. If you didn't manage to do it in time, you need to remove the tile, clean it and the surface from the glue, and only then continue working.
The second row is laid after the first is completely laid. Work also starts from the corner. To ensure an even gap between the tiles, crosses, patterns or pieces of other materials that have the same thickness will help.
Joint width between tiles (thickness)
At the seams between the rows of tiles, you need to stop separately. The joint width depends on the type of tile, its thickness and weight. And their absence leads to the fact that the tiles have nowhere to expand and it bursts. In order for the grouting mixture to lay down beautifully in the future, the joints must not be completely filled during the laying of the tiles, and the excess mixture must be removed with a spatula.
The masters emphasize that it is not worth laying more than three rows in one approach. In order for the glue to set well, it is better to take a break for a few hours. The drying time depends on the type of glue and the manufacturer's recommendations.
In addition, the horizontal is checked after each row of tiles has been laid. If a defect is found, there is time to fix it.
6.2 Tiling the oven diagonally
With this installation method, the first row is usually laid straight. This will align the cladding with the floor. Further, the layout is performed in one of the following ways:
- triangles are laid out, wide side down. The upper corners of the tiles serve as a guide when checking with a level;
- laying goes diagonally, then the mooring cord (marking) is pulled at an angle of 45 °.
The penultimate row is similar to the second. The latter is the first, which is also usually laid out in a straight line.
Note. In the process of cladding, a certain area in front of the stove is often laid out with tiles. This technique allows you to protect the flooring from sparks and deformation from the heat of the oven from below.
Cladding work ends with cleaning the seams (a deepening for better grouting) and rinsing the cladded surface of the oven. After the time required for the glue to fully harden, you can start grouting.
Advice. Better to stop work for 5-7 days. During this period, the risk of displacement of tiles is minimized.
Views
By the nature of the components, building mixtures are divided into:
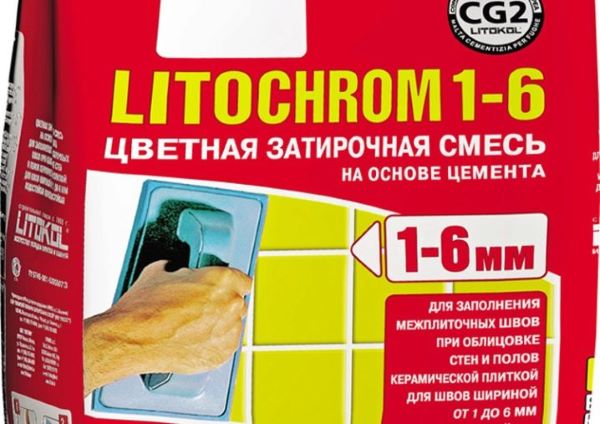
- cement. The main component of such mixtures is Portland cement. There are ready-made diluted grout, or you can choose a dry composition, which should be diluted with water or latex before work.
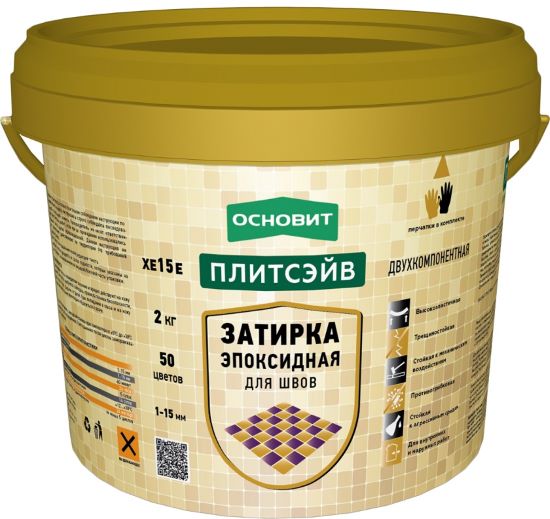
- epoxy. The composition of such grouts includes epoxy resin and a special component, which then becomes hard and ensures the strength of the joints made. They look much aesthetic, but their cost is more than cement ones. Such compositions require a special application technique, they are not easy to work with.
Choosing a grout for the oven
You can buy ready-made grouting mix at any hardware store. Before purchasing it, read the basic requirements for such funds.
Criterias of choice
- Heat resistance. This is the main condition when choosing a grout for the oven. After all, the composition, along with the entire surface, will be exposed to high temperatures.
- Resistant to moisture. If the stove is located in a bath, this criterion is required.But even in an ordinary room, moisture resistance is necessary, because the oven coating will be cleaned of dust or stains with a damp sponge.
- Resistant to fading and discoloration.
- The nature of the composition. You can choose a coarse grout, which will give you a roughened effect. Or you can take a fine-grained one, which, when mixed with water, will give a smooth glossy finish.
- Color palette. Match the grout color closer to the darkest or lightest shade on your stove. Or make the ego bright: white grout looks very nice on a black background, or vice versa.
Top brands and their characteristics
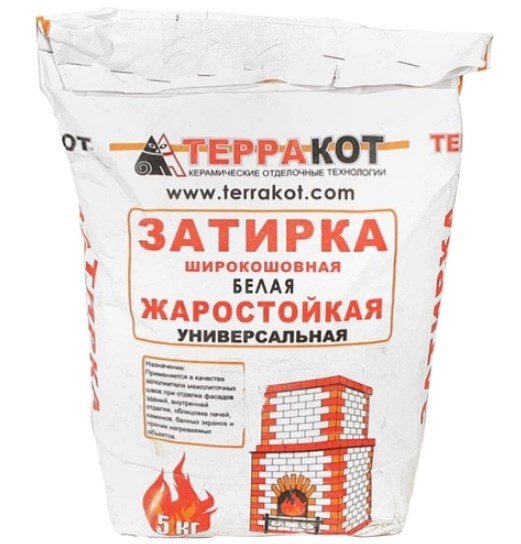
- "Terracotta". White heat-resistant grout for ovens. It is the most suitable and common remedy. The package is 20 kg. Moisture resistant, does not crack. Withstands temperatures up to 400 degrees. You can change the color using color schemes. Price - 900 rubles.

- Isomat Multifill Smalto. Weight - 2 kg. Heat-resistant, frost-resistant, water-repellent. Possesses plasticity, because of this, it is convenient to use. The recommended joint width is up to eight millimeters. You can choose a suitable shade. Cost - 350 rubles.
- PLITONIT Superfireplace ThermoRepair. Weight - 5 kg. The mixture can be used when working with joints on stoves and fireplaces. Heat resistant, moisture resistant, easy to use. Does not crack after drying and during use. Price - 350 rubles.
- Mixonit Fuga KL. For various types of tiles: clinker, mosaic, etc. Heat-resistant, has a water-repellent surface. A construction gun is used for work. Price (depending on color) 600 - 700 rubles.
Existing brands of heat-resistant grout
For high-quality cladding of fireplaces and stoves, materials with certain qualities must be used, and first of all, tiles, glue and fugue must have suitable heat resistance characteristics. There are a large number of manufacturers, and accordingly, brands of various grouting that can be used for finishing heating devices, some of them will be presented for consideration.
Heat-resistant universal grout Terracotta
It is used for processing and sealing joints between tiles on heated surfaces of heating devices. The grout has a high adhesive force with the facing material, does not slip from the surface and is capable of being operated at a temperature of +400 degrees.

Grout "Terracotta" is used to fill tile joints on all types of surfaces
It is brought into working condition by mixing the dry component of the fugue with clean water at a temperature of + 18-22 degrees until an elastic mass is obtained. For 1 kg of dry mix, you need 280 ml of clean water. Once cooked, the grout should be used within an hour.
Plitonite Superkamin hot glue
It is used for mounting ceramic tiles on heated surfaces of heating devices and other areas exposed to high temperatures. It is also successfully used for grouting ceramic tiles on stoves and fireplaces.
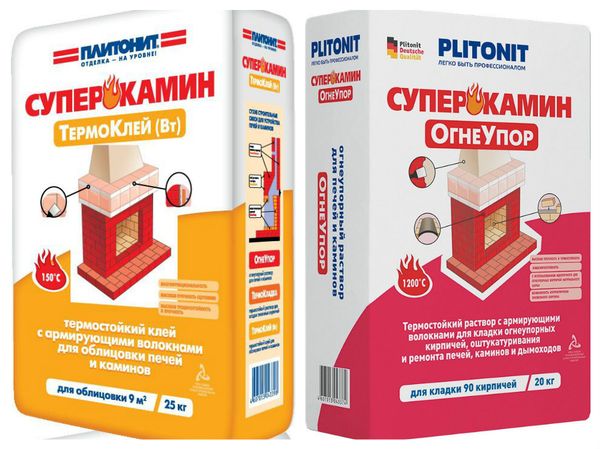
Heat-resistant adhesive with reinforcing fibers for cladding stoves and fireplaces
Heat-resistant grout has good adhesion strength, strength and can be used at a surface temperature of +150 degrees.
Clinker joint jointer MIXONIT FUGA KL
Heat-resistant joint, used for sealing the joints of clinker tiles, has a large number of colors, can be used for grouting joints with a width of 2 mm to 20 mm. Fugue has high strength, chemical resistance and is able to withstand temperatures up to +100 degrees.
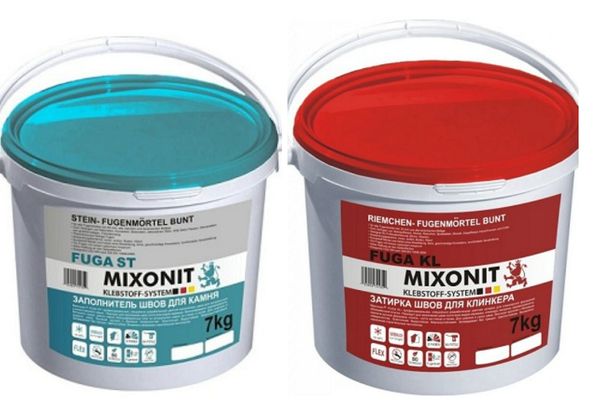
Heat-resistant joint Mixonit Fuga kl
Glue Polimin P-11
Thermo glue Polimin P-11 is used both for facing heated surfaces of stoves and fireplaces, and as a fugue, for processing tile joints. The operating temperature can reach +160 degrees.
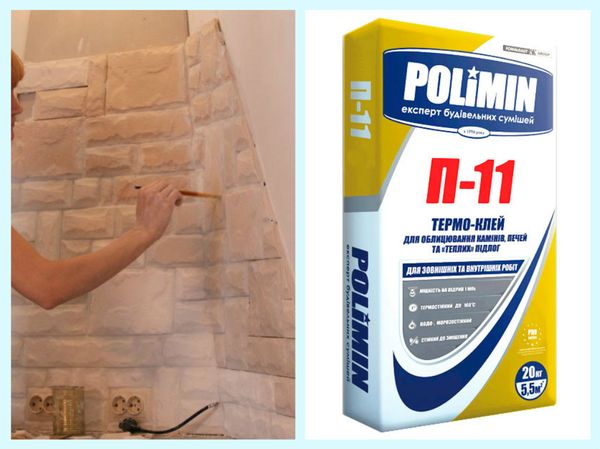
Thermal glue for facing fireplaces
How to make a grout for the oven with your own hands?
You can also make a suitable mixture at home. To do this, you will need plaster of Paris, a water-resistant liquid (available at your hardware store), and a dye. All components are mixed until creamy.
You can make a grout with clay and cement. To do this, take five parts of clay, one part of cement and dilute them with water.
Very often, the mashing mixture is made from Portland cement and sand, but the durability of such a composition when heated can be significantly reduced.
Types and characteristics
Many sources write about the existence of two types of refractory grouts:
- cement;
- epoxy.
Heat resistance, safety of the cement-based mineral composition is beyond doubt. As for epoxy grout, it is possible to recommend it for use in residential premises with great caution.
Based on polymer resins
Epoxy resins are synthetic polymers of an organic nature that burn very well, like any organic. Modifiers are added to the monomers to improve performance.
The combustibility of epoxides can be reduced by introducing halogen and phosphorus-containing compounds into the structure, which is carried out in technological processes. Consequently, heat resistant grout can contain toxic substances.
Manufacturers recommend using them in an industrial environment. If they offer epoxy compounds for grouting home stoves, fireplaces, you need to look at the certificates, make sure that the products are safe.
It is best not to take risks in the absence of accurate information about the composition of the epoxy, and purchase a heat-resistant cement-based grout.
If the composition is known and safe, then you can use epoxy grout, especially since it often takes the form of pastes, it is very convenient when applied to the space between the seams.
Cement based
Cement-based grouting agents have undeniable heat-resistant qualities, because they are made on the basis of Portland cement.
Portland cement contains up to 80% calcium silicates, which are obtained by sintering crushed clinker and gypsum.
Calcium silicate enters Portland cements from clinker powder obtained in turn from clay and limestone. Thus, in the composition of heat-resistant grout for joints, flammable substances are almost completely absent.
There is a dry mortar on the market, which must be diluted with water before use according to the recommendations on the package.
The product retains its properties when heated up to 400 ℃, which, taking into account its application to the outer surface, is a very good indicator.
Varieties for internal grouting of ovens have even greater heat-resistant properties, withstand temperatures up to 1700 ℃. Typically, heat-resistant products are gray or white, because the addition of any pigment will worsen the heat-resistant properties, reduce the density of the composition.
For external grouting, the addition of pigments is allowed, therefore, you can choose the option of a colored product that is in harmony with the appearance of the entire cladding.
Grouting methods
The following methods of applying grouting material to the joints between tiles can be distinguished:
Semi-dry method
When grouting using this method, the composition of the mixture is diluted with a small amount of water. The result is a consistency that resembles wet sand. With the help of a special jointing, the mixture must be placed in the seam.
The advantages of this application method:
- low product cost;
- among the components there are no substances that provide plasticity.
Cons of this grout:
- a seam that is less than 5 mm cannot be repaired;
- the color palette is limited only to gray and beige colors;
- The installer must have experience in sealing seams in this way, otherwise the structure will be of poor quality or unaesthetic.
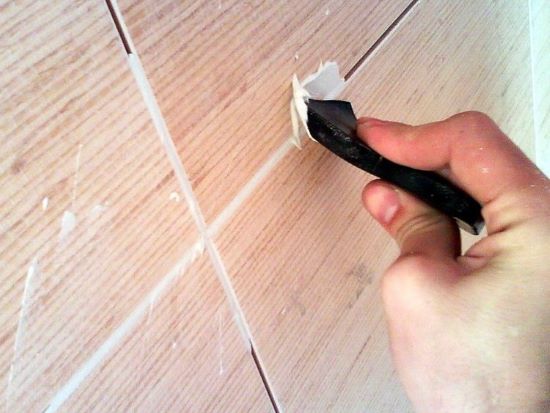
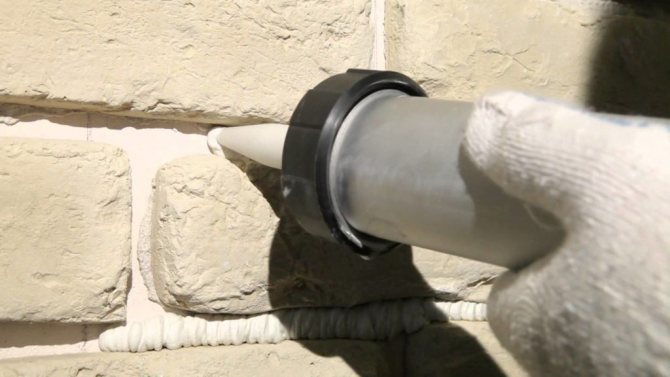
Using a construction gun
The grout is diluted with water and poured into a special construction tool - a pistol. All seams are smeared with a thin tip, and excess funds are removed. For a more dense filling of the seam, you can process the line by pressing the grout with your finger or some kind of tool.
The advantages of the method:
- simplicity and ease of applying the composition;
- you can select the desired grout color.
Disadvantages:
- high price of the composition;
- a special tool is required;
- among the components are plasticizers.
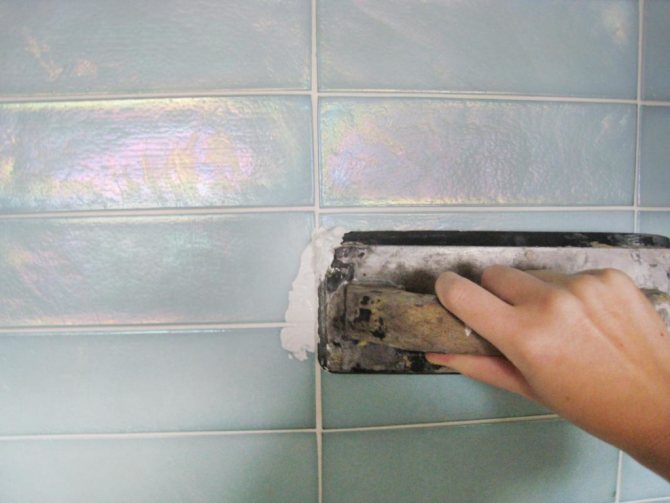
Application of the composition over the entire area of the cladding
The creamy mixture is applied over the entire surface of the tile, then cleaned off with a rubber spatula, and the composition remains in the seams. The oven grout is removed from the tiles with a damp sponge.
Pros:
- long-term operation;
- any kind of tile can be used.
Minuses:
- high price;
- small palette of colors.
Preparing the oven for tiling
High-quality installation and long life of the oven cladding is possible only when tiles are laid on a prepared base.
The need for cladding can be caused by two reasons, and the scope of work for each will be different. However, the overall goal is the same - to give the stove the correct geometric shapes, in which all surfaces are even, and the angles correspond to 90 °.
Note. In addition to the fact that the leveling increases the speed of work, it allows you to reduce the consumption of expensive adhesive for laying tiles on the stove.
Option 1: cladding a new (freshly built) oven
Even a structure erected in accordance with all building codes will need preparation. In this case, it boils down to the fact that the surface of the base is cleaned of dust, primed, equipped with a grid and markings. These types of work will be discussed in more detail below.
Note. It is possible to start facing a new furnace only after a month of operation. During this time, it will shrink and show hidden defects.
Option 2: cladding of an old (operated) furnace
This option is much more complicated than the previous one, since it involves more rough work. Therefore, let's consider the sequence in more detail.
5.1 Dismantling the old coating
Stoves installed in the house usually already have some kind of cladding. Often this is plastering followed by whitewashing or tiling. Therefore, before proceeding with the installation of a new coating, you need to remove the old one.
Related article: How to process the ends of logs after building a house
Dismantling (removal) of plaster from the surface of the furnace
Plaster does not last long on a hot oven. From the high temperature, cracks appear on it or the surface layer moves away from the base. In any case, before proceeding with the cladding, you need to get rid of the decorative coating (remove, clean).
How to remove old plaster from a stove
In practice, there are two methods of removing plaster from the surface:
Forceful method
... It is used if most of the plaster adheres well to the walls of the stove. Its use involves knocking down the plaster using the percussion nozzle of a perforator. This method is quick, but as a result, a lot of dust is created and there is a possibility of damage to the brickwork.
The use of a grinder can simplify the work. With the help of a diamond disc, cuts are made on the surface of the furnace. Their depth should be equal to the thickness of the plaster layer. There is nothing critical if the disc goes 10-15 mm into the thickness of the masonry. Further, the removal of the plaster continues with a perforator, hammer or chisel. If removal is still difficult, the masters advise to heat the site with a construction hairdryer and continue working.
Note. Periodically wetting the surface with water will prevent the appearance of dust or reduce its amount.
Gradual cleaning
... The method is slower and involves impregnating the plaster with water and then scraping it off with a spatula.
It is worth noting that some masters recommend leaving the plaster on the stove, provided that it adheres perfectly over the entire area.
Dismantling (stripping) paint from the furnace surface
Applying paint to your stove is an easy, inexpensive way to decorate your stove. But, the painted surface will peel under the influence of temperature and can harm human health (release of harmful substances).
How to remove old paint from a brick oven
Removing paint from a brick surface is not easy. A thin layer is removed with a metal brush. A good help for cleaning paint will be the use of a building hair dryer. A thicker layer in places leaves by itself, and where this has not happened and the adhesion to the surface is strong, notches should be made, for example, with a hatchet.
Note. Special solutions for removing paint have a pungent odor that takes a long time to disappear, and also have a high cost, so users are not advised to use them.
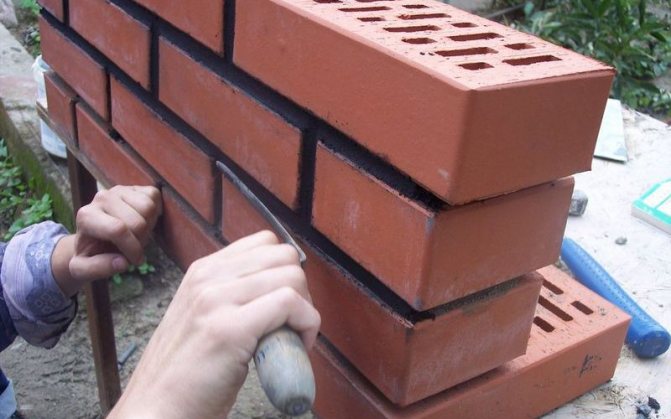
Dismantling (removal) of old tiles from the stove
When the tiles are peeling or wanting to update the oven lining, it becomes necessary to knock the tiles off the oven.
How to remove old tiles from the stove surface
It is recommended to carry out dismantling work from top to bottom. After removing the extreme row, go down to the next one. The tile is removed using a chisel that engages the edge of the tile. In this way, the tiles can be removed without damage. If such a maneuver fails, the tiles must be broken. Split tiles are easier to remove.
Don't be surprised if brick breaks off when you remove a tile. In any case, cleaning a fireplace or stove does not end with removing the old cover.
Attention! Removing the old tiles is carried out strictly in protective glasses, because in the process of work, a large number of sharp fragments are scattered.
5.2 Cleaning the oven wall surface
After removing the topcoat, the entire surface of the stove must be thoroughly cleaned of the smallest residues of the solution. Perfect cleaning of brick walls is accomplished by using a metal brush.
5.3 Deepening joints between bricks
In order for the subsequent layers of mortar to better adhere to the base, you need to take care of removing the mortar and increasing the depth of the joints in the brickwork. To do this, using a chisel, grinder or spatula, the solution is removed from the inter-seam intervals. The depth of cleaning is 5-10 mm.
Upon completion of the work, the surface is once again cleaned of dust and mortar residues with a brush.
5.4 Aligning the oven walls to match the tiles
To prevent the tiles from separating from the base, a metal mesh should be installed on the surface of the stove.
For work, you will need a mounting mesh with cells of 50x50 mm and a wire diameter of up to 1 mm. To fix the mesh, you can use a ceiling dowel with a head (bierbach).
Or you can simply put washers or galvanized pieces on the nails. The main thing is that the hat holds the net securely. The hardware is installed only in the seams. In this case, the nail is hammered, and a hole must be drilled under the self-tapping screw. The mesh fixing step is 500 mm.
The mesh on the surface is installed with tension. Further, the surface of the walls is leveled with plaster. To do this, you can use glue on which the facing tiles will be mounted or a special solution (clay, cement, sand) in a ratio of 3: 1: 0.2 parts.
Recommendation. Users are advised to add PVA glue or any other glue with a low expansion coefficient to this solution.
If the surface that needs to be leveled has depressions up to 10 mm, then the solution must be applied in two approaches. The maximum permissible layer thickness is indicated by the manufacturer.In practice, it is better not to make the layer thicker than 5 mm, this increases the time and reduces the uniformity of its solidification. In this case, the second layer is applied only after the first one has completely dried.
Advice. Getting started leveling the walls, the craftsmen advise to heat the stove. The solution should be applied at a surface temperature of 30-35 ° C.
An alternative to the wall alignment grid:
- installation of hardware with hats and pulling ordinary wire between them;
- the use of stretched burlap, previously aged in clay solution. When stacking burlap, it is important to avoid creases and air pockets.
Note. If the surface of the stove is flat, you can exclude the plastering stage, and lay the tiles directly on top of the metal mesh.
5.5 Priming the oven walls
A heat-resistant primer applied with a brush will improve the adhesion of the mortar to the surface. When choosing a primer for stoves and fireplaces, it is better to give preference to deep-penetrating compounds. When the primer is completely dry, you can pre-mark the surface.
Advice. It is possible to reduce the consumption of the primer without changing the quality of the application if you first walk along the surface of the wall with a slightly damp sponge.
5.6 Pre-marking before laying tiles
The surface on which the markings are applied is considered fully prepared for cladding. It involves the installation of beacons that allow you to navigate when performing cladding work.
The markings are applied using a plumb line and level. It is convenient to mark the horizontal line using a cord. A more technological approach is the use of a laser level.
You should be aware that even a perfectly prepared surface may not save the oven from cracking. Cracks can be caused by:
- excessive overheating;
- incorrectly executed bunch of bricks during the construction of the furnace;
- different thickness of the interbrick seam.
High-quality preparation of the base of the furnace surface will avoid its deformation and will firmly hold the correctly laid facing tiles.
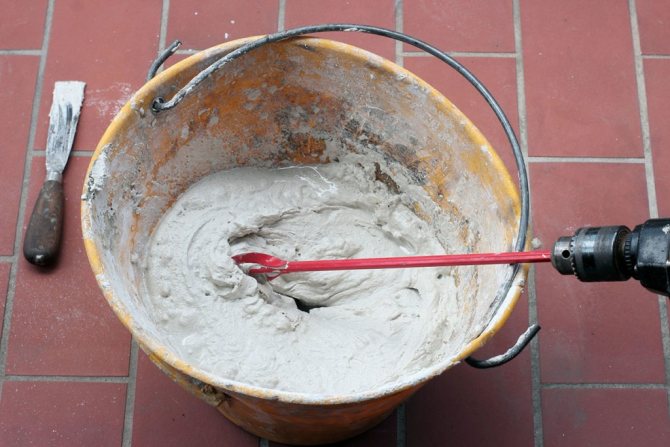
5.7 Preparing the adhesive
A solution for laying tiles is prepared in small portions for 10-15 minutes. before starting work. Moreover, the master stove makers do not use any devices for mixing, the work is done by hand.
Related article: How to choose curtains for the bedroom: useful tips and tricks