

Heating systems do not always have an attractive appearance. This is especially true for old structures, which, even after painting, will look bulky and ruin even the most original interior. In order to cope with the problem, radiator grilles are used. They come in different colors and sizes, differ in structure.
What is a radiator grill?
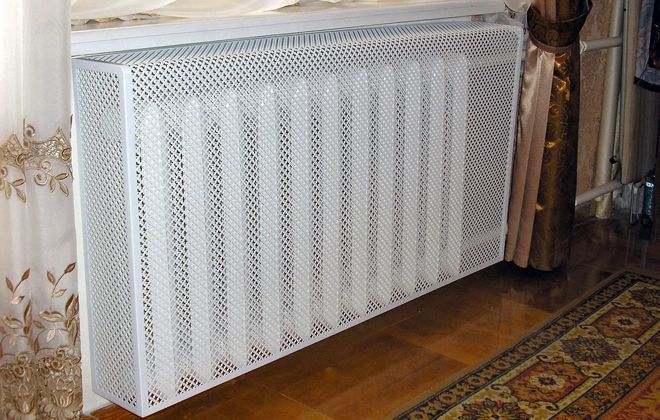
In another way, the product is called a box. Battery grilles are an important part of the interior. They allow you to hide old batteries and complement the design of the room. There are several reasons (besides aesthetic) why people put grilles on radiators, for example, products save on heating costs. The area of the grates is evenly warmed up, and they distribute heat energy throughout the room. It should be noted that the style and design solutions of the grilles do not in any way affect the technical characteristics of the radiator.
What does the radiator grill consist of?
The design of the products can be different. The grille for heating radiators is a surface with protrusions on the sides. They have fixing elements. With the help of these devices, the grille is mounted on the radiator. The product is available with or without a top cover. There is one common design feature for all radiator grilles - they do not have a hole on the surface or below.
Types of lattice structures
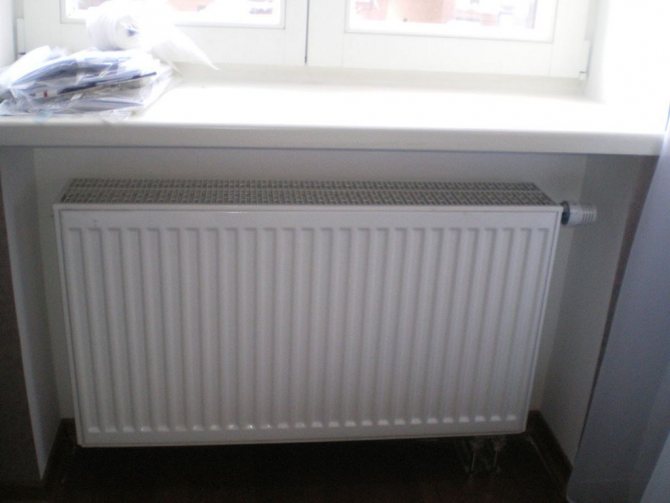
Battery in niche
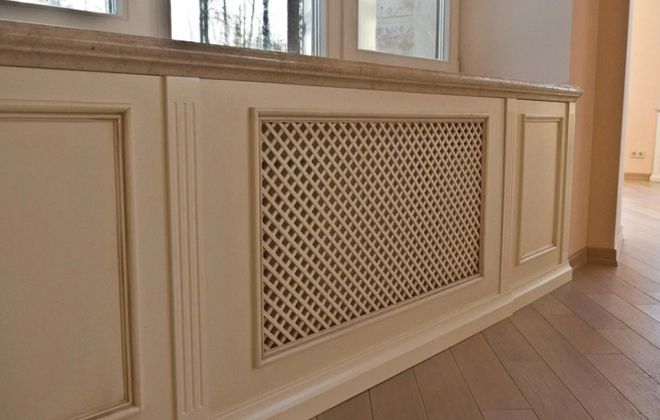
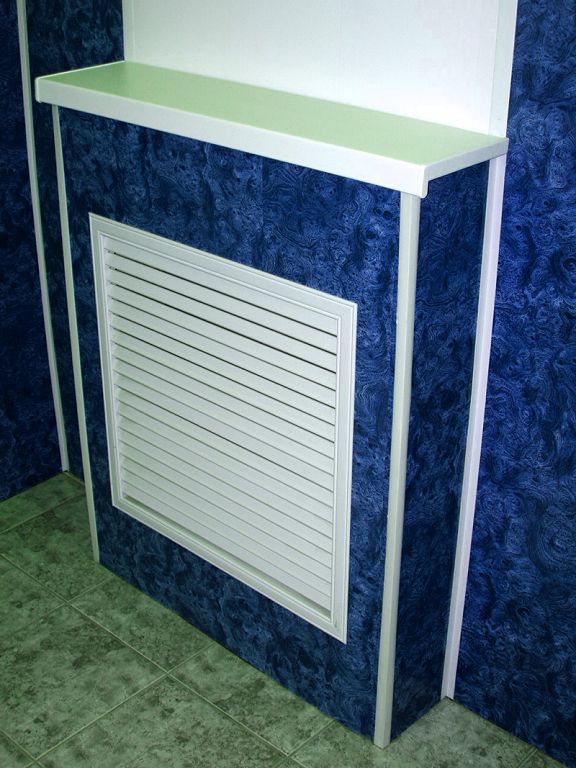
What options affect panel selection? The dimensions of the battery and its position in the wall opening are decisive. Most often, it is installed in a special niche, the upper part of which is a window sill. If it is necessary to close this entire area, the dimensions of the grille for heating radiators are selected based on the dimensions of the mounting recess in the wall.
In this case, do-it-yourself front grille of the heating radiator is installed. This is one of the simplest designs, as it can be attached both to the battery and to the wall.
The choice of the type of mounting assemblies greatly facilitates the independent production of the panel.
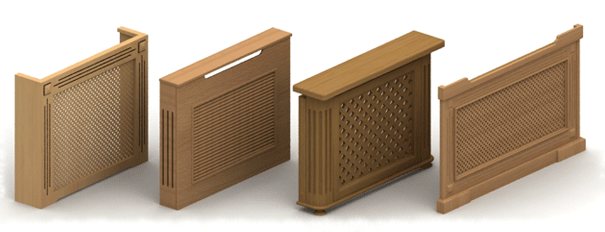
Types of battery grid designs
In addition, they make such grids for heating batteries with their own hands:
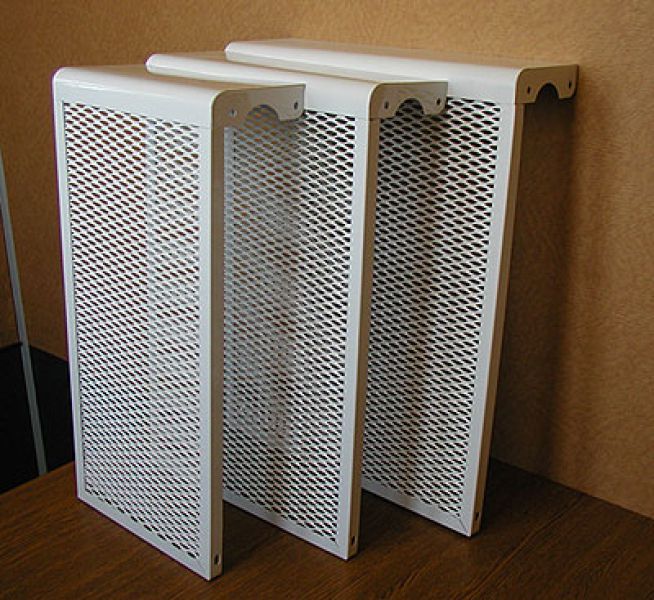
- Hinged, without side panels... Installed directly on the top plane of the battery;
- Hinged, with top cover... They can cover the design of the heating element not only from the front, but also from above. Relevant if the battery protrudes slightly from the plane of the wall;
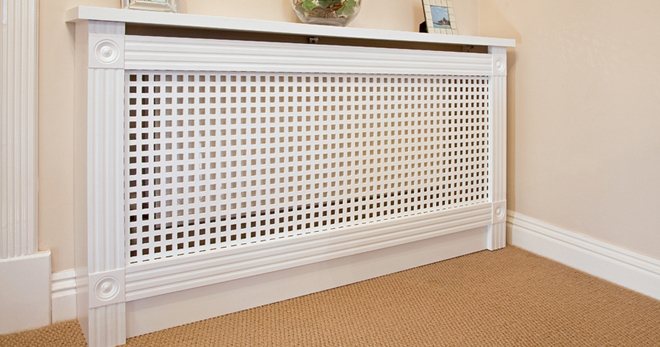
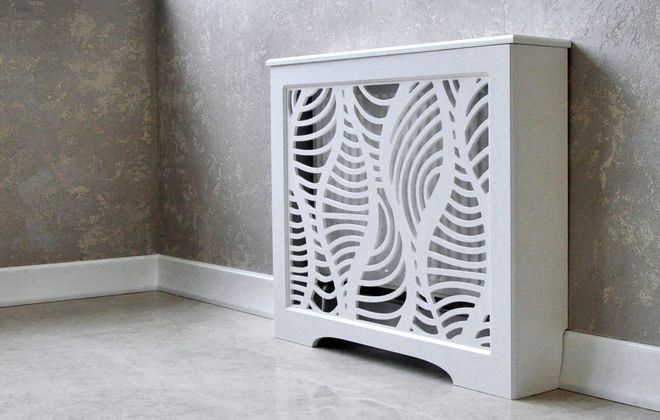
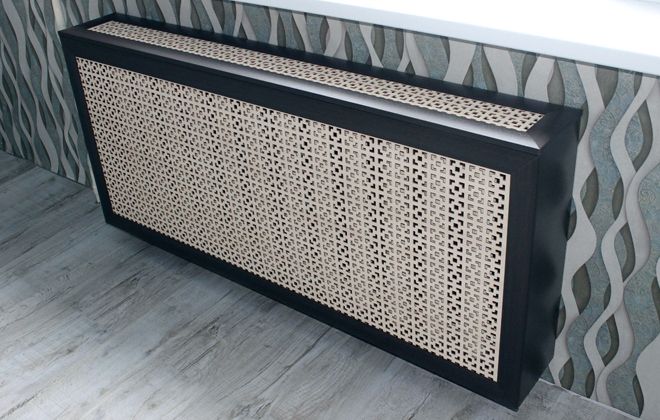
- Boxes... The installation of these decorative grilles on heating radiators completely hides the structure.
In addition to the aesthetic component, complete closing of the radiators is recommended in the children's room. It is mandatory to install metal grilles on heating radiators in public buildings - children's hospitals, schools, gyms.
The upper part of the decorative lattice should protrude beyond the edge of the window sill by at least 2/3 of its depth. This is necessary for normal air convection.
What are radiator grilles for?
The main function of the products is decoration. Decorative grilles for heating radiators give the space with the heat exchanger an aesthetic look. Another purpose of the structure is to heat the room, therefore, for the production of products, those materials are used that conduct heat well. It is worth remembering that the grilles can trap 5 to 25% of the heat coming from the batteries. This is both good and bad. For example, if the room is hot, the grates will help normalize the indoor climate.
In addition to even distribution of heat and aesthetic functions, the grille has another purpose - a protective one. It prevents contamination of the radiator. The batteries are difficult to wash (especially cast iron), and the grate is easy to care for. The protective structure will be relevant in those homes where there are small children. There are no sharp corners in it, so babies will not be injured if they come into contact with it. In addition, the products save children from thermal burns.
Types of radiator grilles
Buyers are offered an extensive selection of systems that differ in parameters, appearance, design, materials and other parameters. Before deciding on the choice of the best option, it is necessary to determine what tasks the equipment performs, what features the room has and, finally, what the buyer wants.
Radiator screens are divided into three types:
- Suspended structures
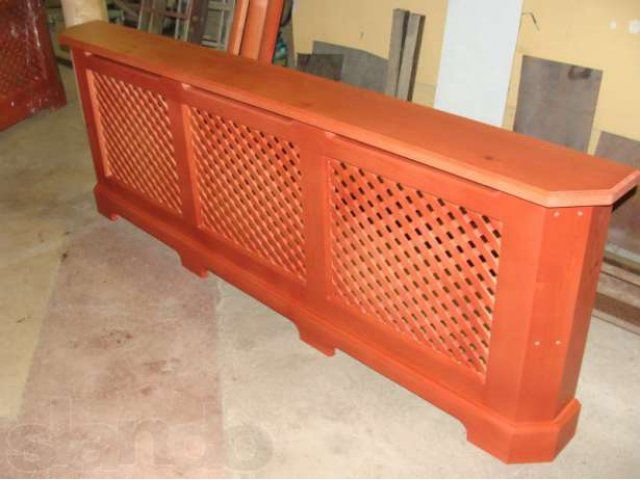
... They are used to disguise unpresentable cast iron batteries. Such decorative structures can have from one to several sections, sometimes with a lid on top. The screen for the radiator is attached either by hooks, or simply superimposed on the ribs of the cast-iron battery. - Flat structures
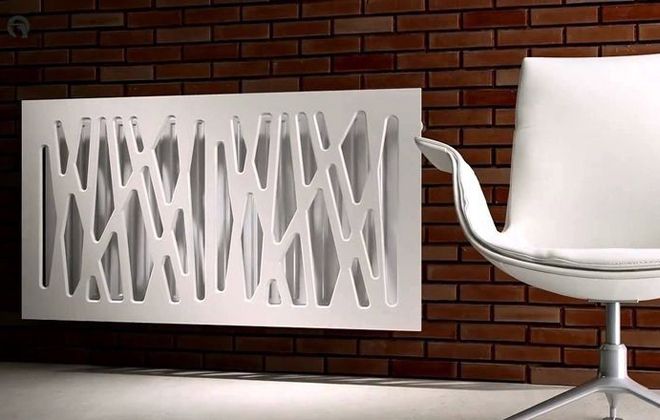
... They will find their use if the battery is in a niche. Such radiator grilles are also called front grilles. Outwardly, they look like rectangular frames with a decorative lattice inside. When choosing a screen with a flat design, it must be borne in mind that they are overlapped. Flat designs are a suitable option for making radiator window sill grilles. - Protective mesh on the radiator grill
... This option is used in cases when it is necessary to mask the heating batteries that are located along the walls. Such screens serve as an additional source of decor. The main disadvantage of the protective box is the fact that, due to the design features, 40-50% less heat gets into the room.
DIY decorative wooden lattice
In order to make the proposed options, you do not need to have super skills in working with wood. It is enough to be able to use a hacksaw, a hammer with nails and / or a stapler. Planks or bars will be needed. Their length depends on the size of the screen and its type. Width from 5-6 cm, thickness at least 1 cm. You may also need fine sandpaper, as well as wood stain or paint on wood, varnish, etc. This is for the frame.
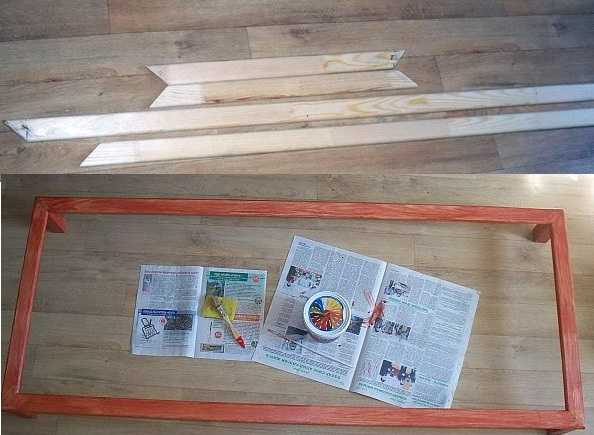
When making a wooden lattice, the first step is to make a frame.
And what to attach to the frame is your business. Here are just a few ideas:
- buy ready-made rattan mesh;
- make a braid from edging tape, which is sold in furniture stores;
- attach the sanded strips to the frame.
The technology may differ depending on what type of grille you need. First, let's look at how to make a grill frame for a heating radiator. It is installed when the battery is in a niche.
The first step is to think over the fastening method. The size of your frame depends on it. If it is possible to fill the strips in the niche (at least on the sides), it will be possible to fix the frame with two-piece furniture magnets. Attach one part to the slats, the other to the lattice. Then the dimensions of your product should be slightly smaller than the dimensions of the niche.
If you cannot nail the planks inside, you will need to do it outside. In this case, the dimensions should be such that, when finished, all "technical" parts are closed.
Having decided on the dimensions, you can cut the strips. Here again, make no mistake: the length depends on how you connect them: at an angle (like frames in pictures) or end-to-end.
Here's a do-it-yourself rattan lattice
Next, you assemble the frame. Any way. The main thing is that you know how to do it.The easiest option is to put a piece of a strip under the junction, and nail the parts of the frame to it, assemble it on flat corners. For more "advanced" ones, you can use a thorn-groove connection, glue, etc.
The finished frame needs to be sanded a little, especially at the joints. Then you can paint, varnish. In general, bring to the desired state. Then you can fix the rattan braid, as in this option. It is better and easier to use staples for this.
There are some tricks to working with rattan. First, before pulling it onto the frame, you need to moisten it (about two hours in cold water). When dry, rattan will break and you cannot do anything. Secondly, when securing, tuck the edges, and try to get the staples into the interweaving places. Then the canvas will be stretched evenly, and will not "crawl".
A more complex option for self-production
The second variant of the radiator grill is on an attachment box. Its frame is made either from wood or from chipboard. The front panel is manufactured according to the same principle as the one described above. Actually, everything is clear on the diagram: both the assembly order and the main stages of manufacturing. What you need is to decide on the size yourself.
If this option of a home-made radiator grill does not suit you in style, you can fill the strips vertically or horizontally. This is how it might look. The principle is the same: assemble the frame, fix the strips on it. An idea for how to decorate the joints can be taken from this video. Here, by the way, another version of the wooden grille for the radiator is demonstrated, only the level of skill is decent.
If you are not satisfied that the heater itself is visible through the slats, you can make the option of mounting at an angle (like on blinds). In this case, inclined grooves are made in the side slats, ground and painted horizontal planks are inserted into them.
In general, there are a lot of options for how to make a decorative grill for a heating radiator with your own hands. Only a small part of them is presented.
What are radiator grilles made of?
The list of materials that are used for the manufacture of structures is large, it can be plastic, wood, metal, MDF, glass, wood. The choice of radiator grilles is limited by the design solution, colors, functionality and cost of the product.
Plastic radiator grill
This is the cheapest kind. You can pick up plastic radiator grilles for heating different in color and size. The price of such a product is not high, but it can imitate almost all known decorative surfaces. It is better to use plastic screens in non-residential premises, since when heated they can emit substances hazardous to humans.
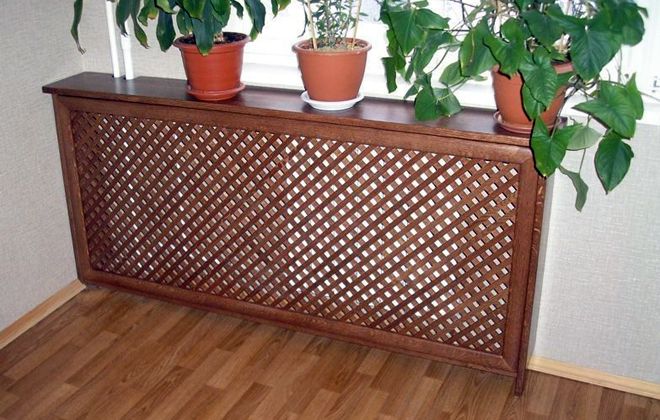
Wood radiator grill
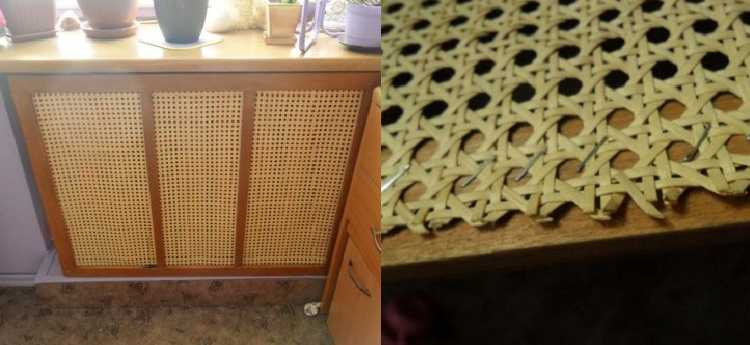
This type is one of the most purchased. The main reason for choosing wood grilles for a radiator is the environmental friendliness of the material. A wooden battery screen cannot be cheap. Special impregnations and treatments against dampness and drying out, difficulties in manufacturing - all this increases the cost of products. The thermal conductivity of wooden battens is low, so it is better to install them in houses where the microclimate is very warm.
In small rooms, such lattices often perform not only a decorative function, but also take on the role of missing furniture. For example, a table under the window. The lathing made of an expensive type of wood (oak, ash) can be made in the form of rattan or wicker and represent a real work of art.
Radiator grill made of MDF
Products made from this material are durable. They are not susceptible to swelling or drying out. A screen for a radiator made of MDF is more environmentally friendly than plastic, but of lower quality than wooden screens.In appearance, such structures are not much different from natural wood, but when heated, they can emit fumes of glue used to press sawdust.
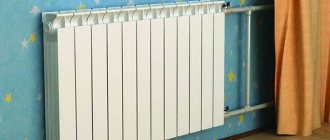
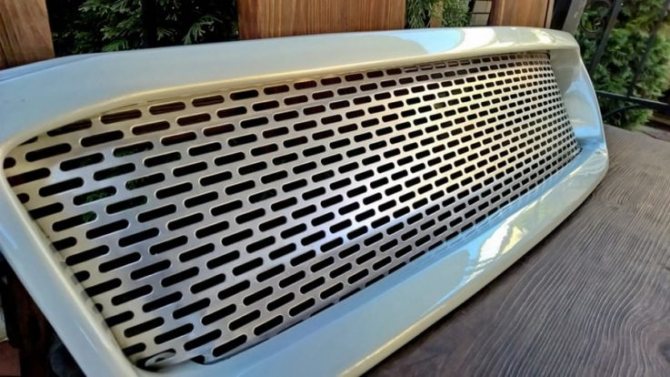
Metal radiator grill
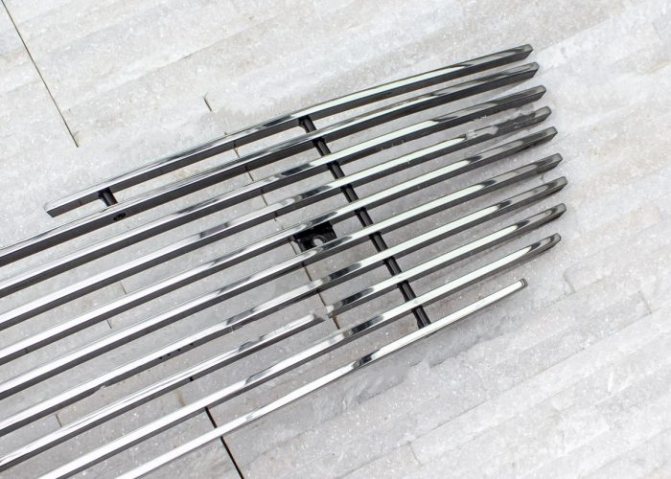
The most practical are structures made of metal. The facade of such a grill is perforated for better air circulation. The main advantage of such gratings is their high thermal conductivity. This means that such a grill will give maximum heat to the room. In terms of thermal conductivity, metal panels rank first among other types.
The inner surface of the metal grilles is specially painted black to further increase the level of heat radiation. The advantage of such a screen is that it does not emit harmful substances when heated, like a lattice made of MDF, and does not deform like a wooden screen. Forged metal grilles for heating radiators are now widespread.
Glass radiator grill
Recently, tempered glass products have become more widespread. So far, these are the most expensive heating grilles on the modern market. These screens are custom-made and come in a variety of decorative styles. Modern technologies make it possible to apply all kinds of images, engravings, and so on on the surface of such screens.
Choosing the material for making the lattice
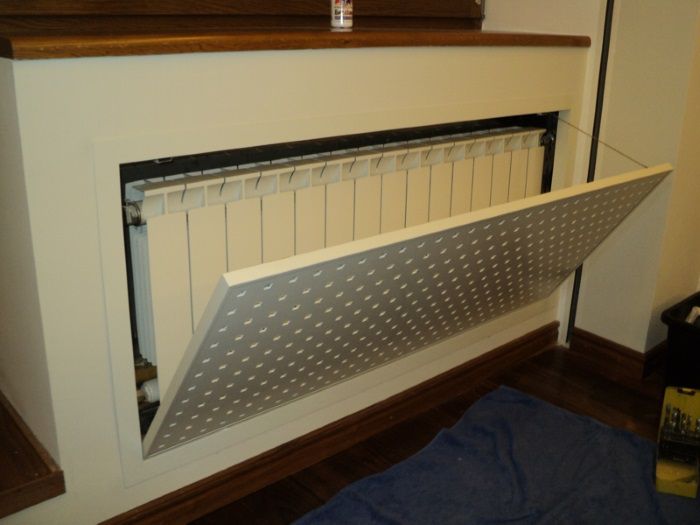
Panel with opening mechanism
Making decorative grilles for heating radiators with your own hands should start with the choice of material. It must withstand high temperatures without emitting harmful vapors. An important point is to maintain the shape and original appearance.
Can plastic radiator grilles be used or steel and wood models are the only alternatives? To resolve this issue, you should find out the properties of each type of material of manufacture and their operational characteristics.
Steel radiator grilles
Steel radiator grill
This is the most common type of panels, since production is possible in various ways. Most often, they make a steel grille for a heating radiator with their own hands of a frame type. For this, you can use "black" metal or galvanized. Stainless steel structures are mostly factory made.
In addition to the size of the grilles for heating radiators, you need to pay attention to the way the body is painted. The best option is powder technology (baking). Such a protective and decorative layer does not change its shade during high-temperature operation of the system. In addition, the selected panel must have the following properties:
- Ventilation holes on the front and side parts;
- The optimum steel thickness is 0.8-1 mm;
- After installation, it will provide free access to all elements of the radiator piping - Mayevsky tap, thermostat, shut-off valves.
To make such a grid for a heating battery with your own hands, you need a welding machine. It is best to use an inverter as it can handle thin-walled metal.
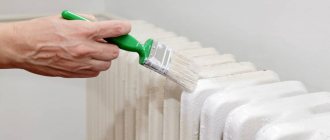
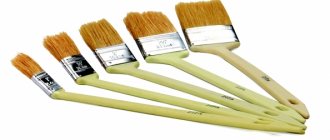
For self-painting, you need to use only special heat-resistant enamel or paint.
Wooden radiator grilles
Wooden radiator grill
The most aesthetic appearance of the room is given by wooden grilles for radiators. To make them, you need to take special varieties of trees that do not emit resin under the influence of temperature.
It is not recommended to make a panel from MDF or chipboard. In the production process of these materials, adhesives are used. Even if they are neutral to high thermal effects, the probability of surface deformation is high. This is due to the natural thermal expansion and contraction of the adhesive layer. Subsequently, this can lead to delamination of the panel.
The best option is to use hardwood trees. You must first dry the workpiece to reduce moisture. This figure should not exceed 12-15%. Then you should do the following:
- Antibacterial treatment. Protection against the appearance of mold and microorganisms in wood fibers;
- Manufacturing of structural elements and assembly;
- Coating with a paint and varnish layer.
All these steps for assembling decorative panels for heating radiators must be performed in a room with a temperature of 18 to 25 ° C and normal humidity. There must also be flow ventilation.
It is not recommended to purchase hand-made wooden grilles for heating batteries. Failure to comply with the technology can lead to premature loss of the appearance of the panel.
Plastic radiator grilles
Plastic grille for heating radiator
For the manufacture of plastic grilles for heating radiators, PVC-based compounds are most often used. With the correct technology for manufacturing plastics, the product can withstand temperatures up to 95 ° C without losing its appearance.
It is impossible to make such models of decorative grilles for heating batteries yourself. An alternative is the purchase of factory panels. The main selection parameters are as follows:
- The plastic must be colored in bulk. Lamination on the surface is unacceptable;
- Plastic should not be flammable. Under the influence of an open flame, it melts, not supporting the combustion process. Similar compositions are used for the manufacture of PVC window profiles;
- Unlike metal grates on radiators, plastic models do not have good mechanical strength. This must be taken into account when choosing panels for a nursery or a gym.
The advantage of plastic panels lies in their low cost and variety of shapes. But at the same time, they lose their original appearance the fastest, in comparison with metal or wooden grilles for heating radiators.
Harmful substances from PVC are released only during smoldering or burning (temperature about 220 ° C). If, during the operation of the plastic grill, an unpleasant odor appears, it is possible that the film burns out or the wrong material of manufacture was initially chosen.
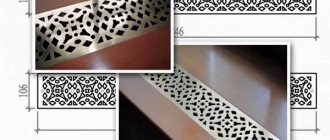
Radiator grille dimensions
In order to understand which panel to choose in size, it is worth considering the length and width of the battery. Pay attention to where it is located: under the window, in the wall opening, and so on. Very often, radiators are hidden in a special niche under the windowsill. In this case, the radiator grille must match the dimensions of the box recess. Experts advise you to select the appropriate product dimensions as follows:
- so that the grille is 16-20 mm longer than the radiator;
- so that the distance between the screen and the panel surface is no more than 20-25 cm.
Only if all conditions are met can effective convection air flows in the room be created. An important condition that is taken into account when choosing a grille of a suitable size is that it should have minimal contact with the radiator. In this case, heat loss is reduced, and the panel itself heats up less. In stores, you can buy products in standard sizes (they depend on what material the product is from). If they do not fit the heating system, then you need to make an order for the creation of gratings according to individual dimensions.
Cons of decorative radiator grilles
• When using plastic, surface deformation from mechanical or thermal effects is possible. In addition, ultraviolet light affects the color of the grating. The material itself cannot be called ecological. When heated, plastic, especially of poor quality, can release toxic substances.And the static qualities are at a low level.
• Metal structures are dangerous only with sharp elements, therefore such constructive solutions should be avoided. Another drawback of metal is the laboriousness of fitting for a specific radiator.
• Regardless of the material, the design may be ineffective if the ventilation holes are not properly designed. If they are too small or a blank surface predominates, heat will not be able to fully penetrate through the grate. It is recommended to take this nuance into account when buying or making a structure yourself.
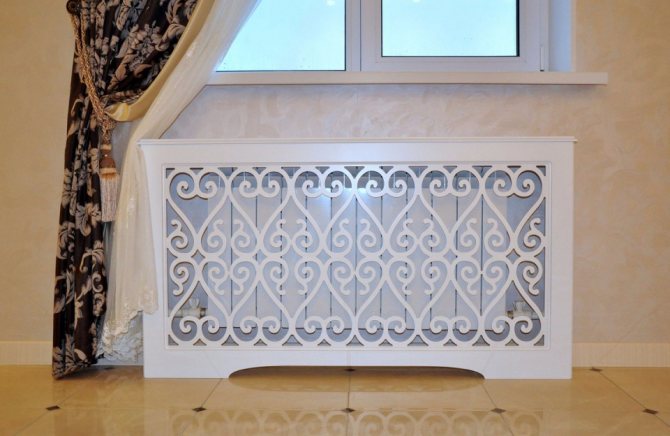
Radiator grille design
Manufacturers offer a wide range of decorative battery panels. They differ in design and cost. Let's take a closer look at what decorative designs are used to decorate a room:
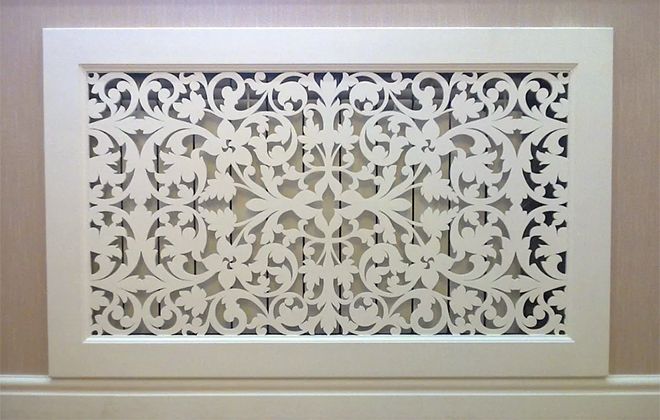
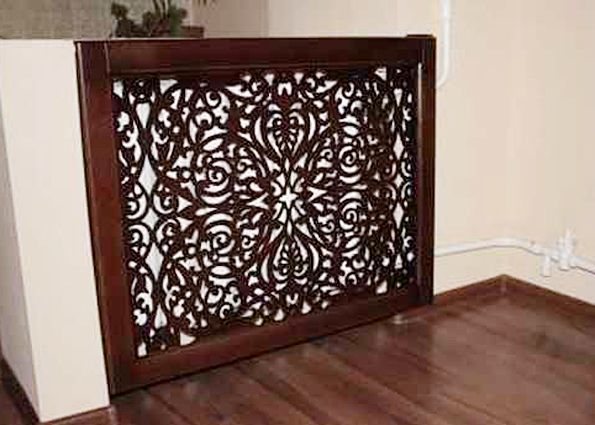
- Screen for battery hinged type made of wood
... They fit perfectly into the interior of the kitchen, create an atmosphere of warmth and comfort. The materials used to create these panels are beech, cherry and ash. You can also use a cheaper option - gratings and MDF. A significant disadvantage of such systems is their high cost. - Metallic decorative mesh
... They are made from steel and aluminum. Popular patterns on the mesh are rhombus, carved ornaments, or notches. However, they are not resistant to corrosion processes. - Tempered or stained glass products
... Decorative patterns are applied to the surface of the grill and it becomes an unusual protective element for the battery.

Diy radiator grill
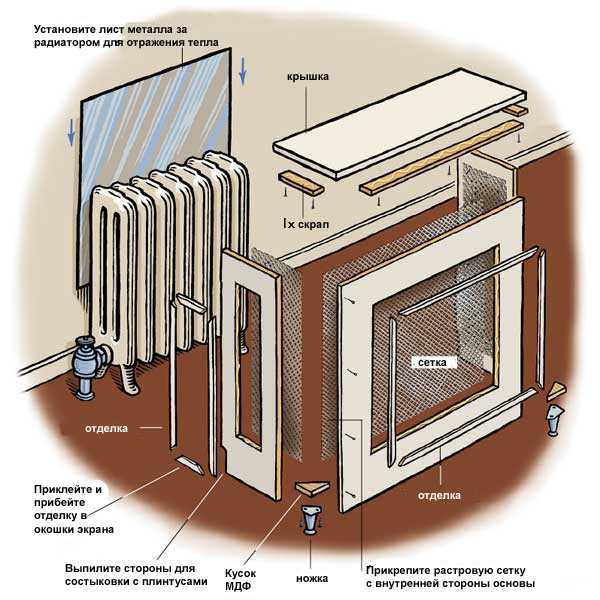
Anyone who knows about the principle of operation of a radiator and the laws of thermal physics can independently make a design that reduces or increases heat transfer from the heating system. Metal is best suited for such purposes. Consider how a decorative radiator grill is made in stages:
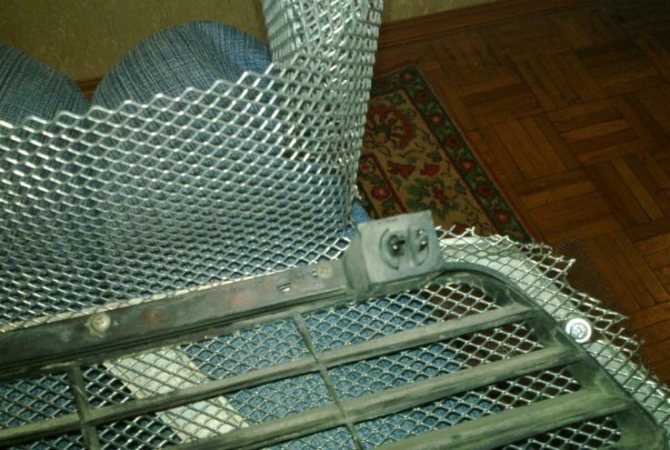
- Take a metal mesh and a sheet of fiberboard. Materials are suitable for making a box with a lid on top and legs on the bottom. Chipboard sheets will be used to create the sides of the product.
- The workpieces are sawn so that they fit the battery. For good air exchange, add 3-8 cm to the length and width of the radiator.
- The sheet metal mesh is cut according to the calculated parameters.
- The facade and the panel are fastened together with a construction stapler or small nails. It is desirable that all connecting elements are on the inside of the frame.
- Collect the box using corners and screws. If you need to increase the heat transfer from the radiator, then a metal sheet is installed behind it.
Do it yourself
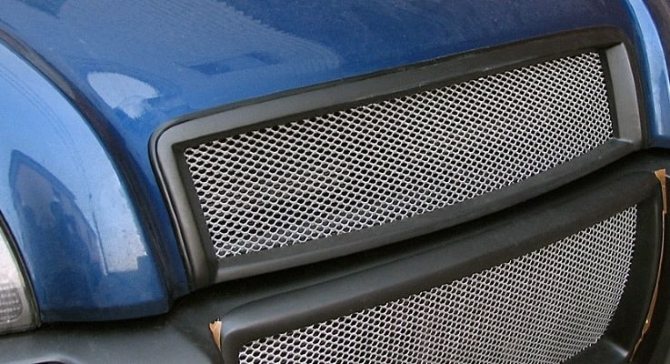
Although you know the catalog number of the grille that would fit your car, I suggest talking about tuning with your own hands. Still, it is much easier to put the finished element and wipe the badge with polish than to cut, glue and saw yourself.
Let's look at the process step by step. The front of the car will delight the eye, and the knowledge that you have done everything with your own hands will lift your spirits even more.
- In order for the new mesh to fall into place, it must be released. To do this, remove the factory radiator grill. Usually it rests on plastic clips, so there should be no problems with how to remove the element;
- Be careful not to pull any wires or hoses behind the grille. Cars are different, so anything is possible. Try not to damage the old frame. It is on this that your new grille will be mounted;
- After removal, the inner part is cut out with a hacksaw for metal. The task is to remove all unnecessary so that the new element fits perfectly there. It depends on what size the new part will be;
- Be sure to clean everything, sand it thoroughly. It is better to fill all unnecessary holes with fiberglass or automotive putty;
- You can use an old frame or buy a new one. In the second case, everything is clear.If you rework an old part, you can paint it or wrap it in vinyl. By painting, you will be able to chrome the part, that is, give it the look of real chrome. Or carbon fiber. As you wish;
- The new mesh is cut based on the dimensions of the wireframe. It is fixed with clamps and self-tapping screws for reliability. The modified radiator grille is put in its rightful place.
Do not forget that the radiator grill has not only a decorative, but also a protective and functional task. It does not allow large debris to pass to the radiator, plus it provides air for cooling the motor. Therefore, in no case make the new grate solid or too fine-meshed. Air must be supplied to the motor with good flows, otherwise there will be problems with overheating.
Radiator grille assembly
Getting the job done is easy. The radiator grill is assembled in several stages:
- Mark horizontal lines so that the box is level. This is done using a conventional or laser level.
- Use a pencil or pen to mark the places where the holes for the screws or plastic dowels will be located.
- Make holes in the wall and remove dust residues from them.
- Insert plastic dowels into the finished holes until they stop inward.
- Cover the edges of the hole with glue or resin composition.
- They begin to install the screen itself. Its hinges are aligned with the previously made holes and screws are inserted. So the whole structure is firmly fixed.

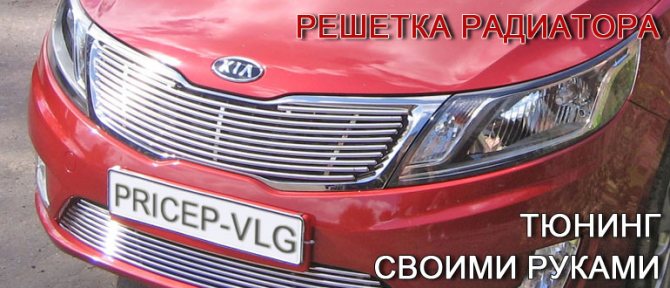
avtocosmetic24.ru
Tweet
Greetings dear fan of car tuning :) If you are reading this article, then you want
make tuning of the radiator grille for your iron horse. At first glance, it seems that making such a lattice is quite simple, cut out the excess, inserted the grid and you're done! But it was not there! The shape of some standard radiator grilles does not allow us to make what we want out of them, and not everyone wants to "spoil" a standard part, so we will do do-it-yourself radiator grill made of fiberglass, without prejudice to the standard. By the way, you can then sell it and recoup your costs for the purchase of materials.
Well, now let's get down to business!
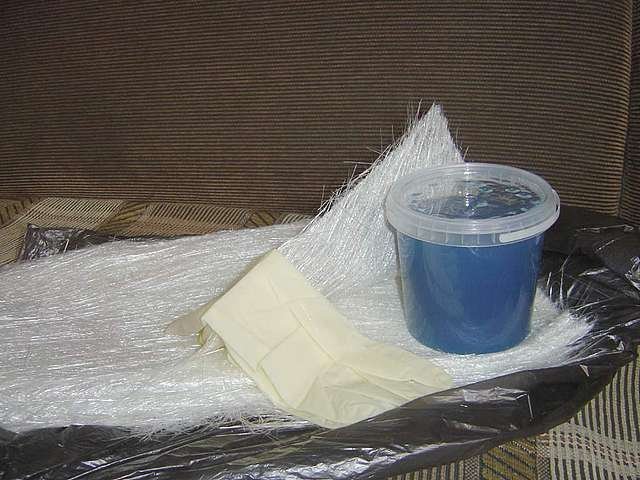
For the manufacture of a radiator grill, we need a certain list of materials:
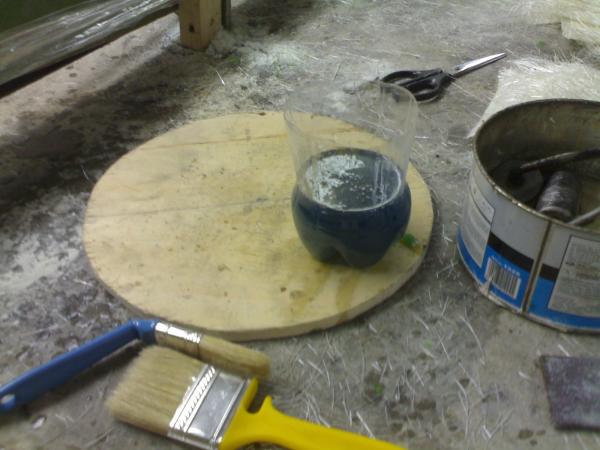
* Polyester resin in a quantity of 200-300 grams + hardener. But most often it is sold in containers of at least 1000 grams.
* Glass mat with a density of 300-450 g / m2, in a quantity of 500 g. or 1 running meter.
* Thick cardboard
* Masking tape
* Universal putty
* Sandpaper with grit from P 40 to P 320 (Convenient)
* Grout Bars
* Acrylic primer
* Thinner and Degreaser
* Well, various little things (screwdrivers, keys, bolts, spatula, etc.)
Manufacturing of the Matrix.
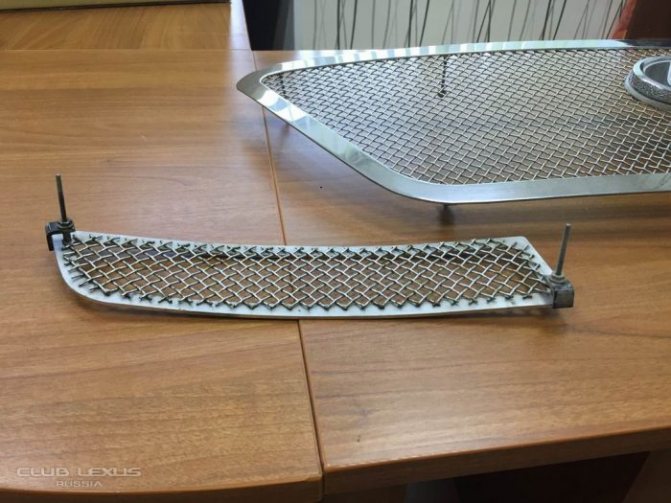
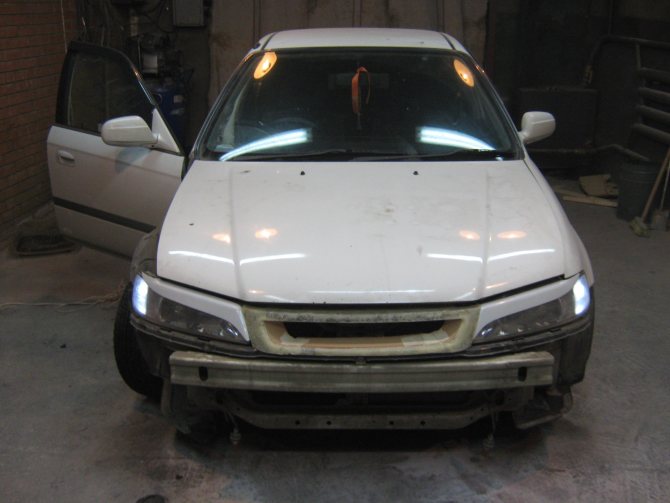
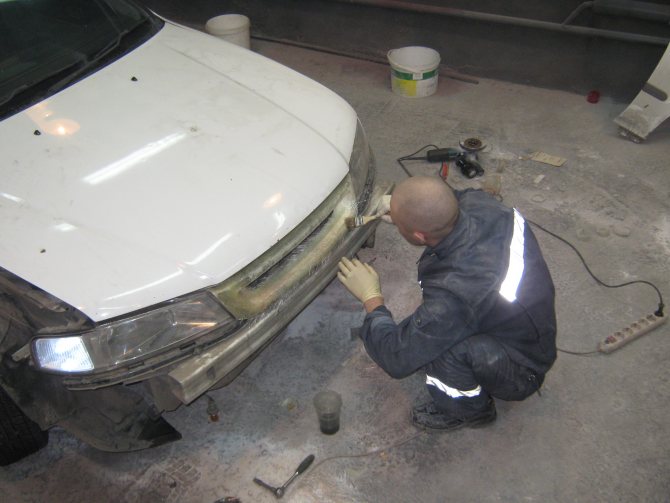
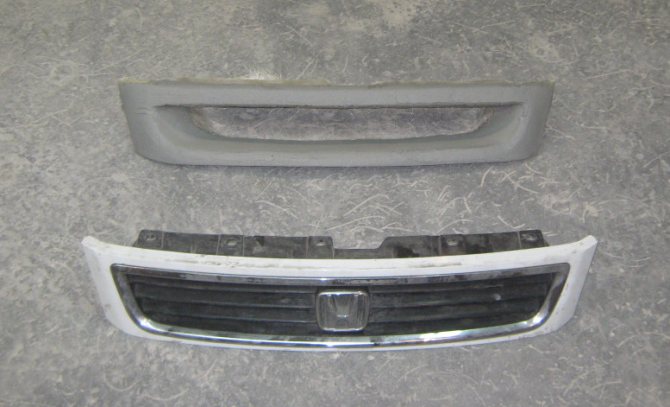
To make a brand new fiberglass radiator grill, we need to make a matrix or frame of the future product. As a frame, we will use the stock radiator grill. But this is not necessarily always the case. Depending on your imagination and the design features of the car, the initial frame can be, for example, a car bumper, optics, and the addition of various materials (cardboard, foam, plasticine, wood) to this composition.
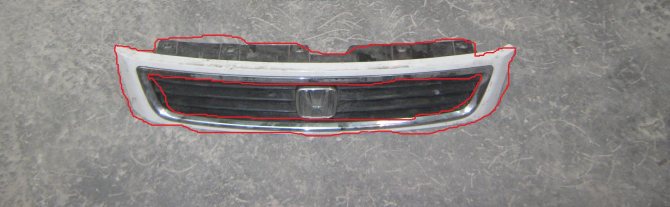
As I said, I took the old radiator grill as a basis. That's actually it.
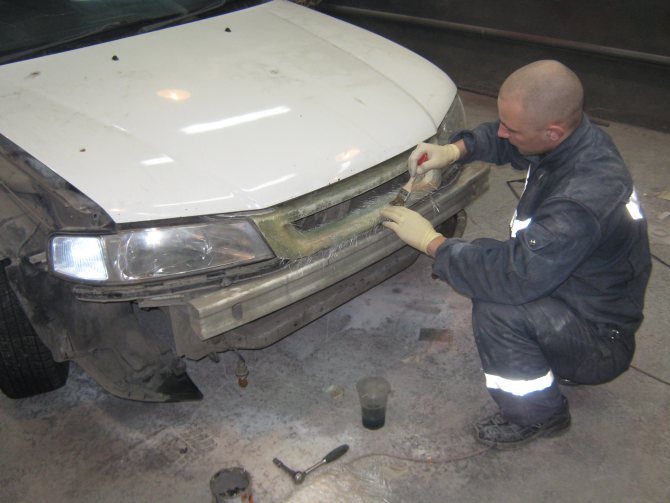
After removing the grill from the car, we need to make a matrix for the future product. In the picture below, with a pencil, I outlined those parts that need to be pasted over. Attention!!! Before working with composite materials, be sure to cover the part well with tape. To do this, it is better to use two types of adhesive tape, masking tape and regular transparent. For what??? In the process of polymerization of materials, a chemical reaction occurs, which is accompanied by heating of the materials. Once I have already encountered such a phenomenon in the manufacture of eyelashes for headlights.The work resulted in damaged headlights. Therefore, learning from these mistakes, I experimented and came to the conclusion that if you first stick transparent adhesive tape, and then paint on top of it, then nothing will happen to the surface of the plastic or paintwork.
Fiberglass production.
The base from which we will make a new part is ready. Now we need to glue the fiberglass. To do this, we take a polyester resin and dilute it with a hardener in the required quantity, observing the proportions. Let me remind you that dilution proportions of polyester resin are 2: 100, i.e. per 100 gr. polyester resin, you need only 2 gr. catalyst (hardener). It is necessary to strictly adhere to these proportions, otherwise you can ruin everything !!!
Glass mat it is necessary to apply in 2-3 layers, if you use the 300th, 450th is enough to put in 2 layers.
Now we are waiting for the product to dry. This time will average 2-3 hours at a temperature of 18-25 degrees.
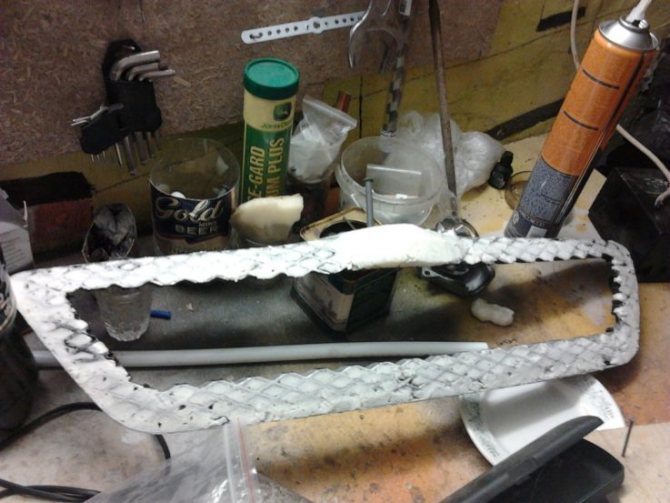
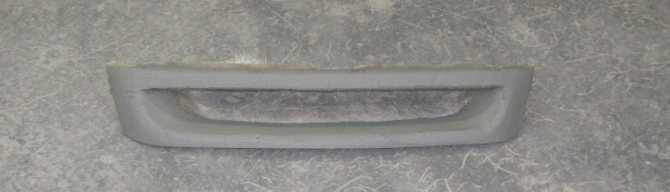
When the part is ready for further processing, it must be separated from the radiator grill. We should have a "frame" that needs to be finalized! With the help of a grinder, we cut off the excess fiberglass and install the part in place. Already in place, we will refine the matrix. As I said above, you can use anything you like to form a matrix. But in my case, cardboard was perfect for this, since the shape of the lattice is quite simple and I just need to add a small side in a circle. See the photo.
The cardboard must be glued from the back, and glass mat must be applied from the front. One layer of 300 glass mat will suffice here. Because if you apply several coats, the part may get too thick in some places. But even for rigidity, one layer of 300 glass mat will not be enough. So what can you do? This moment can be eliminated by gluing an additional layer on the reverse side. Of course, from the inside, all this may look clumsy and not aesthetically pleasing, but do we need this aesthetics in those places where no one sees? I think the answer is obvious.
We glue the "shelf".
Close-up))
Well, almost a new one is ready radiator grill for Honda Domani.
By the way, after work, I advise you to soak the brushes in a container with a solvent, so that they can be reused.
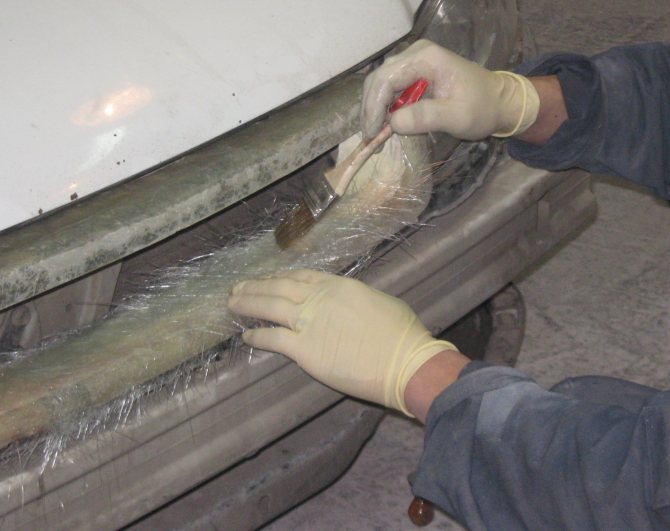
And do not forget to use rubber gloves, as it will be very, very difficult to wash off the resin!
Processing and puttying of the part.
After drying, fiberglass part, you need to align and prepare for painting. But first, you need to trim off any excess and make sure that all the gaps are even and the same. Be sure to install the grille on the car and compare all the slots, corners and roundings. If somewhere, and this sometimes happens, you cut off the wrong thing, then do not worry, with fiberglass it is very easy to solve. Dilute the required amount of resin again and glue the desired piece. In this way, it is very convenient to adjust the gaps. I also want to say that it is very convenient to make rounding and align the boundaries of the part with the help of a flat bar.
The plane of the part itself, it is also necessary to prepare for the application of the putty.
To do this, use coarse sandpaper, grit P 40-60, it copes best with such tasks. After processing fiberglass with coarse abrasives, various small pores and irregularities will remain. We have prepared a universal automotive filler for them.
Before applying it, the surface of the fiberglass part must be cleaned of dust and be sure to degrease.
The putty is also diluted with a hardener, the amount of putty and hardener should be determined "by eye". There are no clear proportions for using the hardener. The most important thing is to stir the materials thoroughly so that there are no clear, red lumps in the filler mass.
The applied first layer of putty should be treated with P80-120 sandpaper, for subsequent layers, it is necessary to use finer abrasives.
After leveling the surface, little remains to be done ... ...
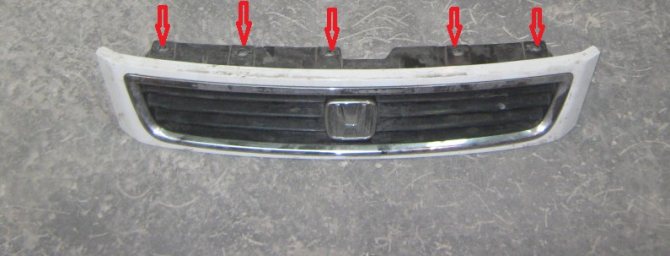
Manufacturing of fasteners.
In this case, there were no difficulties with the mounts. At the top, the grille is fastened with 5 plastic clips, and at the bottom with a couple of latches, which, of course, we could not repeat. Well, it doesn't matter, the grille holds very well without them.
Part priming and painting.
I will not describe in detail this process, since we have a topic making a radiator grill with your own hands, not painting lessons.
When the ground is dry, I advise you to reinstall the radiator grille on the car, so that you can see how it all looks "in color". Thus, you can see any joints that are not visible in the draft.
And in the end what we did.
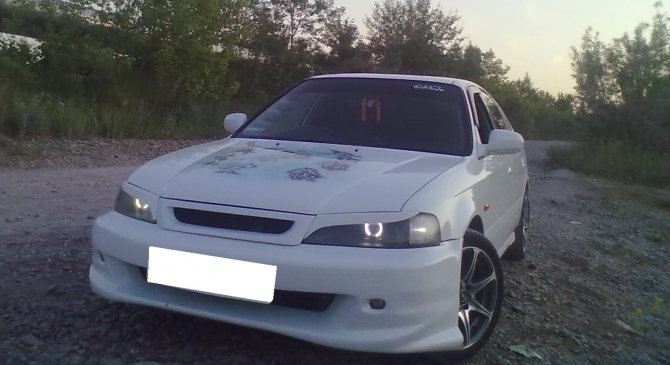
Here, of course, in comparison with the previous photo, a lot has been done besides the radiator grill. By the way, there is now a standard radiator grille, which, if necessary, can be installed back on the car.
Have you read the article about making a radiator grill with your own hands from fiberglass!
Wish you success!
I recommend reading:
Fiberglass. For car tuning and repair.
Car door sill repair. We treat rust with fiberglass.
Fiberglass body repair