Published: 10.11.2012 Heading: Materials and technologies Hits: 780
Installation of a shower cabin is quite within the power of one person. If you have the necessary tools, this can be done within 2 hours.
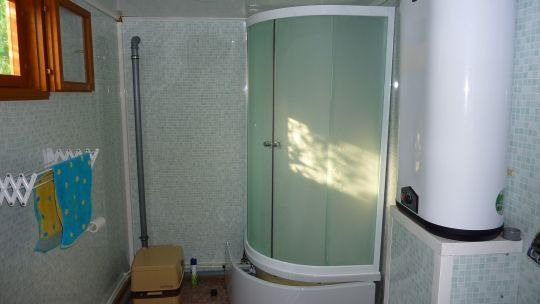
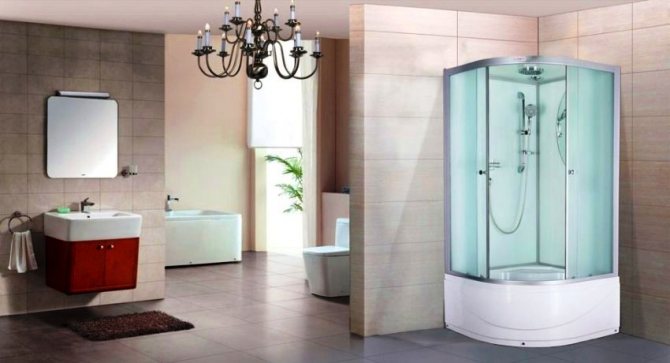
Every time we take a shower, we relax. And it is a shame if something interferes with this process: then the elbow rests against the wall, then the spray will fly in all directions, then the curtain will stick to the wet body. Disappointments can be avoided by installing a new shower stall that is spacious and comfortable.
Millions of years ago, our ancestors came out of the water onto land, but the memory of the water past is still somewhere in the genes. That is why we love to wash, swim, splash so much ... Anywhere - in a river, in a stream, in the ocean. And, of course, in the bath or shower. Washing in the bathtub is a harmless activity: you pour water into it and wash yourself to your health. But the shower is a delicate matter. From him and a lot of splashes. And water running down the wall can form a real lake on the floor. And it's good if only on your floor ...
But if the shower space does not correspond to the dimensions of the owner of the shower, then neither complete washing, nor comfort, nor relaxation is obtained. Therefore, a good shower is not a luxury, but an absolute must. And sooner or later you will have to install it. So why not now?
Planning the installation of a shower stall
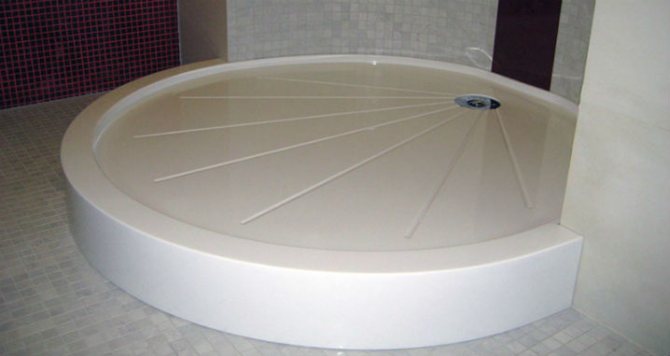
You need to have an accurate idea of where the shower can be placed in the bathroom. Our bathrooms are usually small, so the compactness of the booth is often the main selection criterion. The place of installation will also determine what shape the cabin is best installed in it - rectangular, square or in the form of a semicircular sector. Quarter-circle or pentagonal cabins can rightfully be considered the most compact.
When choosing the type of door, the question immediately arises: "Will there be anything to interfere with its opening?" For example, near the intended place of installation of the shower stall, there may be a central heating radiator or a washbasin tulip, which will drastically limit the possibilities of the door. And then you will have to make a choice in favor of the door in the center of the structure, which opens inward; you can also stop at the door a la coupe, which moves along the guides.
Booth installation
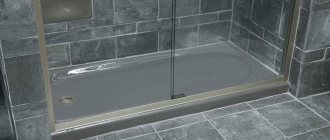
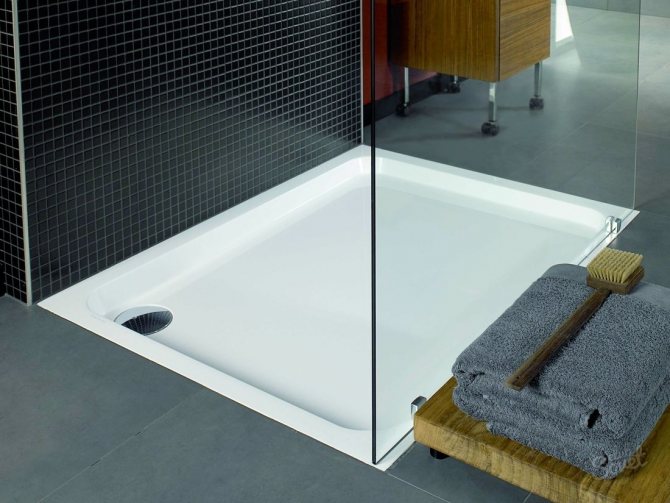
Pallet installation
As a rule, the installation diagram of the shower enclosure is supplied with the product itself. If you are unlucky, and there are no instructions along with the details, or you generally assemble a shower from self-selected elements, it does not matter. The editing process itself is usually intuitive, and below we will look at its main aspects.
You need to start assembling the structure from the bottom up, therefore, at the first stage, we should correctly install the pallet. The final result largely depends on the quality of this task, because the presence of a stable foundation is extremely important.
We work like this:
- Low pallets are quite easy to install. If we tried and brought the sewer pipe to the floor level, then we just have to connect the siphon and put the bowl of the pallet in the chosen place.
Note! Sometimes for sealing and fastening, polyurethane foam or a layer of mortar is used, but this is by no means necessary.
- Medium and deep pallets are more difficult to work with. They are usually equipped with a frame, so we need to assemble the support structure and attach it to the seamy side of the shower base.
- Next, install the pallet with supports on the floor and attach it to the siphon.Usually, a short piece of flexible corrugation is used for this purpose, which allows the lower part of the booth to be moved after connection.
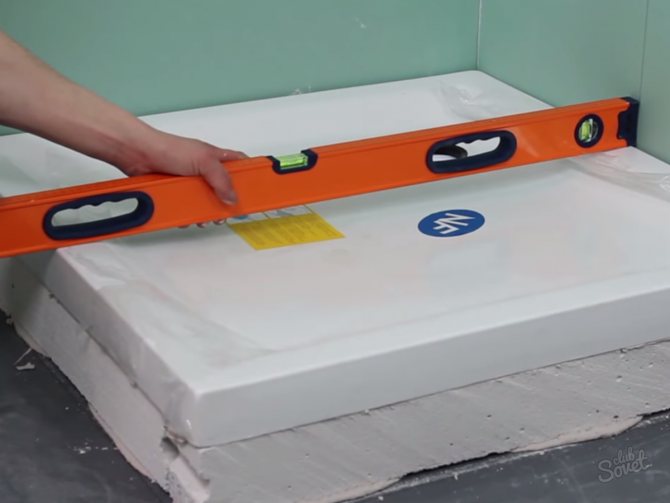
- Then we take a level and check how level the whole structure is. In the presence of the slightest deviations from the plane, use a wrench and adjust the position of the product by rotating the adjusting nuts on the legs.
- After the final alignment, we check the tightness of the siphon connection by pouring a small amount of water into the sump. This should be done at this very moment, since in the process of adjusting the position of the frame, the siphon can "move away" from the mount.
Only in the case when the siphon is fixed perfectly, we proceed to the installation of the side panels that cover the sides of the pallet - the so-called "skirt".
After that, we carefully seal all the cracks with silicone. It is better to assemble the upper part the next day - so the sealant has time to polymerize.
Assembling the top
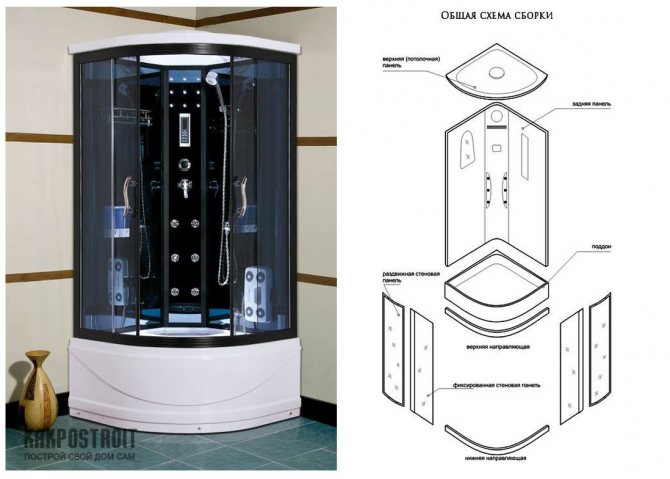
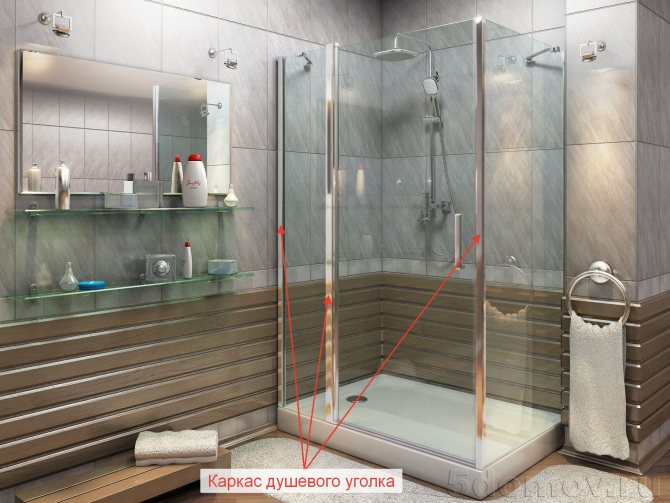
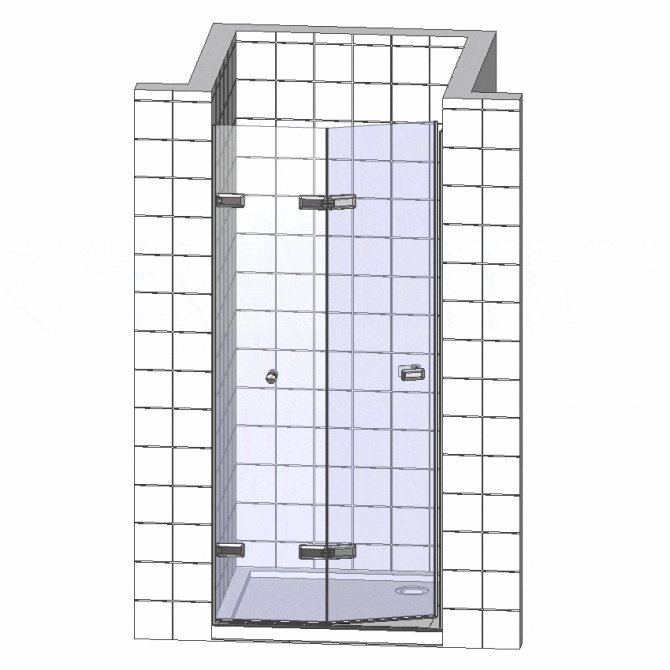
Further installation of shower stalls provides for the installation of a fence, equipment connection and roof fixing.
We perform all these actions in the following sequence:
- We attach vertical posts and guides for fixed parts of the fence to the pallet. If necessary, we install separate guides along which the sliding door leaves will move.
- We assemble frames in which we install either polycarbonate panels or glass. When using reinforced glass or laminated glass, frameless glazing is also possible.
- We put either a sealing polymer profile or a layer of silicone sealant in the grooves of the guides.
- We install the glazing by carefully leveling all the panels.
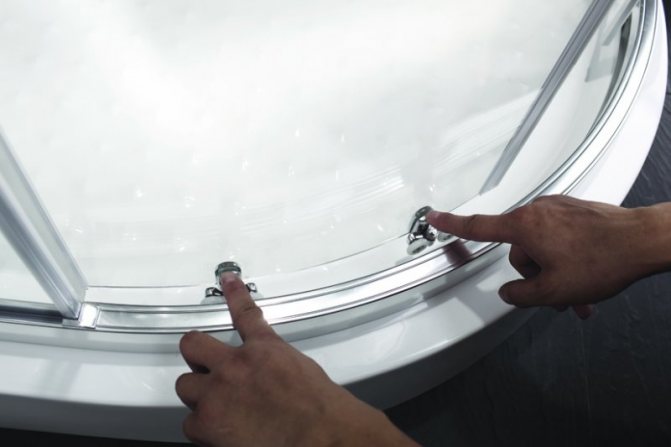
- Separately, we assemble the door sashes: we put on a waterproofing seal on the ends, and we insert handles into special holes, which we tighten with fastening nuts with polymer gaskets.
Note! Many manufacturers complete booth doors with sealing loops with magnetic inserts. Such products are very convenient as they facilitate the tight closing of doors.
- We either hang the leaves on the hinges, or install them on the guides. We check the movement of the doors: they should not "rub" anywhere in contact with other details of the booth. If rubbing is detected, we correct the position of the flaps by turning the adjusting screws on the hinges or special rollers.
- Hoses from the tap and shower are connected to the outlets of the water supply system.
- We assemble the wires into a terminal block and connect them to the mains, not forgetting about high-quality insulation.
After that, we collect the roof:
- We install a shower head, lighting, speaker and other components in the body.
- We connect all communications to wires and internal hoses.
- We put the roof on the racks and fix it with fixing bolts.
After that, we check the performance of all systems. If the functioning of the booth is not satisfactory, we take a silicone sealant and coat all the seams, providing protection against leakage.
Silicone in closed seams dries for about a day, so you can use the booth 24 hours after installation.
Choosing a shower cabin model
When choosing a model of a shower stall, be sure to consult with a specialist: try to outline the layout of the room, mention your taste preferences, touch on the availability of prices for different types of products. An experienced consultant will help you make the right choice.
Since standard built-in cabins are distinguished by an amazing variety of shapes, sizes, functional features, it is not out of place to take an introductory tour of the shower cubicle market.
Square shower cabin
It is convenient to install such a cabin in the corner of the room. As a rule, it is spacious enough, stable and comfortable. Manufacturers produce many models with different types of doors.Some cabins can be equipped with sliding doors. Others are doors that open in both directions, compartment doors or folding doors. The width of the entrance also varies. One door can have a width of 50% of the total length of the wall on which it is located. A door with two movable parts that open in both directions gives a total entrance of 66%. However, despite the functional convenience in the diagonal model, there is also an upsetting moment - in the form of the corner of the booth itself, which noticeably limits the free space of the entire room.
Square shower cabin
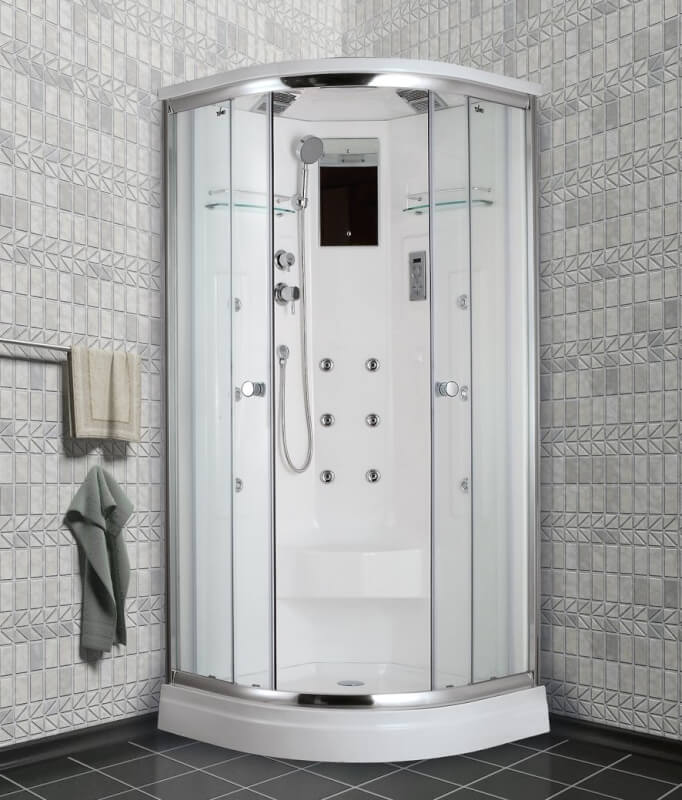
Pentagonal corner shower cabin
As the name implies, this is a pentagonal booth. These cabins are very compact. They are ideal for corner installations. The truncated corner projection successfully compensates for the design flaw of the square model. The advantage of this option is also that the location of the door can be selected at will. It can be traditional, centered. Or consist of two halves that open in both directions - either inward or outward.
Pentagonal corner shower cabin
How to choose the right one?
Today there are a large number of all kinds of low tanks for a shower. And first of all, they differ in the material of manufacture.
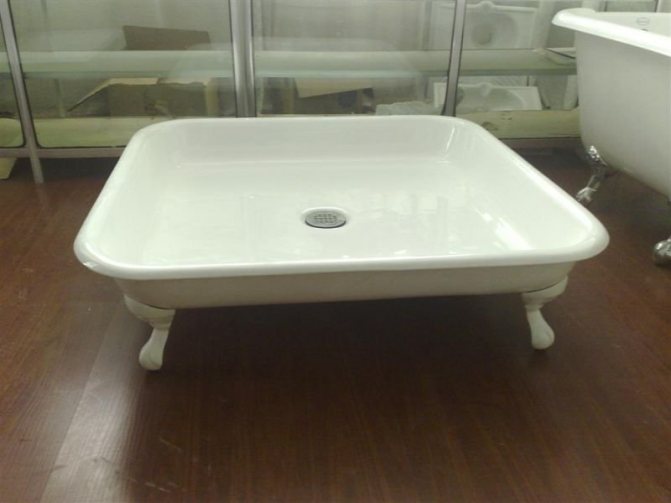
- Cast iron. It is the most common and traditional material for the manufacture of bathtubs and shower trays - durable, reliable and practically "indestructible". Cast iron is completely impossible to deform, so such a pallet can serve for many years. On the other hand, cast iron products weigh significantly more than their acrylic or steel counterparts, which complicates transportation and installation. In addition, such a material has a surface that is cold to the touch, which, moreover, makes too much noise when water hits the enamel.
- Steel. Steel products are lightweight and more affordable. Thanks to modern technology, steel pallets can also boast of the durability of the material, and a special, thickened layer of enamel absorbs any noise. In addition, steel pallets warm up much faster than cast iron pallets.
- Acrylic. This material is now at the peak of popularity, which is very simply due to its affordable price, smooth and pleasant to the touch surface and ease of maintenance. Acrylic pallets have a wide selection of models of all kinds of shapes and variations, so you will have plenty to choose from anyway.
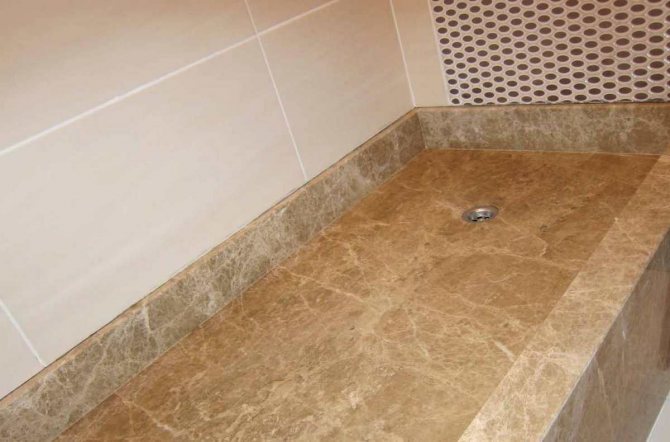
- Ceramics. If you haven’t come across such plumbing options yet, you can be sure that this is an excellent option for the bathroom. Ceramic products are very massive, distinguished by their good quality and high hygiene. In addition, the surface of such pallets has a special relief that prevents slipping and makes the tank even safer. Also, in addition to the traditional white color, you can find ceramic pallets in various shades on sale. The only drawback of this material is the possibility of chipping with a strong mechanical shock.
- Kvaril. This material has recently appeared on the market and is a combination of acrylic and quartz. Thanks to this mixture, quaril pallets are considered one of the most durable and wear-resistant.
- A rock. Due to the rather high price, pallets made of natural stone are rarely chosen, but, of course, no other can compare with the noble texture and pleasant touch of such material. If you want to purchase a stone pallet, but are afraid to undermine your budget - pay attention to artificial stone products. In appearance, such tanks are in no way inferior to natural ones, but at the same time they are much cheaper.

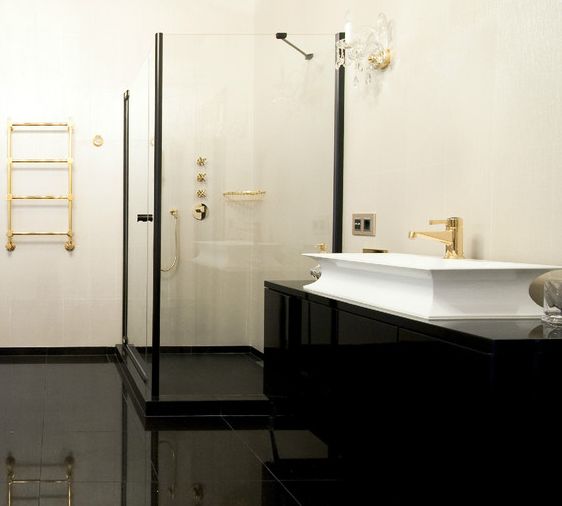
Beautiful shower cabin
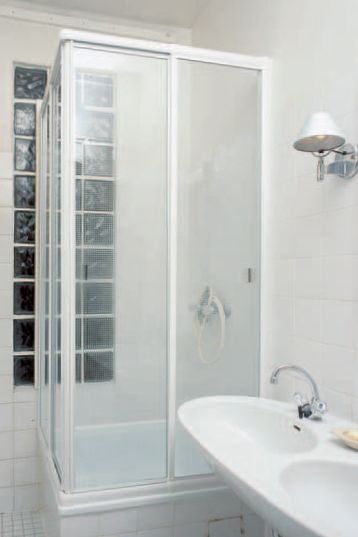
By type of construction, low shower trays are divided into open and closed.The open-type options are shower enclosures that are sold separately and require additional shower walls or doors after installation. The advantage of such a solution will be the ability to independently choose and design a shower stall. Closed shower trays are a full-fledged shower with all the accompanying elements: partitions, sash, roof, mixer, fittings, and in some models, electronic control, ventilation, hydromassage, radio and other pleasant additions. By purchasing such a cabin, you deprive yourself of further hassle of arranging a shower room, because everything you need is already in the kit.
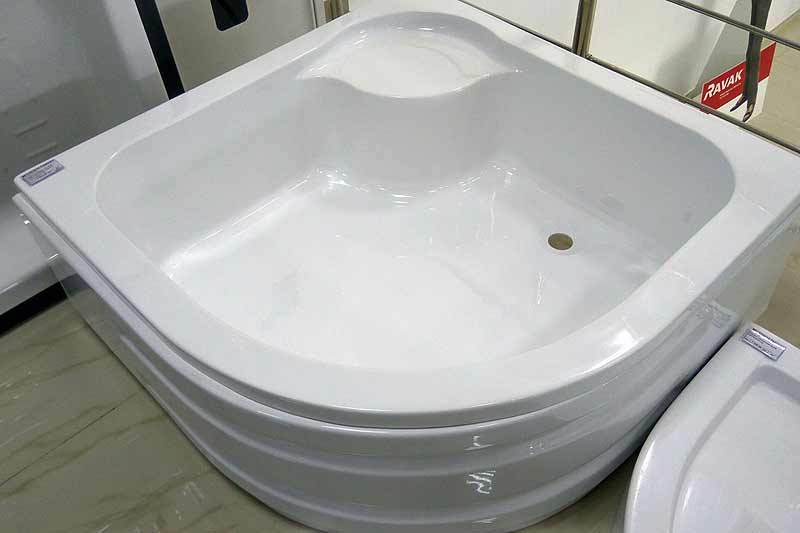
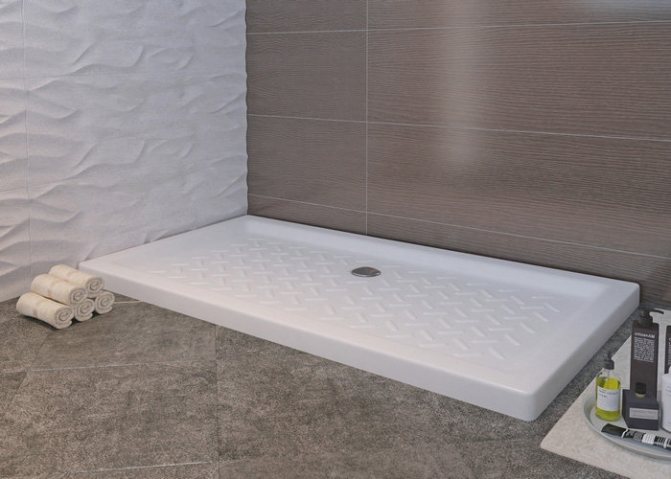
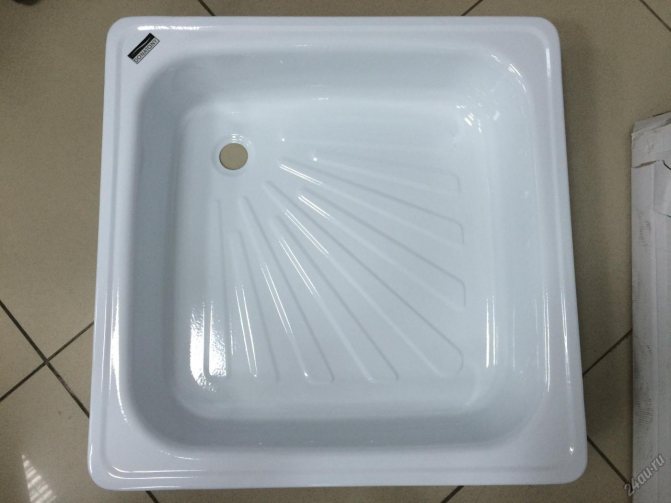
The next logical question arises - what size should the shower stall be? The smallest have parameters of 80x80 centimeters. Showers are medium in size - 90x90 centimeters, and large ones - 100x100. In addition, asymmetric models are produced with parameters from 110 to 120 centimeters. For a bathroom with a standard area, it is better to choose an average 90x90 tray, since this is exactly the model that does not take up much space, and at the same time provides freedom of movement.
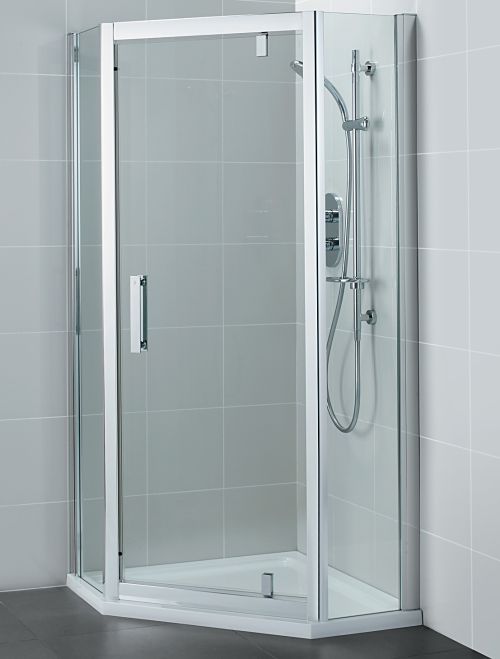
Front-mounted rectangular shower cubicle
Such a cabin can adjoin one bathroom wall or two or three. The impressive length of the booth allows it to be installed between two walls. That is, to mount such a model, it is enough to install only one glass wall - however, quite long. A cabin of this shape can be equipped with any type of door: sliding doors, doors that open in both directions, sliding doors or folding doors. With a rectangular cabin, any type of door will be convenient. This is a significant advantage of this model. The size of the inside of the cab space allows you to install not one, as usual, but two shower dividers - on opposite sides of the rectangle. This will double the capacity of the cabin, which will save time in the morning or evening toilet, say, in a large family.
Front-mounted rectangular shower cubicle
Shower cabin installation
The installation of a shower cabin is quite within the power of one person, and in a fairly short time. If you have the necessary tools, it can be installed within a few hours. All that is required is, in fact, a shower, a drill, drills, a cutter, a level and a screwdriver. The basic principles of installation are simple and, in fact, the same for different types of cabins.
The installation of a shower stall begins with the installation of a shower tray. It is necessary to prepare a site for it. This means that you must check if the joining angle of the walls and the floor is 90 °; whether the edges of the pallet will fit snugly against the walls; whether the socket of the sewer pipe matches the drain in the pallet. After this preparation, you can connect the lower part of the drain to the drain pipe, the slope of which should be 1-3 °. Then, having securely installed the pallet, you need to seal it by filling the gap between the walls and the edge of the pallet with silicone.
| 1. Before purchasing a shower cabin, you need to carefully measure the dimensions of the bathroom and the shower tray. |
| 2. Possible ledges of the wall or tiles must be leveled by placing wooden spacers. |
| 3. Large-sized differences, for example, in a window niche, are compensated by means of wooden beams. |
| 4. The fixing profile is installed 2 cm from the edge of the bath. The old silicone layer must be removed |
If the pallet is already installed, you can start choosing the cabin itself. Before that, you need to carefully measure the dimensions of the pallet and the height of the bathroom walls. Since there is a functional protrusion along the edge of the pallet, it is useful to know its width. This will allow you to choose such a model of a shower cabin, the fastening profile of which will best fit into the width of the horizontal platform of the pallet. The height of the bathroom walls will tell you the height of the cubicle.
| five.The wall should be checked with a detector for any electrical wiring or pipes being drilled. |
| 6. If you stick adhesive tape on the ceramic tile, the drill bit will not slip or scratch it. |
| 7. To avoid splitting, the tiles should be drilled without using the hammer drill. |
| 8. If the joints between the ceramic tiles are wide, you can choose the drilling locations between the rows of tiles. |
Bathroom wall cladding does not always reach the ceiling. When the height of the booth exceeds the height of the lined part, it is necessary to somehow compensate for the difference in the distance to the wall. This is done using spacer strips (plastic or wooden). If the most convenient place for installing a shower cabin is a wall with a niche, then the differences in distances can be compensated for using wooden beams. Naturally, they must be carefully finished with waterproof paint or varnish and securely fixed in the niche. The width of the beams in those places where the fastening profile will lie on them should be several times larger than the width of the profile.
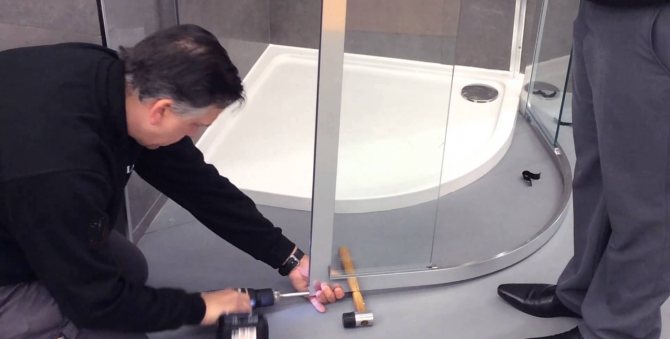
| 9. The frame with movable glass doors is inserted into the fixing profile, but not fixed. | |
| 10. Plastic corners, entering the grooves of the bearing profiles without fastening, leave them temporarily movable. |
| 11. The plastic corners at the bottom must be rigidly connected with screws to the lower bearing profiles. | |
| 12. The frame is leveled with a spirit level so that the gap between the doors is strictly vertical. |
The vertical fastening profile is installed on the wall at a distance of 2 cm from the edge of the pallet. First, it is necessary to remove the silicone layer that connects the wall and the edge of the pallet. This is done first with a cutter, and then with a special solution. The places of the future installation of the profile, or rather the place of its attachment to the wall, must be carefully checked with a detector. If the detector shows the presence of electrical wiring or plumbing services behind the cladding or wall surface, the attachment points must be relocated.
| 13. After the final alignment, the bearing profiles are drilled and rigidly connected with screws. |
| 14. The glass elements are inserted into a U-profile, which is then drilled and screwed together. |
| 15. Fill the small gap between the surface of the pallet and the supporting profiles with a sealant. |
| 16. Before applying the silicone, the lower support profiles are firmly fixed to the pallet with adhesive tape. |
Drilling ceramic tiles requires certain skills. To prevent the drill from slipping to the side over the glaze and scratching the surface at the beginning of drilling, a small piece of adhesive tape is glued onto the tile. If a hammer drill is used for drilling, then you need to start drilling without turning on its impact function. And only after the ceramic component of the wall is finally drilled and the wall has begun, you can turn on the percussion mode of the hammer drill. If the joints between the ceramic tiles are wide enough, you can choose the drilling locations between the rows of tiles. This will save the ceramic from unnecessary trauma.
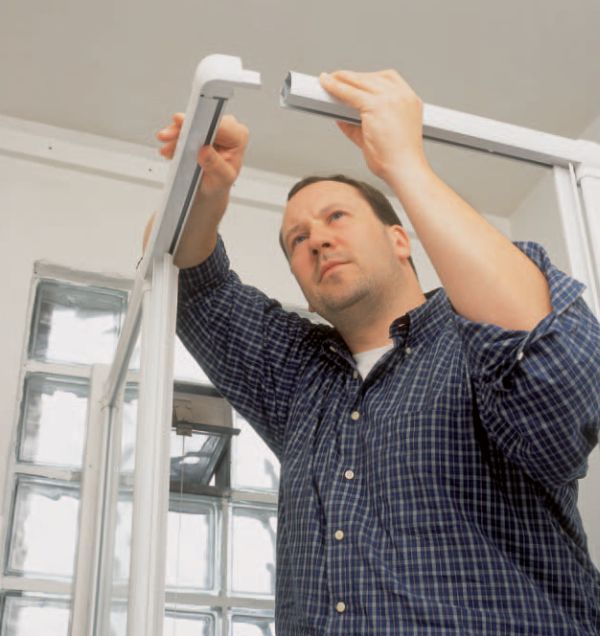
Now you can start installing the cab doors. Actually, this is not really an installation, but only a general fitting. The frame with movable glass doors is inserted into the fastening profile, but is not completely fixed. It still has to be exposed: both the plane of the glass and its edge must be strictly vertical. Then it is necessary to connect the individual parts of the upper profile. This is done in all models in almost the same way: parts of the profile are connected by means of special corner plastic or metal inserts. Since the lower and upper profiles have slide-in guides for installing doors in them, then, by sliding them in or out, you can choose the total length of the entire cabin wall in accordance with the length of the sides of the pallet.
| 17. Apply masking tape to the top and bottom of the joint. This will give the silicone seam a neat look. |
| 18.Silicone should be applied directly from the tube to the joint, trying to distribute it as evenly as possible. |
| 19. After filling all the joints with silicone, remove the excess with an elastic spatula. |
| 20. Finally, the silicone should be smoothed with fingers soaked in the detergent solution. |
The final cab installation starts from the bottom. The corner bottom insert is screwed to the bottom fixing profile, which is laid directly on the functional ledge of the pallet. Naturally, the lengths of the sides of the pallet must match the lengths of the lower fastening profile. The corner insert, being screwed to the profile, will give the necessary rigidity to the bottom of the shower stall.
The frame for glass doors is leveled with a level so that the gap between the doors (when brought together) takes a strictly vertical position. In this case, all vertically located profiles must also be strictly vertical. After that, we can assume that the cab is finally exposed - it can be fixed.
The mounting profile and guide inserts are drilled and then tightened together with screws. After that, both glasses can be inserted into the U-shaped profile, aligned with a level and drilled holes with a diameter of 2.5 mm, and then screwed together. After installing the bottom profile on the edge of the pallet, a small gap will inevitably remain between them. It is filled with a special seal, which is included in the set of elements of the shower stall.
Shower enclosure sealing - this is a separate, moreover, absolutely necessary operation in the process of installing a shower cabin. It is not difficult to properly seal the joints of the shower stall if you adhere to the proven technology. It is based on the connection of edges or surfaces using silicone sealant. If you use a quick-drying sealant, then after 12 hours you can use the shower stall, testing its tightness. Regular (traditional) silicones dry approximately 24 hours.
However, before applying the sealant, the remnants of the old layer must be completely removed so that the new layer of silicone adheres well to the surface of the pallet and the fastening profiles. The bulk of the old silicone can be cut off with a cutter, and what does not lend itself to the cutter can be washed off with a special solution that dissolves it quickly enough. Remains of half-dissolved silicone can be wiped off with a clean cloth.
The frame, consisting of lower profiles, was not attached to the pallet with anything. Therefore, in addition to its insulating function, silicone will also be a means of securing the frame to the pallet. However, the framework must be temporarily secured before applying the silicone. For this, the precisely aligned lower support profiles are fixed to the pallet with adhesive tape. Then, on the outside of the bearing profiles, masking tape must be glued on top and bottom of the joint. This will give the silicone seam a neat look.
Silicone should be applied directly from the tube to the joint, trying to distribute it as evenly as possible. Silicone should "wet" the surface of both the pallet and the profiles well. After filling all the seams with an elastic small trowel available from hardware stores, the silicone must be gently smoothed out. Excess sealant is removed with the same spatula. And the final "finishing" of the silicone seam will be smoothing it with fingers soaked in a solution of detergent.
After the silicone has completely hardened, the masking tape is carefully removed. The edge of the silicone after it should remain flat, like a ruler. The adhesive tape is also removed. It's time to start testing the shower.
These articles may also be of interest to you:
- Not enough space for a shower stall and a whirlpool tub?
- How to choose a shower cabin. Dimensions, construction and materials
- Bathroom layout and rules for placing plumbing fixtures
- Selection and installation of switches
Assembling the shower tray
The assembly of the shower stall starts from the pallet.
Look for a packed shower tray among the large number of boxes with signatures pasted on them. Unpack the cardboard container and inspect its contents. In addition to the presence of the pallet itself, there must be a number of other structural elements inside it:
- pallet apron;
- metal frame from the profile for the pallet;
- studs, on the basis of which the legs will be attached;
- brackets for fitting an apron;
- many nuts and washers;
- screws and siphon.
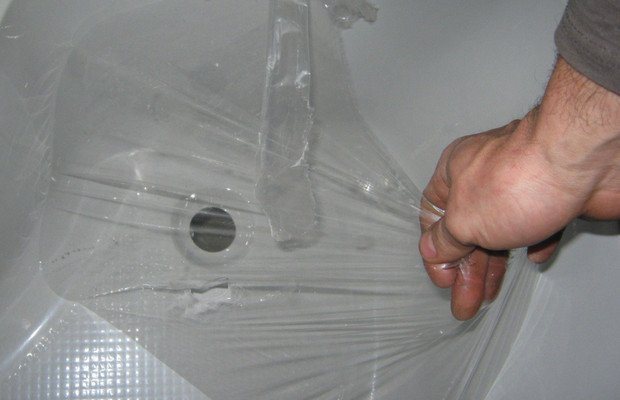
In the event that you were not able to find all of these elements in a container with a pallet, it means that the manufacturers packed them in a separate box. The next step will be to unfold and remove the protective film from the pallet.
The frame, on which, in fact, the entire shower stall will stand, may be in a ready-made, assembled form, or it may be in scattered parts. If your equipment has not yet been assembled, then you should twist the support manually.
To do this, find the frame itself and place it on top of the pallet, aligning the attachment points.
Next, take four long metal studs and put washers and nuts on them according to the directions in the instruction diagram.
Important! To avoid the appearance of mechanical damage on the pallet, which is now left without a protective film layer, a piece of cardboard should be placed under it (you can use the bottom of the package itself, previously separated from the walls for convenience).
Screwing on two nuts on each stud, use them to connect the supports to the frame and the pallet itself.
Put the frame on the exposed pins and fix it with nuts on both sides (one has already been screwed on by you in advance, the second screw on top of the frame). Use the nuts to tighten the metal frame so that its surface touches the bottom of the pallet.
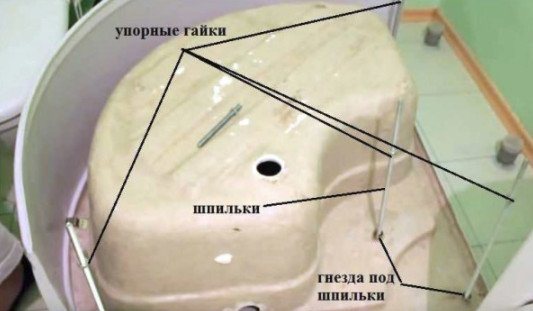
Starting to assemble the shower tray Do not tighten the nuts too much, as the support frame is quite thin and you can bend it, breaking the overall stability and integrity of the structure. Now select the screws of the appropriate size (profile height plus another 5 mm) with which to attach the metal frame to the pallet.
At the bottom of the pallet there are already ready-made protuberances with which you need to dock the frame. After docking, feel free to tighten the screws.
Video: how to assemble a shower tray