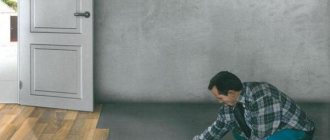
What are the requirements for insulation
Let's see what kind of insulation that can be laid on the floor should be. You must understand that there are increased requirements for it:
- Low thermal conductivity.
- High strength (it should not be pressed through).
- Minimum weight (it is not recommended to overload the floors).
- Resistant to moisture and temperature extremes. It is always humid underground, so mineral wool is not very suitable for insulation.
- Environmental friendliness of the material.
- Ease of installation and the possibility of further finishing.
- The material should not be gnawed by mice, fungus or mold should not grow in it.
- Durability. The insulation is laid once and until the next major overhaul of the floor, which may be in 15-20 years.
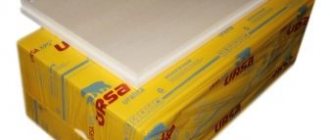
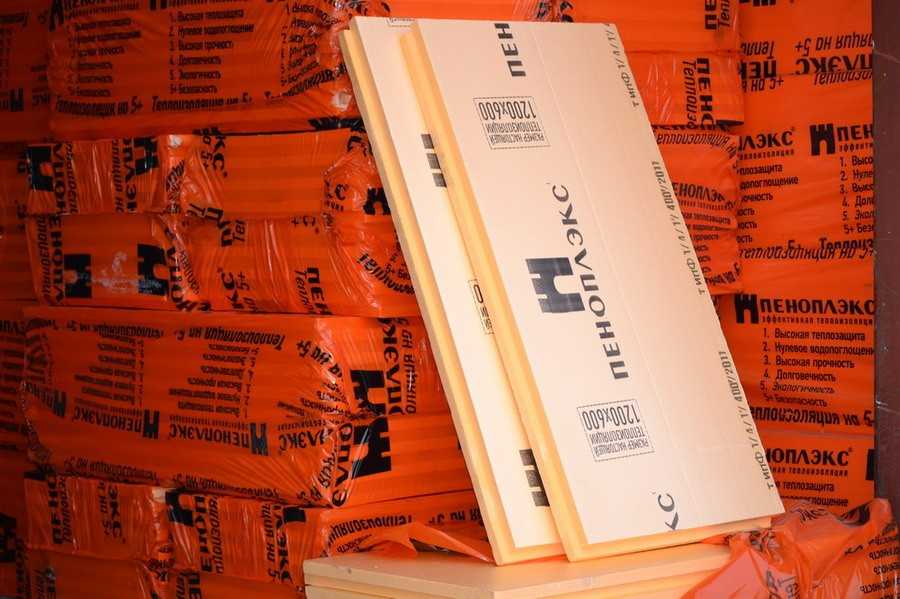
Poplex is a modern material for floor insulation
What is Penoplex
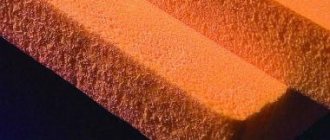
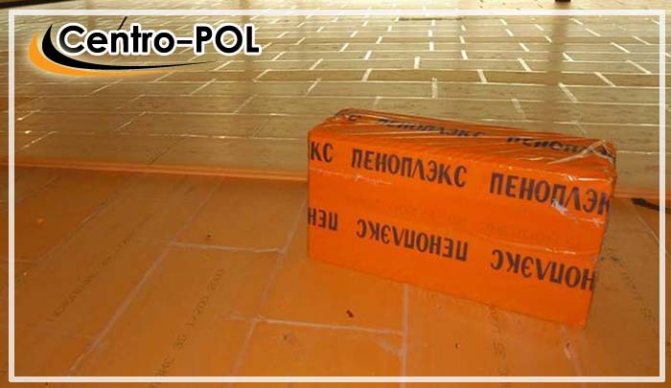
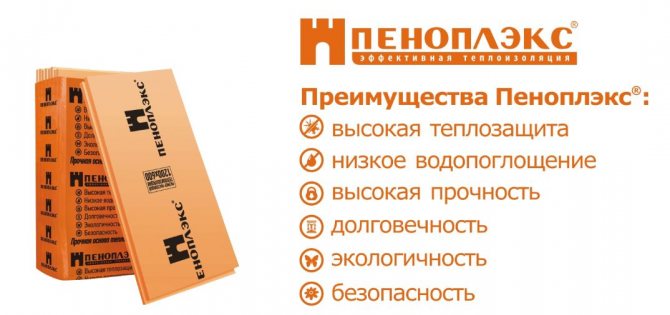
All of the above requirements are fully met only by one material - penoplex. This material is made from expanded polystyrene and has truly unique characteristics. This is a modern, practical and inexpensive solution that is well suited for both a private house and an apartment. The low coefficient of thermal conductivity of the material allows you to save on height - a sheet with a thickness of 30 mm retains as much heat as a layer of expanded clay 200 mm. High strength allows it to withstand heavy loads - it is much denser than foam and practically does not shrink. The material is not afraid of moisture, it contains fire retardants, so it has a negative flammability. Also, it practically does not change its size when the temperature rises or falls, so it can be laid in absolutely any room and poured on top with a screed.
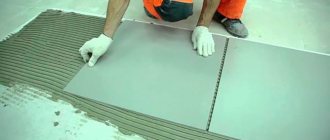
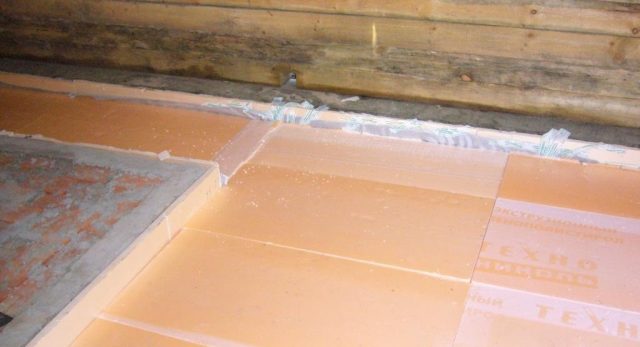
Laying the foam on the floor will not cause you much difficulty. It is produced in the form of squares (rectangles), it can be cut with an ordinary construction knife and glued to the base with foam, putty or special glue. The material can be hemmed under the subfloor or laid in the space between the joists. This is a really good option for insulation.
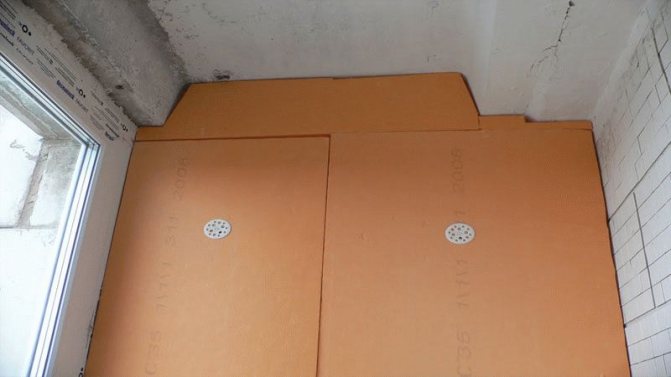
The foam is attached to the base with fungi and glue
Material characteristics
It is worth starting with the fact that, depending on the scope of application, a material of one density or density is chosen. Thermal insulation of the floor structure is carried out using foam grade 35 or 45. There is also a material of grade 31, 31C and 45C.
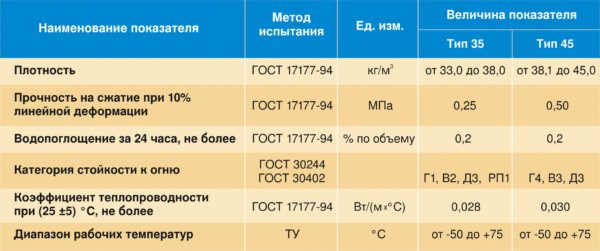
Characteristics of penoplex brands 35 and 45
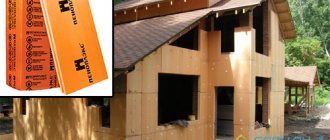
Insulation "Penoplex" brand 35 refers to universal insulation and can be used not only for floors, but also for walls with a foundation.
Table 1. Excellent performance of grade 35
| Indicator name | Units | Value | Explanation |
| Density | Kg / m3 | 28 to 38 | The material can withstand significant stress. |
| Coefficient of thermal conductivity | W / m × ° C | 0.03 | This is a rather low indicator, which guarantees the energy efficiency of the floor structure. |
| Hygroscopicity | % | 0.4 | When tested during the day, the material absorbed moisture in the indicated volume only in the first 10 hours. |
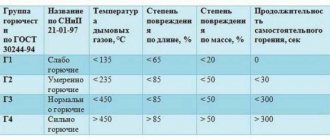
| Flammability | Category | D1 | When combined with a concrete screed, which is not subject to combustion, such a heater, which already belongs to a high fire resistance category, is completely fireproof. |
| Noise absorption | Db | 41 | Relevant for apartments, in multi-storey buildings |
| Tensile strength | MPa | 0.4 – 0.7 | The material allows you to create a solid, solid base. |
| Application temperature range | ° C | -50 to +75 | It will be an ideal material for screed insulation on a cold concrete floor. |
Insulation "Penoplex" grade 45 is characterized by high density, therefore it is more often used to insulate screeds on the ground. This heavy-duty material is used even in road construction.
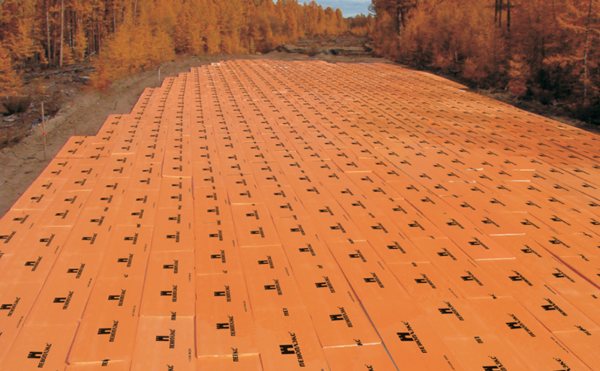
The use of foam in road construction
Table 2. Excellent performance of grade 45
| Indicator name | Units | Value |
| Density | Kg / m3 | 40.1 to 47 |
| Coefficient of thermal conductivity | W / m × ° C | 0.03 |
| Hygroscopicity (according to tests during the day) | % | 0.2 |
| Flammability | Category | G4 (in conjunction with a heat-resistant coating does not matter) |
| Noise absorption | Db | 41 |
| Tensile strength | MPa | 0.4 – 0.7 |
| Application temperature range | ° C | -50 to +75 |
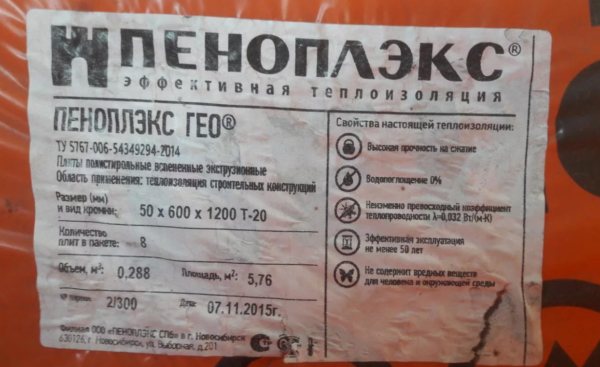
Standard marking on the packaging of Penoplex insulation
On the packaging of the penoplex, you can see the following types of markings:
Characteristics of the main types of insulation
To summarize, there are several types of foam that are used to insulate floor screeds:
- Penoplex grades 35 and 45, suitable for roofs, floors over warm and cold basements, garages and storerooms.
- "Penoplex Foundation", which has high moisture resistance, heat and sound insulation properties and can be used not only for warming foundations, but also screeds on the ground.
- "Penoplex Comfort" is a common type of insulation for interior work, it is not afraid of high humidity. It is laid on a rigid base (concrete floor slabs).
Styling foam
Penoplex is a durable and solid material with a closed cellular structure. That is why it can be safely laid on a solid and not entirely flat base. There is a successful experience of laying the material directly on sand, crushed stone, expanded clay and other loose fillers.
Note:
despite the fact that penoplex can withstand loads and can be squeezed a little, it is still better to level the surface yourself and fill up all the cracks and potholes with ordinary putty.
Construction work is carried out according to the following scheme:
- Buy material with a margin of 5-10%. Just calculate the area of the room and order the required amount.
- Remove debris from the surface, vacuum it, remove paint or oil stains if present. The base must be solid and clean.
- If the base has a height difference of more than 10 mm, then it must be leveled with a screed. If loose substrates are used, simply level and compact them as much as possible.
- Think about how you will fasten the material. On a loose surface, the slabs can be simply laid out in a spacer, on a solid surface - glued with special glue or foam.
- Be sure to prime the hard surface to ensure good adhesion. This will also further remove dust from it.
- Lay the tiles, starting from the far corner of the room, butt to joint. Move the new row by half of the tile to create a bandage, like in brickwork. Tamp the tiles well to get a flat surface.
- Cut it in the corners with a regular knife. We recommend that you stick a damper tape on the walls before laying so that the penoplex and the future screed do not touch them.
- Allow the glue or foam to dry after finishing the installation. Usually 6-8 hours are enough for this. When laying on a loose surface, you can start pouring the screed immediately.

Penoplex is an excellent base for laying a warm floor
Note:
in addition, you can fix the sheets with spacers (umbrellas). To do this, you will need a drill and a victorious drill. After laying one row, you need to drill holes in the center of each sheet and in the seams opposite the corners so that the umbrella presses two tiles at once.
If you want the result to be as effective as possible, then try not to lean the tiles against each other, but to foam each seam.This will avoid so-called cold bridges - the air will not pass through the cracks.
Warming of floors
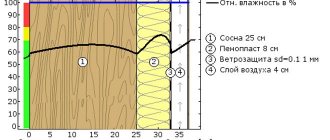
Due to its closed cellular structure, Penoplex can be mounted under a waterproofing layer on a rigid base made of coarse gravel with a sand leveling layer, the thickness of which is more than 100 mm.
This method of thermal insulation eliminates the need for concrete preparation. Remaining on the warm side of the insulation, the waterproof membrane also performs the function of a vapor barrier layer. The thickness of the distribution board, which serves as the basis for the finished floor, depends on calculations depending on the purpose of the building.
Laying on a layer of thermal insulation should be carried out using the cold bonding method, which excludes the use of plasticizers and solvents in the adhesive.
To avoid freezing of the ground at the base, refrigerated warehouses, especially deep freezing chambers, require additional floor insulation. Insulation Penoplex is able to maintain its original thermal insulation properties at a constant low temperature and high load. With a distribution load of more than 10 t / m ^ (2), the deformation of the slabs occurs by no more than 2% of the slab thickness.
Screed creation
The floor screed with penoplex can be carried out both with a cement-sand mixture and with modern ready-made compounds. We recommend that you use ready-made mixtures - they are stronger, have better characteristics and last much longer.
First of all, lay a layer of vapor barrier (special membrane) on the insulation and put its edges on the walls. Then place the beacons in a level the width of the rule. Check the correct installation of the beacons with a long, even bar. Lay it so that it lies on three beacons at once. The bar should not wiggle - when properly laid, all three points are located in the same plane.
The screed is poured in the classical way - prepare the solution, pour it between the lighthouses, tamp, level with the rule. You need to work quickly enough so that the previously laid solution does not set before applying a new one. You need to move from the far corner to the exit from the room. If the room does not have a door and a box, then instead lay an ordinary wooden plank or a piece of profile with a height greater than the expected level of the screed.
Note:
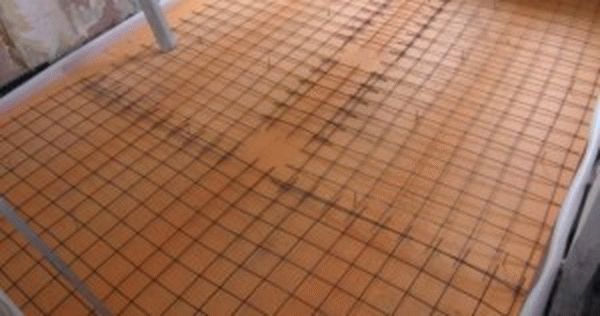
it is desirable to reinforce the screed. For this, a standard metal mesh with a mesh size of 5 by 5 to 10 by 10 cm or special mineral fibers is used.
Lay foam sheets in a checkerboard pattern - this will increase the strength of the structure
It is interesting: Laying asphalt on a concrete base technology 2019
Advantages of combined thermal insulation
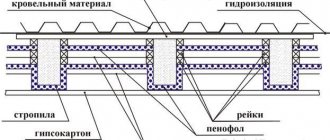
The thickness of the panel thermal insulation is only 40-60 mm, so even with a ventilation gap of 10-12 mm wide, you will not have to raise the floor. A moisture-resistant putty compound is used to seal the junctions with the elements of the supporting frame. It is possible to increase the efficiency of foam insulation by combining the main coating with Penofol or other insulation, preferably equipped with heat-reflecting foil.
As practice shows, such a composite is characterized by full and effective heat preservation, since a significant part of the radiant heat returns to the insulated volume.
Screed thickness
There are no unambiguous recommendations from the manufacturer regarding the thickness of the screed laid on the penoplex. But professional builders recommend making a layer of at least 40 mm. It is such a layer that reliably holds the surface and does not crumple during operation. If you want to make self-leveling floors, then first fill in the classic leveling screed, and then mount them on top. This will save you a significant amount on materials.
Even a novice master can lay penoplex under the floor screed - this does not require special skills and tools. Try it - you will definitely succeed!
Advantages and installation of Penoplex insulation under the floor screed
A large amount of heat leaves the house through the floor, therefore a penoplex screed is the preferred option for many residential buildings and apartments. Penoplex is a relatively new material, which has gained immense popularity over the short period of its existence, has become incredibly popular in the market of thermal insulation materials. Therefore, the choice in his favor is not a surprise.
- 1 Benefits of foam flooring
- 2 Installation of a foam screed 2.1 Preparatory measures
- 2.2 Laying foam and screed organization
Benefits of foam flooring
Why is floor insulation so important? Serious heat losses go through it, the room has to be heated more intensively, this takes additional energy costs and financial injections. Therefore, it is easier to perform floor insulation, the technology of which will make the surface warm, minimize losses and ensure a long service life.
Leveling the floor with a screed is often complemented by installing foam under the screed. This material has serious advantages and important characteristics:
- The material does not absorb moisture. It is because of moisture that mold and mildew form on the floor. This is an urgent problem for private houses and those who live on the ground floors of multi-apartment buildings;
- Penoplex helps to reduce heat loss by about 20 percent, which makes the material energy efficient;
- It is strong in compression, has a slight degree of deformation, and can withstand severe loads;
- The modern technology of the device with foam crumbs allows you to achieve an impressive service life of the foam;
- Environmental friendliness of penoplex. The production technology does not provide for the use of hazardous, harmful substances. Therefore, penoplex is safe, environmentally friendly, does not cause allergic reactions;
- A simple installation technology will allow you to do the screed on the penoplex with your own hands without the help of specialists. It doesn't even need a specialized tool.
Penoplex screed installation
Performing a screed on polystyrene, or rather extruded polystyrene foam, will not be difficult if you do everything yourself. But this work has certain nuances.
The whole process of installing a screed on a penoplex is divided into two main stages:
- Preparatory activities;
- Styrofoam laying and floor screed.
Therefore, we will consider them separately, paying attention to the peculiarities of performing each task.
Preparatory activities
In order for the styrofoam to be laid under the screed or styrofoam as efficiently as possible, it is important to properly organize the preparation.
- Thoroughly clean the floor surface from accumulated debris and dirt.
- Seal all existing cracks, chips, using construction polymers for concrete foundations. There are more energy-intensive ways to do this, but polymer flooring is modern and efficient.
- If the floor is not even, it is advisable to use leveling compounds. When the surface of the floor is flat, you can simply cover it with layers of primer with your own hands.
Penoplex laying and screed organization
Now it's time to lay the elements of the foam board and screed on the penoplex. To do this, you have to go through several rather complex, but possible processes for doing it yourself.
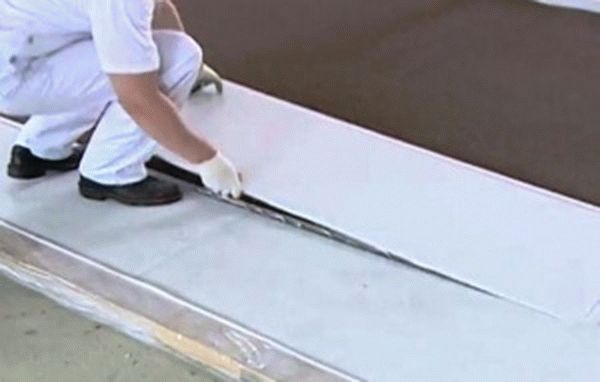
- Place plastic wrap on the prepared floor surface. It should have an overlap of about 10 centimeters on the walls. All joints must be glued with strong tape. This will provide an effective vapor barrier.
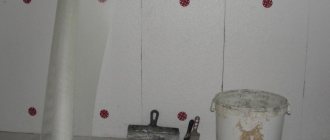
- Cut the polyethylene foam damper tape. The elements should be about 12-15 centimeters wide.Spread the tape around the perimeter, glue it to the wall with special glue. To make the grip more reliable and durable, treat the walls with a primer. You cannot do without a damper tape, since it will compensate for the moisture-thermal expansion of your screed during its subsequent operation.
- Further, floor insulation provides for self-styling of the foam. There is nothing complicated here. But experts recommend paying special attention to the joints. Use tape or high quality sealant in these areas.
- On top of the laid foam, apply a layer of primer, lay a vapor barrier film and install a mounting metal mesh on top of all this. It should also have an overlap of approximately 20 centimeters.
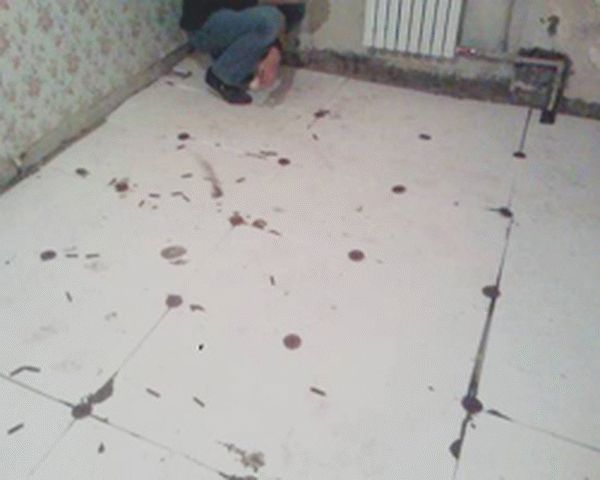
- The guides are mounted according to the strictly outlined level, they are fixed with a concrete solution. The step between the guides is 100-150 centimeters, depending on the size of your room.
- Prepare concrete for screed. The ratio of cement to sand should be 1 to 3. Usually, for 500 milliliters of water, 1 kilogram of cement and 3 kilograms of sand is required. It is not difficult to prepare the mixture. Take a large container, fill it with water and pour in the dry mixture obtained from sand and cement. Move everything thoroughly to get a homogeneous mass. Let it brew for 5 minutes, then mix the solution with a construction mixer.
- We proceed to pouring the screed. Be sure to start pouring the screed over the foam from the far corner opposite the entrance. Throw in mortar, trim with a trowel and pull out excess with a rule. Each poured strip that we get as a result of installing the guides, process with a needle roller. This will remove air bubbles from the solution.
- Wait until the solution dries on top of the foam, remove the guides and fill the resulting voids with the solution.
- Further work on the floor can be done after at least 7 days, although professionals recommend waiting 3 weeks. This will make the material as strong as possible.
- In the process of drying the screed on top of the foam, twice a day, you will need to moisten the floor with water. But not too intense. This will prevent cracking.
Interesting: Styling products for curly hair 2020
It is not difficult to complete the floor screed, as well as to organize insulation with penoplex. The whole screed process will take a little time. The floor surface will take much longer to dry.
A high-quality screed and effective insulation will allow you to get rid of heat loss and get a perfectly flat floor. It should be added that penoplex is suitable for laying under any material, perfectly serves for the warm floor system. Therefore, the screed is not the only solution for which penoplex is useful.
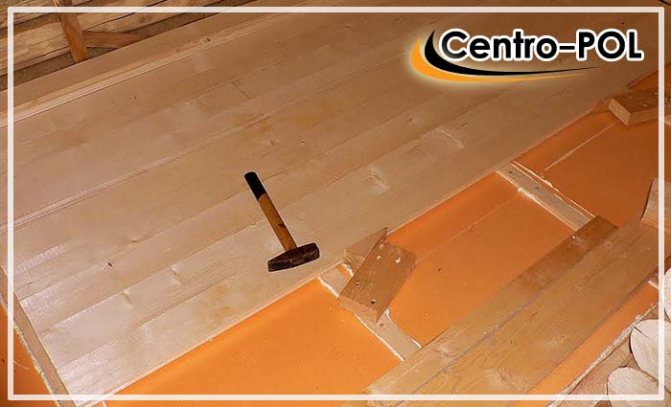
Use for wood floor
Penoplex is laid here directly on a wooden base: fiberboard, plywood or boards. First, remove the skirting boards and remove the finishing coating. Some of the boards are lifted and the lags are checked, while the rotten or bug-eaten ones are replaced.
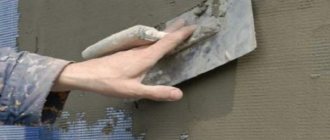
It is important that the floor surface is level and perfectly horizontal. The protruding areas of the floor are removed by grinding, and the gaps are covered with putty
The sheets are fitted to each other so that there are no gaps
The protruding sections of the floor are removed by grinding, and the cracks are covered with putty. The sheets are fitted to each other so that there are no gaps.
The floor surface is primed. Highly absorbent boards are primed several times. When the surface is dry, the insulation is installed. The joints between the sheets are sealed as much as possible. The gaps are filled with polyurethane foam that does not contain toluene, which corrodes the insulation. The insulating layer is covered with a vapor barrier, then plywood or chipboard slabs are attached. The floor covering is laid on top.
Penoplex is a popular floor insulation.It has a high level of insulation and good protection against moisture and steam. It can be used for self-insulation of balconies and rooms with different floor bases.
Penoplex floor screed
In the insulation of floors, penoplex, aka extruded polystyrene foam, has found its worthy application. Its properties allow it to be used for flooring even with the highest load. But in order for the material not to fail, you need to follow the technology - an improperly arranged penoplex screed can ruin the whole thing. In order to prevent unfair complaints about this heat insulator, we will tell you how to properly fit the foam plates into the screed, what are the installation principles.
Features of floor insulation in a bath with penoplex
Technologies for insulating floors in a bath:
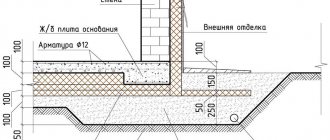
- A simple floor option. It consists of compressed soil, a mixture of sand and gravel, a concrete substrate, a vapor barrier, expanded polystyrene, a polyethylene film, a reinforcing frame. To insulate it, you need to prepare the base, align it from bumps, cracks. On top of all layers, a screed is poured from a special insulating mixture.
- With a screed over the floor. For thermal insulation of the structure, a durable sheet of foam, pressed mineral wool is suitable. The base is made of a concrete slab, which is fixed to walls or strip foundations.
- By lags. It is better to use polystyrene, pressed material wool as insulation.
Due to its physical and technical properties, extruded polystyrene foam is widely used to insulate the strip foundation under the steam room, floors, roofs and walls. The log house is usually insulated with natural materials. Therefore, penoplex is used for the most effective insulation of frame and brick structures.
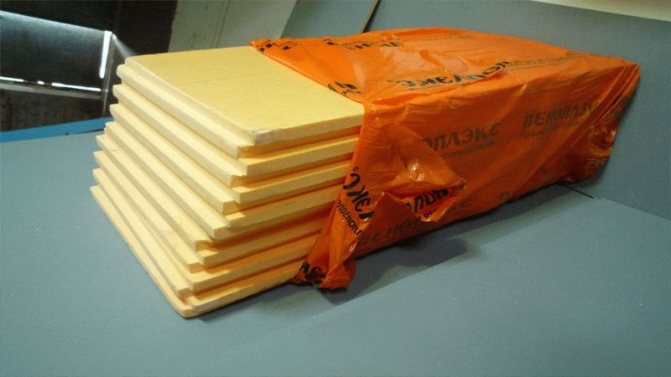
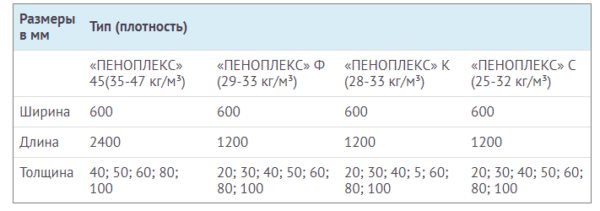
As a standard, slabs are made 60 cm wide and 120 cm long. The thickness can be from 2 to 15 cm. It must be selected depending on the purpose and climatic characteristics of the region of use.
Be sure to purchase certified goods in specialized stores. The quality of the material, its environmental friendliness and performance characteristics depend on this. The cost of penoplex, depending on its thickness, can vary from 3900 to 4300 rubles per cubic meter.
The basement is the thinner part of the foundation, to which the walls of the structure are attached. Therefore, the durability of the building depends on the quality of its thermal insulation.
In the process, we adhere to the following sequence:
- We cover the base with a waterproofing membrane.
- We fix on top of acrylic glue a 12-centimeter layer of styrofoam.
- We lay the second layer of waterproofing. It will be a kind of drainage.
- We attach a geotextile material that acts as a filter.
- Fill with a sand-cement screed.
Due to the hydrophobicity of the heat insulator, the steam room will be reliably protected from moisture.
If you decide to insulate the concrete floor in the steam room, then this insulation can be used in all rooms.

We carry out the work in the following order:
- We cover the foundation cushion with bitumen mastic in two layers.
- We lay the roll waterproofing with an overlap of 10 cm.For this purpose, glassine or hydrostekloizol is excellent.
- We lay sheets of foam. We check the evenness of the installation with a hydraulic level.
- We make a reinforced concrete screed with a thickness of 6 cm.
- We install the cladding.
- The best option for finishing the floor in the bath is wood or ceramic tiles.
There is a lot of controversy regarding the use of this material for thermal insulation of wooden flooring in steam rooms. As for the technical properties of penoplex, it can withstand temperatures up to 75 degrees, and therefore it is strictly forbidden to use it in the steam room, even if it is treated with a fire-fighting compound. But for insulation in the rest room and dressing room, it is considered the most suitable due to its good moisture resistance.
We carry out thermal insulation, adhering to the following algorithm of actions:
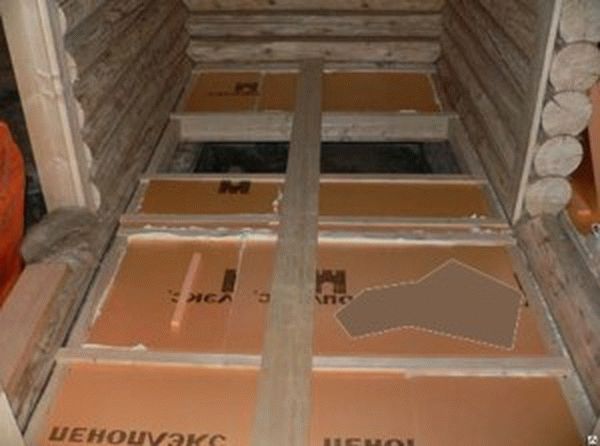
- We cover the logs and the space between them with a vapor barrier membrane. For this, you can use aluminum foil, kraft paper, or plastic wrap.
- We lay between the logs sheets of foam with a thickness of 10 cm, pre-treated with fire retardants.
- We fix the second layer of steam and waterproofing
- We equip finishing flooring.
We suggest that you familiarize yourself with: Distance from the bathhouse to the bathhouse of a neighbor
Before laying, wood for finishing the floor must be thoroughly impregnated with several layers of fire retardant and antiseptic.
Due to the operating temperature range of the material, insulation of the bath with penoplex from the inside is not allowed. Extruded polystyrene foam, as a rule, is used outside for frame or brick baths.
The procedure for thermal insulation of walls in a bath with penoplex looks like this:
- We cover the surface with a primer in two layers.
- After complete drying, we fix the vapor barrier layer.
- We apply an adhesive composition 7-8 cm thick on a sheet of foam. It should cover about 40% of the surface.
- We attach the part to the wall and additionally fix it with "mushrooms".
- Having completely covered the surface of the walls, we proceed to the installation of the second layer, shifting the elements to cover the seams.
- After the adhesive has completely dried, we blow out the gaps with polyurethane foam.
- We reinforce the surface with fiberglass mesh, attach it with glue, and let it dry.
- We plaster the walls and carry out further wall decoration.
Please note that the adhesive for fastening the material can only be used based on cement, polyurethane or bitumen.
The heat-insulating material is polystyrene foamed on modern equipment. Technologies make it possible to achieve an even distribution of small gas bubbles throughout the entire structure of the foam. Such insulation reliably retains heat - it is this quality that is appreciated first of all when decorating the floor and walls of the bath.
Important! About 15-20% of heat loss in any room is associated with insufficient floor insulation.
Penoplex - a guarantee of minimal heat loss in the bath
It is necessary to insulate the floor in the bath with the help of expanded polystyrene in two stages - warming the basement and the direct use of the material when laying the floors. In the first case, the concrete base is covered with a double layer of waterproofing, after which the materials are fixed to the acrylic glue. After that, a reinforcing mesh is laid on it and poured with a concrete screed.
Penoplex screed technology
Laying of foam boards in the screed is carried out end-to-end. It is advisable to glue the seams with a special foil tape, you can also use ordinary tape. This is necessary so that liquid from the cement screed does not get between the plates, which will be arranged on the penoplex. Often, the insulation is additionally protected with waterproofing - it can be roofing material, glassine and even simple polyethylene.
Please note: according to the screed technology, the waterproofing is placed on the penoplex, and not under it. Its task is to prevent moisture penetration. Once it gets into the joints between the plates, water will remain there for a long time - after all, extruded polystyrene foam practically does not absorb it.
Before pouring the screed onto the penoplex plates, it is imperative to leave a temperature gap at the edges. It compensates for possible expansion. To do this, a deformation tape is attached to the wall around the perimeter, for example, foamed polyethylene foam with a thickness of 1 cm.
Floor insulation under the screed
Any screed (concrete, from DSP, bulk compositions) on top of Penoplex is done in the same way. The presence of reinforcement also does not affect the technology of laying the slabs. Let's start with the fact that the slabs have formed protrusions, that is, a lock connection. This excludes the appearance of through bridges of cold.
It is cut, like any EPS, with a hacksaw with a fine tooth (for plastic or metal). A more serious tool is not required.You can correct the cut or slightly trim / trim it with a sharp knife (ordinary or construction). The rules for laying on the floor are very simple:
- For better heat retention, it is best to stack in two layers. Their total thickness should be the same or slightly larger than the selected one.
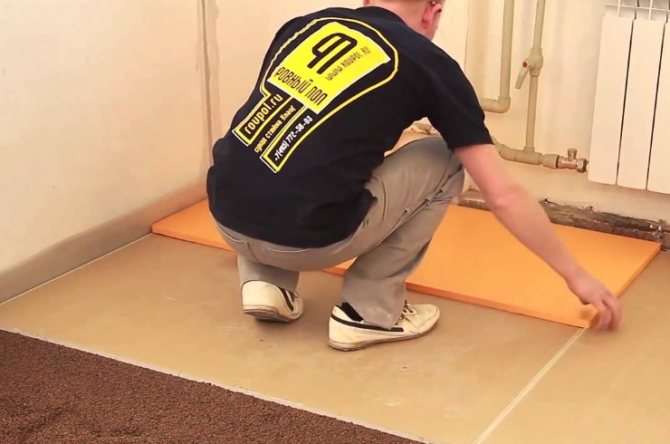
- Before laying Penoplex on the floor under the screed, roll out the damper tape around the perimeter.
- We lay the first layer so that the seams in the rows are displaced and there are no intersections in the form of a cross. That is, we start the first row, for example, with a whole plate. The second - from the segment that remained after cutting the extreme in the first row. If it's too narrow, it's best to cut the new one in half.
- You can glue the joints of the plates of the first layer with tape, but this is not necessary, since the edges in the form of locks are sufficient fixation. But for those who love "more reliable", you can also glue.
- The plates of the second layer are laid so that the seams do not coincide. That is, for laying the first row in the second layer, halves are needed. To do this, the slab is cut lengthwise. That is, the junction of the two rows will turn out above the middle of the bottom sheet. And so that it does not completely match, you need to start the first row in the second with a quarter. In the second row, it is very desirable to glue the joints. Firstly, because they will be walked on - there is no escape from this. Secondly, because it is necessary to protect the joints from the leakage of the solution.
Should the expanded polystyrene be fixed to the base? What for? Loaded with a screed and everything on it, it will not go anywhere. If this method of installation seems very unreliable to you (but this is recommended by the manufacturer), you can fix it. The first layer is a dowel-nails with a large plastic cap. The second is usually not attached, but you can put it on glue (PVA, for example). You can fix the first one with glue or some kind of mastic, but you will have to wait until the glue dries.
Penoplex screed thickness
There is another option, which provides for the device of a screed made of gypsum fiber sheets (GVL). They are laid in two layers, and here a two-centimeter screed on the penoplex turns out to be just right. In this case, the use of glue is considered optional. Simply? But certainly more expensive. The advantages of the screed from gypsum fiber board are primarily in the gained time. According to the rules, the cement must withstand 28 days before the work on laying the foam on top of the wooden floor can be continued. The use of gypsum fiber sheets does not require any waiting at all.
Penoplex screed and floor finish
A floor screed with penoplex implies quite a few options for a finishing coating. In principle, any floor can be made on it. The most common options are:
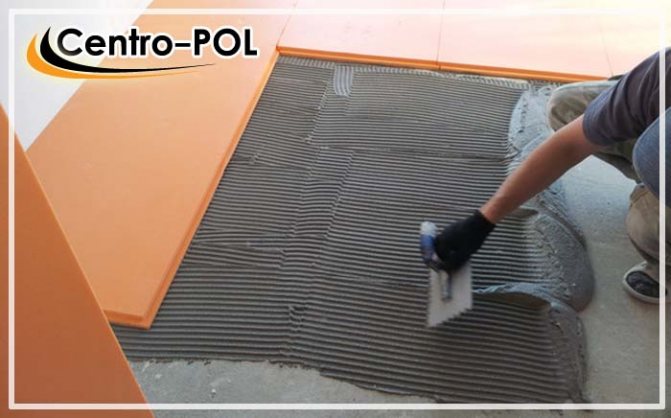
- Ceramic tiles - to be laid on tile adhesive.
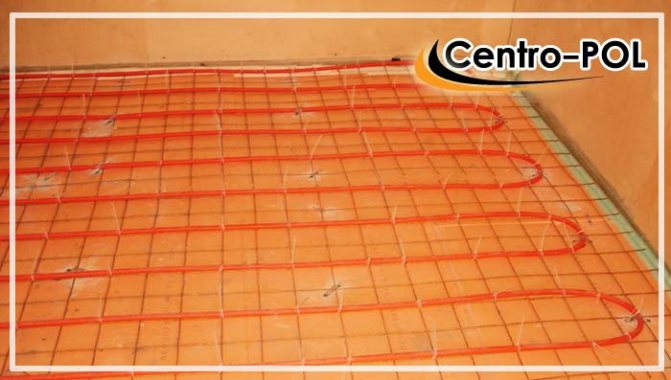
- Underfloor heating, water or electric - the screed on the foam plates is made according to the "warm floor" system.
- Laminate - mounted according to its usual technology, on a substrate.
- Wooden floor - wooden logs are laid, which are fixed with polyurethane foam. The flooring is made on top.
A floor on a heat insulator, even if it has significant compressive strength, should not be laid without a screed. It is needed in order to evenly distribute the load over the surface. It is not at all necessary to reinforce it, especially if the usual covering is arranged in the house, and not the runway. Insufficient thickness of the penoplex screed (less than 4 cm) can lead to the fact that it will crack, crumble and deform in every possible way.
The idea of putting penoplex under a screed of any floor can be called excellent. After all, for this, in fact, it is intended. The insulated floor will allow you to largely keep the warmth in the house and ensure a comfortable stay.
Do-it-yourself floor insulation with Penoplex under a concrete screed
The material is expanded polystyrene, like polyethylene pipes in floor heating systems, as insulation for the floor, has been used for a relatively long time.Expanded polystyrene has such properties that it can be used even for arranging floors with potentially high loads.
Installation of foam under the floor screed
But in order for this type of floor insulation to work effectively, the correct technology for the device of expanded polystyrene is needed (including with your own hands).
Indeed, in cases where the installation technology is not observed, it is possible to make such a floor insulation, which then will have to either be completely dismantled with subsequent installation again, or to carry out a major overhaul with huge financial and time costs.
Obviously, it is easier to do floor insulation in a private house from the beginning correctly.
Why Penoplex?
What kind of thermal insulator should be chosen for floor insulation in a private house? What is the most convenient way to insulate a balcony or loggia? What to use for floor insulation in a frequent bath?
What material is more convenient for a beginner to use? Is it possible to make thermal insulation directly on the ground? What will help to insulate a wooden floor in a private house?
All these different questions can be answered in the same way: for thermal insulation of the floor in all of the above cases, the material "Penoplex" is suitable.
Despite the fact that penoplex or, as it is also called, expanded polystyrene, began to be used relatively recently, it has already won trust and respect.
Photo:
This thermal insulation material is similar to the familiar foam. However, unlike polystyrene, thanks to a special production technology, penoplex has a homogeneous structure and high density.
Due to this, it significantly surpasses foam in strength, but retains its water-repellent properties.
All these qualities make it possible to use it for floor insulation in any premises. It can be used both during construction and during repairs.
It is suitable for insulating residential and non-residential premises, regardless of whether they are heated. Penoplex, even in frost, remains warm thanks to the air inside it.
Therefore, this material can be used for floor insulation on a balcony or loggia, in a private bath, on the lower floors of houses. In addition, it is ideal for installing a "warm floor" system.
There are various types of this insulation on sale, which differ in their characteristics:
- thickness;
- density;
- the degree of flammability.
When choosing a penoplex, you should be guided by the recommendations for the use of each type of material. The instruction for floor insulation with its help does not change from the selected thickness.
For insulation of a floor without a base (on the ground), it is recommended to use a thick layer of insulation. For the best effect, you can lay it in two layers.
When applying the second layer of insulation, it is important to ensure that the joints of the first level do not coincide with the joints of the second layer. It is also allowed to glue the layers together with a special compound.
If these recommendations are followed, the quality of insulation and waterproofing will be better
It is also allowed to glue the layers together with a special compound. If these recommendations are followed, the quality of insulation and waterproofing will be better.
It is more practical to use penoplex in construction. It is a wonderful insulating base for thermal insulation of the floor on the ground or reinforced concrete slab. The floor covering is laid on top of the penoplex.
The use of this material to fill the gaps between the joists and the wooden floor on the upper floors of houses is acceptable, but not advisable.
For this, you can choose a cheaper material.
Penoplex will be the best solution in the following situations:
- insulation of the concrete floor on the loggia;
- insulation of an unglazed balcony;
- laying on the ground or concrete during the construction of a bath;
- device of any floor (including wood) in a private house;
- the device of the heated floor.
You can do the floor insulation with your own hands. This procedure is not complicated and does not require any special skills. Below are step-by-step instructions for different types of bases.