Unfortunately, it happens that after 5-7 years of operation, the refrigerator breaks down. According to statistics, in 20% of cases, the installation of a thermostat on the refrigerator is required. This task is quite solvable and will not hit your wallet if you turn to professionals for help.
"Order a refrigerator repair technician RIGHT NOW and get a 7% discount" * - Mandatory fields for filling
It is possible to determine that it is the thermostat (thermostat) that is faulty by the following signs:
- the compressor does not turn on, there is no cooling;
- the compressor runs continuously, the temperature is lower than the set one;
- the thermostat knob is in the correct position, but the temperature does not correspond to the set one (as a rule, it is much higher).
Some craftsmen claim that replacing a thermostat is a simple operation, they do it themselves, but this does not always end successfully. Refrigerator repair is a business that requires professional knowledge and skills.
How the thermostat works
This is one of the key components in the refrigeration unit. It controls the temperature by turning the compressor on and off according to the signals from the temperature sensor. Modern models of refrigeration units are often equipped with several temperature sensors located next to the evaporator and in the refrigeration chambers.
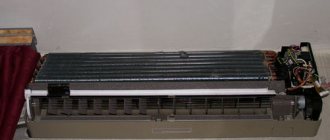
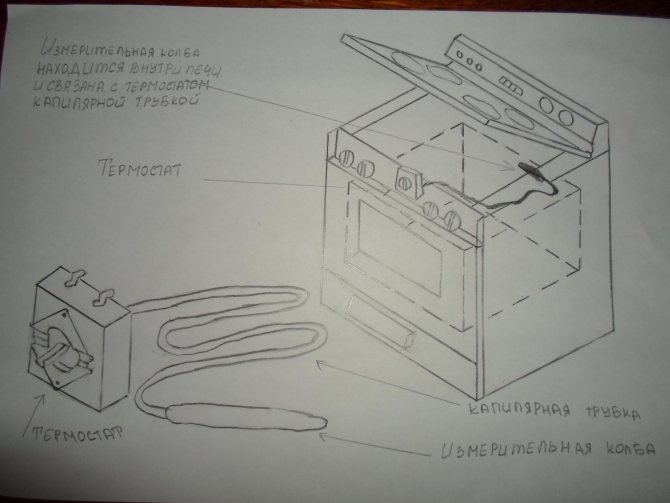
In electromechanical household refrigerators, the thermostat consists of a lever-contact group and a bellows - a corrugated cylinder filled with freon. A bellows (capillary) tube emerges from the bellows and is attached to the surface of the evaporator. It is a sensitive element that reacts to changes in temperature by changing pressure. The change in pressure acts on the lever, closing or opening the circuit, turning on or off the compressor motor. It should be noted that in the event of a breakdown the thermostat is not repaired, but requires replacement, because usually the malfunction is caused by the failure of the bellows tube.
With models with electronic control, the situation is somewhat different, but the general principle of operation is similar.
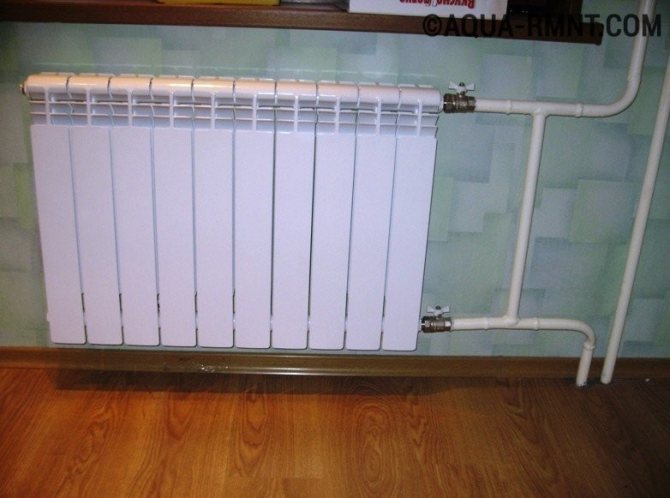
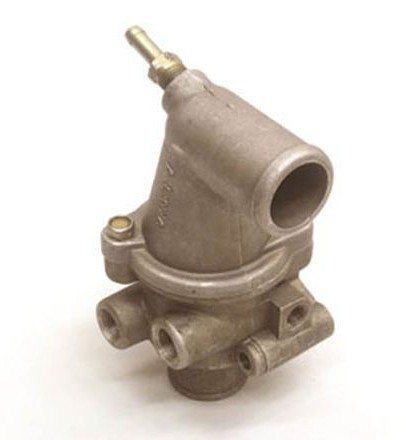
Classification of thermal valves for heating radiators
The part at the bottom of the thermostatic valve is a valve or a valve, which is selected depending on the heating system used. It must be said that for a wide variety of systems, manufacturers produce different adjustment devices. For example, two-pipe systems tend to be balanced by reducing the pressure across the valves. Due to this, the devices in this case have a small flow area and are distinguished by a large hydraulic resistance.
Installing regulators on heating batteries in one-pipe systems will not give a good effect and it will be much colder in the room. In this situation, you can install devices, the throughput of which is of great importance at least 3.
There are also models that are designed for systems with real movement of the heat carrier. They are characterized by a much lower hydraulic resistance, which makes the permissible application of the listed modifications for one-pipe systems.
Therefore, it is necessary to study very carefully all the characteristics of the regulating devices.
Depending on the method of piping, axial, angular or direct temperature regulators for heating radiators are distinguished. The choice of model in this case is determined by the type of connection of heating systems. For example, with a lateral approach of pipes, it is more convenient to install a direct valve, and with a lower connection, it is better to use a corner element.
The material for the production of thermo valves can also be used in different ways. Manufacturers very often give preference to metals with high corrosion resistance. For good reliability on the surface of some of them an additional layer of protection.
The key materials for the production of a temperature controller for heating batteries can be called the following:
- Stainless steel
... This is a pretty good option, but the price of such valves is very high, and they are rarely found on the retail chain. - Brass
, a material with a nickel layer can be used. - Bronze
, can also be chrome-plated or nickel-plated.
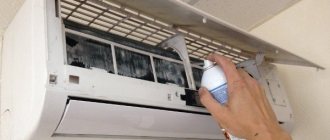
How to install a thermostat on a refrigerator
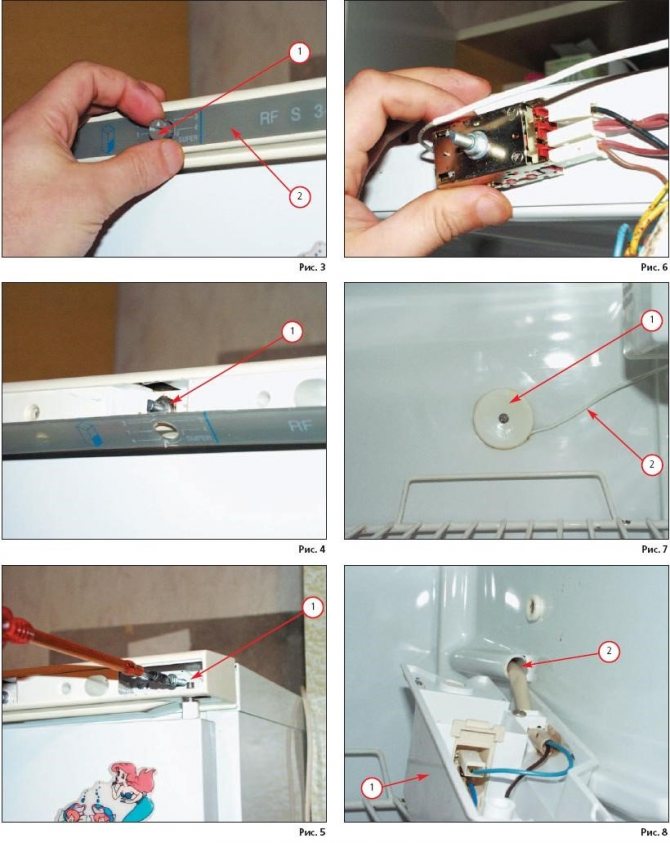
First you need to determine where the thermostat is located. Next, the following actions are carried out:
- The device is disconnected from the network.
- The external elements are disassembled to gain access to the thermostat. If the temperature sensor is in the chamber, then you will have to disassemble it too. Therefore, all manipulations with modern electronic refrigerators, for example, the repair of Westfrost refrigerators, can only be trusted by professionals.
- The thermostat needs to be removed. The wires are disconnected from the terminals. If the refrigerator is electromechanical, you need to remove the lighting unit and pull out the thermocouple. If the temperature sensor is located inside the chamber, you need to cut it off from the control unit and pull it into the refrigerator chamber. The thermostat is dismantled.
- Installing a thermostat on the refrigerator. The new thermostat must be connected to the wiring. For an electromechanical refrigerator, the thermocouple is returned to its original place, the hole is sealed. In electronically controlled models, the temperature sensor is installed in its original place, the wire is pulled through the wall and connected to the control module, the connection is covered with heat shrinkage.
- The temperature sensor is checked and the refrigerator is assembled. It takes place in the reverse order of disassembly.
After completing the repair, the on and off cycles must be checked. If necessary, adjust the thermostat.
Crimping
Another important point regarding how to correctly install a heating radiator, ensuring that there are no leaks: after assembling all the connections, a pressure test is mandatory.
In winter, it is enough to fill the riser for this; in summer you will have to use a pressure pump. An overpressure is created in the section of the circuit, the absence of a drop of which is checked by the pressure gauge for half an hour.
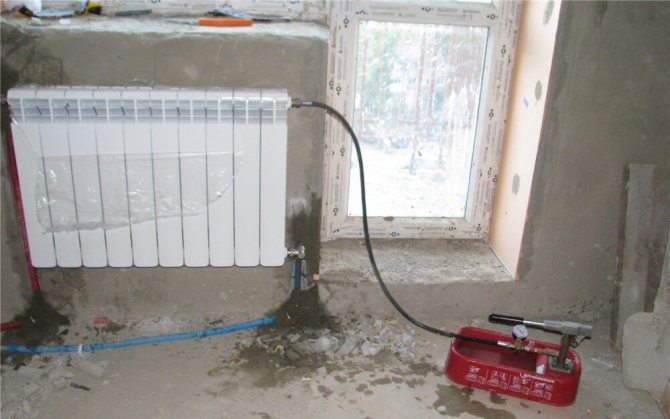
A hand pump with a pressure gauge is used for pressure testing.
Secrets of installing a thermostat on the refrigerator
If you decide that you can handle replacing the thermostat yourself, then a few tips are pertinent:
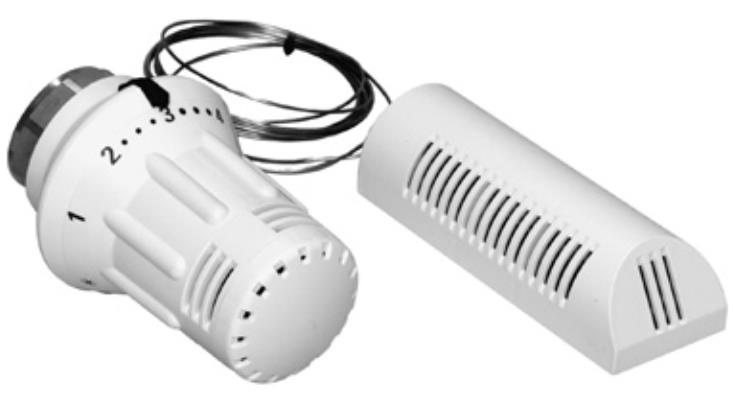
Regulator setting
In order for the device to work correctly and maintain the desired temperature, it is necessary to carry out a preliminary adjustment. When the heating in the room is running, close the doors, install a thermometer where you think it is correct to control the temperature. Now let's start setting up:
- Open the heating medium flow completely. This is done by turning the thermal head all the way to the left.
- The temperature will start to rise. When it gets higher by 5-6oC, move on to the next item.
- Shut off the coolant flow by turning the thermostat head to the right as far as it will go. The room will gradually get cooler.
- When the desired temperature is reached, start gradually opening the valve. As soon as you hear that the coolant has made a noise, and the body has become warm to the touch, stop rotating. This will be the position of the thermal head, at which a comfortable temperature for you will be maintained. Usually, there are marks on the cap - numbers - and you can navigate by them.
Adjusting the thermostat is a simple procedure, but it allows you to calibrate it to your needs. For the most part, the sequence is standard, but sometimes it can be different. Then the entire sequence of actions must be described in the passport for the product. Some firms have even filmed videos that demonstrate how to install and regulate their products.
How to independently connect the refrigerator thermostat?
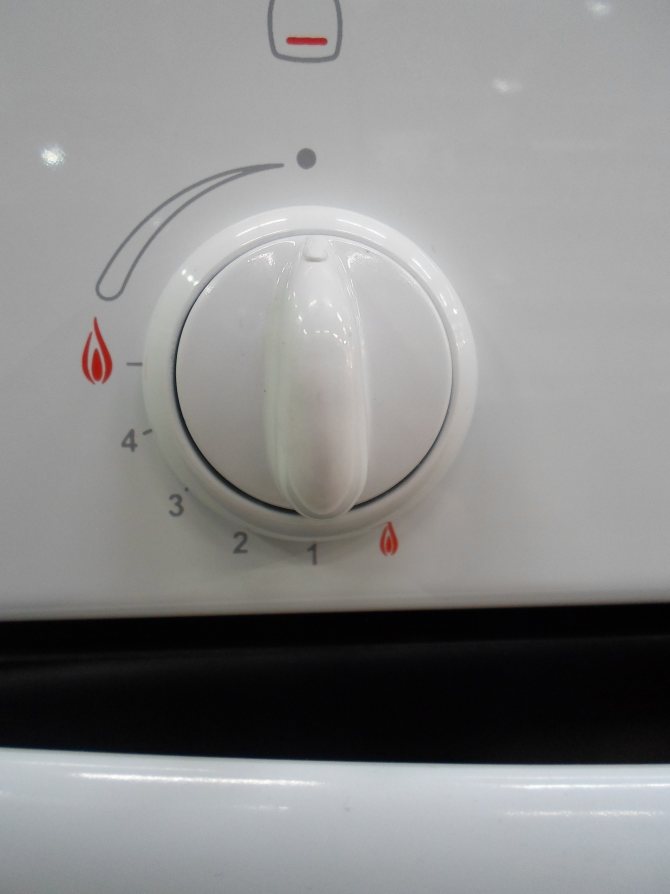
To begin with, the thermostat in the refrigerator serves to turn off / on the refrigeration compressor. When a working refrigerator is initially turned on, the thermostat contacts are closed and a command is sent to turn on the compressor. You can set the temperature in the refrigerator by turning the knob - the degree of cooling varies, as a rule, from +8 degrees to 0 degrees Celsius, a lower temperature is achieved by turning the thermostat knob clockwise until it stops.
To understand what malfunctions can be in the thermostat (thermostat) of the refrigerator, you need to understand its structure.
Refrigerator thermostat device
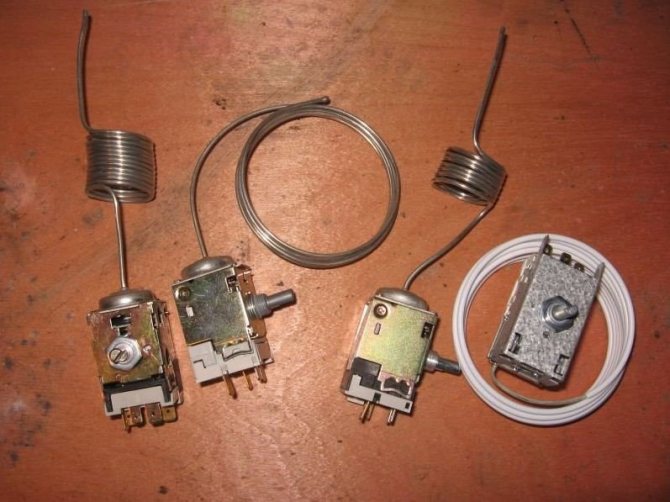
The thermostat mechanism is a lever system that controls the electrical contacts. Externally, the thermostat is a small box with a handle, on one side of which there is a tube filled with freon, and on the other side there are contacts for connecting to an electrical circuit.
The number of contacts can vary from 2 to 6, and the length of the tube filled with freon can be from 0.8 to 2.5 meters. It depends on the additional functions of the thermostat, the temperature regime and the number of plug-in refrigerator modules (light, defrost, indication). It is not recommended to disassemble the working thermostat to study the internal structure.
Principle of operation
The principle of operation of the thermostat is quite simple. The end of the thermostat capillary tube is located in the cooling zone and is attached to the evaporator of the refrigerator. The lever mechanism of the thermostat, which is located in the box, acts on the contact group when cooled - the thermostat opens. When the temperature rises, the thermostat returns to its original position - the power contacts close.
Malfunctions
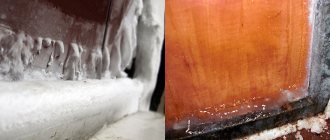
Externally, the breakdown of the thermostat (temperature sensor) manifests itself in two ways. This can be a banal disconnection of the refrigerator compressor from the electrical circuit (the compressor does not turn on, there are no sounds, there is light in the refrigerator), or there can be a change in the temperature regime in the refrigerator (freezing or high temperature).
In the first case, there is a high probability of damage to the galvanized capillary tube of the thermostat, which is subject to corrosion in an aqueous environment, as a result of which the lever mechanism of the thermostat simply stops working. In the second, it is necessary to understand what exactly caused the violation of the temperature regime - corrosion, sticking of the thermostat contacts or violation of the internal factory settings of the sensor. The answer can only be given by a specialist - a refrigerator repairman.
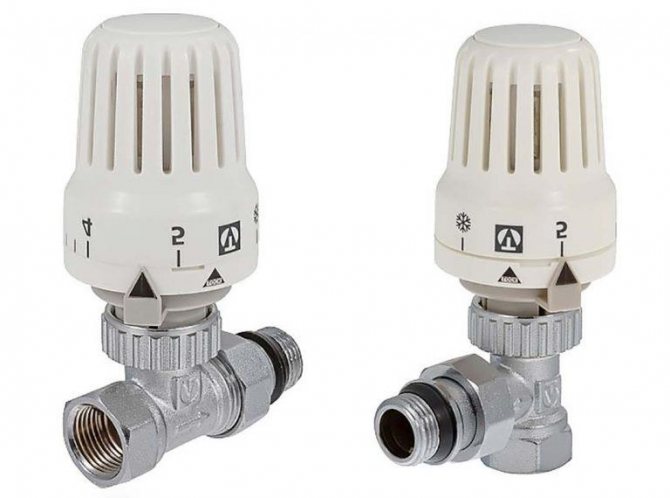
How does a thermal valve work?
The thermal head is required to adjust the temperature of the radiator.
The very first versions of thermostats that were installed on heating radiators were created in 1943 by DANFOSS. Several decades later, such devices have undergone many changes, as a result of which they have become more accurate. Their design consists of several parts: a valve and a thermal head. Moreover, they are connected with a special locking mechanism. The purpose of the thermal head itself is to measure and analyze the temperature and influence it by using a valve mechanism for this, which opens and closes the flow of water into the radiator.
This method of regulation is also called quantitative due to the fact that the device changes the temperature by changing the amount of coolant that passes through the heating radiator. There is also another method called quality. Its principle is to change the temperature of the water directly in the system itself. This is the responsibility of the mixing unit, which is usually installed in the boiler room.
Inside such an element there is a bellows filled with a heat-sensitive medium.
Moreover, the latter can be of several types:
- liquid;
- gas-filled.
It is worth noting that liquid versions are easier to manufacture, but their speed is lower than that of gas ones. The essence of their work is as follows: when the temperature rises, the substance inside, according to the laws of physics, expands, due to this, the bellows expands. Further, the latter reduces the size of the valve section by moving a special cone. Ultimately, the flow rate of the coolant decreases. When the air in the room cools down, the process is reversed.
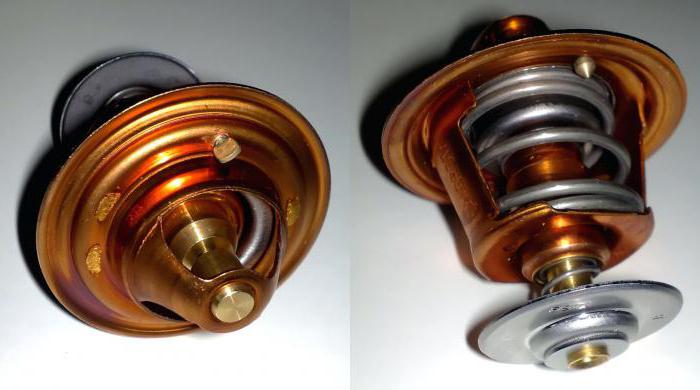
Replacing the thermostat with a Gazelle
The need to replace this part arises when problems begin with heating or cooling the engine. In order to find out the exact reason, you need to start the engine, and try the lower radiator hose through which the liquid flows with your hand. Initially, it should be completely cold. If the tube does not start to heat up at temperatures from 85 to 92 degrees, it means that the thermostat needs to be replaced.
- The first thing to do is to remove the plug from the radiator expansion tank, and then drain all the liquid. When the liquid is drained, the plug must be replaced.
- After that, it is necessary to loosen the tightening of two clamps, which are located on the nozzles of the cover from the thermostat.
- Further, the hoses are removed from the nozzles.
- After that, you will see three bolts that need to be unscrewed and the thermostat cover removed.
- Then it is necessary to remove the fixing plate. In order to do this, it is necessary to overcome the resistance of the spring, lower the cover down, and then turn it in any direction. This is necessary so that the cover disengages from the grooves and can be removed.
- After that, the thermostat is removed from the cover.
Features of the thermostat "Grants"
The factory installed thermostats on cars of the 14th series, which are more similar in design and principle of operation to those used on cars of the 9th and 10th series. These are pump thermostats that work only when the temperature reaches + 90..95 degrees.
The main feature of the Grants thermostat is that it can be installed on the VAZ-2114 without any significant design changes. But the engine will run much better and the cooling efficiency will be higher. The response temperature of the thermostat is about 60 degrees, which allows for normal movement in any traffic jams. Even standing for many hours in a dense stream with the engine running will not lead to the boiling of antifreeze.