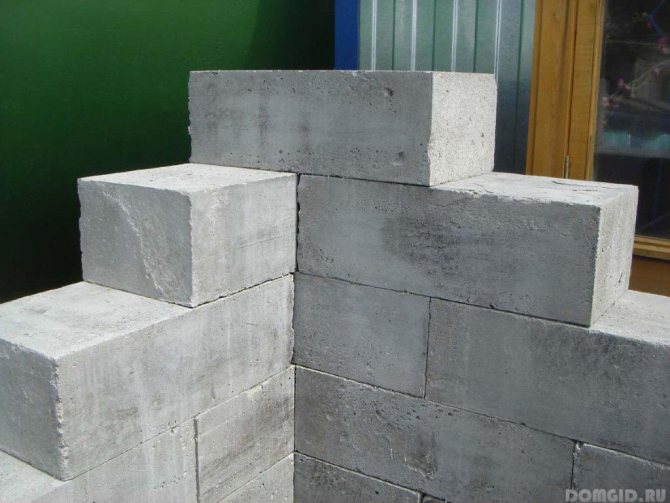
The shavings remaining after wood processing are called sawdust. Floors, roofs and other surfaces have been insulated with them for a very long time, they perfectly allow you to keep heat, wood resins are released from them.
Ceilings in old houses are made of a mixture of sawdust and clay, they serve for a long time without any damage.
In industry, wood blocks, pellets, sawdust concrete and wood concrete are produced on the basis of sawdust. Excellent thermal insulation properties and low price are the main advantage of raw materials. They are often used in everyday life. There are two main areas in which sawdust is used:
- Agricultural.
- Construction.
Sawdust as insulation - modernity and tradition
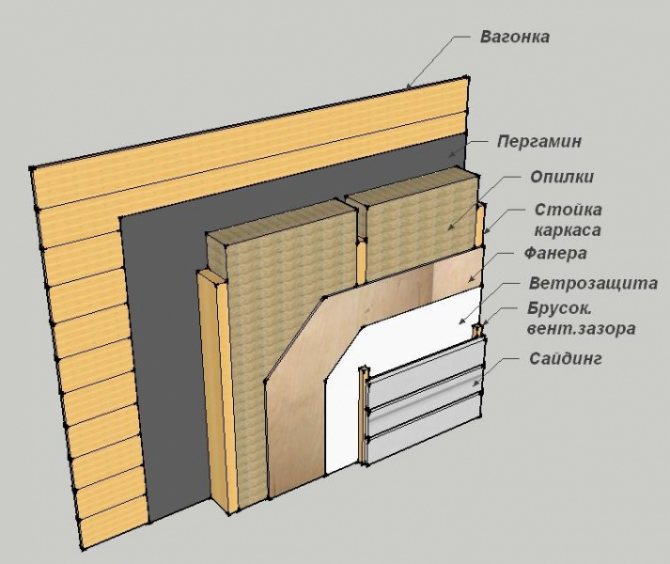
Wood shavings are the most economical insulation material. Today there is a wide variety of building materials for insulating roofs, walls, floors between floors, ceilings and floors. However, the most inexpensive raw materials for insulation are sawdust and mixtures with shavings, they are suitable for almost any structure.
In the twenty-first century, many find it ridiculous to use sawdust as insulation, however, they give an amazing heat and sound insulation, as well as environmental friendliness and purity of wood.
Insulation of the stream with sawdust is a method that has long been used in the construction industry to obtain good thermal insulation. You can endlessly argue about the pros and cons of this option. In residential and commercial purposes, this material is often used in buildings. Naturally, a number of rules must be followed.
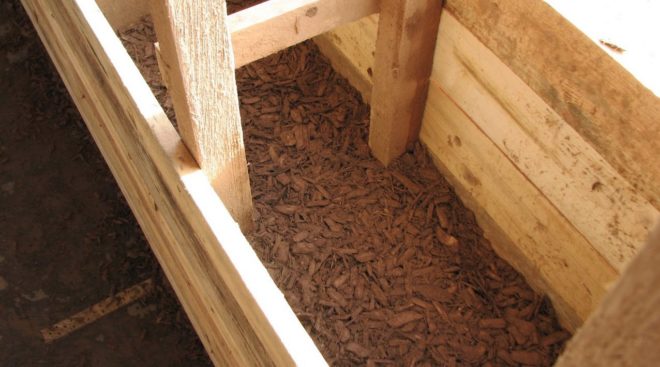
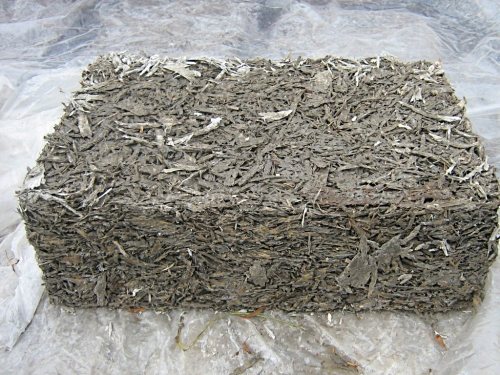
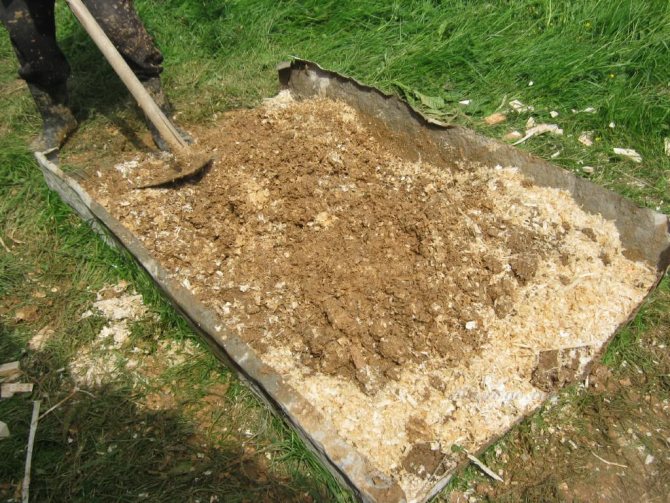
Hard-to-reach areas are covered with sawdust: first you need to mix them with other elements, after which tamping takes place. The result is a block of wood of the desired shape, which has a very good qualities... Sawdust as insulation for the house is properly prepared.
First, they need to be treated with an antiseptic, then dry well and mix. This is done to protect the thermal insulation system from pests. Walls, attics, floors and areas that are difficult to access are insulated with sawdust without impurities, provided that there is no possibility of using another insulation.
Insulation with sawdust has disadvantages:
- if the sawdust is free of impurities and has not been processed, they are flammable;
- rodents also reproduce in them.
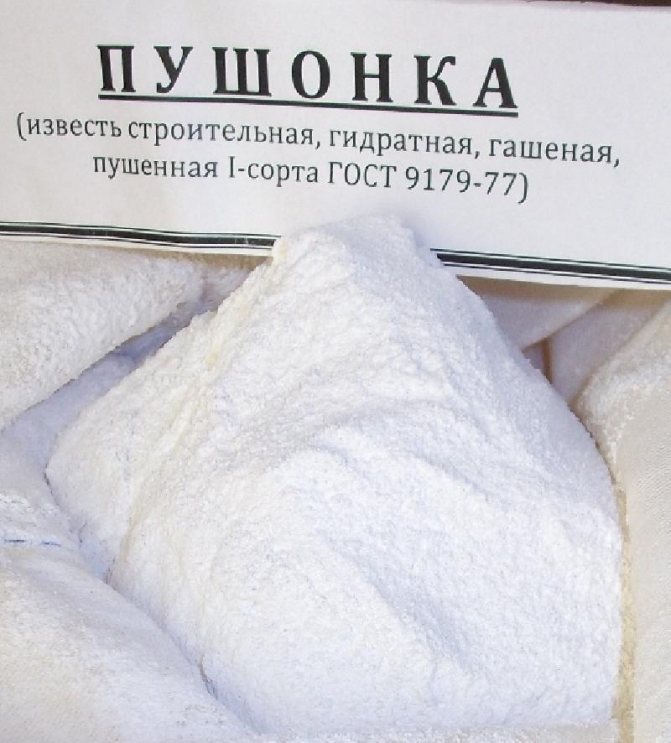
Therefore, cement, gypsum or lime is added to the sawdust and moistened with an antiseptic solution. This mixture is non-flammable and rodents avoid it.
Insulation with sawdust: the pros and cons of this material
Wood sawdust or shavings are a universal insulation that can be used not only for walls, but also for floors and ceilings. It is often used to isolate baths, saunas or outbuildings. Insulation of walls with sawdust has its pros and cons.
The advantages include:
- environmental friendliness;
- low cost;
- long service life;
- insulation work does not require special skills and knowledge;
- even without binders, sawdust has high heat saving rates.
Advantages and disadvantages
Like any other material for home insulation, they also have disadvantages, which, one might say, are quite significant:
- increased fire hazard;
- attractiveness to rodents;
- instability to mold and mildew formation;
- over time, the material can shrink, so the voids need to be filled periodically;
- Despite the good vapor permeability, the sawdust layer must additionally be insulated with vapor and waterproofing membranes.
Insulation of one-story houses
Insulation with sawdust is often used for one-story houses, frame type, if the construction is carried out independently. To do this, you need to prepare:
- Cement.
- Sawdust.
- Lime.
- Watering can.
- Wood antiseptic: boric acid or copper sulfate.
- Shovel or stirrer.
- The container where the mixture will be poured.
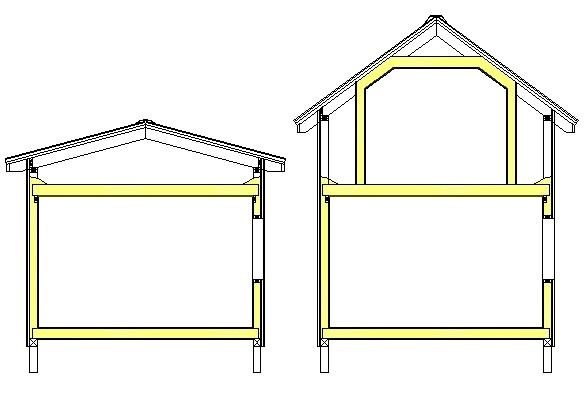
The thickness of the layer depends on the average annual temperature and the purpose of the building... If the goal is to live only in the summer, then twenty-five centimeters of overlap and a wall of fifteen centimeters will be enough. If year-round residence is envisaged, then the layer should be thirty centimeters. To do this, you need to add racks to the frame, forming a larger volume of backfill.
Areas where chimneys and electric wires pass must be insulated with materials that are fire resistant. It is recommended to remove electrical wiring into the pipes, while the pipes must be metal, and their wall thickness must be at least 3 millimeters. Places increased fire hazard - sockets and switches must be laid out with non-flammable materials.
No vapor barrier is required, as excess moisture is absorbed by the cements in the mortar. The mixture is not strong enough if the sawdust is fresh, because they contain substances that do not allow cement to bind with water. Therefore, the sawdust must be moistened with liquid glass or let them stand for two months.
Features of the
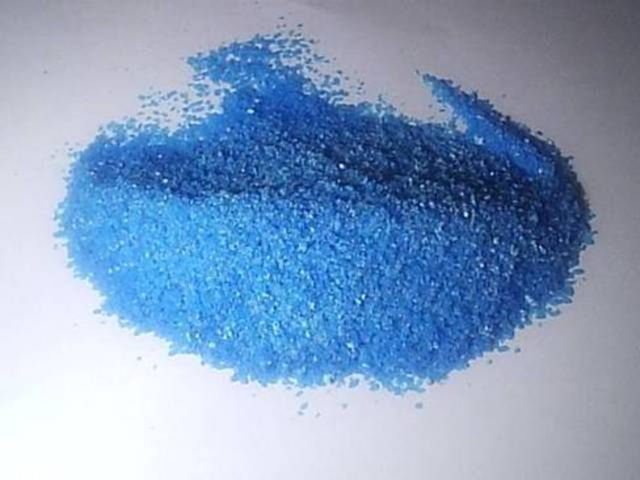
Dust and shavings are not used in their pure form, but in mixtures to which cement, lime or gypsum are added. In addition, they are pretreated with a wood preservative, which can be copper sulfate (not recommended for thermal insulation of baths, since it emits harmful vapors when heated) or boric acid.
It is better to insulate the house with sawdust (both frame and wood) in the summer, since it is possible to dry the mixture well. It is recommended to use a medium fraction material (at least it should be the majority): wood dust is too light and rises from the slightest breath, and large chips do not have sufficient thermal insulation characteristics.
How to carry out the insulation correctly
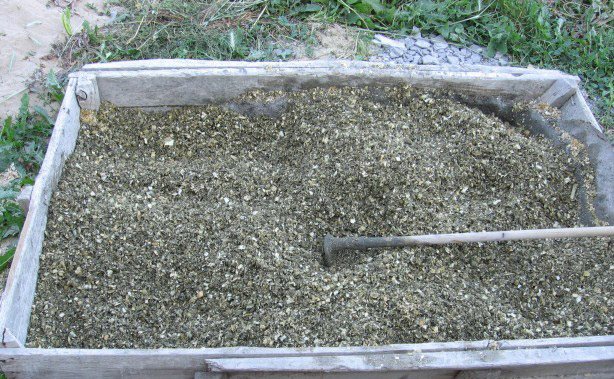
For backfilling, a solution is needed, which is prepared as follows: ten buckets of sawdust, one part of cement and half or one bucket of lime. After that, an antiseptic is diluted in the water and it is necessary to spray this water with the help of a watering can for the garden.
After the mixture has been stirred, try to squeeze it with your hand. If a the lump did not crumble and the water has not flowed out, which means the mixture is ready. Then the vestibule is covered with sawdust layer by layer, and the necessary places in the amount of the required amount. The blocks mature for at least two weeks, while the room must be regularly ventilated. You need to wait a couple of weeks after the filling has occurred and make sure that all the voids are filled in and, if necessary, the missing is filled up.
With the help of sawdust, it turns out good plaster: add cement, clay, water and newsprint to them. This plaster is used for interior work. Also, sheets of the desired size are made from this mixture, they are made in forms, they need to be tamped and given time to ripen. Sheets are used for thermal insulation at the discretion.
The technology of laying sawdust insulation on the ceiling
After mixing the mixture, the resulting mass is poured from above from a watering can with a solution of copper sulfate or boric acid. Water for the solution is taken at the rate of 5 to 10 liters.Thorough mixing of the mixture and solution should lead to the formation of a dense lump that does not fall apart and does not release liquid when pressed by hand. Before laying, cardboard or glassine is placed over the entire area, then the cement-sawdust mixture is distributed, the solution is tamped into voids and other hard-to-reach places. Within two weeks, the insulation should be monitored: good styling quality is evidenced by the crunch when walking and the stability of the layer.
Sawdust can also be mixed with clay as ceiling insulation. Five buckets of clay are poured with water and mixed until a homogeneous mass is obtained. A clay mixture is added to a container with wood chips, until the composition is homogeneous, medium in density... Further, as in the previous version, the surface of the ceiling is covered with a film coating, fixed with a construction stapler, a clay-sawdust solution is applied with a layer of about 5 cm for summer rooms, and for winter ones - up to 12 cm.A few days are enough for drying, after which cracks are corrected with clay.
Useful: Prefab house kit
Floor insulation with sawdust
It is rare where you can find that the floor is insulated with sawdust without impurities, because the tree ignites very quickly and burns perfectly. To date, a large number of heaters are produced, which include sawdust: wood concrete, ecowool and sawdust pellets.
Ecowool allows by hand or by spraying do floor insulation. To do this, you need a blow molding system or turn to professionals. It is not profitable to purchase a device to use it once, however, if you do everything manually, the amount of expenses will increase by about forty percent.
In places where the temperature regime in winter does not drop below twenty degrees, it is recommended to make an insulating layer at least fifteen centimeters thick. If the cold is much stronger, the insulation should be thicker and for every five degrees it is necessary to add four centimeters of insulation.
How to stack
Sawdust as insulation for floors and ceilings can be used in the following form:
- dry;
- with lime and plaster. But how the walls are aligned with gypsum plaster, this information will help to understand.
- with clay;
- with cement. But what kind of facade fiber cement slabs are, you can read here.
Let's take a closer look at the first two options.
Dry method
With this method of warming, sawdust is not mixed with any binder. This option is especially good for the ceiling, since the layer is light and does not create additional load on the floors. Well-dried sawdust is required. To determine the readiness of the material, it is necessary to squeeze a handful of the material: after compression, it should easily crumble with a slight pleasant squeak. And if the material is not yet dry enough, it will stick together.
Stages
All gaps and slots are filled with polyurethane foam or sealed with thick cardboard. You can also lay sheets of chipboard, plywood. It will also be useful to learn how to insulate a concrete floor with expanded polystyrene.
On top of the prepared surface, medium-fraction sawdust with a thickness of about 10 cm is poured. The material must be carefully tamped with feet or with a special pusher. On top of this layer, another one is poured - from fine-grained material. It also compresses and compresses.
Everything is covered with a vapor-permeable film. Polyethylene should not be used, as it can cause heating and rotting of the wood material. Planks, plywood, any hard surface that can be walked on is laid on top of the film. It is also worth paying attention to how the wood floor is insulated with plywood.
On the video insulation of the ceiling of the house with sawdust by the dry method:
Second way
Let's figure out how to lay the insulation by combining it with lime and gypsum.
After buying sawdust, they are treated with an antiseptic. Copper sulfate usually plays its role: 3-4 teaspoons are enough. Then the free-flowing wood material must be thoroughly dried.
After drying, prepare the following consumables:
- sawdust - 85%;
- lime-fluff - 10%;
- gypsum - 5%. And here is how a plaster facing stone looks and is used is indicated here.
All these components will be needed for competent and high-quality insulation of the floor or ceiling.
The work takes place as follows:
First, sawdust is poured onto the surface, moistened. The specified amount of lime is distributed over them from above. The whole mass is mixed with a shovel. This must be done carefully and carefully in order to capture the entire volume.
Then you need to distribute gypsum in the amount of 5% of the total volume, and mix everything again. A layer of waterproofing should be laid between the lags, and then the resulting mixture should be evenly distributed. When laying the composition, try to tamp it carefully. In this case, the mixture will perform its functions more efficiently, since there will be fewer slots, gaps and holes in it.
The solution will completely "grab" and harden in two to four weeks. And then, when it comes to floors, you can lay the flooring.
Distinctive features of chipboard
Chipboards are made from wood shavings. With the help of this material, it is possible to insulate subfloors without making preliminary preparation. Thoroughly first the primer is leveled, and then a polyethylene film is laid for waterproofing.
After that, the chipboard must be laid on a plastic wrap. Chipboard, therefore, serves as insulation and as a final coating. The material is attached to the base with expanding dowels, anchors and in other ways.
In places where moisture increased chipboard cannot be used as a finishing coating: cellars and garages. Since the floors of the cellars are not exposed to high stress, chipboard can be glued to concrete with construction glue or molten bitumen. The temperature in the basement can be increased by making a double layer of insulation to prevent dampness.
Wall insulation
Considering the construction of the walls, the methods of insulation are also different. For example, hollow bricks or concrete are often poured with wood chips mixed with lime, cement or PVA glue. For the walls of a frame house, this method is also effective, because the solution can only be poured into such a structure.
In some cases, with external insulation, the sliding formwork method can be used. Despite the complexity of the work, this method guarantees uniform coverage of the heat insulator layer.
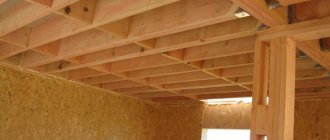
Insulation of ceilings with sawdust
Insulation of ceilings is one of the most important stages. It is necessary to take a responsible approach to the issue of thermal insulation of the ceiling, because about twenty percent of the heat goes through the ceiling. Insulate the ceiling with sawdust much cheaper other materials for insulation.
Ceiling insulation. First, you need to cover the rough ceiling with glassine. Ceiling boards must be treated with fire protection. Sawdust that has been stored for a year or more is very suitable, otherwise there is a possibility that the cement will not set. The material must be odorless and dry.
Sawdust needs to be mixed in water-cement mortar, the ratio must be ten to one. Just enough water is needed to make the mixture a little wet. One and a half buckets of water need to be taken for ten buckets of sawdust. It is necessary to mix dry cement with wood materials, gradually adding water. As a result, the shavings are slightly greased in the cement.
The resulting mixture must be tamped and scattered with a two centimeter layer between the beams over the entire floor surface. It is better to do everything in the summer so that everything can dry out by autumn.A mixture that is completely dry will not slip underfoot, there may be a slight crunch.
Sawdust can be different in fraction. The less sawdust, the more water and cement you need. Also, more cement is required if the sawdust is fresh. However, the properties of the material for thermal insulation will become progressively lower as the amount of cement in the mix increases.
Sawdust insulation technology
It is not so easy to fix loose insulation on a vertical plane. The technology of all work requires strict adherence to all rules and stages, otherwise the effect of the insulator will be minimal. In addition, insulating a frame house with sawdust implies insurance in the form of a cable, as well as the presence of an assistant, because the walls are filled with material at a height.
Preparatory work
Before starting work, you should take measures to prepare the surface for insulation. This requires:
- inspect the walls for significant deficiencies and eliminate them;
- to close up all defects that may lead to the destruction of the structure;
- to clean the surfaces of the walls from dust, debris, if necessary - from old paint and plaster;
- all wooden parts must be covered with special protective agents against insects, decay, fire protection, etc.
- patch up all holes and cracks;
- if you plan to insulate with sawdust plates, then before installing the crate, you need to strengthen the steam and waterproofing membranes.
Training
Filling internal cavities
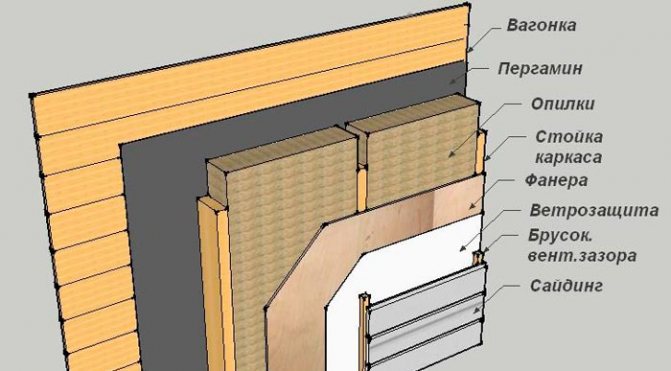
If the construction of the walls implies a frame, then it is made of two layers of boards, and it is customary to fill the space between them with shavings in a wet or dry form. To avoid excessive moisture of the material during operation, the inner side is insulated with special films that are designed to protect the insulation from moisture.
The resulting mixture is poured into the wall space and tamped well. It will take about two weeks to check all wall cavities for voids, which, as they form, need to be filled with a new portion of the solution.
Filling cavities
If it is planned to fill the internal cavities with dry shavings, then before that it must be treated with special means to protect against rodents and small pests.
From all of the above, we can conclude: sawdust is used to insulate the walls of the house, which can be built of brick, foam concrete, cinder block or have a frame structure. This is an environmentally friendly material with good heat saving performance, which will not significantly reduce your budget. It should be said that this is a great way not only to insulate a house, but also to increase sound insulation, but only if all the insulation work is carried out correctly, taking into account all the features.
The use of sawdust for the purpose of do-it-yourself insulation
The use of sawdust for home insulation
Often, shavings can be used for the purpose of thermal insulation of one-story buildings. If you plan to collect a heat insulator from sawdust yourself, then you should prepare the following types of materials and tools:
- Cement.
- Lime.
- Sawdust.
- Shovel.
- Stirrer.
- Antiseptic.
The thermal insulation layer can have a thickness, the size of which is determined by two factors:
- The conditions of the area.
- Multifunctional purpose of insulated rooms. A heat insulator with a width of 25 cm will be sufficient for installing ceilings up to 15 cm wide for walls.
For this purpose, a special rack is mounted on the main frame, which creates space for the purpose of filling it with sawdust.
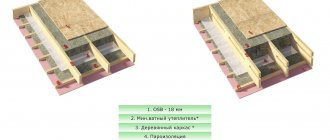
Scheme of wall insulation with sawdust.
In order to correctly perform insulation with sawdust, you need to know the following points:
- It is imperative to take into account the presence of objects that have a risk of flammability, which include sockets, wiring, switches, insulated with a material that cannot be ignited.
- The electrical wiring and the flue pipe must be connected.
- Electric wires are usually hidden in steel pipes 3 mm thick.
To prevent the cement from absorbing excess water, insulation must be provided. It should be noted that new sawdust contains special substances that prevent the adhesion of cement with water. The consistency of the solution is not strong, so this difficulty can be prevented by wetting the sawdust before using it.
Related article: Do-it-yourself firewoods and woodpiles
How to prepare a sawdust-based mixture for thermal insulation of buildings
To create a heat insulator using sawdust and cement, the following materials should be prepared: for 10 buckets of sawdust, take one bucket of cement and lime. All these components should be mixed for ideal impregnation of the sawdust with the prepared composition, while insulating the roof or attic. Then you should dilute the antiseptic in water, pour this composition into a watering can to irrigate the mixture.
The check is done by taking a little of the composition and squeezing it in your hand, if water does not appear, and the lump does not spill, then this means that the solution is correct. At the next step, the composition with sawdust and cement is backfilled with its layer-by-layer compaction. The blocks should be fully ripe for at least two weeks.
Providing insulation of the ceiling, floor or walls with the help of a composition with shavings, all work is carried out in a well-ventilated room. After two weeks, those places that have been filled up must be inspected, which will reveal the presence of voids that arise during drying. In the presence of voids, they are filled with a composition with shavings.
Heaters
127 votes
+
Voice for!
—
Against!
Thinking about building your own home, sooner or later each owner faces the question of the choice of materials. And this applies not only to the execution of the structure of the structure itself, but also to the products from which the thermal insulation will be mounted. The modern insulation market can offer a huge range of a wide variety of materials, from mineral wool to extruded polystyrene foam. But even the most expensive material does not guarantee complete heat preservation, without its unnecessary losses, while the budget due to its purchase will be significantly reduced. Many experts increasingly began to return to the long-known, but gradually forgotten methods of thermal insulation of buildings. And above all, we are talking about the insulation of the floor, ceiling and walls using sawdust or shavings. The article will focus on insulating a house with sawdust.
- Warming with clay with sawdust
Features and varieties of sawdust
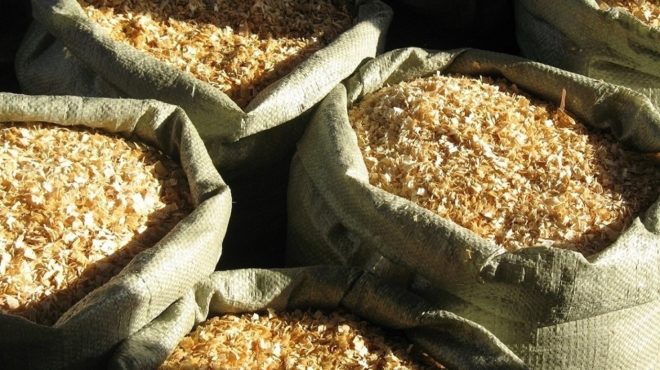
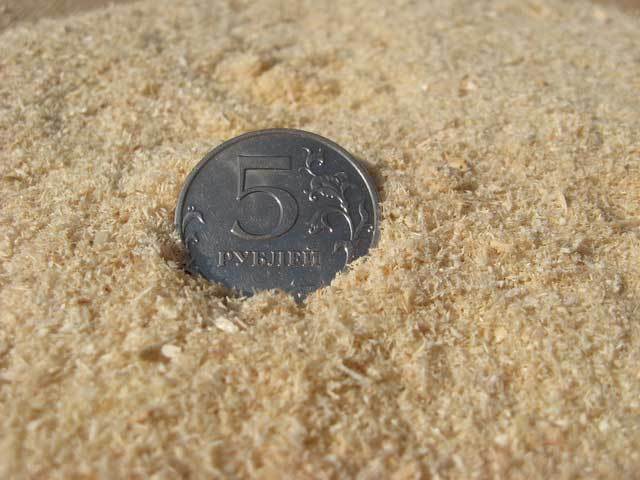
- Sawdust is the name given to particles of recycled wood obtained by sawing; outwardly, they look like fine dust.
- There is also such a type of wood waste as shavings. The differences between them are in the manufacturing method, so for the production of shavings, wood must be planed or drilled, it also has a slightly larger size (approximate length 3-5 cm) than sawdust.
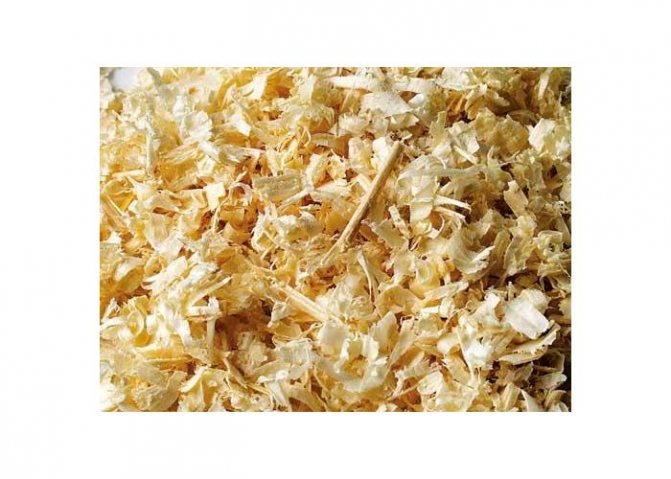
- Sawdust can also be of different fractions from 5 mm to 3 cm. The length depends on the technological processes of the woodworking industry, that is, what type of tool is used in each case.
- This is an environmentally friendly material, which, in addition to its low cost (on average, the price per bag ranges from 10-70 rubles, and often they are given free on sawmills) has a lot of other advantages.Among the more significant are excellent thermal insulation and sound-absorbing properties and a relatively low specific weight of the product. Most carpentry waste is made from hardwoods such as spruce, pine or ash.
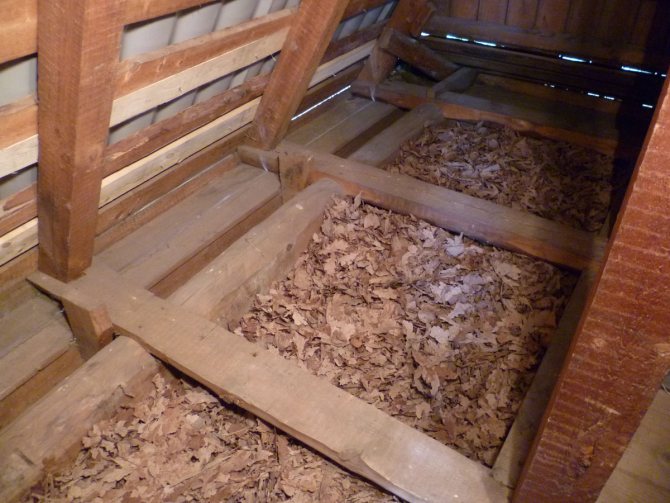
Insulation of the ceiling with sawdust
Ceiling insulation issues should be dealt with in private housing construction from any material, be it a wooden house, or made of bricks or foam blocks. After all, it is through the ceiling that significant heat loss occurs, on average it is about 20%. The most cost-effective way to insulate a structure is to use a thick layer of sawdust.
Of course, stacking wood products is not easy. Before proceeding with the direct installation, you will have to carry out a lot of preparatory work. First of all, this procedure is aimed at protecting against fire, since wood in almost any form is extremely flammable, that is, it is highly flammable and has a long burning time.
Required materials and tools:
- fine and coarse sawdust;
- sand, clay or slag;
- lime and copper sulfate (or boric acid);
- backing material (corrugated board or any other breathable materials, that is, with good vapor permeability);
- sealant and polyurethane foam;
- fire retardants, water repellents and wood preservatives (in the event that ceiling boards do not have protection against mold and mildew, fire and water, then a preliminary complex treatment should be carried out);
- construction stapler and staples to it.
Stages of work
All work begins with protecting the ceiling beams and boards from possible adverse factors. As a rule, high-quality buildings are already built from processed material. But if such a procedure was missed for some reason, then it is necessary to carry it out now.
How to carry out the processing correctly
Wood structures are protected in a comprehensive manner, in accordance with the following sequence:
- antiseptic agents that prevent putrefaction and protect against insects;
- fire-retardant preparations for resistance to fire and high temperatures;
- water repellents, which prevent moisture from entering the wood structure and washing out previously applied products, at the same time, water-repellent substances should not prevent excess moisture from leaving the boards.
It is necessary to observe the compatibility of all means with each other. It is advisable to choose a product line from one manufacturer.
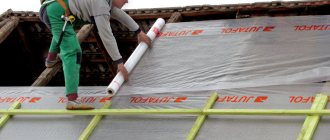
Laying the underlay
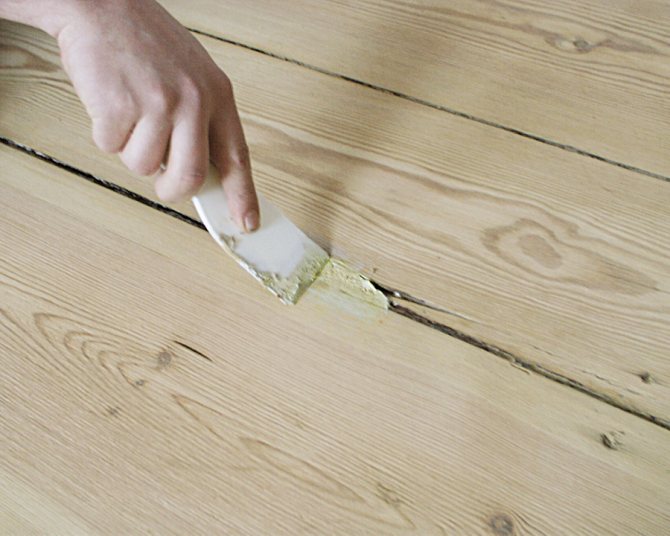
- After the required protective work has been carried out, all seams, joints and existing cracks should be sealed with foam and sealant. Polyurethane foam is used in places with large gaps, small cracks and gaps are sealed with acrylic, polyurethane, thiokol or silicone based sealants. Although the bituminous composition is good for roofs, it does not withstand high temperatures, but in principle, no one forbids its use.
- It is not recommended to just foam all the cracks, since due to the special structure of the foam, it ignites very quickly, which is extremely dangerous in cases of thermal insulation of the structure with sawdust.
- In addition to the cracks in the ceiling, all other openings in the roof structure are sealed. This is necessary so that precipitation does not fall on the insulation or the insulating layer does not rise when gusts of wind occur. At the same time, places should be left through which air will pass, for example, small attic windows. Such a measure is needed to dry the laid sawdust, as well as to ventilate them.
- Do not forget about trimming the protruding parts of the foam flush with the ceiling beams, otherwise in the future there will be voids in these places through which heat will escape and get cold. When all the holes in the ceiling are sealed, the sealant and foam are dry and leveled, the underlayment can be installed.This procedure is necessary so that fine dust from sawdust does not crumble from the ceiling and does not create additional dust in the house. After all, no matter how carefully all the cracks are sealed, the possibility of their occurrence is not excluded, so you should insure yourself in advance.
- The substrate must necessarily have para-permeable properties, otherwise warm air and steam, rising up, will linger between the boards and materials, forming unnecessary condensation, and in the future, the development of bacteria, mold and rot is not excluded, that is, the failure of the entire structure.
- Any cardboard is suitable, from old boxes, packaging and so on, as long as it is dry.

- Ceiling boards are cleaned of dirt and dust and cardboard sheets are laid on them in several layers. The material should be overlapped 15-30 cm so that sawdust does not accidentally fall between the seams. Further, all the joints of the substrate are fixed with staples, it is advisable to place them at a small distance from each other and make sure that all layers of cardboard are captured. It is best to lay thin cardboard in 2-3 layers. The edges in contact with the beams are also fixed with brackets, and then they pass around the entire perimeter with a sealant or foam.
The choice of sawdust and methods of filling them
- Wood-shaving material should be chosen dry or slightly damp, with no odors unusual for wood. It is best to pre-treat sawdust with solutions of fire retardants and antiseptics. When the mass dries up, you can add 10% lime (fluff) and a little copper sulfate (or borax) to it, mix the composition thoroughly.
- There are several main methods of installing thermal insulation from the waste of the wood-shaving industry. Sawdust can be poured both in a clean dry form, and mixed with cement and diluted with water (or initially wet material is used). You should work with the cement mixture as quickly as possible, since it hardens within 30-60 minutes, after which it will no longer be possible to tamp it thoroughly.
Dry method
- For the dry method, it is recommended to fill the sawdust in two layers. The first consists of a larger fraction or shavings, and the second is filled with the smallest products. Such a measure will help to avoid unnecessary dust in the house, which may arise from filling only small fine-grained products.
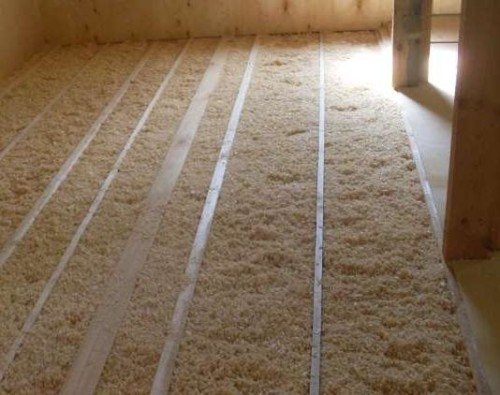
- Also, large sawdust cannot be properly tamped, and this must be done so that the heat-insulating layer does not let heat through itself, but retains it and even gives it back to the room.
- The coarse-grained material is covered with a layer of 10-15 cm and compacted, on top of it a layer of fine sawdust of the same thickness is placed on top of it and is also carefully pressed and trampled down.
- It is allowed to slightly moisten the layer for better shrinkage. In general, insulation with a thickness of 20-30 cm is sufficient. It is also recommended to lay ash, slag (always in a completely burnt and cooled form), sand or clay on top. This, firstly, will help keep warm, and, secondly, it will prevent the appearance of rodents and the development of mold.
Insulation with sawdust with cement
- A method of installing thermal insulation from wet sawdust with cement. For its implementation, it is necessary to stock up on wood-shaving material that is stored for at least a year and has a slightly moist composition. It is imperative to make sure that the sawdust does not have foci of bacteria, fungus or mold growth.
- The ratio of shavings, water and cement in the composition should be as follows: 20: 3: 2. In this case, it is best to start the solution in small portions in order to have time to use it. The dry components (sawdust and cement) are thoroughly mixed, and then water is gradually added, while the mixture continues to stir.
Tip: do not forget that the shavings must be pre-treated with various protective agents and mixed with lime, as well as with copper sulfate.If such procedures were not performed in advance, then all this should be added to the prepared solution.
- The prepared insulation is poured between the floor beams onto a substrate or a layer of sand and tamped. As a result, a heater with a thickness of up to 5-10 cm should be obtained. The mixture grasps well and after it has completely solidified, you can move around it fearlessly, it will crunch a little, but should not slip.
- Once the insulation has been laid in order to walk normally on the surface of the attic, it is best to arrange the flooring from planks or other solid material. If frequent movements are not planned, then it is allowed to leave the roof in this state (that is, without covering the insulation layer).
Floor insulation with sawdust
Thermal insulation of the floor with sawdust is an environmentally friendly solution, profitable from an economic point of view, at the same time, this method allows you to create conditions for a comfortable stay, reduce heat loss and reduce heating costs.
- The sawdust used for floor insulation, as well as in the case of ceiling insulation, requires preliminary treatment against rodents, insects and the development of pathogens. For this purpose, special ready-made products or slaked dry lime and broken glass are used. One has only to be very careful about the composition to which the glass is added. Most often, such a remedy is abandoned in favor of lime fluff and copper sulfate.
- The difference between floor insulation and ceiling insulation is that it is extremely problematic to add an insulator that has shrunk in the floor structure. This means that you should take care in advance and choose a method in which the mixture will not decrease in volume over time, which, ultimately, will lead to heat leakage. In practice, this means that when arranging the protection of the floor from freezing, loose sawdust is most often poured, and mixed with various components and subsequently hardened.
- In order to prepare such a composition, it is necessary to add gypsum or cement to the sawdust. The following proportions are recommended: 85% of the mass is sawdust, 5% gypsum and 10% fluff lime or lime paste (which is required twice as much as dry lime). Do not forget that gypsum sets almost instantly, in order to slightly extend the life of the solution, gypsum can be replaced with cement, which, although it has a short life time, is still more than that of a gypsum mixture.
- It is not necessary to dry the sawdust before kneading; it is worth preparing the insulation in small portions and thoroughly mixing all the components. If the sawdust seems too dry, then add a little water or milk of lime to the mixture. You can check the degree of readiness by squeezing the prepared composition in your hand - if the lump does not crumble or spread, but keeps its shape well, then the mass is ready.
- If the floor is insulated in an already operated room, then the floor covering is dismantled, the floors are treated with antiseptic primers and moisture-resistant mastics, and then a substrate of vapor barrier material or film is laid.
- A prepared mixture of sawdust is carefully placed on top of the substrate and carefully compacted, the layer height is about 10 cm for the first floor and up to 20-30 cm for the interfloor overlap, which should be taken into account, since the floor on the second floor will rise exactly to this height.
- When the mass is carefully rammed, it must be left to solidify, the ripening period is from 2 weeks to a month.

Warming with clay with sawdust
- A method of floor insulation using a mixture of sawdust and clay. This method assumes lining as a backing of a waterproof material, for example, a thick plastic film (150-220 microns).It is because of this feature that such a technique is not suitable for ceiling insulation, since breathable materials must be present in the ceiling insulation design, easily permeable water vapor and not forming condensation, which invariably leads to the formation of mold and rot.
- The foil can be glued to a concrete base or fixed to a wooden surface. This will help keep it in place without mixing. The substrate is laid with an overlap to avoid leakage of the solution, since the mixture of clay and sawdust will be in a sufficiently fluid state.
- For kneading, you need clay and water. In consistency, the solution should resemble liquid sour cream. That is, for 100 liters of water, 5-6 buckets of clay (it is important to adjust the density, depending on the material). To mix the mixture with sawdust, it is best to use a concrete mixer or a construction mixer. It is recommended to mix it gradually, take 1-2 buckets of liquid clay and add sawdust until the mass thickens.
- To apply, this should be insulated with a uniform layer up to 10 cm in thickness. You can press it down with a flat, even object with a large surface area (for example, a wide wooden board or shield).
- It takes 7 to 15 days for the mixture to harden, depending on temperature and humidity. Drying, cracks can form on the surface, which can be easily repaired with the same clay. Also, if such a heater is supposed to be in a damp room, it should be covered with a moisture-resistant mastic. Next, you can lay wood flooring and use the floor.
Dry way of laying sawdust
- It assumes the device of a raised floor. Sawdust is treated with fire retardants and antiseptics. This can be done by pouring protective solutions from a watering can over the dry mass and stir thoroughly so that each particle is covered with the agent. After the insulation is prepared, proceed to the construction of the subfloor.
- For this, all wooden products (logs, floor beams) are also covered with protective compounds. After that, a rough floor of boards is mounted on the base, and a layer of waterproofing is laid on it. Sawdust with a thickness of at least 10 cm is poured over the water barrier. It is recommended to spill the sawdust with milk of lime (lime diluted to a very liquid state). This will increase the resistance of the thermal insulation to biodegradation.

- It is worth considering that it is not allowed to insulate the floor with sawdust for the subsequent implementation of the screed. Since such a layer has low strength and can give significant shrinkage. Before covering the topcoat, it is necessary to allow time for excess moisture to come out, this is about 2-4 days. It is also possible that in the allotted time the sawdust will shrink by 2-3 cm, that is, in the future, you should either add an additional layer, or at the filling stage immediately make its thickness within 12-14 cm, which is more optimal. In addition, there may be slight shrinkage over the next year.
- If the sawdust does not have good waterproofing and ventilation (the gap between the finished floor and the insulation layer), then soon they will lose their heat-shielding properties. Therefore, this must be thought about at the planning stage of the floor structure.

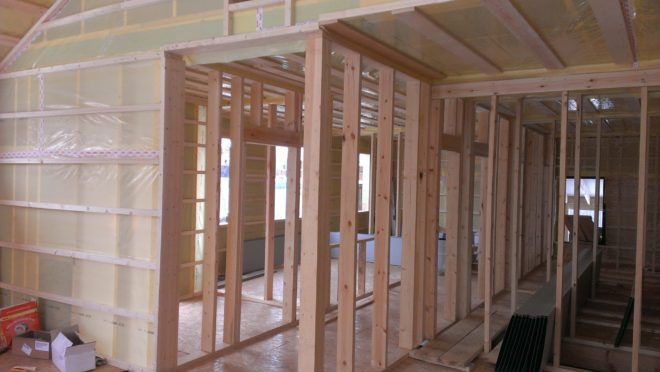
Wall insulation with sawdust
- The most difficult procedure is wall insulation, since it is necessary to erect a frame, which is clogged with sawdust and compacted by hand. For laying in a frame wall, coarse sawdust should be harvested. If dry laying is expected, then the thermal insulation material must be well dried and not contain excess moisture.
- The mixture is prepared from wood chips, lime, gypsum or cement (since on a gypsum basis you will have to work with the material very quickly, and prepare it in small portions), as well as with the addition of antiseptics to the composition.The well-mixed mass is moistened, poured into the prepared frame and carefully compacted to avoid further subsidence. Gypsum or cement in the composition eventually draws out all the available moisture, and binds the mass into a monolith.

- A waterproofing material with vapor-permeable properties should be located between the wall and the insulation. The effectiveness of the insulation and the degree of shrinkage depend on the quality of the compaction and the density of the backfill. Voids may appear in a poorly compacted layer, which means that in these places in the future, heat loss will inevitably occur.
- The mixture is laid in layers of 20-30 cm and tamped, then a new layer of the same height is poured and pressed again carefully and so gradually the entire space is filled. The thickness of the insulation varies depending on the purpose of the building and its location (climatic zone). So, in a house with seasonal residence, a layer of 15 cm is enough, but if it is a capital house, then 25-30 cm of wall insulation is required to maintain a comfortable temperature. The frame can be made of wooden boards with a section of 100x50 mm.
- The mass in the wall begins to harden in 1-2 weeks, and finally sets within a month. Throughout this period, it is advisable to maintain a relative humidity of no more than 60-70% and a temperature within 20-25 degrees, as well as arrange regular ventilation of the room. If voids appear during this time, then it is better to fill them immediately and only after that proceed to further wall decoration.
Tips for insulating a house with sawdust
- In order for the sawdust thermal insulation to serve as long as possible, not to be attacked by rodents and to be reliably protected from the development of mold and bacteria, it is necessary to add 5-10% of dry lime to the total mass.
- When insulating wooden buildings with sawdust, fire safety requirements must be observed. That is, in the places where the chimney, stove pipes or electrical wiring passes, it is necessary to take additional protective measures - to arrange separation areas in which instead of sawdust there will be any other non-combustible material, hide the wires in special boxes or in metal pipes, lay out the locations of sockets and switches with non-combustible substances.

- If buying cardboard seems like an expensive procedure, then you can find a free shipping method. It is enough to go to the nearest shops, supermarkets and ask them for unnecessary boxes. In addition, sawdust can be obtained completely free of charge: ask around from neighbors involved in construction, or go to the nearest sawmills and sawmills, it happens that they just give the waste away for self-pickup.
- A year or two after laying dry sawdust, they shrink a little, and for better insulation it is recommended to add a small additional layer.
- Fresh sawdust contains substances that prevent a good bond of cement with water, which means that the prepared mixture will not have the necessary qualities. To avoid this, it is recommended to use sawdust that has been in bed for at least 2-3 months. If it is necessary to build urgently, then liquid glass can be added to the composition.
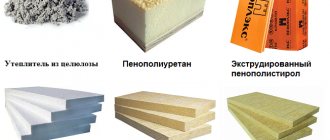
- If we compare sawdust with other heaters, then mineral wool is closest to them in terms of thermal insulation and sound-absorbing properties. The consumption of these two materials is approximately the same, but wood chips are a natural product, environmentally friendly and safe.
- The main disadvantages of wood-based products are its flammability and damage by rodents. But these disadvantages are easily eliminated by using various protective drugs. In addition, for the same purposes, it is practiced to add lime, gypsum or cement to the composition, copper sulfate and boric acid. Such masses are "too tough" for rodents, and also do not ignite and do not support combustion.
- It is best to carry out work on installing thermal insulation in the summer season, since it is at this time that it is possible to dry the mixture well, and, therefore, in the future to avoid problems with the development of all kinds of bacteria and mold formations.
- Sawdust varies in size, and the smaller they are, the more water will be required to wet the mixture. And when fresh shavings are used, more cement will be required, which will significantly reduce the thermal insulation properties.
- The main advantages of wood processing products are affordability, efficiency, durability and ease of installation.
- When purchasing sawdust, you should opt for a medium-fraction material, since it is very difficult to work with small products due to the large amount of dust, and the large fraction does not have good thermal insulation properties. It is best if the waste comes from boards that have passed the preliminary chamber drying, but if such sawdust is very difficult to get and there is waste from logs of natural moisture, then the chips must be laid under a canopy and slightly dried without covering in any way.
- For home insulation, coniferous sawdust will be the best option, since they already contain resin, which scares away bugs and rodents. To insulate other outbuildings, including baths, waste from deciduous trees (for example, ash) is suitable, but they should be mixed with antiseptics or ash.
- It is better not to purchase too dirty sawdust, if the garbage is present, then it is either manually selected or sifted through a construction sieve.
- When adding copper sulfate or borax to the composition, do not forget that this is a chemical poisonous substance and it is imperative to apply all the necessary safety measures, first of all, this applies to the protection of hands and respiratory tract.
- If the mixture of insulation is being prepared for thermal insulation of the bath, then it is better not to use copper sulfate, since when heated it emits poisonous vapors.
Sawdust is used in the construction of residential buildings and utility buildings. It is an economical and environmentally friendly material. It is used for insulating roofs, walls and floors, both in pure form and with the addition of various components. We can say with complete confidence that this is a great way to improve heat and sound insulation, but only if certain rules are followed.


We work with wooden partitions
Drywall is usually chosen for walls. This building material has proven itself well as a noise absorber. Sheathing of wooden walls only with plasterboard can be carried out after the completion of construction. Standard sheets are attached to the surface with self-tapping screws. The seams between the strips are treated with putty and carefully rubbed. After that, a standard building procedure is carried out for putty and surface plaster.
Plasterboard can also be fixed to a wooden ceiling. This will significantly increase the quality of noise isolation.
But, nevertheless, to achieve maximum effect, builders lay a layer of sound absorber on the wooden walls. Anchoring to the surface is carried out using rails.
On top of the insulating material, gypsum board, plywood, and other coating are attached. Some craftsmen put sound-dampening material on a protective film. This is especially true for fibrous compounds - wool, especially glass wool. From above, such a layer is also covered with a film.
If glass wool is used as an insulating material, it is necessary to carefully glue all the seams to prevent microparticles of fiberglass from entering the room.
To use cotton wool, you need to understand that this material can be used in the construction of a wooden house. When working with walls in an already finished room, this method looks very problematic.
When laying the timber, a sound-insulating material is laid, which performs an additional function - insulation. The most demanded cotton wool is mineral, basalt, eco-wool. Due to its fibrous content, it protects wooden buildings well, is lightweight and easy to work with.
Another material that can be easily used on wooden walls is cork. Porous, lightweight, it is ideal for soundproofing a frame or block house. In order to protect a wooden wall, it is enough to place a cork panel on the surface. The soundproofing properties of this material will work flawlessly. In addition, this material does not burn, which is especially important for wooden buildings.
For a complete soundproofing of a building, it is not enough to process only the walls. It is also necessary to provide protection for each wooden floor.