Features of the choice of door insulation
The reasons for heat loss are different: from the skewing of the door leaf and insufficient sealing, to insufficient quality of the material. If the replacement of the door is not included in the plans, then the only correct solution that will help to save 25-30% of heat energy is the door insulation, the nuances of which will be discussed.
The nuances of installing a door insulation
You will have to tinker with the insulation of a metal door.
Algorithm for installing heaters on a metal door:
- If the door is collapsible, it is untwisted, after removing it from the hinges and dismantling the locks with handles. In the case of welded seams, they are separated using an angle grinder.
- Laying insulation in an empty box (if necessary, blowing with polyurethane foam).
- Assembling the door frame.
In the case of a wooden door, first align the jamb and reinforce the hinges.
Stages of fixing insulation on a wooden door:
- The doors are removed from the hinges, the fittings are untwisted.
- Lay the canvas on a flat surface, after which a heater is attached to it with liquid nails or glue.
- The upholstery is reinforced with a nail spacing of 30 cm.
Each material has design and installation criteria that help to choose the insulation correctly.

Mineral wool
Minvata is made from silicate rocks. High noise and heat insulation characteristics of the product are determined by the fibrous structure. Minvata is environmentally friendly, non-flammable, resistant to moisture penetration, the influence of temperature fluctuations, is not afraid of the effects of chemicals, and besides, it is characterized by a moderate cost.
The main disadvantages of the material are subsidence under its own weight, as a result of which voids are formed. The installation of additional stiffeners that can keep the insulation from slipping helps to avoid this.
In any house or apartment, most of the heat goes through the front doors. This problem can be solved only by competent insulation of the door structure. If you choose the right insulation material, you can reduce heat loss by 25-30%. But the choice of insulation is determined taking into account the material from which this or that door was made. Further in the article you will find which self-adhesive insulation is better to choose, its descriptions and characteristics.
How to stick
So, you have chosen and bought a self-adhesive insulation, how to glue it on the windows? Remember when we said at the beginning that the adhesive layer makes installation easier? So, this is actually the case.
- If there is one, remove the old insulation by prying it with a knife;
- Thoroughly clean the work surface of the frame or glass. This may require a rag or brush. Sometimes the remnants of old glue need to be removed with a knife or sandpaper;
- Degrease the surface with an alcohol solution;
- After the surface has dried, remove the protective tape from the purchased insulation;
- Press it gently against the frame or glass.
Remember, the tape will be fully glued only after 2 hours.

Application
Door insulation can be glued in several ways. To understand which one suits you, you need to consider them separately.
Along the perimeter of a metal door
If the door does not fit snugly against the door frame, then gaps appear during its closing. It is because of them that the cold air will come in from the street.
To solve these problems, it is necessary to evaluate the flatness of the door frame and the operation of the hinges. Maybe the reason for the penetration of cold lies in the skew.After that, mount a heater around the perimeter of the box. It will have a rubber or foam strip. You can use such insulation for wood, metal and metal-plastic sheets.
On video insulation around the perimeter of the door frame:
The advantages of the method include ease of installation, low cost of materials and efficiency. The disadvantages of this installation include low durability.
Insulation of the door frame
In order to insulate the door frame, it is necessary to seal up its inner space with the selected heat insulator. This type of insulation is often used for an iron structure. It is such a door that quickly cools and freezes.
The interior of the door is represented by several compartments. They are separated by stiffeners, the structure of the lock and other elements. Place the material inside the box. At the same time, it is worth using a heater that is light, reliable and resistant to fire.
Most often, mineral wool, polystyrene is used for these purposes. In addition to thermal insulation, the inside of the box must be covered with polyethylene foil. Blow out all cracks with a sealant.
Video: rubber insulation tape for the front door
On the video, self-adhesive insulation for metal doors:
The advantages of this method include high efficiency, low cost of materials and excellent thermal insulation properties that the entire box receives. The disadvantages of thermal insulation can only be attributed to the fact that it is very difficult to open the door without the help of a specialist.
External door insulation
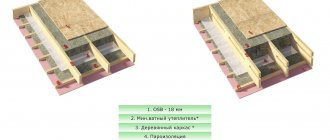
With this option of insulation, a mineral wool insulation is mounted on the outer side of the door structure. In addition, you need to attach a protective cover. For these purposes, you will have to use dermatntin or a leather substitute. Today you can also buy genuine leather material.
You can implement work of this kind with your own hands. Before insulating the entrance structure from the outside, you need to assess its integrity. Be sure to also calculate where the door peephole will be located. Applying this option for installing insulation, it is possible to save personal time and not pay money for unnecessary material.
On the video external door insulation:
The advantages of external door insulation include ease of installation, cost-effectiveness and the ability to eliminate external structural defects. But the disadvantages of a heat insulator are that when using cheap material, it deteriorates very quickly. To solve this problem, you should not save on material, but immediately buy a reliable and durable insulation.
maybe
How and where to correctly install rubber or foam insulation for windows
First of all, you should deal with the question, where is the window seal installed? The fact is that many people, in their ignorance and misunderstanding of the essence of the work performed, glue the sealing tape is not entirely correct. It seems that the place is chosen correctly, but it is not installed on the right side relative to the window sash. Correctly installed tape is, first of all, a guarantee of the absence of drafts; it must be glued so that the plane of the adhesive base coincides with the plane of the glasses in the frame. That is, it must be glued to the part of the window frame to which the sash is pressed. In addition, a more reliable protection against drafts is the installation of two sealing strips at the same time, which provide a double barrier for cold air entering the room. The second tape is glued to the window sash, or rather to its bar, which covers the gap between the window and the frame.
How to properly install insulation on the windows photo
As for the very technology of gluing the sealing tape on the windows, it looks quite simple. The main thing here is to withstand just a couple of nuances.
- The cleanliness of the place where you are going to glue the sealant. Not only does it need to be cleaned of dust and dirt, it also needs to be degreased with alcohol or solvent.
- The second nuance concerns the tape on a self-adhesive base - you need to remove the protection from it gradually, as it is glued, so that dust or dirt does not get on the Velcro.
- The tape must be firmly pressed against the surface to be glued.
- It is necessary to install such seals not in fact, with the onset of cold weather, but in advance, when it is still warm outside. It should be understood that negative temperatures negatively affect the adhesive properties of the base of the sealing tape.
In all other respects, installing the seal on wood or is an elementary action. Yes, and one more thing - it is better to stick the tape so that there are as few gaps as possible on it. It is better to wrap it at the corners than to cut it.
How to install rubber window insulation
Choosing a self-adhesive insulation for entrance doors
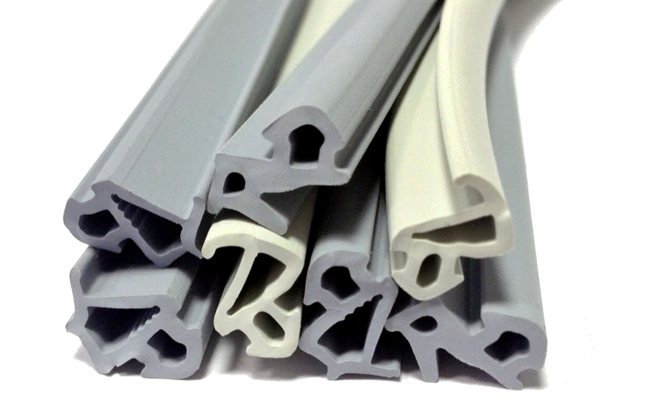
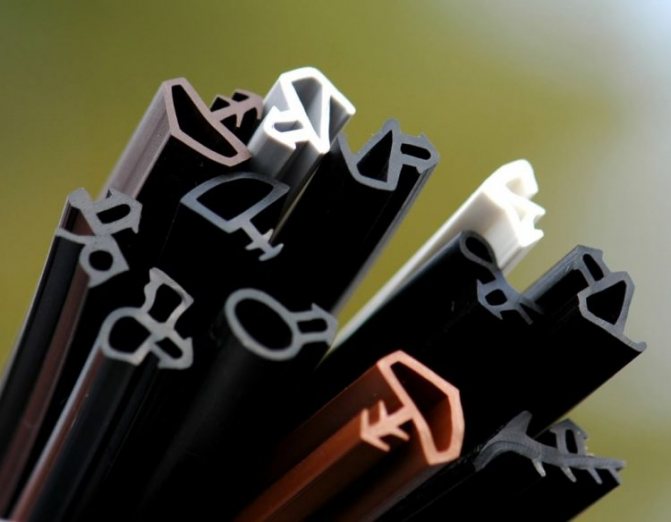
On the shelves of hardware stores, there are several options for self-adhesive insulation that are suitable for entrance doors. They are all tape with an adhesive edge.
The tape itself can be made from:
1. Rubber-based seal.
Rubber insulation for the front door can be called universal. It is not afraid of moisture and temperature extremes, exposure to chemicals, it is easy to install.
Service life - from 3 to 10 years. One package contains about 12 meters of material, the cost of the tape is 150-250 rubles.
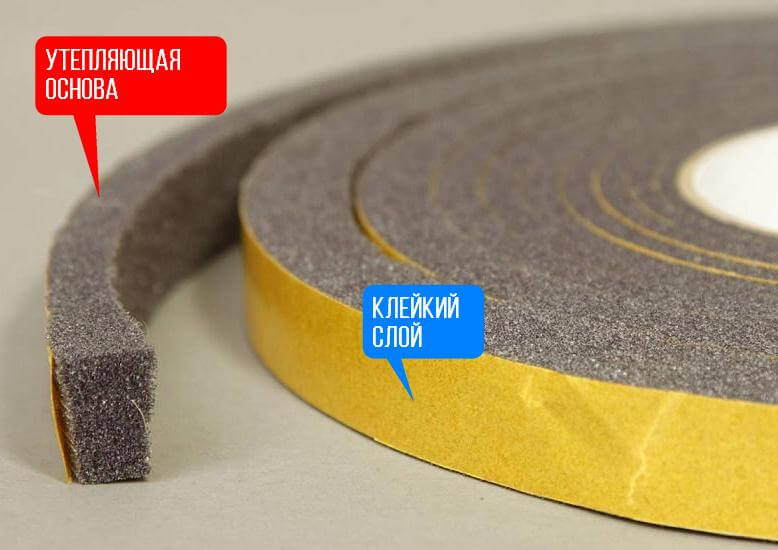
2. Foam tapes.
Of the advantages of foam rubber, it is worth highlighting that it is easy to stick it and an affordable price.
However, the disadvantages outweigh the advantages:
- weak thermal insulation effect,
- short service life.
The cost of one package is about 100 rubles.
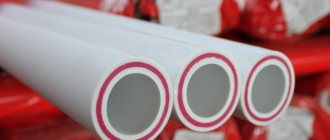
3. Polyvinyl chloride. These tapes are appreciated for their high reliability, they are not afraid of temperature drops from -50C to + 70C. Their service life is up to 20 years. Their main disadvantage is the high cost, but taking into account the durability of the material, the price pays off with interest.
4. Silicone. Such heaters are environmentally friendly, but due to the nature of the material, they are used mainly for interior doors.
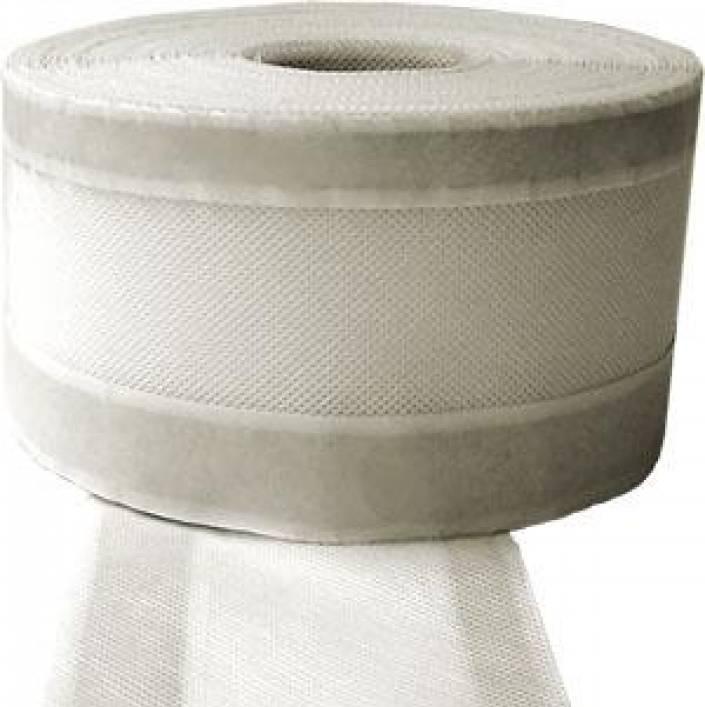
5. Isolon. Another glue-based material. It is made of polyurethane foam. Sold in rolls, it is convenient to glue it. Cost - from 10 to 160 rubles per square meter.
We take into account the nuances of the door material
1.When choosing a seal for a metal entrance door, follow these recommendations:
- Do not purchase foam rubber tapes; it is not recommended to use them for entrance metal doors, since the material will not withstand frequent door opening and will have to be replaced after half a year.
- Press lightly on the base of the insulation. If it quickly regains its shape, then it will be able to provide a good tightness.
- When choosing a color, give preference to black seals, they are considered to be of higher quality.
- Make sure the sticky base is not past its expiration date.
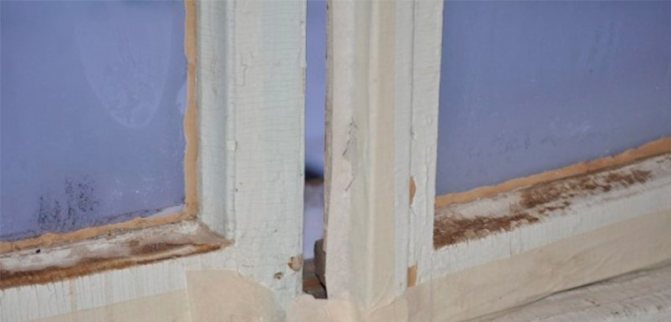
2. Fitting a wooden door to a door frame is always accompanied by difficulties, which is associated with the individual characteristics of the natural material.
When wet, drying, temperature changes, the tree is deformed, therefore cracks are constantly formed.
To eliminate cracks, it is recommended to glue silicone and rubber insulation, which fit snugly to the surface. Izolon has also proven itself well.
If the task is to save money, you can limit yourself to foam rubber, but it is important to understand that it will not last long
Instructions - how to properly glue the seal on the door
- We carefully remove the old insulation with tools. In our example, the strips are firmly attached to the door frame. We also remove all nails, staples and buttons.This stage is mandatory, otherwise the door will not close after replacing the insulation.
- We use insulation with a gap of 1-3 mm. In the upper part, we glue a strip of material along the length a little longer than necessary. This will give us a neat design.
- We check if the material is evenly glued. In the lower part, we cut it off with a knife. In the upper part, glue the strip of the sealant so that it overlaps the vertical strip. We do the same at the bottom of the box.
As a result, we get two strips of tapered seal, connected at an angle of 45C. This design will retain heat for about 5 years.
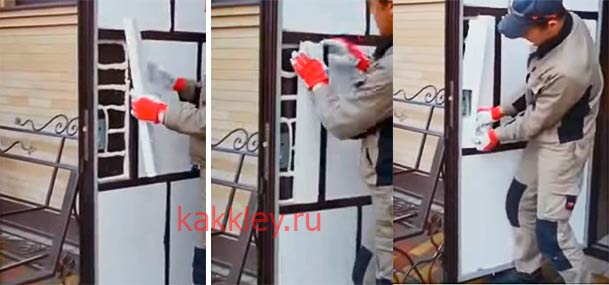
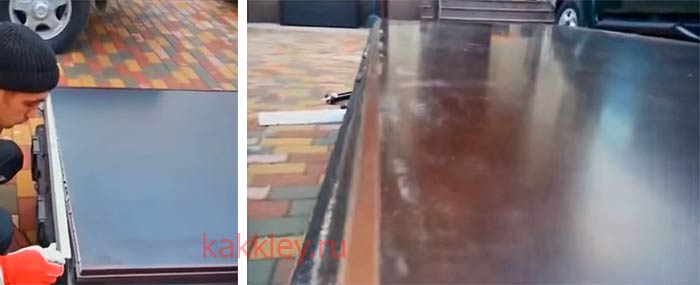
We insulate the entrance metal door using foam sheets
If you have a metal door, study it to see if it is possible to remove the inner metal removable sheet, it is often attached at the top and bottom of the door with self-tapping screws at the corners.
We act as follows:
- We remove the removable sheet.
- We go through the inner corners with a sealant. We put insulation in the door leaf, for example, polystyrene. Each piece must be the same size as the cells in the door.
- We lay the insulation in an even layer. If this is not possible, fill the voids with polyurethane foam (excess foam is removed).
- We put the removed sheet back. The door is now insulated and ready for use.
>

Subtleties of choice: manufacturers and prices
When choosing a self-adhesive tape, you should pay attention to the profile and material from which the insulation is made. For slots 1-3 mm wide, profile C or E is suitable, for 3-5 mm - P and V, for 3-7 mm - B and O.
Important: the shelf life plays an important role in insulation, as the glue dries out over time.
The modern assortment of heaters includes many manufacturers:
- rubber heaters, which can be found in any store - from 160 rubles for 5 meters;
- Ultima - Polish foam rubber seals, price from 220 rubles per 12 m;
Penosil - two-component EPDM rubber insulation, price from 600 rubles;
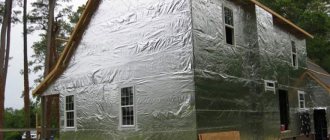
- "Penofol" - foil-clad polyethylene foam, price from 108 rubles per m 2.
But how and where you can use liquid insulation in Polinor cylinders, you can find out by reading the content of this article.
It will also be interesting to know what kind of insulation to put under the linoleum and how to do it correctly.
But what is the price of insulation for a warm water floor and which one should be used, this information will help to understand.
What insulation for the floor under the screed is the best to use and how to use it correctly, you can read in this article.
But what is the price of foil insulation for the floor and where it is worth using such a building material, this information will help to understand.
Related article: Standard window size in a brick house
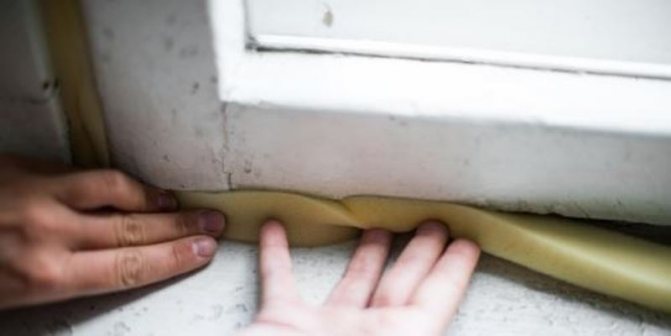
The traditional method of sealing is inconvenient
Usually, special self-adhesive seals are sold for insulation. It is proposed to stick them between the door and the frame in the places of their contact. But this approach proved to be ineffective. The seal installed in this way is very sensitive to door distortions. The slightest misalignment leads to a loss of tightness, since the seal ceases to adhere. Installing such a tape is also not easy. Only if the door is in perfect position can you simply glue the strip. Otherwise, the distance between the door and the frame is different in different places. So you have to put something under the sealing tape to ensure a secure fit.
The disadvantages of such insulation
The only drawback of this method is that by accidentally touching the seal, it can be torn off. Oh, okay. Glueing it in place is not difficult at all.
Korovin Sergey Dmitrievich
Master of Architecture, graduated from the Samara State University of Architecture and Civil Engineering.11 years of experience in design and construction.
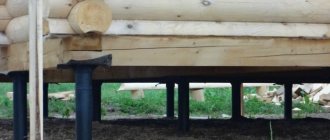
Warmth and comfort in the house are the main tasks facing each owner of his own living space.
Particular attention is paid to the front door, as it is in direct contact with the street. And in the cold season, heat is able to leave the room precisely through the doorway.
To avoid unpleasant consequences, you should insulate the front door. You can do this work yourself. But before insulating a wooden door in a private house, you should prepare everything you need for this.
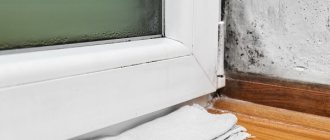
Features of preparing a window for insulation
The preparation of a window for insulation with tape is almost the same as preparation for other insulation. At the same time, there are some peculiarities.
The main steps are as follows:
- Everything is removed from the windowsill. The blinds are removed from the window.
- Frames are washed with soapy water and then dried. The tape needs a dry and grease-free surface.
- The glasses are carefully examined. The glass of wooden windows is sometimes cracked. They must be replaced as they are a source of heat loss.
- Grooves are prepared for the sealing strip. They should be free of old tape, dirt and paint.
- Before the start of work, they are determined with the places from where the cold air comes from the street. They are insulated first. Weak points are sashes, slopes, windowsill.
With the onset of cold weather, the owners of apartments and houses have a problem in the form of window frames that allow heat to pass through strongly. And if 5-10 years ago you had to use old methods - from newspapers, cotton wool to strips of fabric, now you can find simple and effective materials on the market. One of these is a self-adhesive window insulation. What it is and how to work with it - you can find out below.
Wood door seals are a popular option.
To seal a wooden door, you can stick any of the profiled or solid rectangular (square) material specified in the previous chapter. Of course, of those that are intended for this installation (self-adhesive and installed using glue). For a good secure attachment, in addition, the sealing inserts can be screwed through the washers with self-drilling screws. The installation locations are the same as for a metal door.
And you can make the seal with the material of its manufacture - in other words, rollers. We wrap any material for insulation (foam rubber is often used) in dermantin or vinyl leather. This is the roller. You need to install it in the middle of the apartment (house). Installation is performed:
- On the box - along its inner surface on the left, on the right side and on top at a short distance from the door. It is necessary to achieve that the door, when closed, fits snugly against the rollers. The rollers are not installed on the threshold, due to the fact that they wear out in a short time.
- And on the door - to its lower edge.
The fastening of the rollers is done with decorative nails along the side opposite to the place where the dermantin is doubled around the foam rubber.
Insulation of the front door
Regardless of the effectiveness of the sealing by the above methods, for doors made of wood, various cover strips are now used:
- wedge-shaped slats;
- external slats;
- plastic tubes inserted into the grooves using specialized clips on them;
- iron and plastic strips with a brush or rubber band;
- and the rest.
The wedge-shaped rail is placed on the box in the corner between the porch and the surface opposite the frame of the closed door. Moreover, the installation is done exclusively for the upper part of the opening and its sides. Before installation, the rail is cut to the size of the given installation locations. For the docking points (at the top of the opening), cut at an angle of 45o. And you need to cut the rail in the places with which it will adjoin the door lock and hinges. Then we hammer it with nails.
The outer rail is placed on the door stop of the box (in other words, it is like a continuation of the porch). It is also cut to the size of the opening for its top and sides. Install with self-tapping screws or self-drilling screws. After qualified installation, a piece of paper should pass between the rail and the closed door.
There are also strips that are mounted on the outer front side of the door, closing the gap in the opening. They are also first cut into pieces of the required size. After they are attached to the doors, which must be closed at the same time
It is especially important to carry out the installation with rust-resistant self-tapping screws - rusted fasteners usually provoke rotting of a wooden door
The bottom of the door opening is sealed with other types of rails, the method of using which is also slightly different. Some of the slats are nailed to the threshold, and others to the inner face of the door. They are all cut to the width of the bottom of the door opening, fixed with self-tapping screws.
Flat threshold products represent the base of aluminum or plastic, to the bottom of which a brush or rubber plate is fixed. Such slats are usually installed on both external and interior doors. After quality installation, the gap between the flat bar and the threshold should be small. However, in this case, the rail should not interfere with the easy free opening and closing of the door. Certain types of flat slats are equipped with specialized (elongated) holes for screws, thanks to which you can adjust the height of their installation.
Threshold products with a plastic shield protect the intrusion of unsaturated air into the living area (house). Basically, they are mounted on the outer door.
Combined strips consist of 2 metal strips, one of which has a nylon brush attached. The product without a brush is placed on the threshold. And a rail with a brush - on the door. The sill strip is equipped with a specialized groove that prevents water from entering the middle of the room.
After high-quality installation of the combined strip, the hanging edge of the strip installed on the threshold should "look" towards the premises. And the door trim brush should exert a slight pressure on the sill strip.
Insulation for windows: types of seals for sashes and their features
There are three main types of sealing materials, with the help of which it is quite easy to ensure the complete tightness of the window sashes - all of them are installed either on the window frame or directly on the sash itself.
When choosing a sealing tape, you should not pay attention to its cost. Many people think that cheap tape is bad and is not able to provide high-quality sealing of window sashes. In this regard, it is better to give preference to rubber seals - they do much better with the tasks assigned to them and, moreover, have a more attractive appearance. Such material can be selected clearly in accordance with the color of the window frames.
How to properly insulate the front door
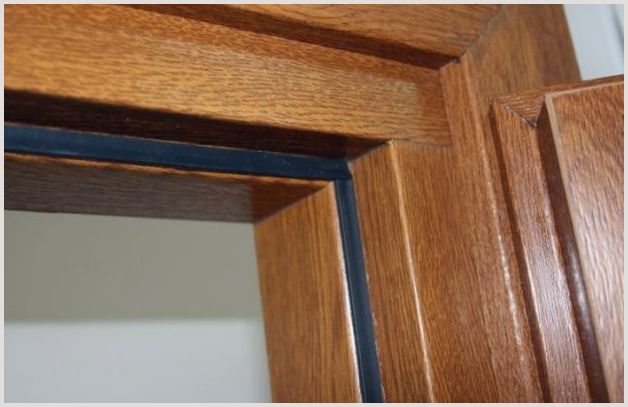
Another approach is reliable. It is shown in the figure.
The seal is not installed between the door and the jamb, but on the jamb so that it fits snugly against the door. In this case, the seal has a large degree of freedom and, accordingly, ensures tightness with a greater deformation of the door. This installation method does not depend on the initial position of the door relative to the frame, since when gluing the seal can be installed exactly in the position that will ensure the sealing.
I use Moment glue for this work. The work is done like this. The door frame in the place where the seal will be glued is lubricated with glue. The sealing strip itself is cut to the required length. Edges are cut at 45 degrees to fit with other strips of tape. The side that will stick is also smeared with glue. The glue is kept for 15 minutes.Then the door closes. The tape is applied to the place smeared with glue so that it fits snugly against the door, and is firmly pressed with your hands for 2 - 3 seconds. Further, for complete drying, the glue is kept for a day.
It is convenient to use a rubber tube as a sealing tape (only the rubber must be stable, not decompose or stain) or a special round-section sealing cord made of foamed polyethylene.
How can you insulate the front door
The guarantee of future comfort depends on the selected material, for the sake of which the insulation was started. And if a few decades ago only felt, foam rubber and dermantin were available, today the choice is much greater. And this is what the manufacturers offer:
- Mineral wool;
- Styrofoam;
- Izolon;
- Expanded polystyrene.
Mineral wool, like polystyrene, is most often taken as the basis for insulation for metal door leaves. Both materials perfectly retain heat indoors and are not susceptible to the influence of microorganisms. Mineral wool is also worth noting because no rodents will spoil this insulation.
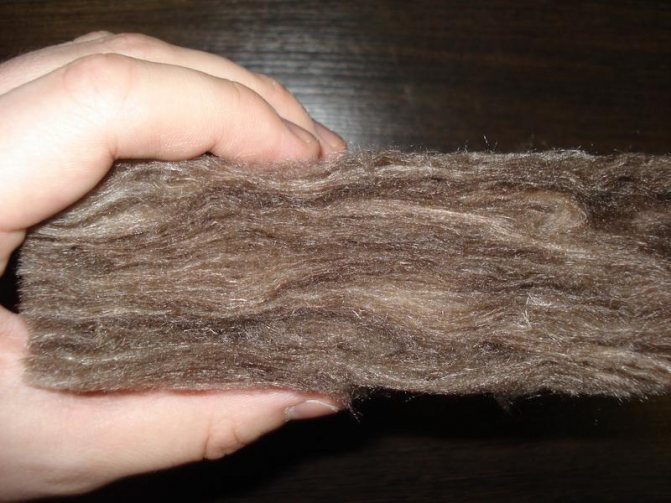
Mineral wool absorbs moisture
But these materials have some restrictions on their use.
Isolon is more justified to achieve the heat retention goal. This material is made on the basis of polyethylene foam, which gives it minimal thermal conductivity. The advantages of the material include the fact that a canvas 10-15 mm thick will be enough for work. This allows you to maintain an attractive appearance of the door leaf without thickening it or making it bulky.
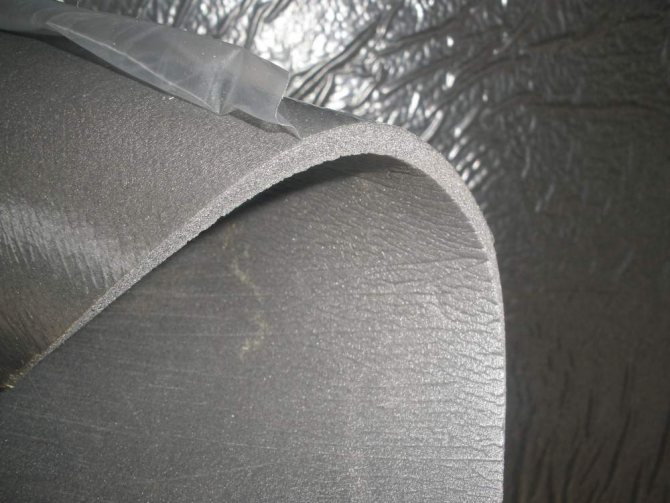
Izolon has low thermal conductivity
Polystyrene foam has excellent performance. A door insulated in this way will become a reliable and safe barrier between a warm house and a cold street. Among the advantages of expanded polystyrene, its incombustibility should be highlighted. When a flame occurs, it will gradually disappear on the surface of this material.
For inexpensive insulation, you can always use foam rubber. The material is convenient in all respects and will be a real find for a novice home craftsman. Foam rubber will forgive the mistakes made and allow them to be painlessly corrected.
Variety of models
Manufacturers offer several options for hermetic seals. In most cases, rubber and PVC are used in the base. Each of them has a set of characteristics:
- the peculiarity of mounting and fastening to the surface;
- degree of durability;
- the ability to resist external negative factors.
For popular models, the described factors fully cope with the tasks. For each type of tape, there are detailed manufacturer's installation instructions for optimum results.
On the shelves of hardware stores there are such types of tapes:
- self-adhesive (with an applied adhesive layer);
- groove (designed for installation in slotted grooves);
- adhesive (having a surface on which glue is supposed to be applied for fixing).
Each option is selected based on real conditions and the state of the window.
Self-adhesive rubber bands
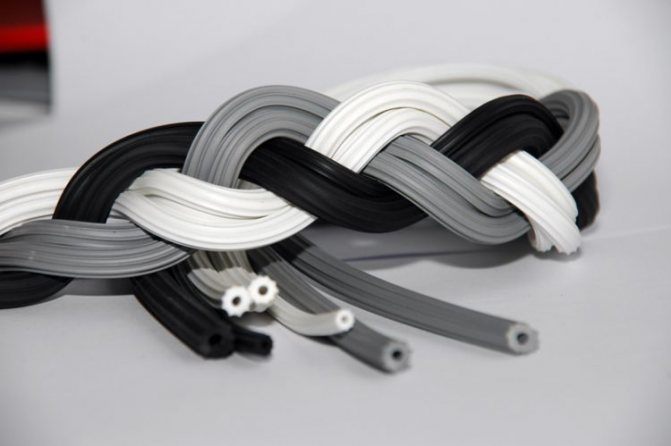
Modern self-adhesive tape for window insulation is made on the basis of rubber, polyvinyl chloride, polyethylene foam. Plastic materials allow such insulation to be compressed to the required state in order to minimize gaps. In production, various dyes are used, which make this element less noticeable against the background of the window.
Colors of the following shades are selected:
- white;
- brown;
- black.
The ribbon has more than just a decorative difference between different models. It is also differentiated by the possibility of hiding gaps. The most popular versions of its design are capable of blocking gaps from 3 to 7 mm in increments of 2 mm.Each interval has its own index. Although there are no perfect gaps in the frames, you can always find the best option.
VIDEO: Heaters for windows - an experiment
The use of foam rubber
You can get rid of annoying drafts spreading from poorly sealed frames by installing a self-adhesive foam tape for window insulation. The product blocks the escape of heat outside the room.
Insulation of windows with foam rubber and tape
The main shape for such tapes is a rectangular profile. Among the wide assortment, it is always possible to choose the most optimal option, since the models differ in the following characteristics:
- dimensions (section and length);
- the degree of rigidity (relevant for uneven gaps);
- colors (easy to match the frame from white and beige to gray and black);
- the presence of an adhesive layer (self-adhesive can be applied on one of the sides).
Foam rubber was one of the first to be used for such purposes due to its physical properties. It has many advantages, remaining one of the popular materials with the following characteristics:
- good compression ratio;
- there is no injury to the frame;
- affordable cost per running meter;
- easy to mount / dismantle;
- copes with the task quite effectively.
However, with all the advantages, it has disadvantages:
- with significant differences in the gap, air leaks;
- has a relatively short service life;
- in cheaper models, this adhesive tape for window insulation is weakly fixed;
- weakly resists moisture.
If you need to temporarily get rid of a draft, then foam rubber is a quick and easy way to solve this problem at least for the winter season.
For the convenience of attaching to windows and joints, it is worth purchasing foam rubber with an adhesive base. Such material lingers on the surface longer, is elastic enough to last for several seasons and regulates the tightness of the flaps.
Tubular seal
Manufacturers of tapes for insulating plastic windows offer a special variety of these products. It is also made from rubber and PVC. Its back side has variants of execution, both with a groove hook and with an adhesive side covered with a protective paper tape.
It is this type of seal that is the basis of the so-called. Swedish system of thermal insulation of wooden windows. And although, in fact, it is not so much about insulation as about the complete restoration of the thermal insulation properties of a wooden window, it is the tubular seals that take on the main role in blocking the cracks and cold bridges.
The slotted version is more reliable, since a slot of a special profile is pre-cut on the frame. It is able to keep the tape from mechanical stress, unlike the sticky side of other models.
The main advantages of the material are the following properties:
- it is possible to block possible gaps that are even 7 mm wide;
- durable prepared material withstands significant temperature changes from a surface hot in the sun to significant winter frosts;
- there are several color options for different frames;
- the material has an affordable cost;
- during the period of operation, the owner has the ability to repeatedly open / close the sashes without any problems at any time.
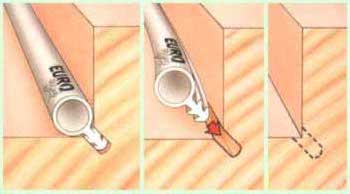
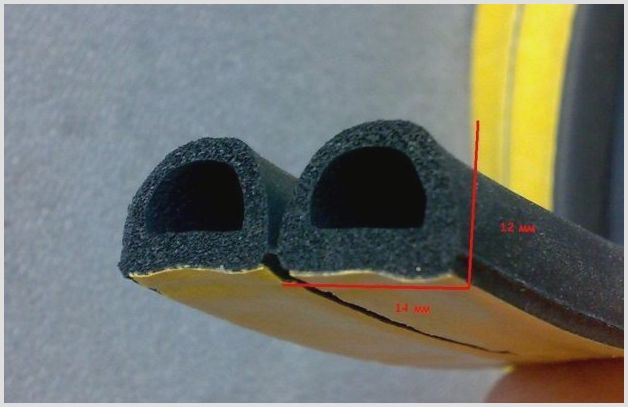
This is how the seals are inserted into the gaps.
Due to these positive qualities, the tape has gained many supporters.
In this case, it is worth noting the negative factors that the tubular seal has. Most of them refer to models with an adhesive base:
- frequent deformations can disrupt adhesion to the surface;
- temperature changes negatively affect the properties of the adhesive layer;
- not relevant for all window designs.
It will be possible to get rid of the shortcomings of the tubular seal if you choose the products of well-known world brands.
Warming film
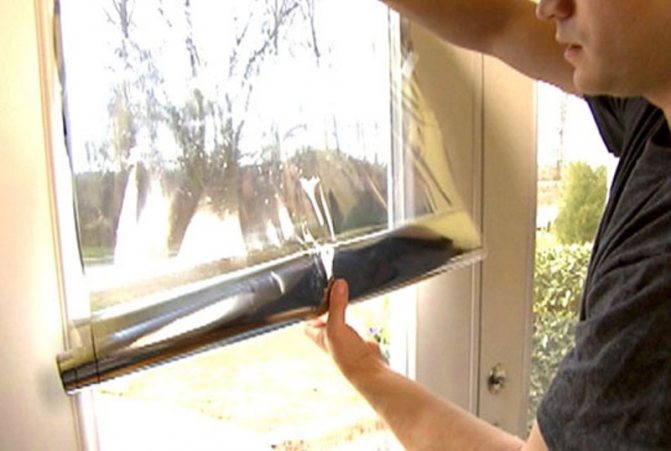
No wonder they say that everything new is well forgotten old. The film for insulation was used back in the 90s of the last century, but then it was ordinary cellophane, with which the cracks were caulked. Today it is an improved canvas that can be easily installed on the window and creates a sealed chamber.
Polyethylene film for thermal insulation
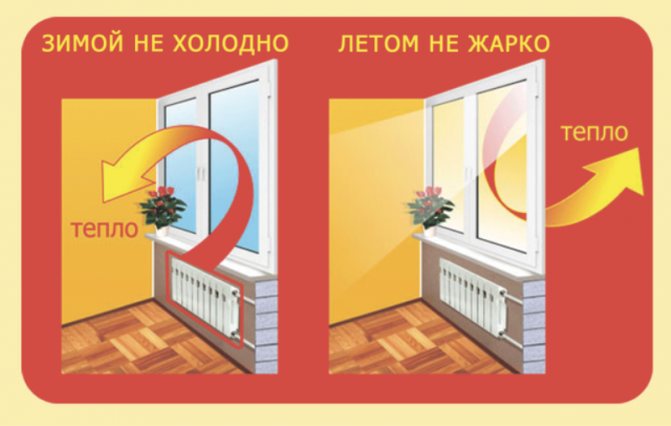
The film is attached with double-sided tape to the frame, stretched and heated additionally to make the tension even stronger. Such manipulations make it possible to create an air chamber between the glass and polyethylene, working on the principle of a heat-insulating cushion. At the same time, the film is a heat reflector, preventing heat from escaping outside. In summer, everything happens the other way around - the film keeps ultraviolet light and heat from getting inside, and a favorable cool climate is created in the room.
Where and how to properly start preparation work
First, we examine the door and the box. If they already have some kind of seal that has ceased to perform its own functions, then it must be dismantled. Then, if necessary, we perform pre-cleaning of surfaces where there was obsolete material, removing its remains. We use a fine emery tape for this.
After that it is recommended if there is a need to adjust the door. Distortions will cause uneven seating and wear on the seal. The different size of the gaps between the frame and the door from below and from above, on the right and on the left will also lead to this if material of the same thickness is selected for the entire opening. Or you will have to choose a seal for each side of the opening. The critical value of the skew and the difference in the size of the slots is 1–1.5 mm. If they are larger, then it is an excellent option to remove them by adjusting the door. It happens that the implementation of this operation eliminates the reason why it was decided to seal the opening, and there is no need for such work.
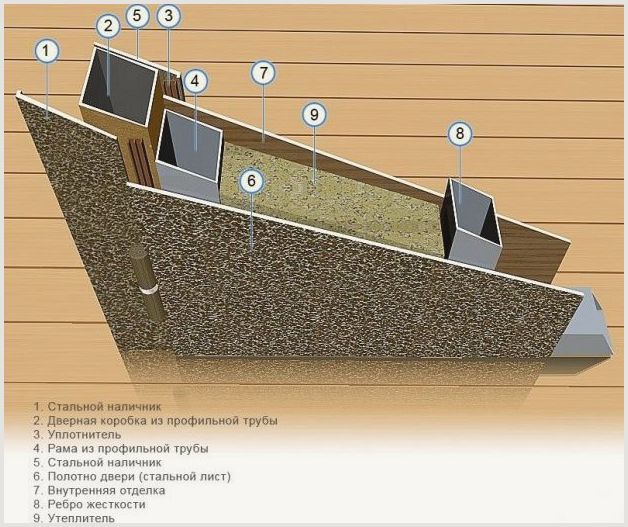
Door structure diagram
Now you need to decide on the installation site and the type of seal. This may determine which part of the door or frame needs to be measured in order to find out the required amount of material.
Why is blowing from the front door
Then we measure the perimeter (or it is necessary only in one place the height and width, and then fold and multiply by 2) of the contour on which the sealing inserts will be placed. This is the entire length of the required material. But it is best to take with a margin, based on the location and installation method.
After that, if the seal is intended to be installed in one of the slots between the door and the frame, it is necessary to determine its required width and thickness. The first size is clear. It is detected by measuring the width of the installation site.
To determine the thickness, ordinary plasticine is perfect. We sculpt it onto the box at the site of the upcoming installation of the material and close the door. Then we open it and measure the thickness of the flattened-oiled plasticine. This will be the required size of the height of the sealing insert. However, this is the thickness of the compressed material when the door is closed.
You need to take the seal a little thicker. In this case, it is necessary to provide for what materials the insert is made of, as well as its density, rigidity and reliability. For example, an excessively thick foam pad may soon just break, and the rubber pad will interfere with the doors closing and expanding it, which will add an additional load on the lock and hinges, thus reducing the period of their operation. And if the insert is not thick enough, then there may be gaps somewhere.
New door seal
If the size of the gap on the left, on the right, above and below is different and radically different, then it is necessary to measure the thickness using plasticine for each of these sides and, perhaps, take material with the corresponding different heights. For unadjusted (skewed) wood doors, in case of sealing with strips along the gap, it may generally be necessary to adjust at least 2 extreme points of each side.
It is necessary to purchase sealing inserts in integral parts of the required total length for absolutely all sides or for any of them if it needs to be cut.And in any case, you should not use some of the pieces, and especially the trim of the seal. The result of such work will be a low-quality sealing of the door, thanks to this, if part of the material was damaged by poor cutting or installation, it is better to buy it in the required length.
After purchasing the material, we make, if necessary, its cutting (cutting) into pieces of the required size. And only specifically before installation, if there is a need, we prepare the surfaces on which the sealant will be placed. We clean them from dirt and dust and remove relief irregularities. After that, if the installation of a sealant with an adhesive base (self-adhesive) or using glue will be performed, the surface of the metal door should also be degreased (with white spirit, solvent, acetone or gasoline), and the wood should be plastered with the smallest foot (zero).
Then we start installing the material. Sealing corners requires great attention, precision and accuracy. Here the biggest risk is to leave gaps. When laying the seal in pieces (2 short for the bottom and top and 2 long for the left and right sides), loose joints may come out between them. And during installation, the seal in the corners tends to wrinkle completely and / or may not adhere tightly enough.
Characteristics of heaters
Before using heaters for windows, you need to get to know them, find out their advantages, identify disadvantages, divide them into types. This section will help you gain useful knowledge about this type of window seals.
Types of seals
- The most common are self-adhesive tapes made of rubber and foam.
... easy to fix with your own hands by simply removing the protective film from the side where the glue is applied. The shelf life is no more than 3 years, after which the foam rubber wears out, and the rubber loses its shape.
Self-adhesive rubber tape - suitable not only for windows, but also for doors and hatches
- Another type of insulation is tapes that do not have an adhesive base.
... For fixing, you need to purchase a special glue (silicone sealant is suitable), which is applied directly to the window frame. The price for such tapes is much lower than for all other types. - Groove seals are suitable for plastic windows and wooden ones, which are manufactured using modern technologies. Insulation is a tubular cord made of silicone or thermoplastic elastomer. A feature of the products is a long service life, about 15-17 years.
Note! It is best to use rubber window insulation, at least it is more durable than foam rubber. And such a tape looks better, it can be matched to the color of the window frame.
Benefits of using
- Simple and convenient installation on any surface. You don't need a special tool or any skills for this process, a little instruction before use and the windows no longer create drafts.
- Visually, window insulation is almost invisible. They can be matched directly to the color of the window: white, gray, brown and many others.
- The seal does not create unnecessary problems when closing the window, it is quite elastic. At the same time, air permeability in the room increases, which has a beneficial effect on both people and indoor plants.
- It is worth noting the resistance to low temperatures. The temperature range at which the insulation for window frames does not lose its working properties is quite large: from + 45 to - 50 degrees.
disadvantages
- Short service life. Every few years you will have to change the old seal for a new one, spending not only money, but also time on this.
- Low wear resistance. Foam products begin to crumble over time, and rubber ones lose their previous shape.
- The need for preparatory work.This is because the adhesive is unlikely to stick to a dirty or uneven surface. Therefore, it is very important to degrease and remove all irregularities from the window frame.
Important! It is necessary to glue the window insulation before the frost begins, otherwise the glue will lose its properties at low temperatures. This does not apply if the tape is already on the window.
Tool
It is impossible to get the job done without the right tool kit. To create insulated wooden entrance doors you will need:
- Roulette and pencil;
- Stationery knife;
- Hacksaw;
- Hammer;
- Screwdriver;
- Smooth rail or metal meter;
- Rigger or nail clipper;
- Construction stapler.
If necessary, this set can be expanded, but for most operations it will be quite sufficient. It should be noted that a hacksaw can easily be replaced by an electric jigsaw. This tool allows you to get the job done with the same quality, but much faster. And if there is no screwdriver in the house, then you can take a simple drill. The main thing is that it has a reverse, which will allow, if necessary, to unscrew any self-tapping screw or screw.
In addition to the tool, it is necessary to prepare the cladding material. For most door leaves, it will be enough to use a leatherette that has an attractive appearance. This material has good characteristics and durability, so the blade will not need to be repaired for a long time.
And if you like to do everything yourself, then we recommend you instructions on how to make a wooden entrance door.