How to insulate a greenhouse to survive frosts without loss
To be interested in how to insulate a polycarbonate greenhouse with their own hands, owners of suburban areas often begin only after the young seedlings planted in closed ground freeze almost to zero as a result of spring frost. There was a case, and almost half of the young plants were severely affected by my parents, so I had to study the technologies for increasing the energy efficiency of greenhouses and greenhouses quickly and immediately in practice.
As a result, it turned out that insulation has several aspects that can be implemented in parallel. That is why in my article I tried to highlight separate blocks, each of which is a completely independent instruction.
Foundation and beds
The easiest way to deal with a problem is to prevent it from occurring. I was convinced of the validity of this thesis more than once, and here he did not disappoint me either.
Indeed, as my experience shows, insulating an already built greenhouse is long, difficult and very often expensive. It is much easier to immediately design and build a greenhouse with good energy efficiency.
Analyzing the structures of most soil protection structures, I came to the conclusion that they have two most problematic units in terms of heat loss:
- the place where the greenhouse walls adjoin to the ground;
- the upper part of the greenhouse, which very often loses a lot of heat due to ineffective glazing.
You can work with both points: although this will lead to additional costs, in the future, the greenhouse will practically not require additional thermal insulation with a guarantee. Below I will describe a few of the techniques I use, and will start with the arrangement of the foundation and the beds.
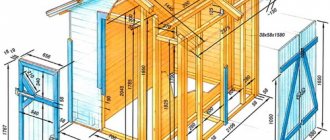
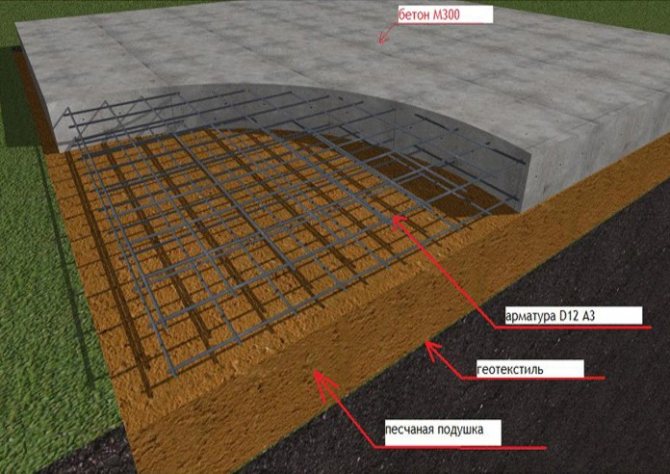
Strip foundation diagram
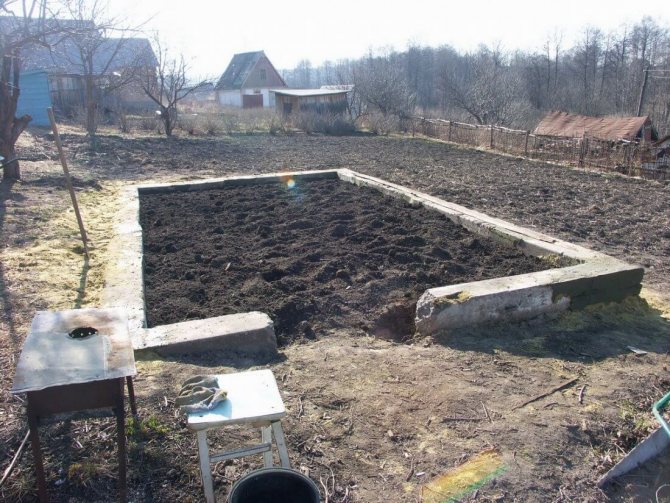
If you plan to use the greenhouse in early spring (and even more so in the winter months), then you cannot do without a foundation and a high base. The best solution would be to lay the base of the tape type. I built it this way:
- I applied the markings on the ground in accordance with the plan of the future greenhouse.
- According to the markings, I dug trenches about 40 cm wide (20 cm - the width of the base and 10 cm on each side - for installing the formwork) and a depth of 70 cm.
- The bottom of the trenches was covered with a mixture of sand and gravel with a layer of 20 cm. The backfill was carefully tamped with the help of a heavy wooden block with two handles from a bar.
- In the trenches I installed formwork from old boards with wooden struts inside. To prevent the solution from leaking out, I covered the formwork with plastic wrap.
Prepared formwork
Note! To increase the strength inside the formwork, metal reinforcement from welded or bonded rods can be installed. I made a small greenhouse, therefore I limited myself to laying single reinforcing rods, a small amount of scrap metal and broken stone.
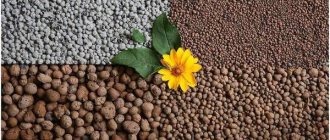
- Next, we will prepare a solution using cement MZ00, sifted sand and crushed stone. Expanded clay of 0-5 mm fraction was added to the solution to reduce the thermal conductivity of the foundation.
- After pouring, he carefully compacted the foundation with a bayonet and dried it for three weeks.
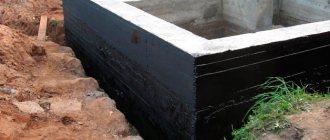
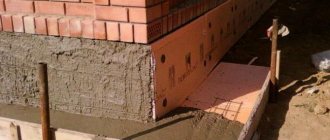
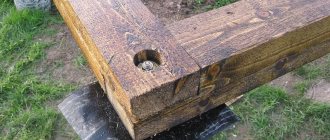
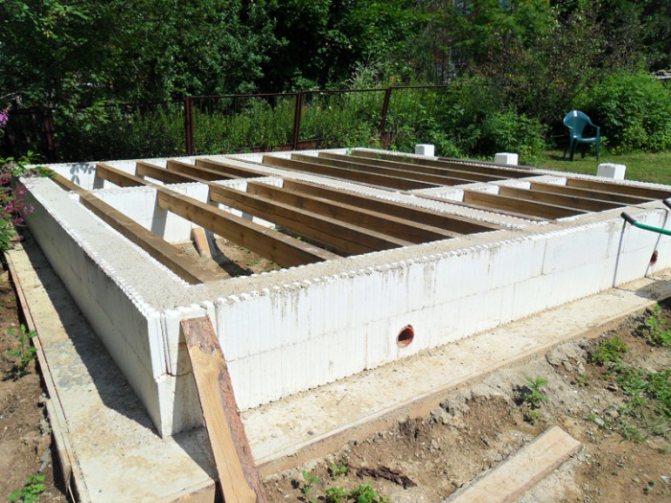
- A layer of roofing material was laid on top, then - three rows of brickwork (it formed a base) and a wooden beam 100x100 mm. The beam was attached to the plinth with steel anchors and treated with moisture-proof impregnation. I then attached the frame struts to this wooden board.
- He took out soil inside the greenhouse in those areas where the arrangement of the beds was planned.
Foundation with beds
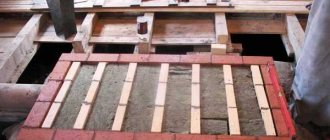
The edges of the future beds were reinforced with a wooden blind area, the free areas were covered with a mixture of sand and gravel.
- On the bottom of the depressions I laid a layer of cut branches, then a layer of fallen leaves mixed with peat, and only then a layer of soil mixture made of black soil and peat. As a result of these manipulations, the beds have risen by about 15 cm relative to the ground level.
If you equip the bottom of the greenhouse according to this algorithm - with the laying of a strip foundation and raising the beds above the ground - then the heat loss of the structure will significantly decrease. Accordingly, we will need less fuel or other energy sources to heat the room during the cold season.
Formation of beds with blind area
Glazing sealing
The second aspect of arranging an energy efficient greenhouse is the installation of such glazing, which:
- on the one hand, it will let in the maximum amount of sunlight for efficient heating;
- on the other hand, it will be as tight as possible, releasing the minimum amount of internal heat.
Cutting scheme for polycarbonate panels
Note! Here, unfortunately, we will hardly be able to follow the path taken by industrial greenhouse complexes: we simply cannot afford the arrangement of glazing from double-glazed windows with low thermal conductivity. So you have to solve the problem with available means.
In most cases, the question of how to make the warmest dome over the beds with seedlings in the spring from polycarbonate is solved by maximizing the sealing of the structure. For this:
- Polycarbonate sheets with a thickness of 6 to 16 mm, intended for sheathing the frame, are cut in such a way that the joints of the panels are opposite the load-bearing elements.
- We put the panels on the frame and be sure to connect using special plastic profiles. If you just mount polycarbonate end-to-end, then heat loss will increase to 15-30%.
Option for attaching polycarbonate sheathing to minimize heat loss
- We use special screws with plastic washers to fix polycarbonate sheets. The presence of this element allows you to create a so-called thermal break, which prevents the structure from freezing at the attachment point.
- Immediately after construction, and before the beginning of each season, it is necessary to check the tightness of all sheathing joints. I treat all problem areas with a moisture-resistant sealant.
- Separately, it is worth paying attention to the vents, which are used for ventilation, and the entrance door. All places of the vestibule need to be sealed to avoid drafts, and it is generally better to additionally cover the vents with rolls of polyethylene - when there is a need for ventilation, the polyethylene can be removed.
Scheme of correct fixing of polycarbonate sheets using self-tapping screws equipped with thermal washers
In principle, compliance with these requirements is desirable for any more or less permanent greenhouse: in any case, tightness and the absence of drafts will be useful.
If you do not plan to interrupt the cycle of growing plants for the winter, then you must follow these tips.
Alas, a temporary frame installed directly on the ground almost never saves from frost - it has been proven in practice.
Active heating
Biological heating
The main difference between a greenhouse and a greenhouse lies in the heating system: if the air temperature in the greenhouse rises only due to exposure to sunlight, then the greenhouse needs to be additionally heated. Naturally, biological heating will be the cheapest, most affordable and most environmentally friendly.
When choosing how to heat your greenhouse, pay attention first of all to organic biofuels.
To save biofuel and to maintain an optimal soil temperature, which will contribute to the normal development of seedlings, I practice the creation of so-called warm beds. They are done quite simply:
Layer bookmark sequence
- On the site that is planned to be used for growing the first seedlings or seedlings, I take out the soil to a depth of about 0.8 - 1 m.
- I cover the bottom of the recess with expanded clay drainage.
- Next, I put about 0.5 m of organic matter: wooden logs, thick branches, waste paper, old books, etc. will do. Our task is to form a dense layer that will rot very slowly.
- Then I put about 20 cm of chopped branches, hay, leaves and sawdust.
Such beds are themselves heat generators.
- The next layer is biofuel, which will be the main source of heat. I mix compost and manure with sawdust, moisten and put in a recess with a layer of about 20 cm.
- From above I cover the rotting organic matter with chernozem or a mixture of meadow soil and peat. I select the thickness of the layer in such a way as to form a bed raised above the ground.
Biological heating functions very simply:
- Under the influence of moisture, organic matter in the lower layers of the soil mixture begins to decompose.
- When organic matter decomposes, thermal energy is released.
- The heat rises from the bottom up, gradually warming up the soil above the humus and going directly to the roots of young plants.
Option for arranging a warm bed
Use of heating appliances
However, biological heating has one drawback: it heats mainly the soil, but in the cold season the air in the greenhouse cools down to critical values. That is why, if you want to equip a polycarbonate greenhouse for the winter, you cannot do without additional heating.
The simplest stove will help you survive any frost
Today, different heating schemes are practiced, each of which has both pros and cons. You can compare them using the table:
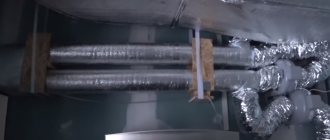
Laying hot water pipes for ground heating
Emergency insulation of the structure
All of the above tips relate to a situation where "time is running out." But there are times when the insulation of the greenhouse with your own hands must be carried out quickly, literally in a matter of days or hours. Of course, it will not be possible to radically correct the situation, but you can minimize the damage by performing several relatively simple operations.
For an urgent increase in the level of thermal protection, we take actions from the following list:
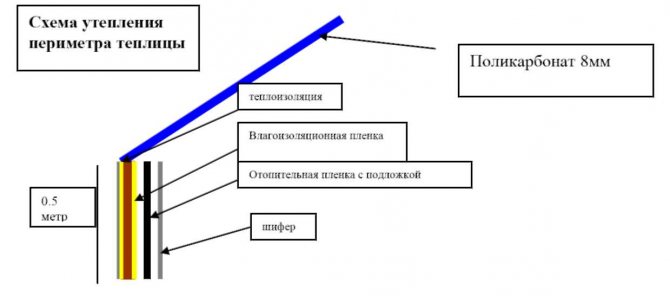
- Outside, we cover the dome of the greenhouse with polyethylene, tarpaulin or any other material (if there is a foil film, it's generally great). We do not pay attention to the change in the level of illumination yet: our task is to survive the frost!
In early spring, even polycarbonate structures can be covered with polyethylene, as in this photo
- Outside, along the perimeter of the foundation, we make a dump of sand or sand and gravel mixture. You can also put a layer of sawdust, leaves, hay, straw or small twigs here.
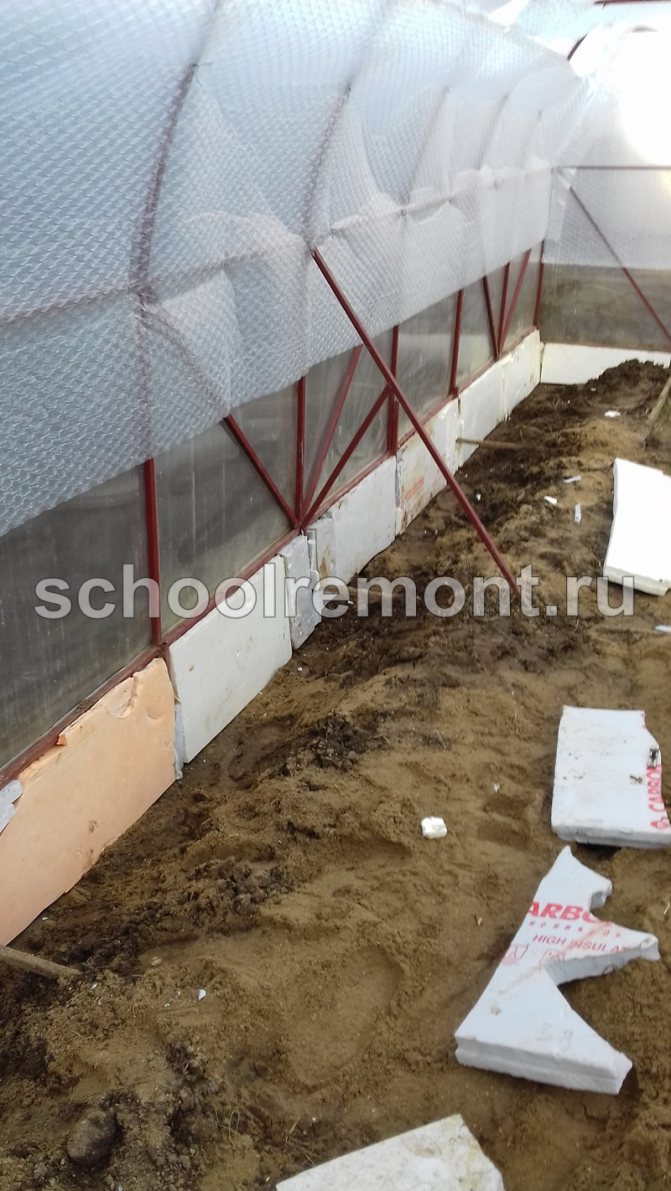
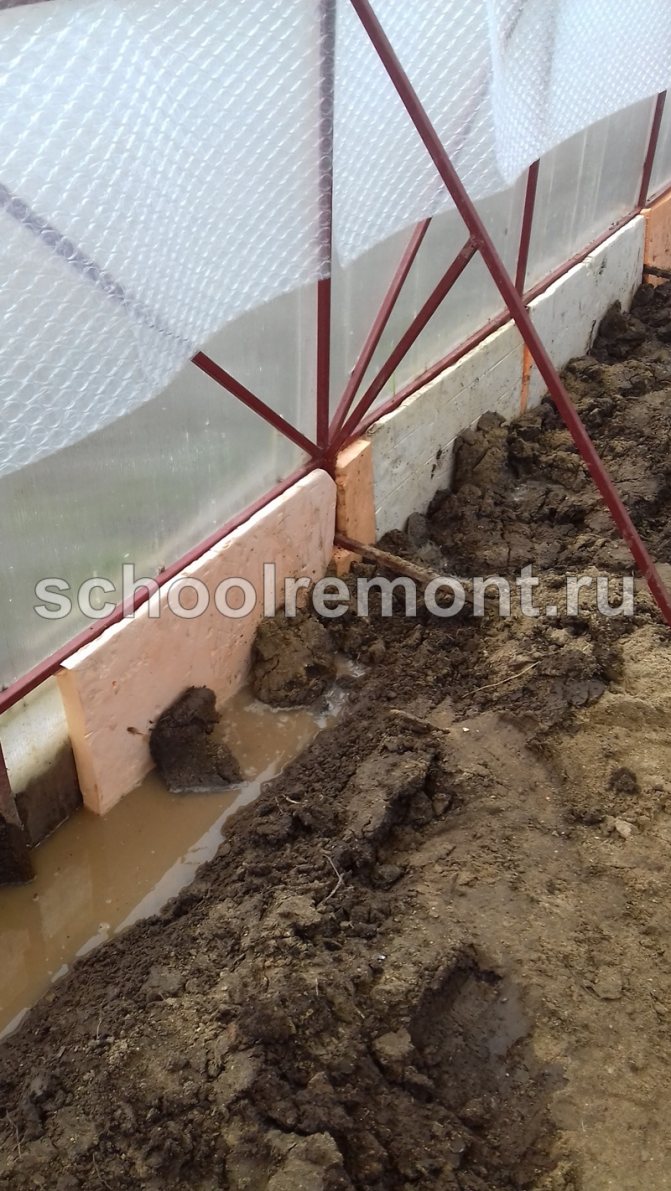
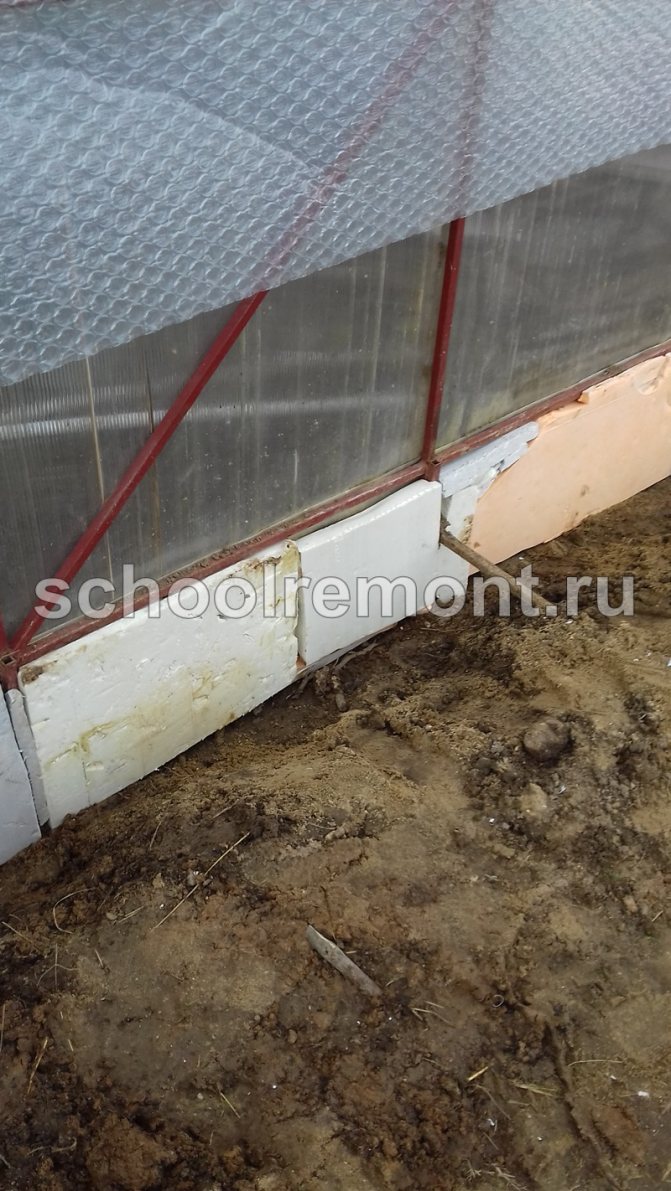
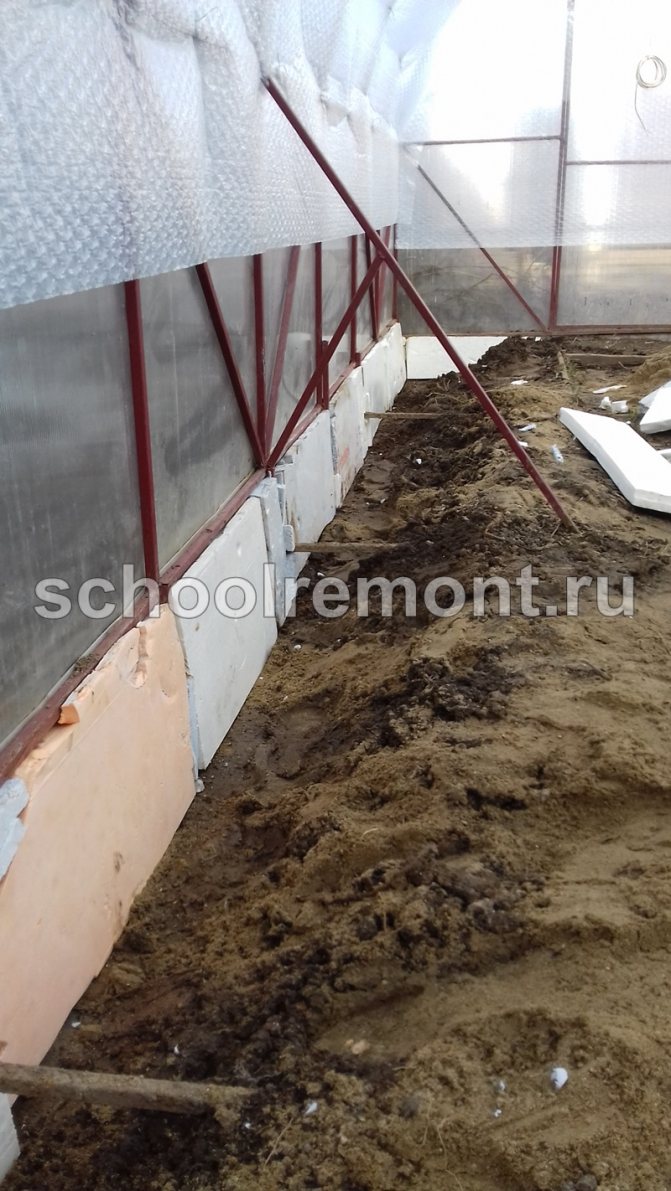
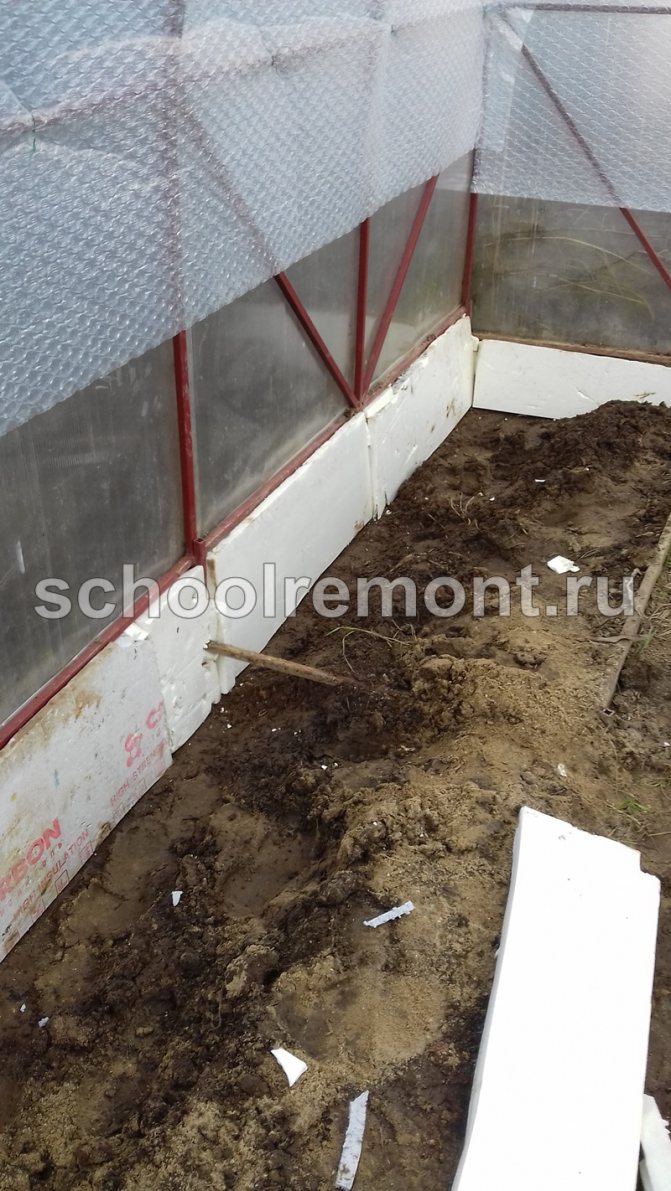
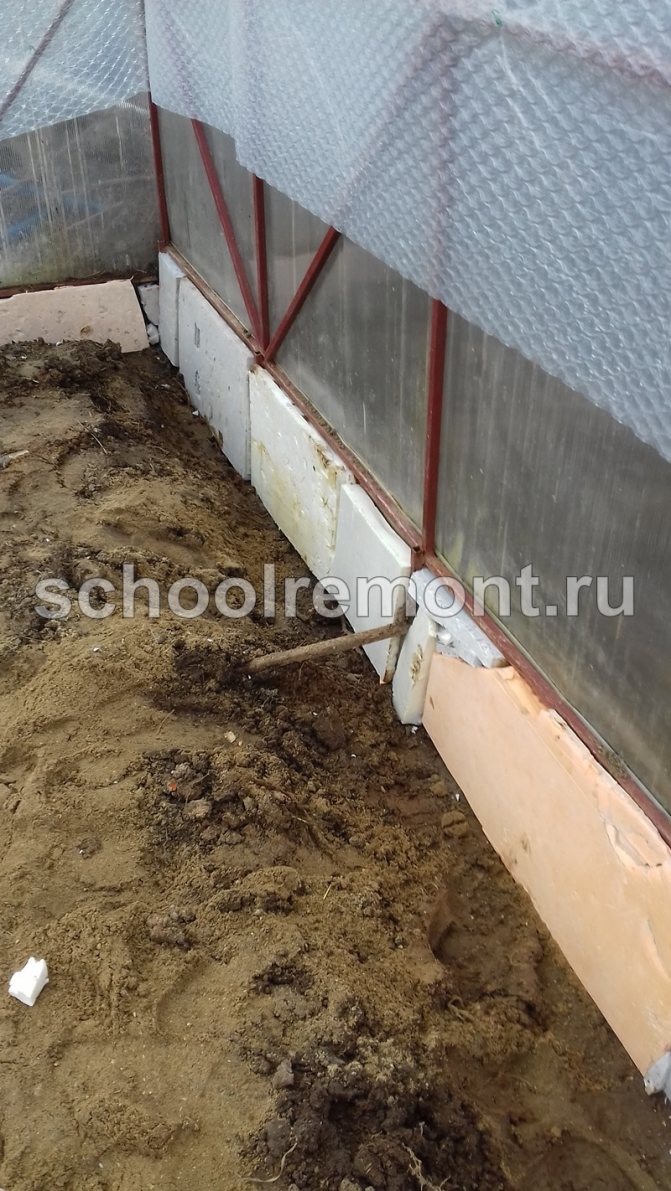
- Inside, along the basement or the lower part of the walls, we place sheets of foam, polystyrene or any other insulation. To avoid excessive condensation (we definitely don't need cold water inside), we wrap the foam in polyethylene, geotextile or non-woven material, seal the cracks with polyurethane foam.
If an early landing is planned in the spring, then it is better to install the foam for additional insulation in advance, even in the fall
- We equip the entrance to the greenhouse with an impromptu vestibule, hanging the door with several layers of polyethylene or tarpaulin. We block the ventilation holes in the same way.
- We bring several barrels inside the structure, up to half filled with a mixture of humus and sawdust. Fossil fuels will slowly decompose, gradually increasing the temperature.
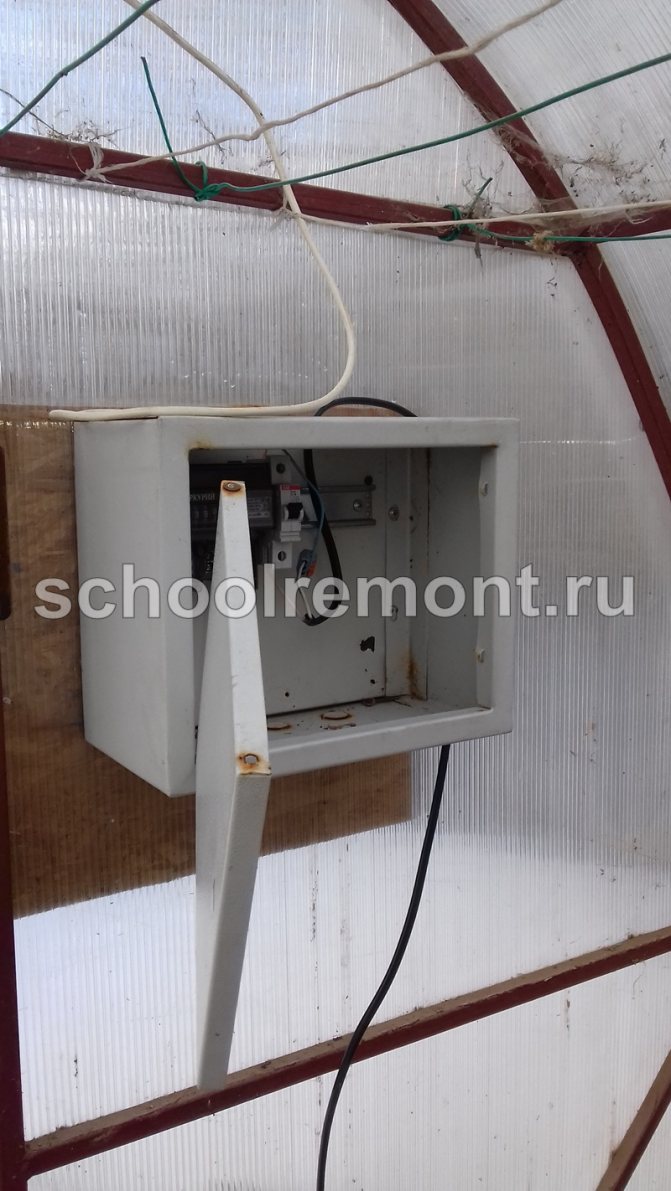
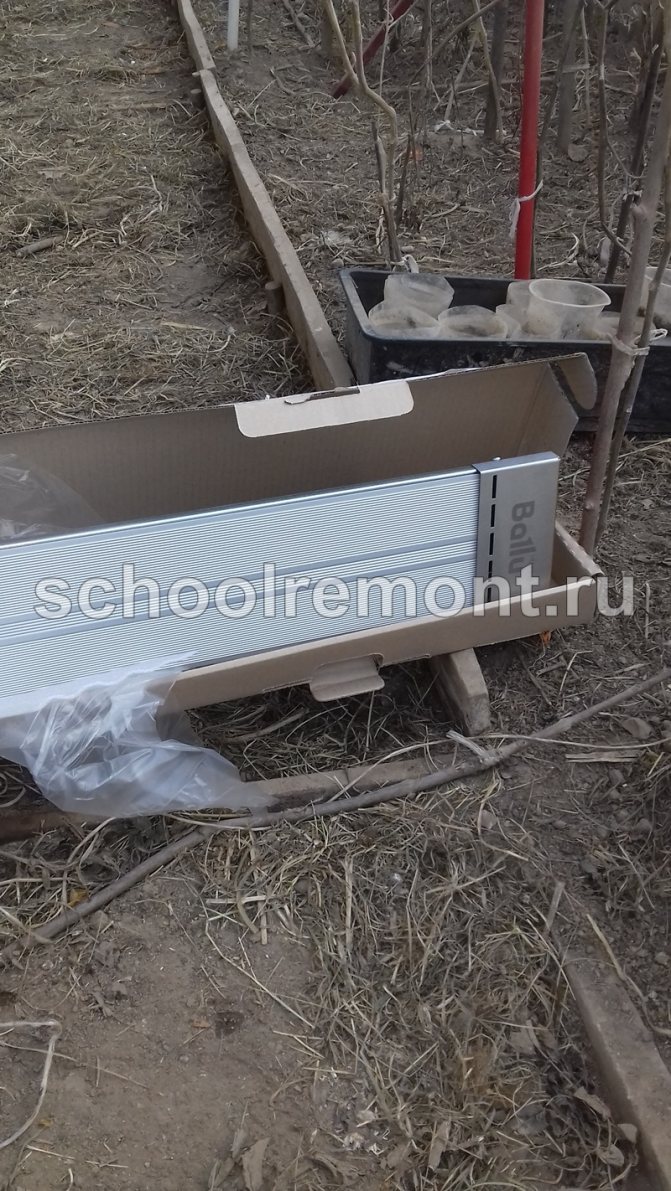
- If possible, we use electric or gas portable heaters.
Such a compact heater in a critical situation can save seedlings
Of course, plants will not last long in this mode, so for winter cultivation you will have to practice a fundamental approach. But it is quite possible to save your favorite seedlings from sudden March-April frosts.
Conclusion
When figuring out how to insulate a greenhouse, it is important to study not only the technologies of emergency thermal insulation and heating, but also the method of building such a structure that will initially retain heat well.
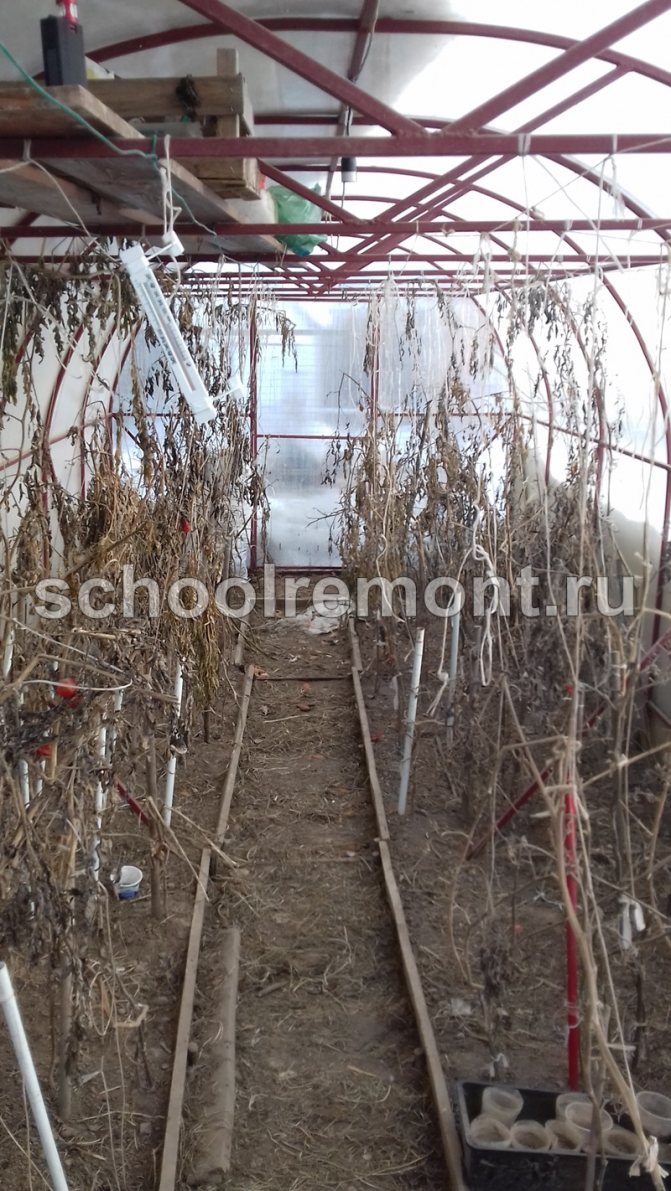

Pest control
You need to know that digging up and freezing the ground to get rid of pests is an insufficient measure, since they are very tenacious, therefore additional measuresto secure the harvest.
There are several recipes that are good for the earth:
A proven method is fumigation with a checker; this will require 150 grams of substance per 1 m3 of space.
When processing a greenhouse, high sealing of walls, cracks and windows is required. Checkers should be evenly spread over the area. In order not to be poisoned by chemicals, you need tight clothing designed specifically for these purposes. The set of clothing should include gloves, a tight respirator and goggles. Sulfur treatment is carried out for three days, then the greenhouse is ventilated. In the same way, the greenhouse is prepared for winter.
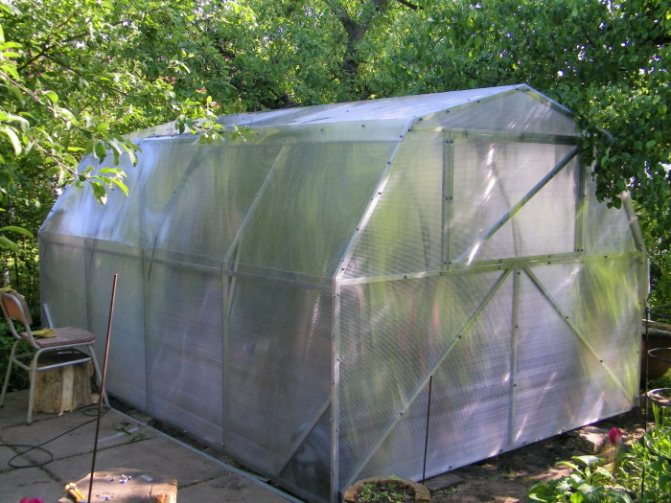
How to make a greenhouse from arcs with a covering material
Preparing the greenhouse for winter
An important factor is the material from which the greenhouse is built. If there is a metal frame and it is covered with polycarbonate, then fumigation with sulfur is prohibited to prevent corrosion.
How to insulate a polycarbonate greenhouse in spring
Polycarbonate greenhouses are located in many suburban areas, whose owners are engaged in the cultivation of vegetables, fruits and berries. These buildings are used to create comfortable conditions for plants that are sensitive to the harsh climate. In the case of year-round operation of the structure, you need to know how to insulate a polycarbonate greenhouse for the winter.
Polycarbonate greenhouse
If this is not done, it will be too cold inside, the soil will freeze, and the risk that the seeds planted in autumn will not sprout in spring increases many times over. There are several ways to insulate, they differ not only in the degree of complexity, but also in the cost of time and money.
Biological heating
This method combines affordable cost with relatively little time and effort. The main task is to warm up the soil and protect it from freezing during temperature fluctuations in winter, for this, environmentally friendly substances are used. The most popular solution is the arrangement of "warm" beds, which is carried out as follows:
- Excavation of soil in the landing zone, creating a trench with a depth of about 80-90 cm.
- Creation of a drainage layer. It is optimal to use expanded clay: it keeps heat well and is safe for plants.
- Organic layer bookmark. It can be made from paper, thick branches, stumps; the main task is the formation of a dense bottom, the decay of which is slow.
- Laying a layer of foliage, hay, mulch. The thickness should be 18-20 cm.
- Formation of a biofuel layer. It serves as the main heat source; for preparation, a mixture of compost and manure with fine sawdust and wood shavings is used. Thickness - 20 cm.
- The top layer is black earth or meadow soil with peat additives. The finished bed should protrude above the soil surface.
- Organic layers decompose when moisture gets into the soil, which appears in the course of precipitation or groundwater. The process is accompanied by an abundant release of heat energy, which goes directly to the root system.
Use of heating appliances
Biological warming, despite many advantages, has a minus: it is directed to the soil without affecting the air temperature. The use of heating equipment allows you to solve the problem; for this, devices of different designs and capacities can be used.
The efficiency of heating to a large extent depends on the area and layout of the building: for example, the corners freeze most of all. For this reason, even at the stage of choosing a design, you should pay attention, for example, to round polycarbonate greenhouses: their heating will be most uniform if the device is positioned correctly.
Today, active heating can be organized using the following types of equipment:
- Solid fuel stove. It runs on coal, wood, briquettes, sawdust pellets, warms up the atmosphere well, but needs frequent refueling. In addition, heat distribution may be uneven and the greenhouse will need to be ventilated from time to time.
- Electric heaters. They maintain optimal thermal conditions and can work together with sensors that regulate the air temperature. The downside is the high cost of equipment and high energy costs. In addition, the installation of such equipment is possible only in summer cottages with permanent electricity.
- Water heaters. This option is suitable if the greenhouse is located in close proximity to a house or outbuilding that has heating. The batteries are installed inside the structure along a long wall and provide economical and efficient heating. The downside is the fact that the system takes up a lot of space, which is not suitable for compact greenhouse buildings.
- Infrared equipment. Such panels are economical, compact, provide uniform atmospheric heating, but are more expensive than analogues. They are usually purchased for industrial greenhouses.
When choosing equipment, you need to pay attention to power, dimensions, method of operation and cost. Its use allows you to create optimal conditions for growing heat-loving plants in the most severe frosts.
Foundation and beds
There is an opinion among gardeners that to create a greenhouse it is not required to make a foundation, since it has a small mass and does not need it. This point of view is erroneous, since a prepared substrate is one of the most effective methods of protecting against soil freezing.
Greenhouse concrete foundation
Heat loss will be minimal in the following cases:
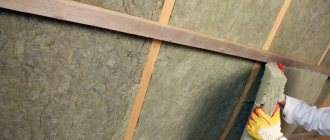
- Arrangement of a strip monolithic foundation with insulation. For the insulation of the structure, polystyrene foam is usually used, sheathing it with sheets of material.
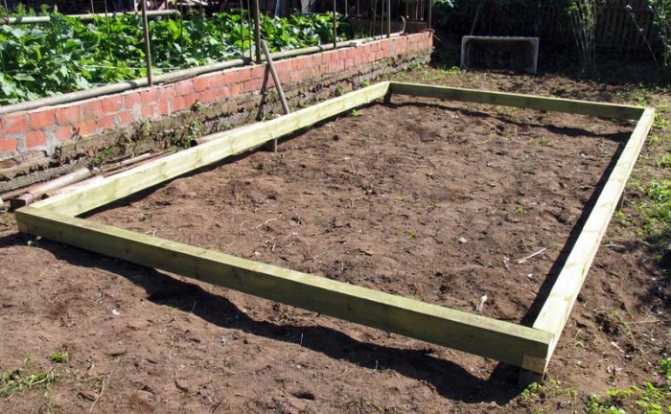
- Creation of a base from a bar. It must first be treated with antifungal agents and protected from the negative effects of moisture.
- A concrete foundation is more expensive, but ensures maximum durability of the entire structure, and with thermal insulation protects the soil from freezing. The depth of filling is on average 40-60 cm, the indicator directly depends on climatic conditions. Expanded polystyrene sheets are attached to the bottom of the base and from the outside; for greater reliability, the material is used to cover the tape after removing the formwork.
In addition, in the greenhouse itself, it is worth equipping high beds: they are raised to 35-40 cm, below the ground is covered with a layer of compost.
How to insulate a polycarbonate greenhouse
Polycarbonate is an excellent material for greenhouses. With its help, most of such structures are built in a modern dacha economy. There are ready-made kits on sale - you just need to assemble them. But you need to take care of additional insulation separately, so you should know how to insulate a greenhouse.
Methods and preparation for operation
In short, in order to get a good indicator of heat retention, you need to perform a complex of the following works:
- choose a suitable place;
- insulate the foundation;
- process joints, seams;
- improve the design (equip the vestibule);
- internal insulation work.
Place for a greenhouse
Initially, you need to choose a good location for the greenhouse - this will help to retain more heat and, accordingly, reduce heating costs. The main nuance here is the illumination by the sun. A good place is open to light and free heat.
The best location is from east to west. It is in this case that the structure will begin to warm up, illuminating from the eastern side along its entire length.
It is advisable to place the structure in a place protected from the wind: for example, attach one side closer to a house or other structure - the wind will not chill out, cool it.
Near trees or a high fence, the greenhouse should be placed not along, but with its end to them. Be sure to consider where the wind most often blows on the site.
An excellent option would be to place a structure like a winter garden: between two stationary walls, but at such a distance that they do not block the sun.
The place should be illuminated by the sun from morning to evening. If the greenhouse is used starting in spring, then its orientation does not matter. It is advisable to place structures in the northern regions with the direction of the ridge from east to west (orientation in latitude), in the middle lane it is recommended to place the long side from north to south (orientation along the meridian).
Foundation
The basis of the structure - the foundation - plays an important role in keeping the heat inside.
The sellers of greenhouses made of polycarbonate greenhouses claim that it is lightweight and does not require a foundation - it can be a timber or just a soil. But if the owner wants his greenhouse to effectively retain heat, then a reliable insulated base is needed.
Warming the base
Thermal insulation of the base of the greenhouse consists of two points:
- warm foundation;
- thermal insulation of the soil.
If the greenhouse is located without a foundation - from below, a small distance is created between its cover and the soil, since it is impossible to perfectly level the site. The soil not only gives off heat during the day, but also takes it in at night - the structure cools down faster. A concrete or timber foundation will help prevent this. So, the most popular materials are:
- concrete - a strip of concrete is poured, which is lined with foam from the bottom and sides;
- timber - the greenhouse is installed on beams with a large section.
Create and pour a concrete foundation
A platform of a striped concrete base along the perimeter will protect the inside from the influence of the environment, and will increase the frost resistance of the structure as a whole. The depth of the base is determined by the level of freezing of the soil - in most cases, 50-60 cm is enough. The foundation can be created with your own hands in the following steps:
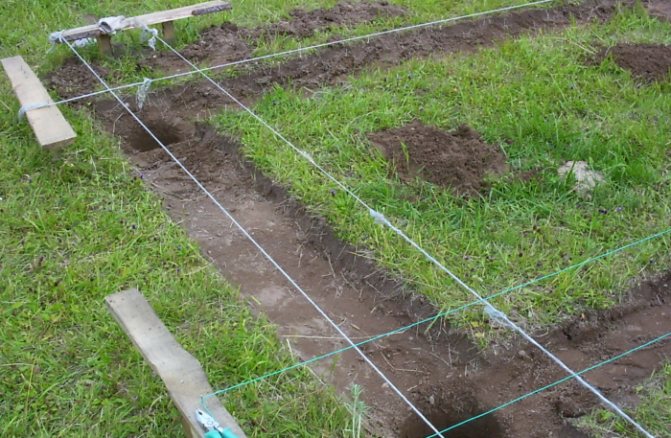
- marking the corners, measuring the diagonal;
- a cast-off is mounted - this is a wooden structure with fishing lines to determine the outer and inner boundaries of the base;
- the soil is taken out to the required depth (at least to the depth of freezing);
- at the bottom, a cushion of sand is made, and best of all from several layers - for example, sand or gravel. The interlayer will protect against deformation and create additional insulation. An excellent solution would be to backfill layers on a waterproofing film, which is applied to the bottom and walls of the pit.
The trench is ready - they make the formwork. It is a simple construction of wooden planks and boards. Its height is determined by the planned thickness of the foundation. It is desirable that they are equal - it will be more convenient to tamp and level the concrete mixture.
The next stage is reinforcement. It will allow you to achieve high strength and is created with steel and iron rods, they are laid evenly or a reinforced mesh is made.
Its elements are connected by means of knitting wire or welded into a one-piece structure.
Mixing and leveling
The concrete is mixed. The following composition is suitable: one part of cement, two - sand, four - crushed stone. Typically, the volume of water should be half that of the cement. The concrete should not be too thick or too thin. Lightweight concrete can also be used for the greenhouse. The concrete mix is poured evenly throughout the formwork.
If its surface is painted with water-based paint or lubricated, for example, with used machine oil, it will be easier to remove after the solution has set. It is necessary to use all the concrete at once: the solution is never left "for later".
The concrete is leveled and also rammed with a special vibration device or a simple board with a handle. It is imperative to release the accumulated air - for this, the mixture is pierced with metal pins.
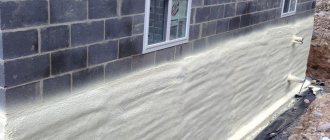
The foundation can be covered with roofing material (additional waterproofing), exposing it from the inside, and from the outside, making a visor of 20-25 cm. Styrofoam is also laid on the inside of the foundation and covered with a layer of sand 40 cm thick - this will additionally protect against moisture and cold.
Warming the base with foam
It is even easier to create a warm base for a foam structure with your own hands. This is a cheap and affordable material, it will be able to perform the function of keeping heat. It should be borne in mind that such a foundation will not last long - it is much less effective and of high quality than a concrete base.
So that it does not deteriorate, it is advisable to pack it in polyethylene before laying. This material is loved by mice: they do not eat it, but gnaw holes and place their houses there. To protect such a foundation, a perimeter of 1/4 or 1/2 brick can be created. A good substitute for foam is foam glass - it is not afraid of moisture and rodents, but more expensive.
Warming of soil
One of the simplest ways to insulate the soil is to raise the beds. For this, the soil is raised by laying foam or similar material. The beds themselves are raised by 40 cm. Plants can also be planted in boxes and placed on racks.
Sealing joints
The joints in the structure between the polycarbonate sheets and the metal frame, between the structure and the foundation strip are one of the main causes of heat loss. To reduce heat loss, roofing material or waterproofing is placed on the base, but still additional insulation of the greenhouse in these places will not hurt. It's also easy to do it yourself.
For processing joints use:
- sealants. Those that form plastic surfaces rather than hard ones are best suited. The latter do not react well to temperature changes and crumble. Various mastics have shown themselves well: thiokol, polysulfide;
- rubberized gaskets perfectly seal the gaps between the metal frame and the foundation.
Correct design
For a free-standing greenhouse, a vestibule is needed - this will protect the plants from a sharp temperature drop. If the greenhouse is attached to the house and the entrance to it is located from it, then the vestibule is not needed. It is advisable to place the entrance even to the heated structure from the south side.
In addition, racks for tools and inventory can be installed in the vestibule.
Internal insulation works
Insulation and processing of joints does not always solve the problem of keeping warm - all the same, the cold penetrates through the greenhouse material itself, no matter how high-quality it is. Its windows should remain transparent, therefore, coatings that transmit light well are used for internal insulation.
The standard way is to lining the space with plastic wrap from the inside of the structure: an interlayer of glass / air / film is formed, which will not let the heat go away. In the same way, polyethylene is used outside.
Installation of an additional layer
In addition to polyethylene, you can use another layer of polycarbonate; sheets of less thickness than those that make up the greenhouse are suitable.In this case, a three-layer coating is formed: two layers of material and an air layer. The standard thickness of outer sheets is 16 mm, inner sheets - 4 mm.
You should know that simple polycarbonate does not hold heat well. Cellular polycarbonate is the ideal material for greenhouses - it works much better as an insulator. Sheets of this material are easy to cut, drill, they are quite plastic.
Several nuances of installing an additional layer:
- the hole to be drilled should be at least 40 mm from the edges of the sheet - this way the material will not crack;
- the hole should be 1-2 mm larger from the thickness of the self-tapping screw;
- for fastening it is better to use a special thermal washer, you can make it yourself. It consists of a sealing washer (made of rubber material), a plastic washer, a self-tapping screw (sold separately), a thermal washer cover.
Additional heating tools
The fastest way to insulate greenhouses with improvised means is plastic water bottles. But it can be used in the off-season, it will not help protect from frost.
In winter, you can use as additional heating:
- high beds with insulation of the lower layer;
- laying along the beds of the cable;
- gas heating (gas heaters, injection infrared heating pads);
- soil chimney (the stove is outside the greenhouse, the chimney is placed in the soil);
- catalyst burners.
Insulation of the base of the greenhouse with penoplex: technology, price, advantages
I will clarify right away that today we will consider a method of insulating a solid structure of protected ground, based on a real concrete foundation, and not a temporary mobile structure that can be transferred from place to place along the garden plot.
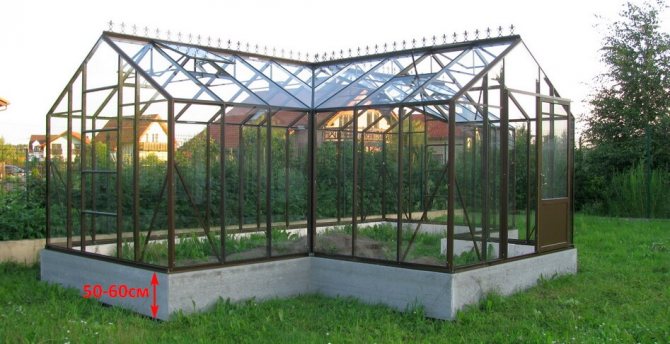
Greenhouse on a concrete foundation
On our portal "7dach" we regularly discuss designs and ways to optimize the use of greenhouses and greenhouses:
The author of the last article is absolutely right, drawing a clear semantic line between the concepts of greenhouses and greenhouses. The main difference between these constructions is clear already from the names:
- greenhouse creates a greenhouse effect without the supply of thermal energy;
- and greenhouse it is heated from two sources: firstly, it retains the solar heat received through the transparent walls and roof; secondly, the interior space is additionally heated by the heating system. Therefore, it is possible to grow greens and vegetables, berries and flowers in greenhouses all year round - whatever the owner wishes.
It turns out that most of the greenhouses in our gardens, despite the familiar name, are not greenhouses at all, but greenhouses. Nevertheless, both variants of "thermal oases" should be maximally protected from the vicissitudes of the surrounding climate. And there is something to defend against.
Greenhouses and greenhouses must be reliably protected from the cold
Our country is cold, regions with seasonal freezing of soils occupy a significant part of the Russian Federation.
In the spring, summer residents are in no hurry to plant early crops: even at above-zero air temperatures, the soil is still in a frozen state, since it warms up much more slowly.
Do not forget that the soil constantly changes temperature depending on weather conditions, especially in spring, when thaw can suddenly be replaced by frost.
Insulation of the base is indispensable
When constructing a greenhouse on a strip (or slab) foundation, a large amount of heat will go through the concrete straight to the planet Earth.
Can we let this happen? Of course not, because this is not why we worked, creating an oasis of warmth in order to lose it literally under our feet.
But organizing an earlier start of the season and, therefore, guaranteeing the ripening of vegetables and greens is possible if the base of the greenhouse is reliably insulated.
Strong arguments in favor of PENOPLEKSA®
Do not forget one very, very important point: you will spend this amount for insulating the base only once in the entire life of the greenhouse, since PENOPLEX® is a really durable material. Biostable (unfavorable for the development of microorganisms, fungi and mold, dangerous and harmful to human health), chemically and physically neutral. Eco-friendly (its use in greenhouses is safe) - it allows you to grow useful and healthy products, creates favorable natural conditions for them.
And the last, but a compelling argument in favor of this method of insulating greenhouses. This is not a dacha activity of local "kulibins", but a proven technology that has long been successfully used by agricultural leaders of the industry.
Thermal insulation using this technology is also used for industrial greenhouse complexes. As an illustrative example, I will cite the demonstrative experience of the Maisky agro-industrial complex in the Republic of Tatarstan. The productivity of industrial greenhouses with a total area of more than 50 hectares today is more than 15,000 tons of vegetables (cucumbers, tomatoes, peppers, eggplants, and others).
How and what to insulate your greenhouses and greenhouses is up to you. But do not forget that a miser pays twice: choosing low-quality materials from an unknown manufacturer, you risk just throwing money down the drain, leaving greenhouse plants without protection from the cold.
Greenhouse insulation methods from the inside
If the structure is installed directly on the ground, then first, the soil is insulated in the greenhouse. For this purpose, a protective plinth with a height of 50-60 cm is constructed from heat-insulating material. In the work can be used slabs of aerated concrete, wood concrete, foam concrete or expanded clay concrete. The foundation itself is partially buried in the ground to increase stability. As an alternative to the new foundation, insulation can be carried out by raising the beds themselves above the ground level at a level of 50 - 70 cm.
An effective way of warming is to create a greenhouse made of polycarbonate - a special polymer plastic with increased optical transparency and heat-insulating properties. The structure itself can be installed directly on a plot of soil or on a pre-prepared foundation. The floor of the greenhouse will be protected from the penetration of external cold if a special insulation tape is installed around the entire perimeter of the foundation.
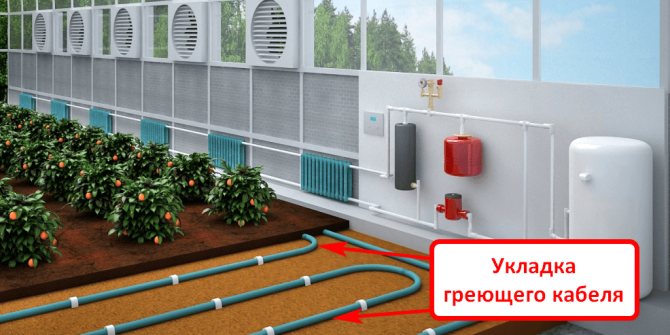
The process of insulating a structure can be carried out using a water or air heating system, as well as by laying a heating cable. The most time consuming and expensive is the water heating device. Air heating is carried out through special air ducts connected to a stove or boiler.