Planning and development of the drawing of the gazebo
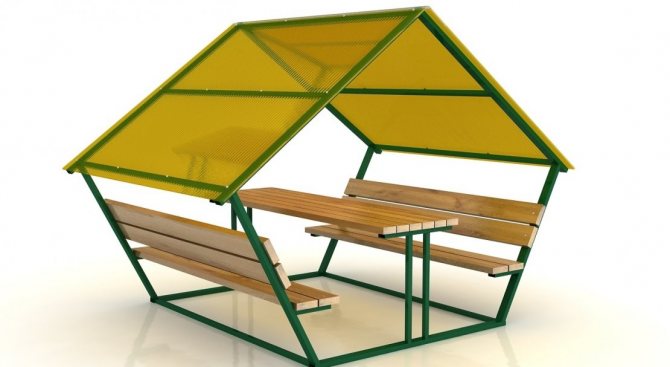
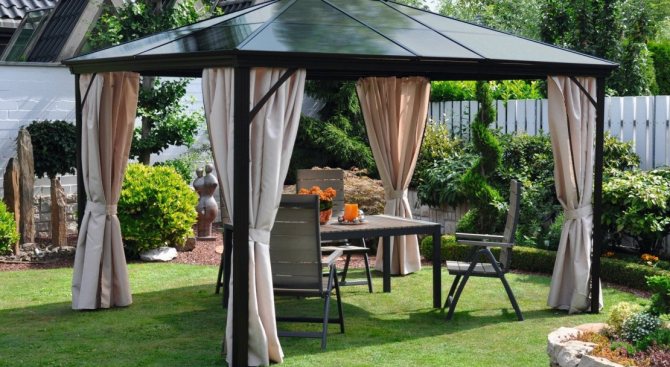
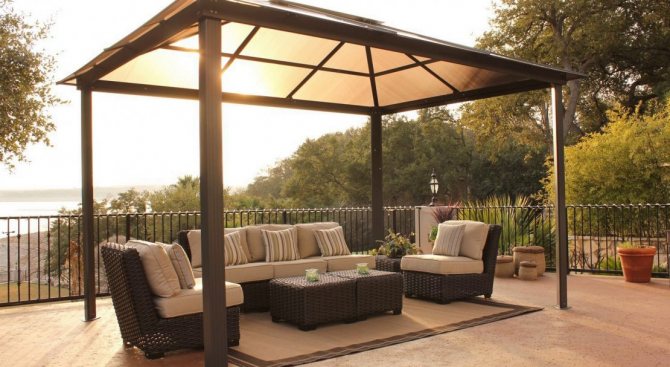
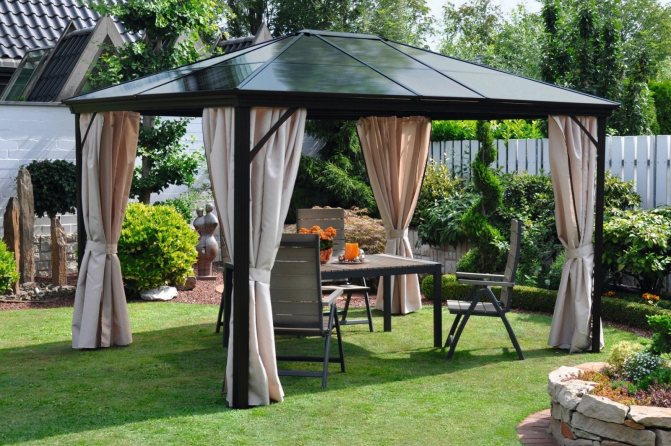
Before starting work, the home craftsman needs to decide on the size of the future structure and its appearance. This largely depends on where the gazebo will be located. It can be made both as a free-standing pavilion and adjacent to the house.
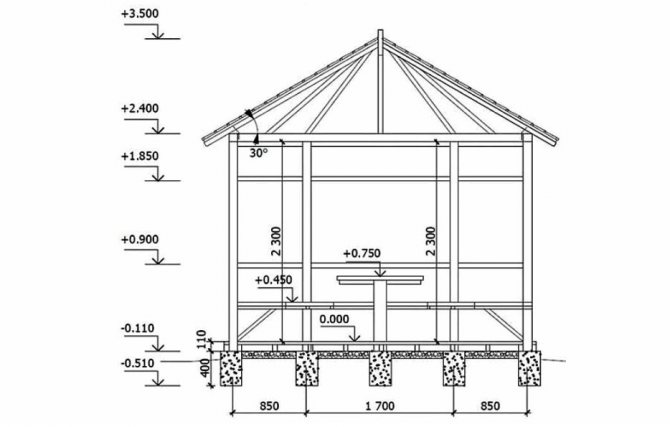
After determining the required parameters, it is recommended to draw a drawing, which will take into account the width, height, and configuration. Thus, you can accurately calculate the amount of materials required for construction, and prepare an approximate estimate.
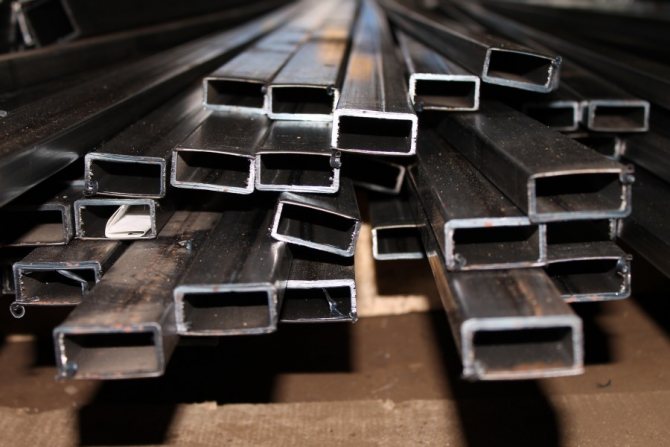
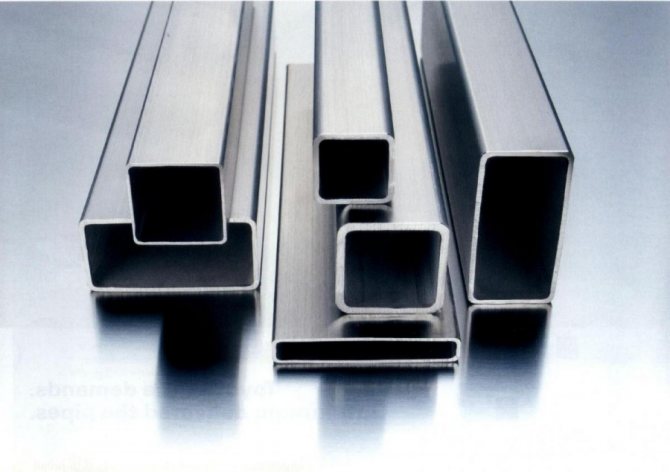
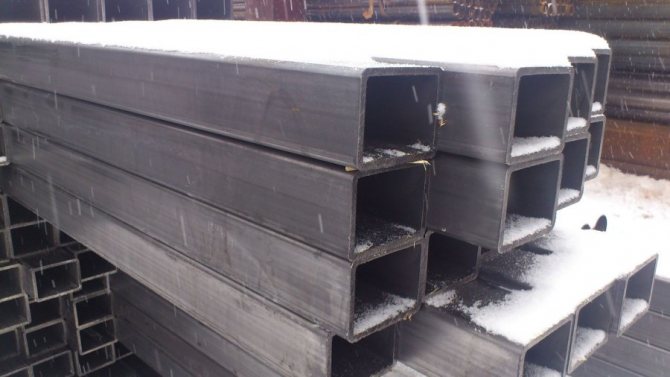
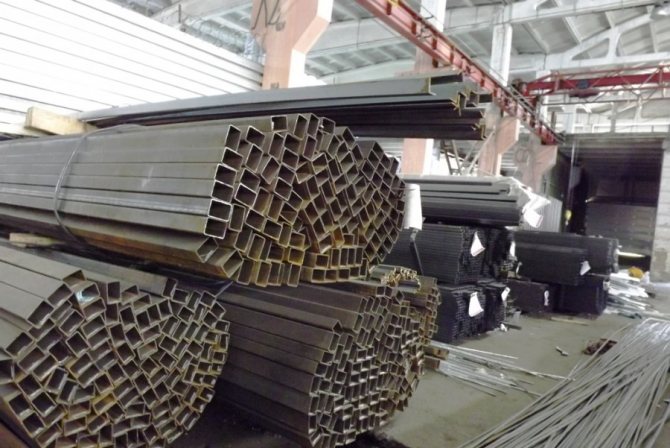
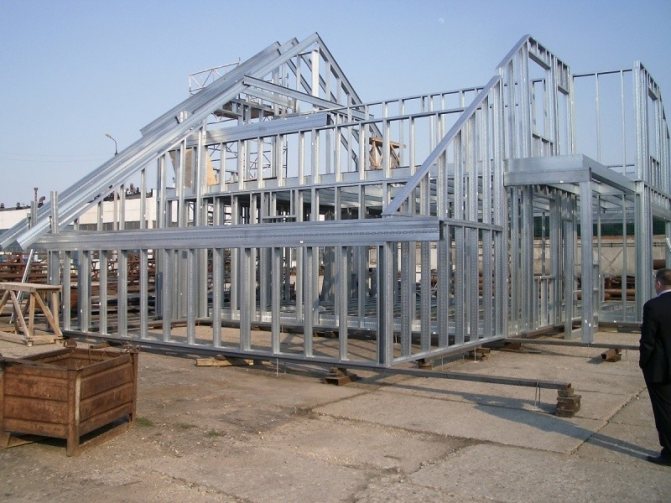
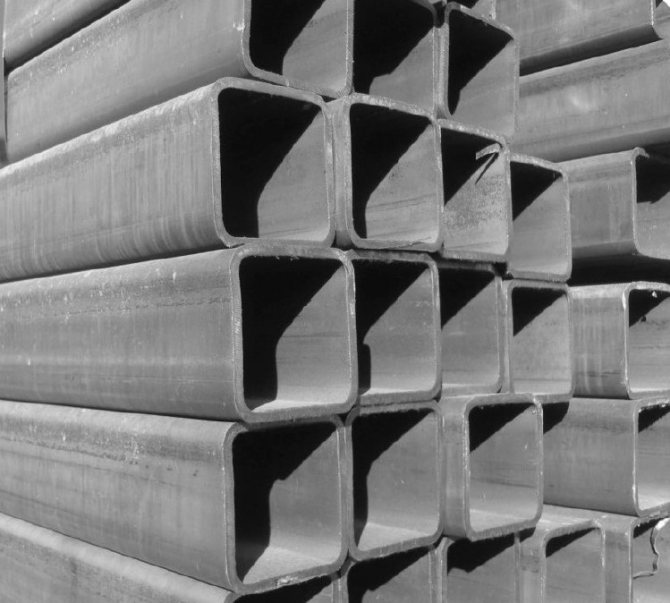
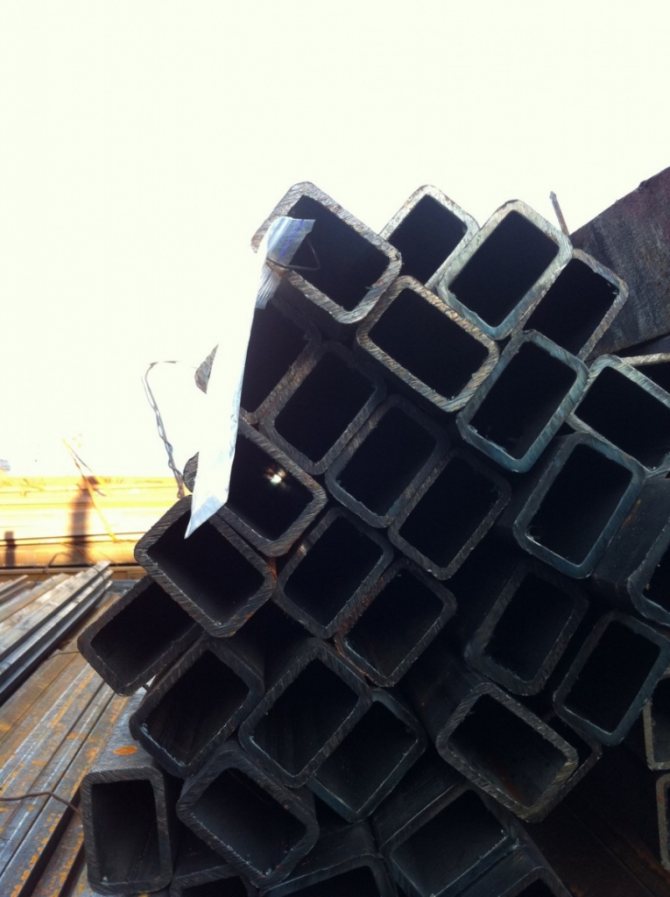
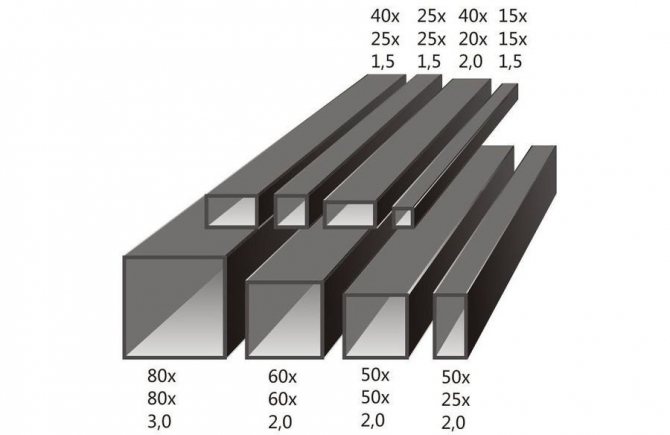
The supporting frame of the gazebo is easiest to assemble from shaped pipes. They come in rectangular or square sections. The characteristics of this material allow it to be used for the manufacture of all kinds of metal structures. Experienced craftsmen claim that it is significantly better than other types of similar products, such as a corner, round bars or rods.
Did you know? Summer buildings can be made not only in the form of a capital structure made of stone, metal or wood. In tropical countries, their walls are often made of vines, like a wattle fence, which is traditional for southern Russia, and the roof is made from armfuls of large leaves.
On the Internet, you can find many ready-made options for building a gazebo from a professional pipe. Any of them can be taken as a basis for construction or adjusted to the needs of the consumer. After reviewing the examples and choosing the appropriate option, the home craftsman can begin the construction of the summer pavilion.


Dimensions (edit)
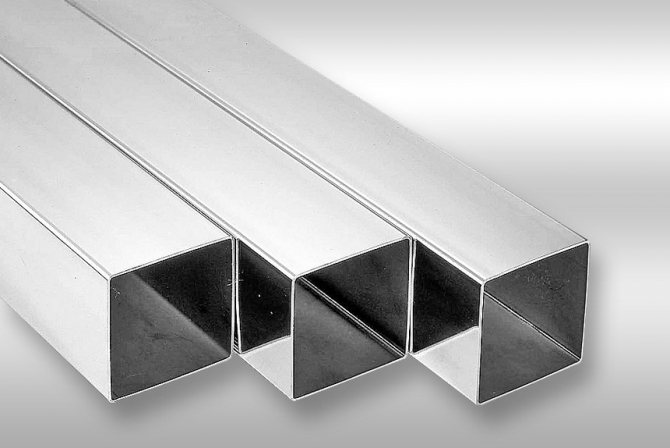
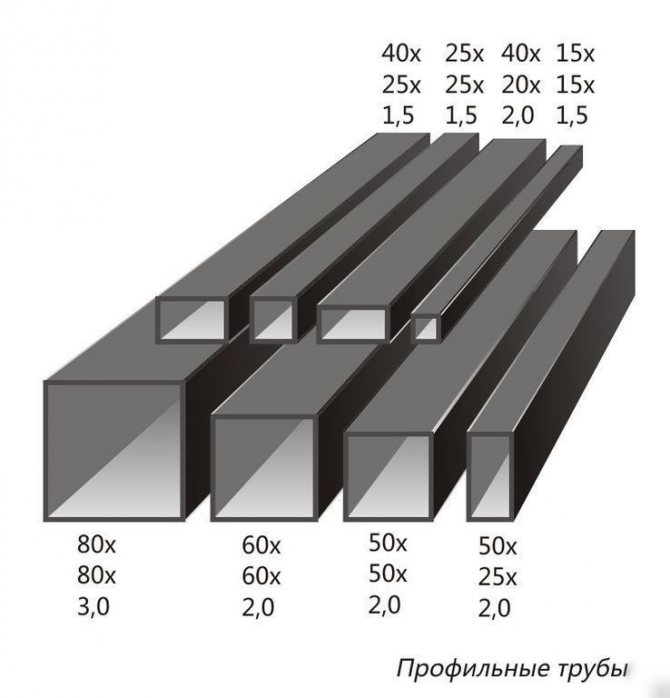
The release is regulated by GOST with an indication of the deformation capacity. The standard dimensions of a profile pipe are:
- With a square section: 10-180 (32-60) mm and a wall thickness within 1-14 (4-6) mm.
- With a profile in the form of a rectangle: 15 * 10 (28 * 25) mm with a wall thickness of 1-12 mm.
- Oval shape from 6 * 3 mm to 90 * 50 mm with a wall thickness of 0.5-2.5 mm.
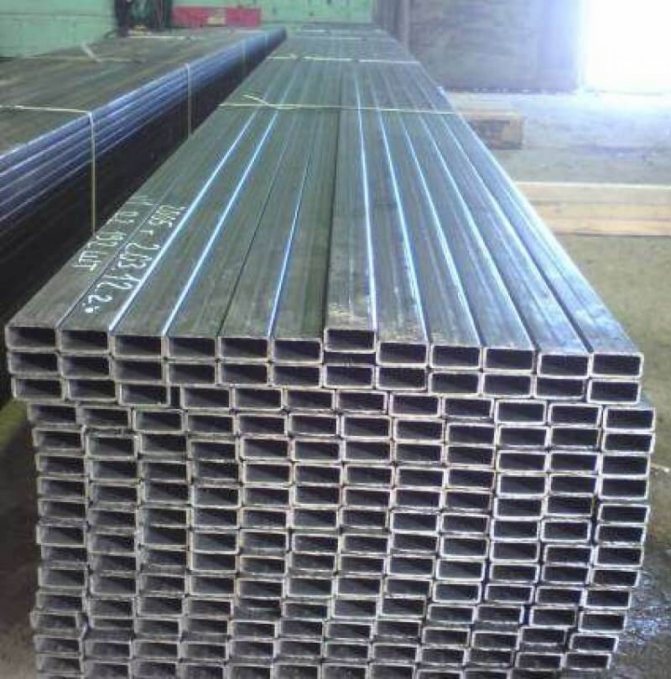
Products vary in length:
- Measured length.
- Not measurable.
- Multiple length.
The profile pipe in accordance with GOST varies from 50x50 to 400x400 mm.
Required materials and tools
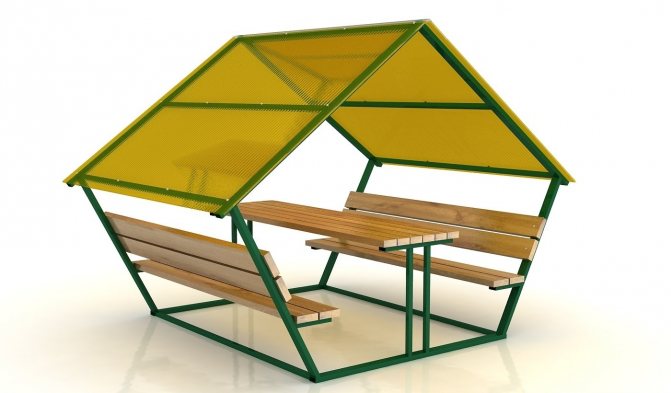
Further, the process of erecting a summer pavilion with a gable roof and an area of 300 × 540 cm will be considered in detail.It consists of several stages that must be performed sequentially. Before starting work, you should prepare tools and materials.
You will need:
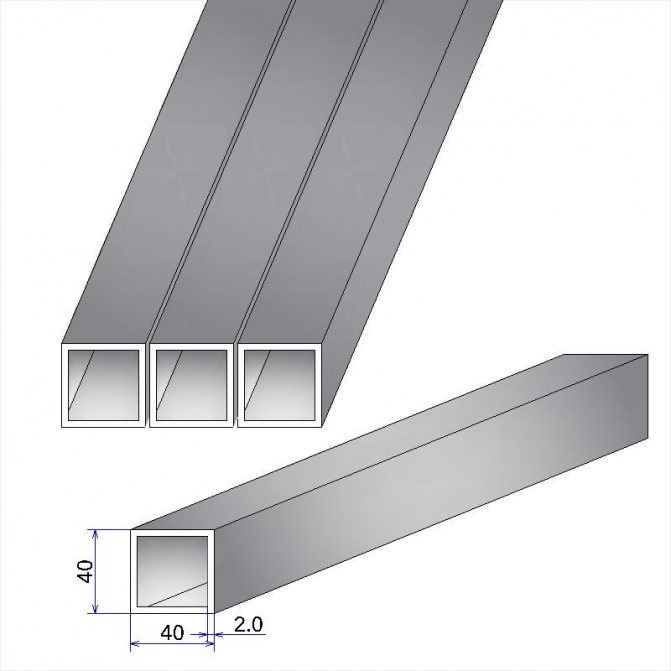
- rectangular and square shaped pipe with a cross section of 4 × 2 and 4 × 4 cm;
- crushed stone of medium fraction, river sand and cement;
- welding machine (electric or gas), a pack of electrodes with a cross section of 3 mm;
- grinder, rubber hammer and sledgehammer;
- pegs made of wood for marking, a drill for soil;
- water level, cord, elbow;
- construction tape and chalk;
- bitumen, primer, iron brush, paint brush;
- paint for metal surfaces;
- slate, ondulin or polycarbonate for the roof.
You may be interested in learning how greenhouses are used in landscape design.
Profile pipe selection
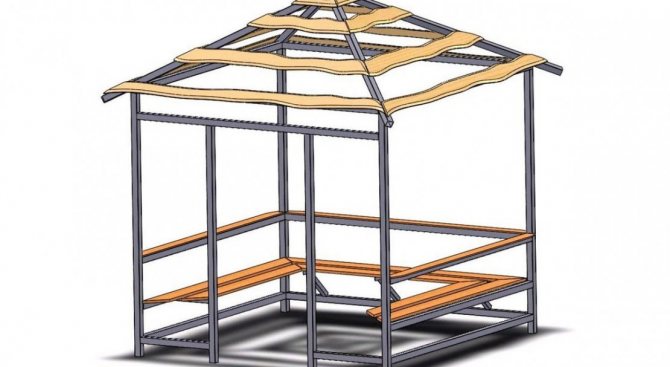
This material is very versatile, and is used not only in the case of the manufacture of load-bearing structures (under the roof or sheds), but is also suitable for the implementation of all other elements of the summer pavilion. It can be used to build tables, benches, wall lathing.
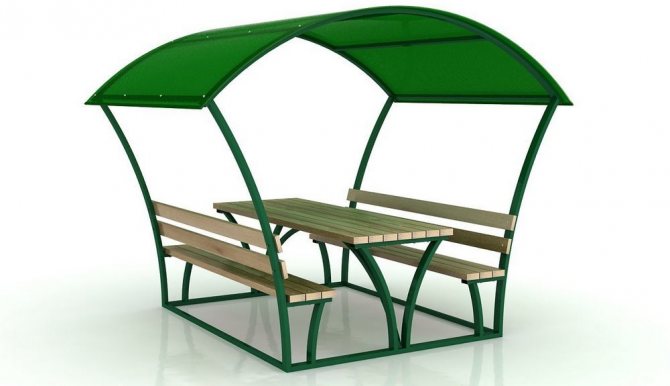
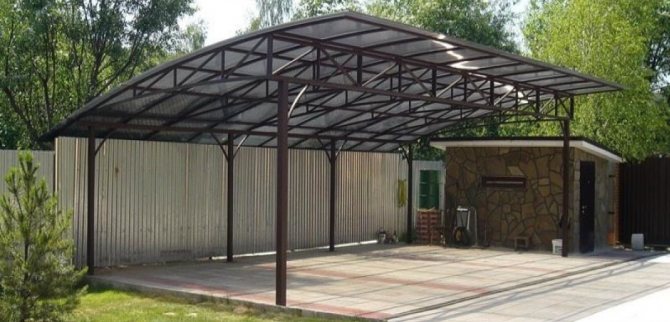
You can build a gazebo from only two materials: a metal profile and cellular polycarbonate or ondulin for the roof. Additional decorativeness can be achieved by taking pipes with different sections as a basis.
- Why are professional pipes good:
- The strength and lightness of the iron structure, achieved due to the internal voids.
- Allows you to evenly load the entire frame, including non-metal elements connected to it.
- From them, you can quickly and easily build a structure with your own hands.
- The appearance will be much more attractive than products from other types of rolled products.
- The convenience of fitting and joining the places to be connected, which cannot be said about rolled products with a circular cross-section.
For the supporting pillars of the gazebo, it is best to take a profile with a square section, it is much stronger than a rectangular one. The latter is suitable for side battens, holders for lamps or lanterns, and other decorative elements that are not subject to serious stress.
Important! The metal profile used for the pillars of the summer pavilion must be strong in order to impart stability and reliability to the entire structure. Other elements, depending on the functions of the finished product, may be less durable.
During the construction of the summer pavilion, the master will need to be able to handle a power tool, especially such as a grinder, an electric drill. In addition, the skills of a welder will be required, since the main work on assembling the frame is carried out using a welding machine. Attaching parts to bolts doesn't look as pretty as a neat weld.
What type of rental is best for the gazebo:
- Metallic profile - the main consumable, due to the simplicity of work in such a construction, it is used most often. It is better to purchase products with a wall thickness of at least 2 mm. It is also not recommended to buy overly thick pipes, they are usually sold not per running meter, but at a fixed price of 1 kg, therefore, with the same dimensions, they will cost much more.

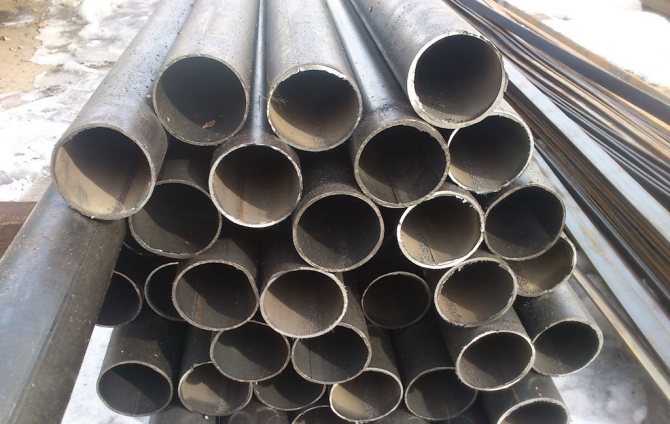
- In case the master, for any reason, chose round pipes, then the thickness of their walls should be the same as that of square ones. It should be borne in mind that they are much more difficult to process (especially during welding). But this material has one indisputable advantage - they are much cheaper than rectangular ones, therefore, having sufficient experience, you can take them into work.
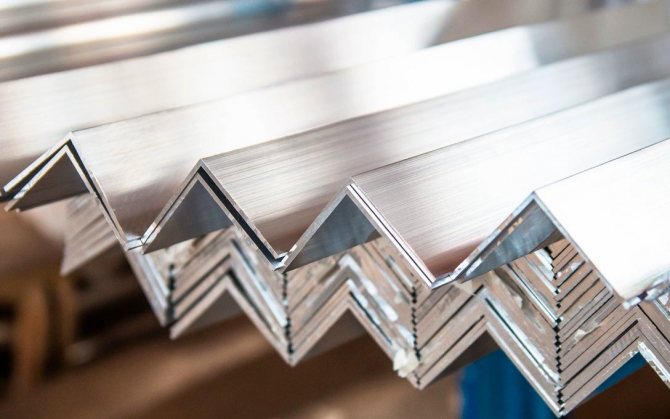
- I must say about one more option - using the corner... This is quite possible, but a large metal thickness is needed, from 2.5 to 3 mm, so the material has a much lower rigidity. Such a frame looks very good, being sheathed with elegant panels.
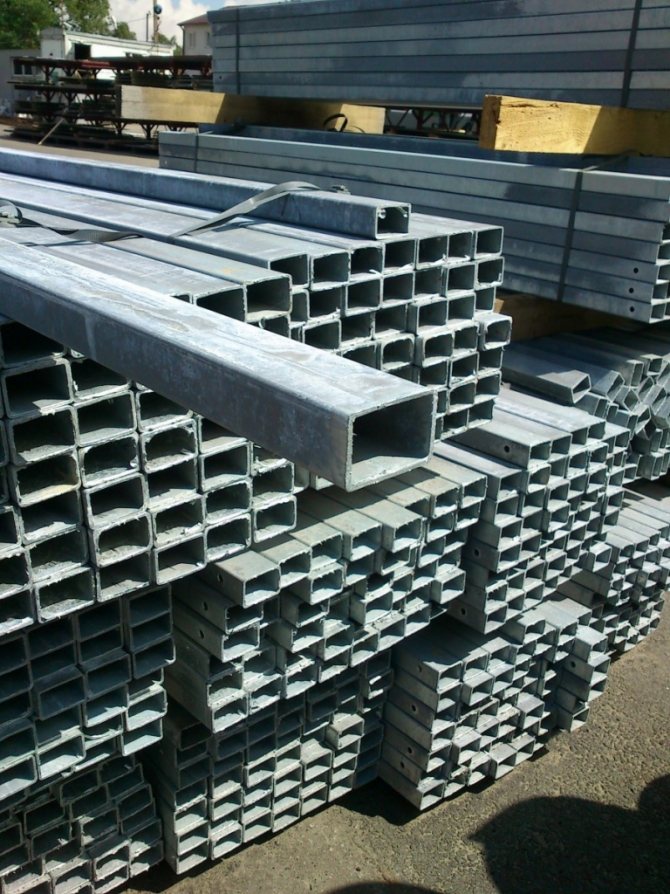
A profile pipe, like a corner, can be made not only of steel, but also of aluminum. When choosing the last material, the weight of the summer pavilion will significantly decrease, and its cost will increase several times, so the decision is for the consumer.
All about machines for the production of coiled pipes
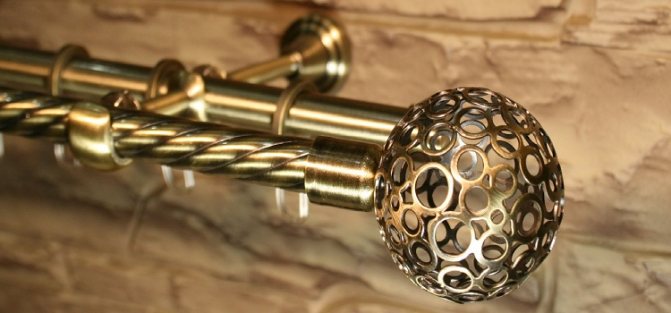
Coiled pipes can be encountered quite often in various fields of application. What are they for, what is the process of making them? These products are mainly used for decorative purposes.
Moreover, they do not always perform the function of a concrete conductor of any liquid.
Let us consider in more detail the scope of application of pipes, as well as the features of their production, the ability to do the work with our own hands and how the homemade material will look like, is it worth spending additional forces and funds on making the machine.
Application
Coiled pipe making machine is a useful thing in various fields. For example, it can be used in the manufacture of furniture, oddly enough.
This is because twisted pipes can be used as structural elements of various furniture options.
Modern technologies of furniture production are a non-standard approach and the use of high-quality and reliable materials. Twisted pipes in the furniture industry can be found as elements:
- tables;
- chairs;
- legs of upholstered furniture;
- bar counters;
- shelves;
- beds;
- shelving.
Having a small furniture production, a machine for the production of a twisted pipe can give a new round in production: to push for fresh ideas, to expand the range of products.
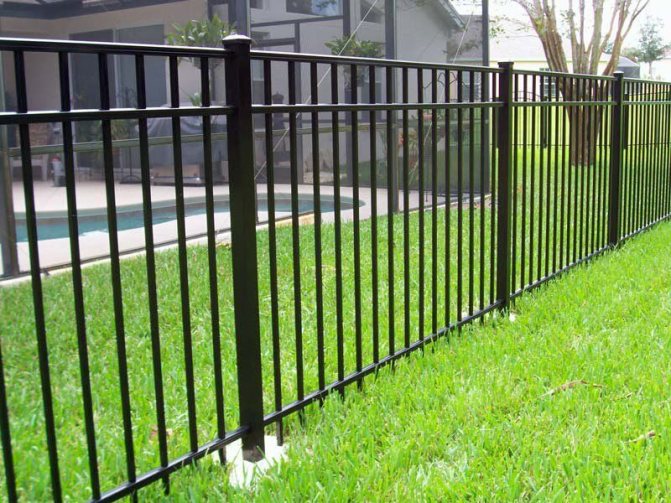
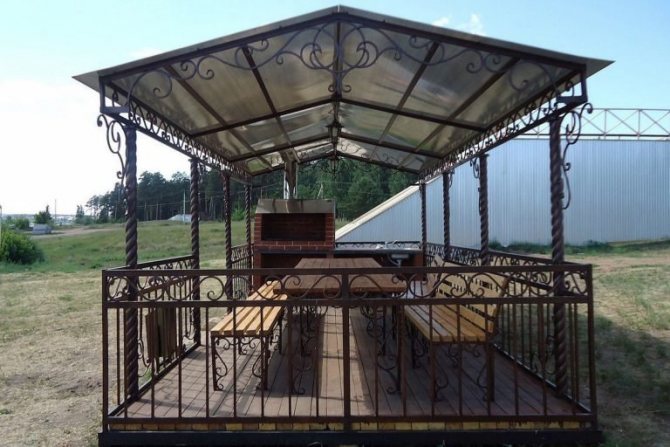
Another industry where twisted pipes can often be found is construction, or rather, the design of the exterior and interior of the building. In the first case, supports for a canopy, porch railings, railings for stairs, balcony racks and much more can be made from a twisted pipe, in the second, pipes have also found application.
They can make up a composition for a decorative addition to a design, for example, as a stand for flowerpots. The twisted pipe making machine will be useful in the production of stairs, structural decorative and functional elements of buildings. It can also be used in the production of awnings, gazebos.
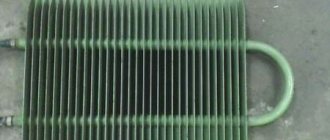
In some cases, heated towel rails are made from coiled pipes.
Due to the fact that the pipe is made of metal, it can be used as a cavity for filling with hot liquid, water or oil. And the twisted shape will create a more original look.
Moreover, such pipes can be coated with special heat-resistant paint - this will give additional options for solutions for bathroom decoration.
Making a DIY twisted pipe machine requires some engineering and technical knowledge. The main thing in do-it-yourself production will be the correct drawing up of drawings. Only correctly calculated and executed drawings will give all the necessary parameters for the production of precision equipment.
However, if there is no time, effort and special need for serious brainstorming, it is quite possible to buy this machine. Despite its considerable cost, it pays off quickly enough.
Although, of course, it will be more practical to take it as an addition to an existing production line, and not as an independent device.
Using
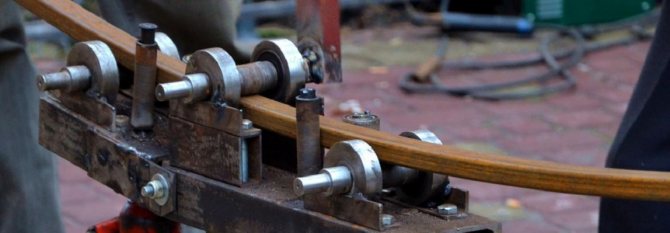
The most important thing in the operation of the machine for the production of coiled pipes is ease of use. If the creation of such a device requires serious calculations, drawings and a lot of time, then for use it is enough to watch the video one or two times or use the photo instructions.
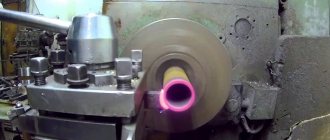
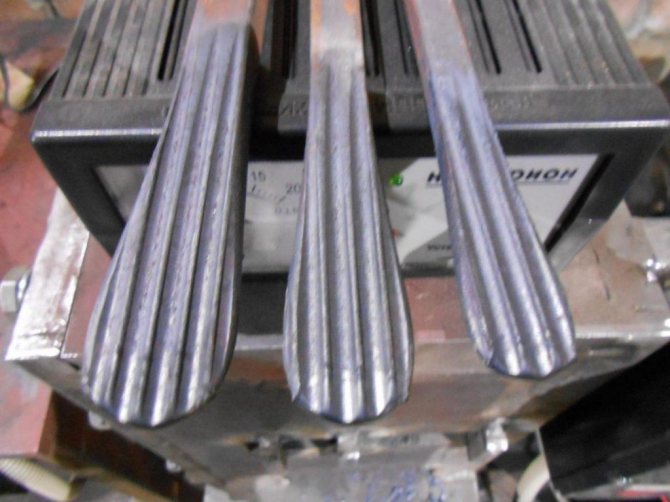
The principle of operation consists in a special rolling of the pipe layer, without cutting all the metal. During preparation, the operator sets the position of the sliders according to the adjustment nanogram.
The position comes with a clear correspondence with the thickness of the material. You can use products with a diameter of 1-15 cm. After that it is important to rotate the screws, making marks on the sliders.
Installation takes place opposite the marks on the ruler, which is located on the working plate.
As soon as the preparatory work is completed, it is necessary to turn off the machine. The pipe can rotate clockwise. The knives create the necessary cuts without completely damaging the metal. The angle of elevation of the pipe coil will also depend on the device.
The most common angles are 35, 45, 55, 90 degrees. The productivity of the device is up to 120 m3 / h, but it depends on the model and manufacturer. Therefore, if this parameter is important, it is better to clarify it separately and in advance when choosing a machine.
With a sufficient level of orders, the machine usually pays for itself in just a few days. Therefore, before buying, it is advisable to assess the amount of existing and subsequent work. Moreover, it is desirable to give an assessment according to the most critical indicators.
Then the question of payback will not touch.
Summing up, it is worth noting that such a machine is an auxiliary device.
Although, if you get regular orders specifically for a twisted pipe, you can take more than one machine, specializing only in such a production.
Source: https://TrubyGid.ru/stanki-dlya-izgotovleniya
Step-by-step construction instructions
As the first stage, the site selected for construction is cleaned, debris is removed from the surface and sod is removed.
Place markup:
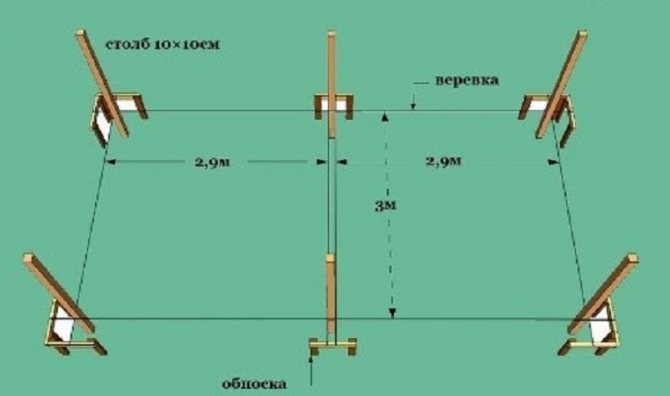
- To mark the location of the future foundation, it is necessary to drive one of the wooden stakes into the ground.
- Next, you need to measure the length and width of the future building from this point, stick the pegs in again and pull a rope between them. As a result, a rectangle will come out, where you need to measure the diagonal lines. If they turn out to be equal, it means that the corners are displayed correctly.
- According to the chosen project, the length of the pavilion is 540 cm, width - 300 cm. The end sides are divided in half using a construction tape and a mark is made in this place.
- The length of the back wall is divided into three segments, each of which is 180 cm.
- The facade is marked last: 220 cm are measured from each of the corners (towards the center), and marking pegs are driven in here. The space left in the middle is the future doorway.
Did you know? More recently, round tables for gazebos have come into fashion, in the center of which there is a hole where the hearth or barbecue is located. This allows vacationers to combine sitting by the fire and eating.
Foundation
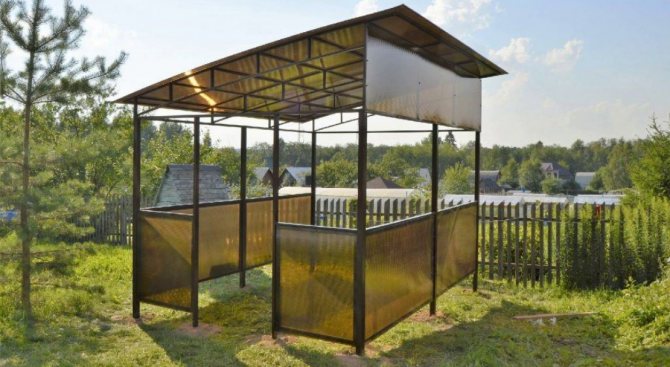
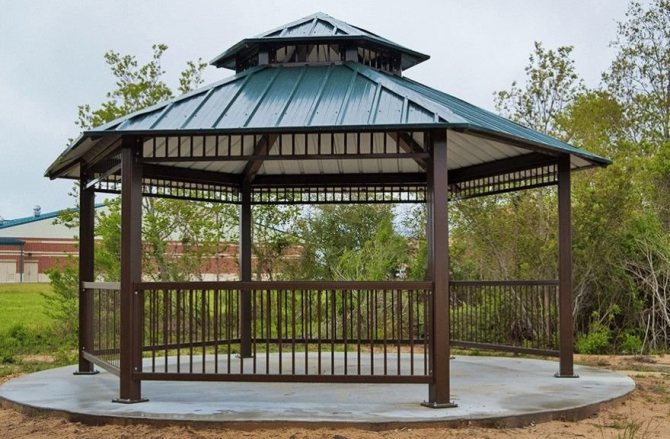
A summer gazebo from a profile can be made: rectangular, square, with six or eight corners, as well as round.
The finished metal frame can be installed in two ways:
- Concrete in the ground vertically located pipes, which will be the main bearing pillars. Other elements of the pavilion will be fixed on them.
In the absence of a capital foundation, such a structure is stable, but in order to make the floor, the master will have to slightly raise the lower harness above the ground. Most often, in such pavilions, paving slabs are laid out instead of the floor.
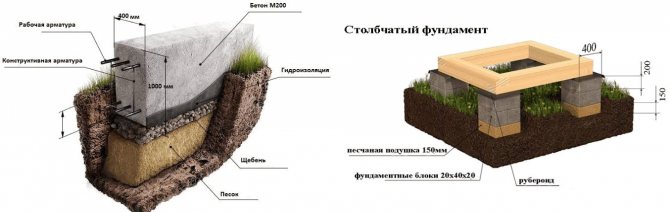
- Initially, build a strip or columnar foundation on the soil surface; a solid concrete monolith is also suitable.
The frame of the building must be assembled aside (starting from the racks and ending with the lower strapping), after which it can be fixed in the prepared place. If the foundation is strip / columnar, then the bearing struts of the structure must be installed on them, and only then fastened together (directly in place). In finished form, such a gazebo can only be moved with the help of a special crane.
Both options are good, so it is difficult to choose one of them. In the first case, the gazebo will be more reliable and strong, since the support posts are concreted. In addition, this method is cheaper, since it does not provide for the construction of a foundation around the entire perimeter and the lower piping. Among the disadvantages - the lack of a floor makes it impossible to use the pavilion in the winter.
Also learn how to properly plan your small patio landscaping.
The main advantage of a gazebo on a foundation is the presence of a floor. It is also good that the inner surface of the pavilion is on an elevation, albeit not high, and does not allow splashes of dirt to enter the room during bad weather.
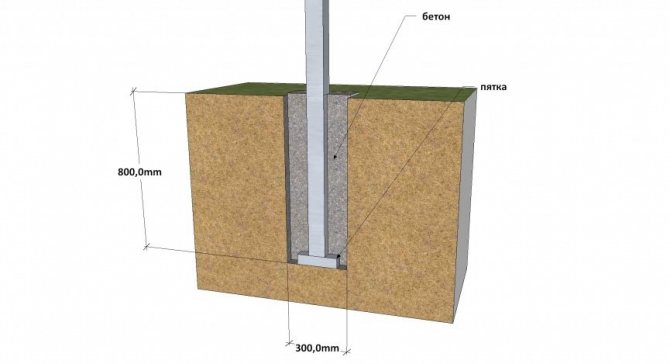
Making a columnar foundation:
- Under each peg, you need to make a half-meter depression in the ground. It is best to work with a hand drill. At the end of the work, the master will have a dozen of the same soil holes.
- A strong square professional pipe (4 × 4 cm) is taken, cut with a grinder into 10 three-meter racks, the lower parts of which need to be lubricated in liquid bitumen (by about 1/3).
- After the metal pieces dry well, they are lowered into the drilled holes, down with the processed ends, setting exactly in the center.
- Then they need to be hammered with a sledgehammer about 80–90 cm into the ground.
- You should once again check the installation of the pillars for verticality, and, if everything is in order, fill the grooves to the top (1/3 with sand, then with rubble).
- For capital reinforcement, a slurry of concrete is poured over the crushed stone, the pouring is pierced several times with a thin iron probe in order to release air, it is leveled and left to solidify.
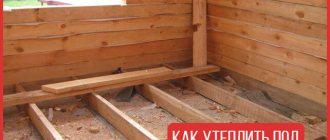
Bottom strapping
To do this, you need to take: 6 metal segments of 3 m each from a profile with a cross section of 4 × 4 cm, 4 thinner segments from a 4 × 2 cm pipe, the length of each is 540 cm. The lower strapping is fixed on concreted vertical supports, at a distance of about 90 cm from soil. Exactly the same actions are carried out on the upper edge of the bearing racks.
When building a gazebo, pay attention to vertical gardening techniques.
Since the pillars are at the same height, there will be no problems with the placement of the side pipes and welding... Before starting this stage of work, it is recommended to markup using a construction tape and chalk, which will greatly facilitate the work of the master. After the completion of the upper strapping, it is necessary to lay two pipes across the structure, they will serve as a rigid bundle. Only then can you start assembling the roof of the gazebo.
Assembly and installation of the frame
Most often, steel parts are joined into a single structure by welding, which allows you to carry out work quickly and get a good result. But it should be borne in mind that sometimes there is a need to disassemble the open summer pavilion, and after a while, reassemble it. The need is due to the fact that in winter, the summer cottage remains unguarded for a long time, and such an amount of metal can be stolen.
DIY cold forging
The entire workflow for creating products using cold forging can be divided into several stages.
- Drawing or diagram of the finished product.
- Selection of materials.
- Metal processing and parts manufacturing.
- Assembly and finishing.
Drawing
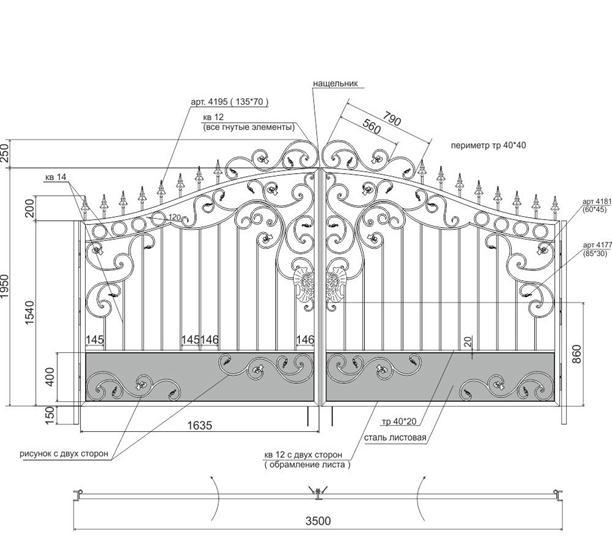
On the drawings of the future product, all dimensions of the parts, the angles of the individual elements and the landing points are calculated and marked.
It can be made both manually and with the help of modern computer programs such as AutoCAD.
The main thing is to execute the scheme on an approximate scale, so that calculations can be easily carried out without problems. The purpose of such a drawing: the exact definition of the names and the number of necessary parts, the counting of materials, the correct final assembly of the entire product.
Materials (edit)
Various types of rolled metal are processed in cold forging.
Almost all elements are produced from bars or squares: tops, crow's feet, curls, spirals, monograms and others.
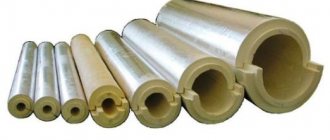
However, workpieces such as sheet metal, steel strip and shaped pipe are also cold processed. They are used to make spirals, leaves or the same curls with a volute.
The dimensions of the processed rolled products depend on the capacity of the equipment. For example, hand held machines are not capable of bending a bar thicker than 14 millimeters.
In some cases, non-ferrous metal can also be processed with cold forging: copper, aluminum and others.
When the drawing is ready, you can easily calculate: how much of this or that type of rental is needed to create a thing.
Material handling
At this stage, all the individual parts of the product are created and prepared for assembly. On the equipment, if necessary, the production of the following forged elements is carried out.
- Legs, lances, tops - for finishing the ends of gratings or other linear parts.
- Curls - they include their own subspecies: volute (the ends are bent in one direction), worm (spirals in different directions), commas (just the curved end of the rod).
- Rings.
- Baskets - two rods twisted in a spiral and connected at the ends.
- Twists (torsion bars) are rods or strips twisted around their axis.
All these elements are produced on special equipment capable of bending metal blanks without heating to the forging temperature.In workshops, for the production of cold-forged products with their own hands, they use the "golden six" of workbenches: a whip, a snail, a flashlight, a twister, a volumetric box and a wave.
Rolled metal processing is based on three main technological
processes:
- Hood.
- Flexible.
- Torsion.
As with hot forging, drawing involves rolling the metal in order to reduce its cross section. In cold forging, this technology is used to produce lances or crow's feet.
To make the hood in a cold way, a rolling machine is required, which flattens the end of the workpiece. With the use of stamps, the relief is immediately applied. Peaks are produced on presses, giving the blanks the desired configuration.
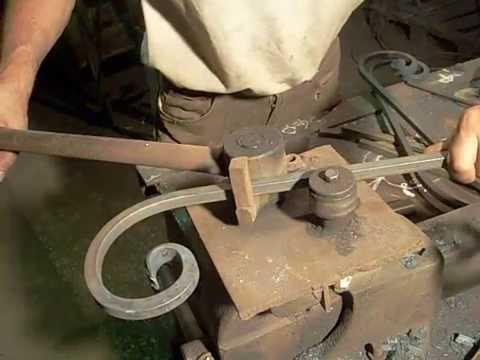
Bending is practically the main process on which cold forging is built. The machines listed above (except for the twister and flashlight) work according to the same technological principle. Most often, a snail is used, which forms a large list of all sorts of curls (monograms, curls, spirals, and others).
Torsion is based on the property of metal - plasticity and the ability to maintain a given shape. During such processing, the workpiece is twisted under the force around its axis. Usually the procedure is done on a twister. However, items such as baskets are produced with a flashlight. He is able to twist several blanks, while forming a volumetric element.
Usually, all processing is carried out in a cold way, however, sometimes it is necessary to heat certain points on the workpiece. This is done when bending or twisting thick parts, or when you need to fix defective parts. Heating can be carried out in forging forges or with a gas cutter to a temperature of 200-300 degrees, which is significantly lower than the forging temperature.
Also in the cold working of metal, standard methods are used: cutting, chopping, grinding and others. For this, grinders, cutting wheels, grinders, guillotines, chisels and others are used.
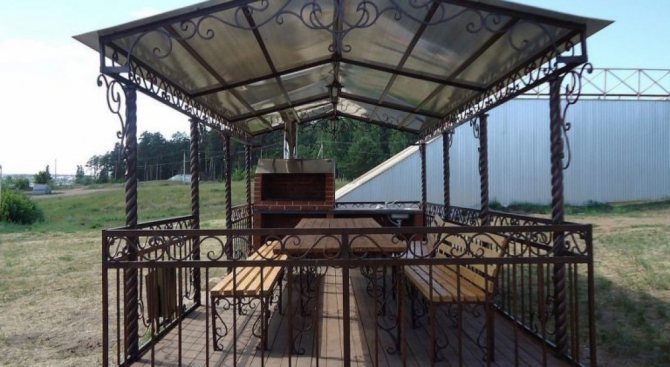
Building decoration
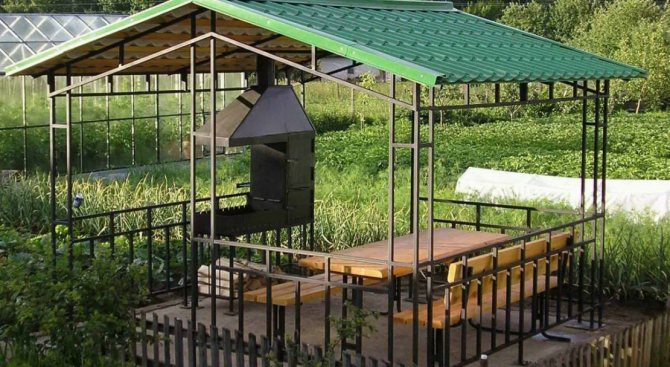
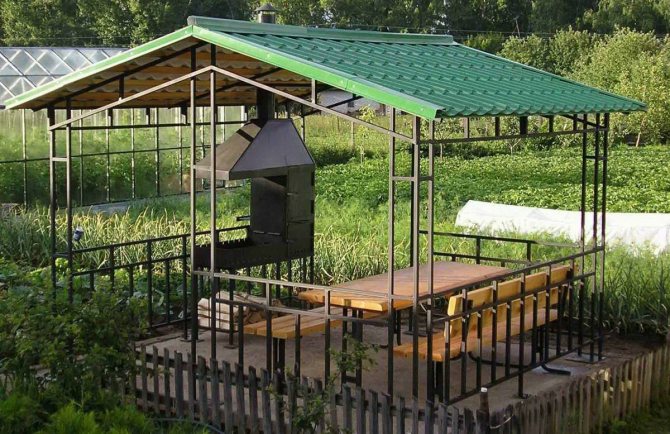
It is also advisable to equip the garden pavilion with a brazier or a barbecue stove, a comfortable table and several benches. It is worth conducting electricity inside and installing street floor lamps on the sides of the entrance. If space permits, install a rocking chair for an afternoon rest or reading. It is advisable to provide for the presence in the room of several decorative pillows and a cozy, soft blanket.

The construction of an open gazebo for a summer cottage is not too difficult a task even for an inexperienced home craftsman. Especially if, before the start of the work, all the necessary materials were carefully prepared, as well as their number was calculated. Such a structure will serve the owners of the garden for many years.
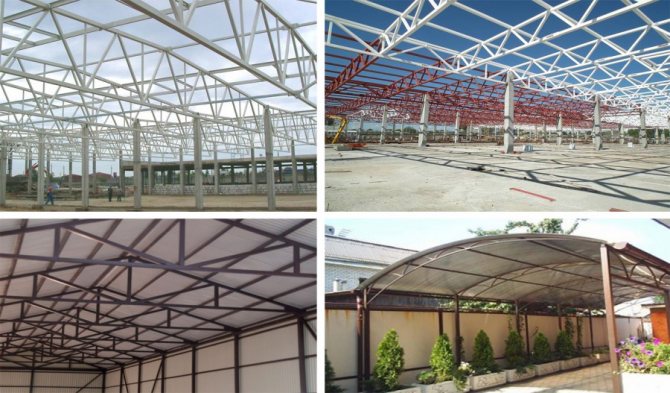
What to consider when building
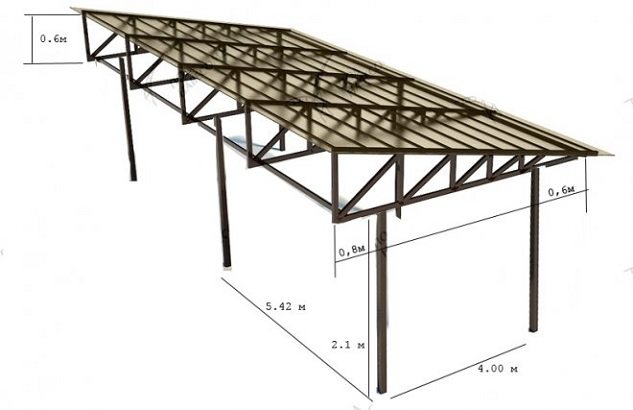
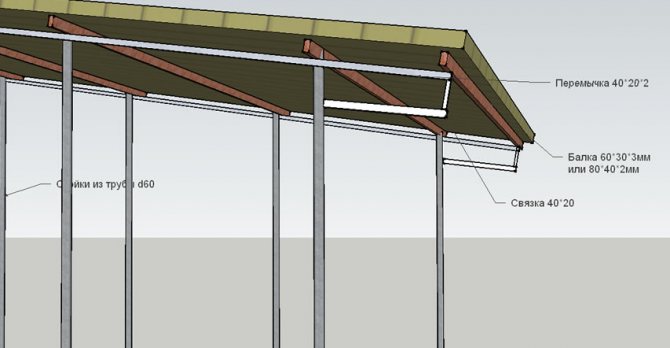
When welding and installing a canopy near one of the walls of a building, it is better to make the length and width of the supporting structure somewhat shorter. Such an operation will allow the release of the covering material and the drainage of rainwater into the gutters. Another advantage of the method is the saving of more than 2 m profile pipes on each farm.
The lowest cut of the canopy should be at least 2.2 m high. When a gazelle arrives, the height should be increased to 2.6 m. The size of the highest place depends on the imagination and budget possibilities.
But one rule of roofers should be taken into account. The angle of inclination of the roof slope should not exceed 120, therefore the total height of the structure should be less than 4 m.
When locating and choosing a place, it is imperative to take into account the main directions of the winds and the amount of precipitation typical for the region.
Depending on these values, the dimensions of the shelves of the main profile for welding, pipes for racks and squares for fastening are selected. For the main parts of the canopy made of shaped pipes, a separate drawing is prepared with all dimensions, places of fastening and stiffness.
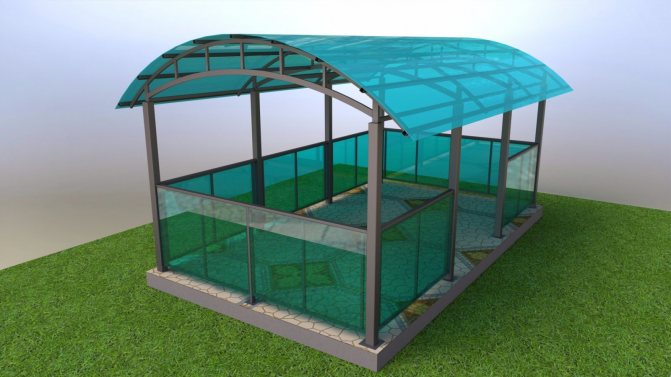
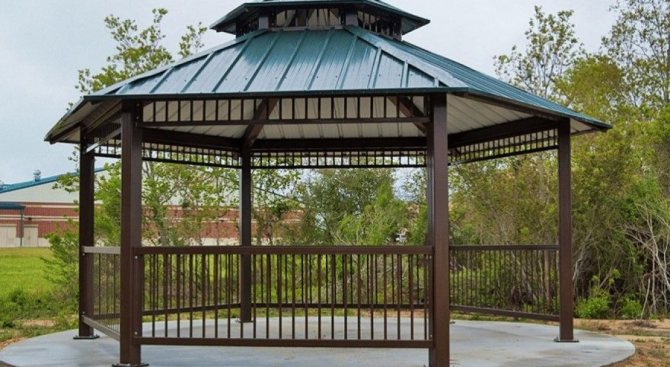
There are quite a few options for the shape of the roof of the sheds - single-slope, arched, gable (house), complex. Each design has its own pros and cons.
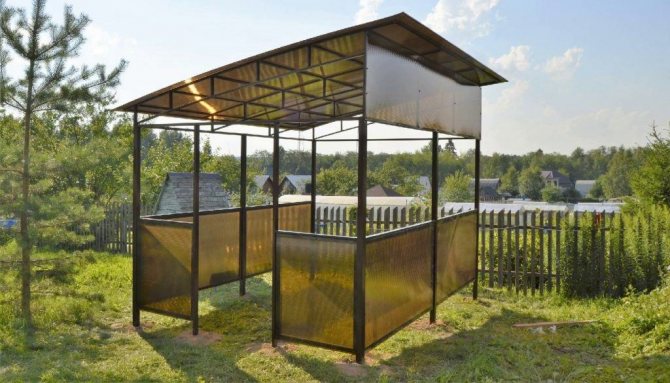
The most common is a pitched roof, which is not difficult to weld. The angle of inclination of the truss should not be less than 8%. If this value is not observed, snow will collect on the roof of the canopy in winter, and such a visor will not last long.
Canopy assembly technology from a profile pipe
The process of building canopies from a profile pipe of both options is largely similar, but there are differences. In the first case, most of the connections can be made on bolts or pins, more powerful and heavy structures of canopies must be assembled only by welding, otherwise it will be much more difficult to achieve the required rigidity of the structure from a profile pipe.
The canopy assembly process consists of five steps:
- Preparation of the foundation for the installation of a canopy made of profiled pipes;
- Manufacturing of trusses from profiles pre-cut according to the drawing;
- Installation of vertical supports, strapping of racks with horizontal floor beams, installation of rectangular trusses;
- Installation of wedge-shaped trusses and their connection into one frame;
- Laying of roofing material and painting of canopy profile pipes with protective enamel.
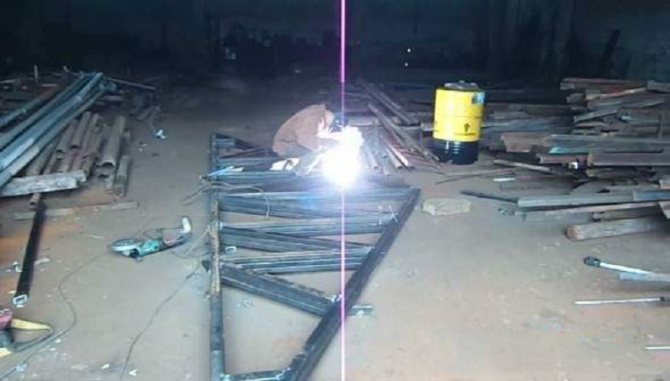
For your information! Wedge trusses are assembled on the ground using carbon dioxide welding and a pre-assembled welding template.
The use of welding in a protective environment allows you to reliably connect profiled pipes 50x50 mm and 25x25 mm with a minimum wall thickness of 2 mm. This stage of work requires a good knowledge of the technology of joining thin-walled products. If it is not possible to use argon or carbon dioxide, then it is better to replace the welding with a bolted joint, and after installation, reinforce the joints with welding points. A thicker profile pipe can be welded using conventional electric welding according to the scheme shown in the video:
Features of preparation and arrangement of the foundation
The larger the cross-section of the profile pipe, the heavier and tougher the construction of the lean-to canopy is. But in both projects there is a significant drawback - the lower parts of the vertical racks are not tied with additional horizontal jumpers from the profile. Therefore, the rigidity of the lower tier can only be ensured through correct anchoring to the base.
For arranging the base, you can make a shallow strip foundation, it is even better if the platform under a canopy is sealed with monolithic concrete in the form of a slab. In both cases, the concrete foundation will be sufficient to support the canopy without tipping or skewing under the influence of wind loads.
For awnings, two types of embedding of vertical posts into the foundation are used.
In the first case, for each support, a well is dug to a depth of 60-70 cm, a piece of asbestos-cement pipe with a diameter of 200 mm is placed in it, and the remaining space between the walls of the well and the pipe is covered with gravel with sand and spilled with cement milk. Each vertical support from a profiled pipe is inserted into a prepared socket and poured with concrete. Within 20-30 minutes, it is necessary to align the rack vertically and support it with two or three struts. After the concrete has set, the heads of the posts are cut at one level, and you can proceed to the installation of the canopy from the profiled pipe.
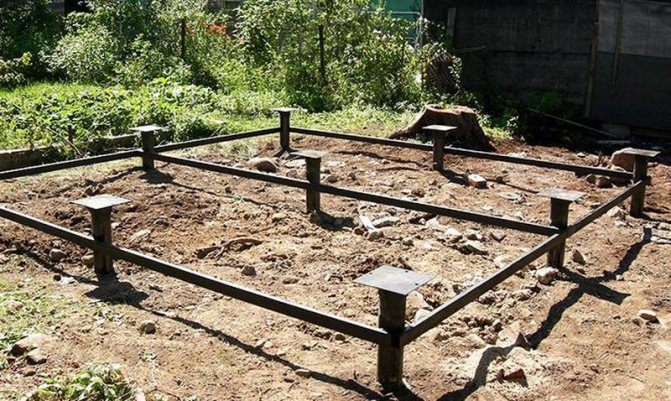
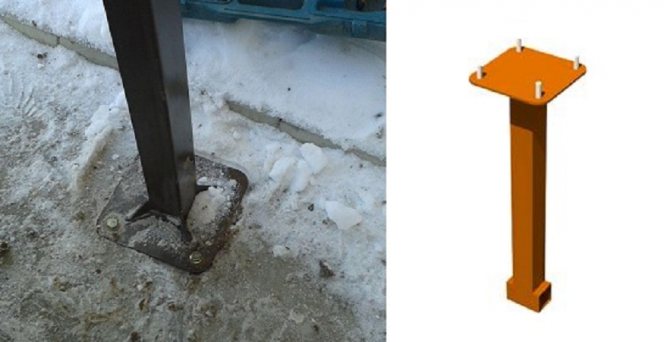
In the second case, for the installation of racks, special concreted support platforms are used from a section of a profile pipe 100x100 mm, with a square of sheet metal welded at the end. For the vertical supports of the canopy, a mating part of the "heel" is made with holes for fastening with anchor pins. This method of fastening allows you to perfectly align the supports when assembling the frame, and, if necessary, correct their position.It remains only to decide how to weld a canopy from a profile pipe.
The sequence of assembling a canopy from shaped pipes
After the vertical supports have been installed, it is necessary to tie the heads with horizontal profiles. The first to install short sections of the canopy, then long. Rectangular trusses are welded directly onto the frame. To do this, the horizontal sections of the profile pipe are initially welded, first aligned to the water level, tacked with welding points or a clamp, and only after that the seams at each joint are welded.
Further, according to the drawing, sections are cut from the profile pipe 50x50 mm for the manufacture of the profile. After trimming the corners, the struts are tacked with points inside the truss. If, after installing all the struts, no curvature appears in the horizontal runs, you can perform the final welding of all elements.
After that, the extreme roof trusses are lifted and installed so as not to disturb the geometry of the roof, the frames are temporarily reinforced with wooden beams and planks, and horizontal longitudinal pipes are installed on the upper and lower overhangs.
After all nodes are connected by welding, the rest of the trusses are attached to the canopy frame.
Places and lines of welding seams are carefully knocked off slag, cleaned and primed. All metal elements of the profile pipe canopy must be treated with a phosphate anti-corrosion compound, primed and painted in two layers with alkyd enamel for outdoor use.
For the roof, cellular polycarbonate or corrugated board is most often used. The first one is very convenient and beautiful, the second one is cheap and practical.
Advice! Before proceeding with the laying of the roofing material, it is necessary to inspect all the welds on the trusses and struts; if, due to an error or temperature stresses, the welding cracked, it will be necessary to weld on a reinforcing scarf made of sheet material.
Sometimes, after laying the roof, light versions of the canopy under the influence of the wind can sway and make vibrations imperceptible to the eye in the horizontal direction. To increase the lateral rigidity of the frame, you can additionally weld arched struts to the canopy between the uprights and horizontal girders from a profile pipe. This solution will allow you to get rid of the slightest hesitation and, accordingly, preserve the integrity of the roofing material.