Rest in the country or in the village is an opportunity to enjoy nature in all its manifestations. As a result, many owners abandon standard cooking methods and prefer to cook food over a fire. The right decision would be to build your own oven for the summer kitchen, making family lunches and dinners a real ritual.
This article will help you understand the features of factory models of stoves, step by step will indicate the nuances of designing and creating such a cooking and heating device at home.
Recommendations for the selection of purchased designs
The key indicator in purchasing a ready-made kitchen stove is the type of fuel on which it will work.
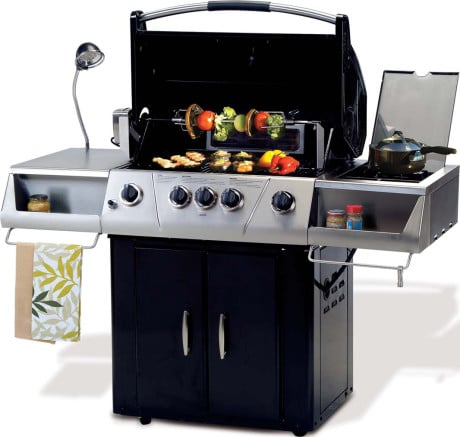
The factory-made summer stove has several design options.
- If there is gas nearby, you should consider buying a gas stove with an oven. Its heating temperature is adjustable. The device is ready for operation at any time and does not require the cost of finding fuel.

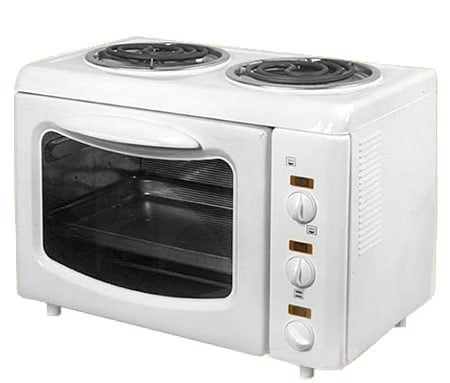
- A cheaper solution would be to buy an electric stove. Easy to operate and convenient to transport.
- In the absence of communications, an excellent wood-burning option is a solid fuel stove. Suitable for the most remote suburban areas.
- Universal cookers allow the use of several types of fuel, which significantly saves time on cooking.
It is worth noting that factory models have a number of advantages in operation:
- a large selection of finished products of various sizes, colors; metal alloys and refractory mixtures are used as materials;
- the scheme of operation of the device minimizes the risk of fire and smoke leakage;
- lightweight structures.
- fast assembly and installation.
However, a do-it-yourself project of a closed or open summer kitchen with a stove will take into account the features of the site, the wishes of the owner and save money. In addition, step-by-step construction instructions have now been developed for furnaces of varying complexity.
Budget options can be:
- Russian stove for a cauldron;
- two-burner stove with oven;
- barbecue oven with barbecue.
It is important to remember that when creating a furnace, you need to accurately draw up a drawing in order to take into account the nuances of construction, the amount of material required and the amount of work.
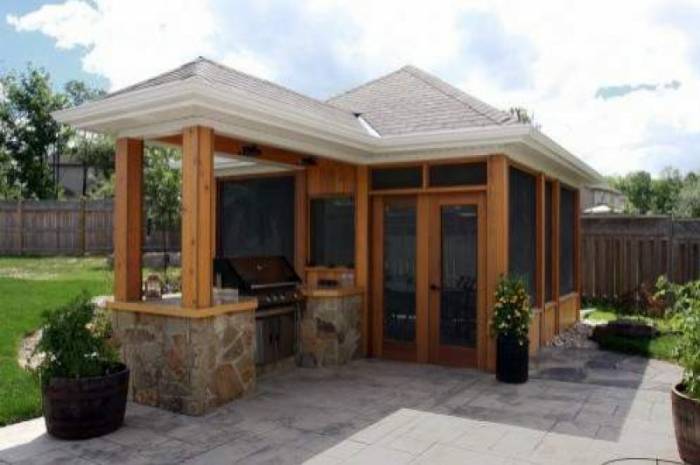
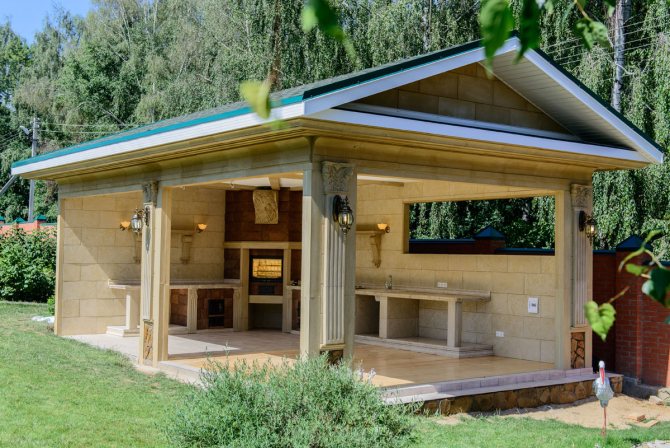
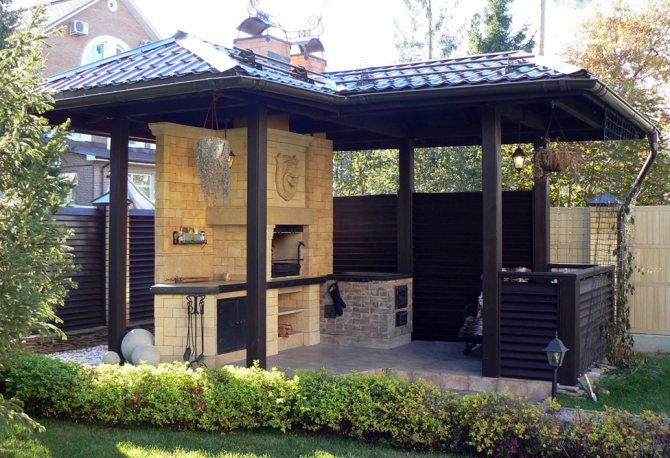
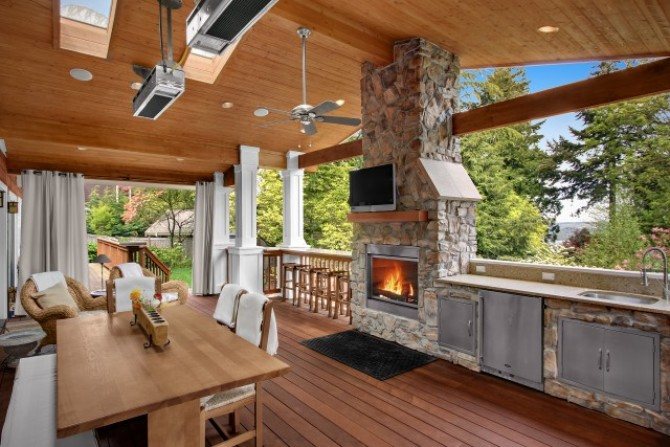
Open and closed summer kitchen design
The choice of design for a summer kitchen is influenced by the type of construction:
- an open kitchen cannot be erected in an open and windy place. For construction, a site is selected that is less prone to the wind rose than the rest of the land. The pleasure of drinking tea in the kitchen, when a strong wind blows in the ears and face, is rather doubtful.
Placing a gas stove in a building that does not have solid walls is very important. This is required by the fire safety regulations. In addition, the location of the refrigerator and other electrical appliances in an atmosphere of aggressive external factors (humidity, wind, precipitation, cold, etc.) needs to be thought out to the smallest detail. Traumatic situations often arise due to ignorance of the laws of electromagnetic and other radiation.
Furniture and accessories are selected in a single style solution.
In order for the summer kitchen in the country house to be decorated "wisely", furniture and accessories are selected in a single style solution. Mixing different stylish directions, especially with an inept approach to the issue, sometimes looks comical. On the windows, which are most often open and voluminous, you can hang air curtains floating in the air.You need to think about additional light sources in case of evening gatherings, because it is better to hide the wiring under the finishing material (drywall, lining, etc.).
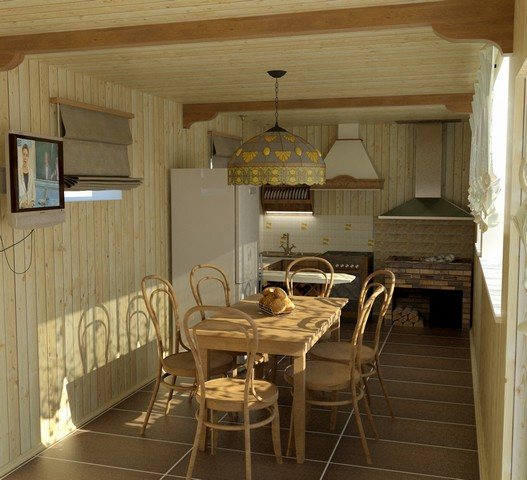
- a closed summer kitchen, called in the common people "winter", is used by residents throughout the year. Year-round operation becomes possible thanks to the presence of a good stove and often an additional source of heat (fireplace, heating system, radiator, etc.).
Windows in such a building are usually glazed, depending on the climatic zone, single or double glazed windows are installed. The tighter the PVC window is installed, the lower the heat loss of the kitchen in winter.
Some summer residents, when revising their estates in winter, stop in the summer warm kitchen. Here you can have tea, watch TV and even take a nap on a small sofa if you wish.
The summer kitchen is a favorite vacation spot for many summer residents.
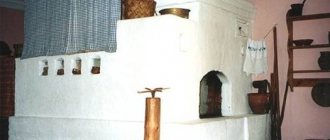
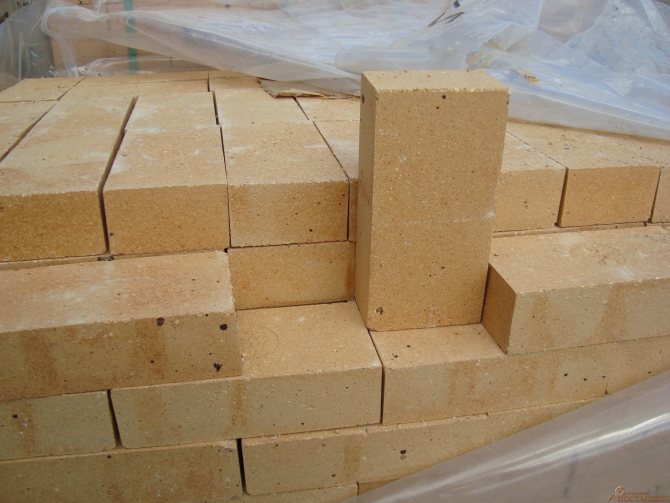
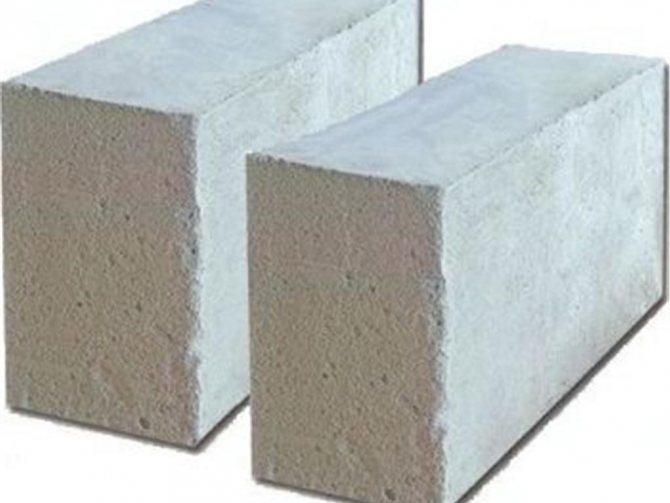
Fireclay brick or aerated concrete
To make a structure of this type, it is better to purchase aerated concrete or refractory bricks. These materials are capable of withstanding high temperatures, do not burn out under constant heating, and retain heat inside the device for a long time.
Will significantly save financial costs, the purchase of aerated concrete. But after laying it, the oven must be lined without fail so that the heat inside remains as long as possible.
It should be noted that refractory bricks have several advantages:
- moisture resistance;
- there is no need to carry out facing work;
- long service life;
- external aesthetics.
But the cost of brickwork will cost much more than aerated concrete.
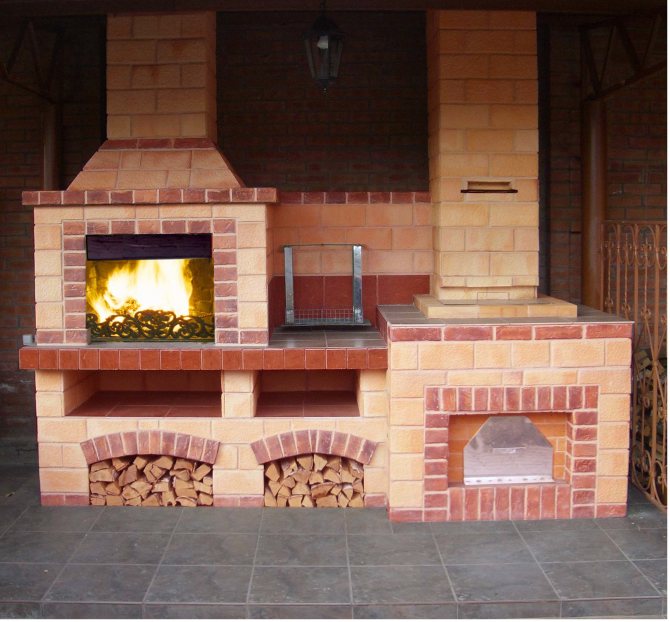
When designing a product, it can be supplemented with the functions of a smokehouse, barbecue, barbecue, or develop a compact heating and cooking structure without any adaptations.

What to consider when choosing a stove
When choosing a hob, you should focus on your own needs and capabilities. What dishes are planned to be prepared in the summer kitchen? In what volumes and with what frequency? For some chefs, a miniature assistant is enough, while for others, a full-fledged oven complex is needed. There is plenty to choose from today!
Fuel is the main determining factor
The presence on the site of the opportunity to conduct main gas into the summer kitchen is a huge advantage that allows you to install a functional gas stove and not worry about the constant search for fuel. If the gas pipeline runs far, you can purchase equipment that works on bottled gas. The advantages of gas are the quick readiness of the stove for work, simple adjustment of the flame intensity and oven temperature.
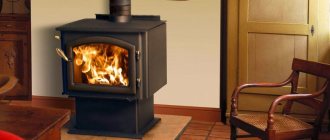
Electric stoves can also act as a stove for a kitchen, taken out in a gazebo or in a separate room. Their advantage is simplicity and ease of use. On sale you can find compact mobile stoves that can be easily taken to city housing for the winter.
A solid fuel stove for the kitchen does not depend on the availability of communications and can be installed even on a site in a deep forest. Affordable firewood and inexpensive coal are suitable as fuel. The aroma of dishes cooked on fire and coals will stir up the appetite of not only households, but also those of the nearest neighbors.
Combined kitchen stoves are very convenient, combining the ability to use wood and gas or coal and electricity. With such equipment at your disposal, you can choose the most suitable cooking method and save time.
Buy or build
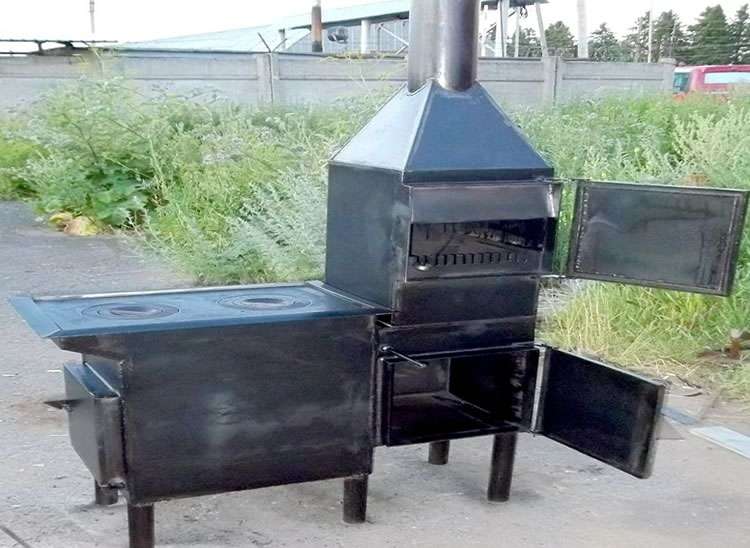
A huge selection of factory models inclines in favor of buying a ready-made stove. On sale you can find stoves for a summer kitchen of any size and type. Steel, cast iron, refractory mixtures are used as material for their production.In factory products, the design of the furnace is carefully thought out, flue gas leaks and cases of fire are excluded.
When installing factory equipment, installation difficulties rarely arise. Metal appliances are relatively lightweight and can be installed without additional foundations. Hearths made of refractory mixtures are not afraid of moisture and easily spend the winter in an unheated house and on the street.
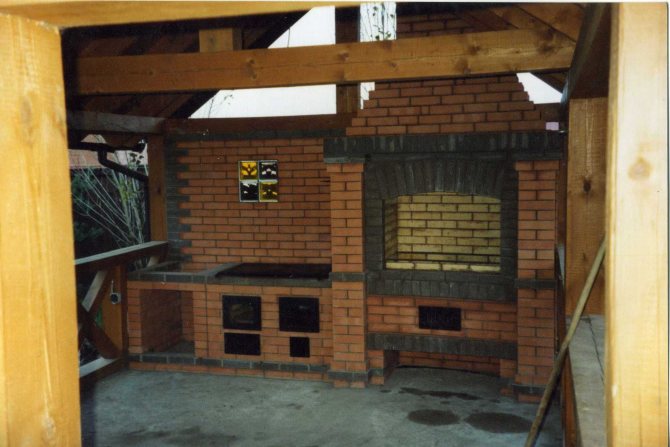
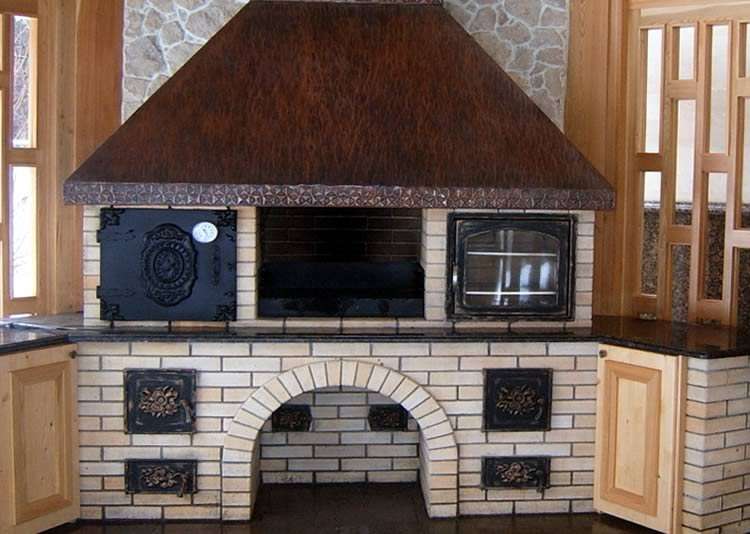
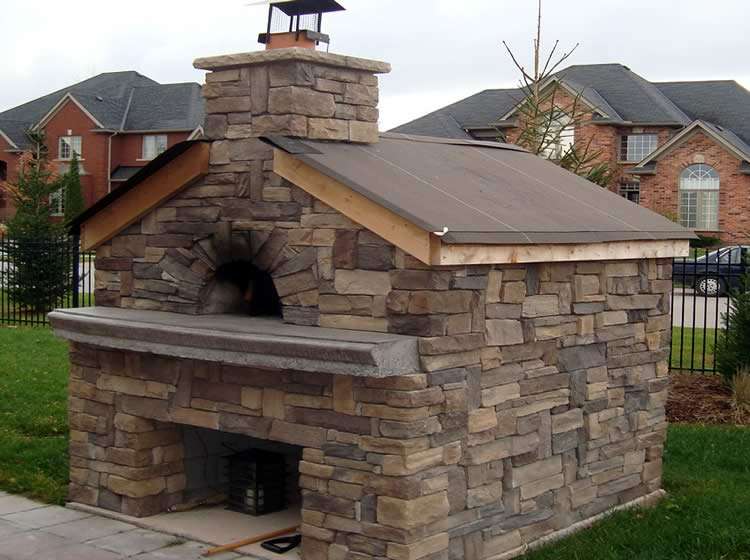
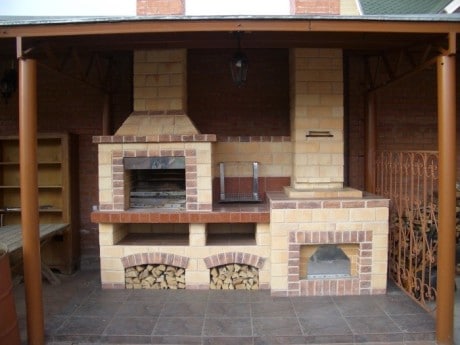
Brick and stone hearths look solid and are equally suitable for both open gazebos and closed pavilions. Masonry of the furnace complex under the order or with your own hands allows you not to be limited to strict frameworks, but to choose a multifunctional design that combines all the necessary modules.
Self-construction of a miniature stove will cost less than buying a ready-made model with similar functions. The brick structure will last longer than metal, it is not afraid of moisture and does not burn out during operation.
Oven options for a summer kitchen
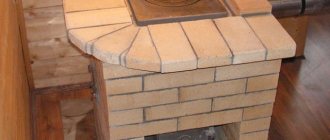
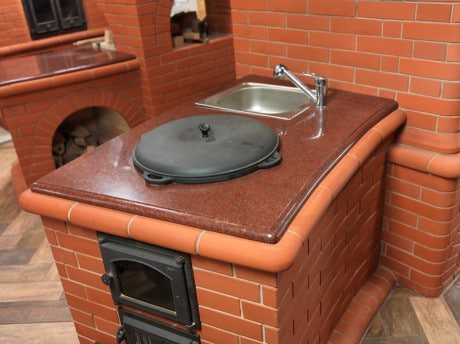
A kitchen stove with an oven is a convenient stove, ideal for both a gazebo and a separate house. For a summer kitchen, you can choose a budget two-burner stove with an oven or an option with four burners and a grill. On sale there are compact tabletop and standard floor models powered by gas and electricity, and the simplest wood-fired kitchen stove is easy to build from bricks with your own hands.
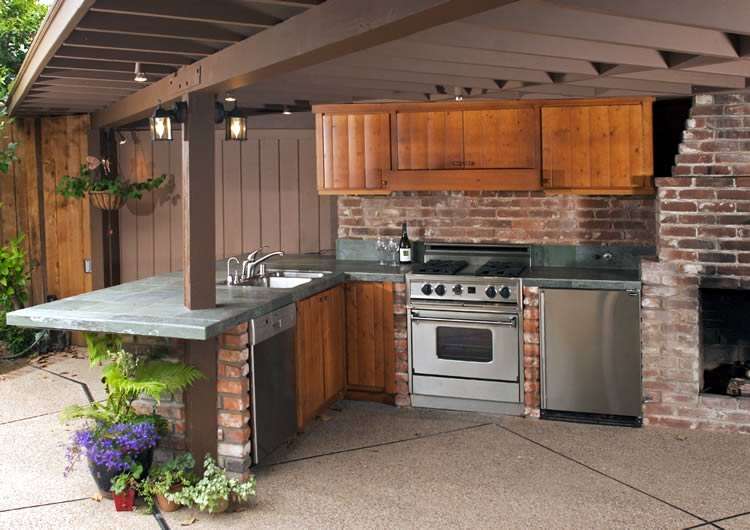
If a separate kitchen is operated not only in summer, but also during cold weather, it makes sense to pay attention to the heating and hob. These devices, as a rule, are equipped with two fireboxes and operate in two modes: winter and summer. In winter, the hearth will not only warm up the stove, but also heat the room, and in summer it will not emit strong heat, as from a standard heating stove.

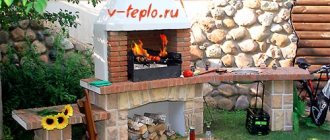
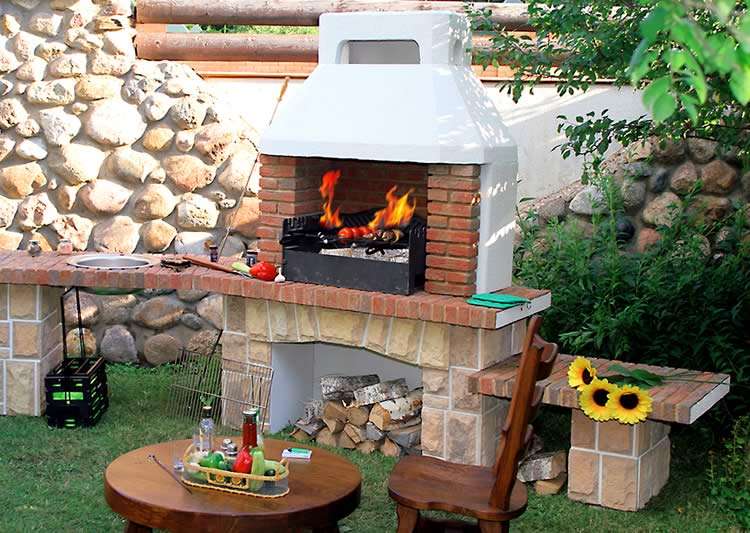
A barbecue oven is most often installed in open-air summer kitchens. Classic barbecues allow you to grill meals. Models with an extended set, called barbecue complexes, in addition to the grill, include oven modules for cooking barbecue, pilaf, pies, smoked meats. The complex includes modules for pizza, hobs, Russian ovens, ovens.
A gas grill, complete with an oven and side burners, is an excellent choice not only for personal use, but also for a small cafe. On the basis of this modern equipment, functional modules of summer kitchens are produced, equipped with sinks and cabinets. In the same series there are compact portable and built-in gas grills. Gas grills can be installed in open and closed kitchens.
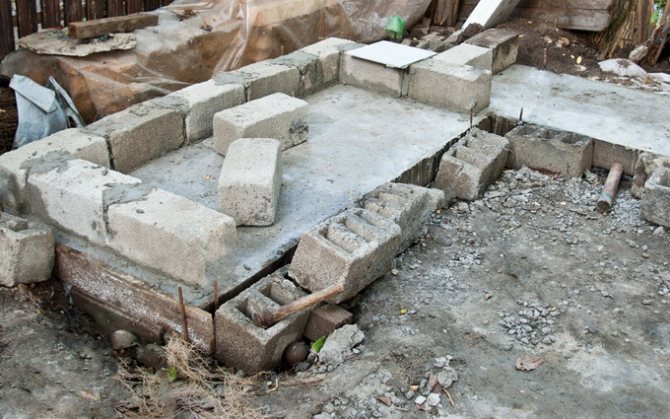
Preparation and pouring of the foundation
The first step in the step-by-step building construction instructions is to lay a solid foundation.
In the case of a stove, this stage can be skipped if the weight of the future structure will not be more than 700 kg and the summer kitchen has a solid and even floor. If the design drawing of the furnace involves the construction of a large-sized product, laying the foundation is required.
Important recommendations.
- The depth of the base under the structure must be at least 0.5 m.
- With the simultaneous construction of a summer kitchen and a stove, the gap between their bases must be filled with sand or screenings. Then tamp.
- The area of the foundation must be at least 5 cm larger than the total area of the structure on each side, so that the shape of the furnace remains unchanged when the soil subsides.
- If the construction work is not carried out on rocky soils, then it is necessary to form an additional layer of crushed stone, the so-called sole, the height of which will be at least 15 cm. Having received a flat surface, it is tamped.
- An additional layer of rubble 30 cm thick is applied to the tamped sole, and then poured with concrete.If the territory of the summer cottage is covered with damp soil, it is better to replace the rubble layer with a solution of cement and sand of the same thickness.
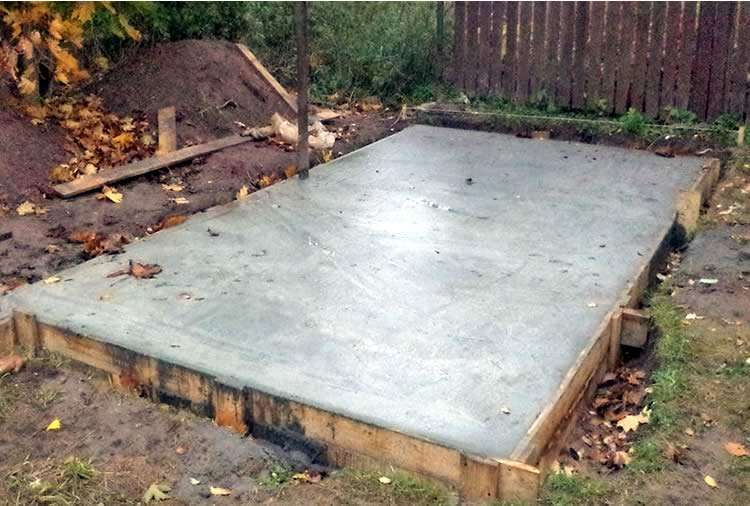
Using brickwork with a bandage as part of the base, it is recommended to fill the distance between this layer and the ground with a mortar of cement and sand.
Secrets of self-laying
The most important thing in building a furnace is to form a solid foundation.
When building a stove for a summer kitchen with your own hands, you must clearly adhere to the technology, which is required for the long-term operation of the structure. With independent manipulations, the most important thing is the formation of a reliable foundation. High requirements for strength are due to the constant exposure of the stove to aggressive environmental factors:
- precipitation;
- wind;
- temperature drops, etc.
In order for the support to last not a year or two, the concrete pad must have a thickness of at least 10 cm. The furnace base must be reinforced according to all the rules:
- Excavation is carried out to a depth of ½ of a shovel bayonet;
- Plank formwork device;
- Formation of a frame from reinforcement, steel wire or waste fragments of structures made of steel or metal;
- The production of concrete is carried out by mixing cement with sand and crushed stone in a ratio of 1: 2: 2. In the absence of crushed stone, the material can be replaced with concrete or brick fragments.
Brickwork does not require any rework.
Important: when concreting the base in dry and hot weather, it is necessary to periodically moisten the concrete. Complete hardening occurs within 2 days.
The pipe from the furnace can be bricked or remain unchanged (factory), this nuance does not affect the performance of the stove. You can make a removable grate for cooking barbecue, and equip an excellent smokehouse on the chimney. Grilled fish or chicken legs are a great addition to an outdoor picnic.
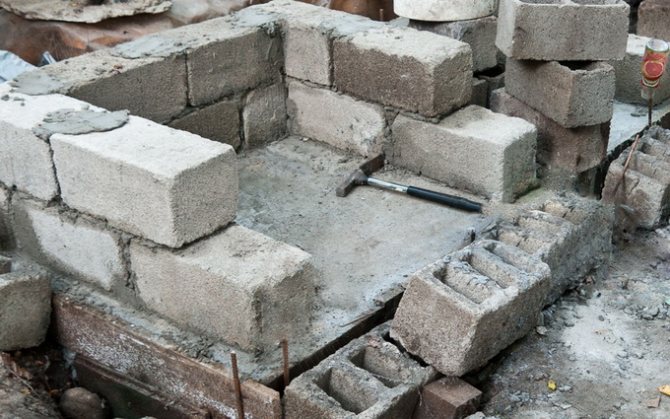
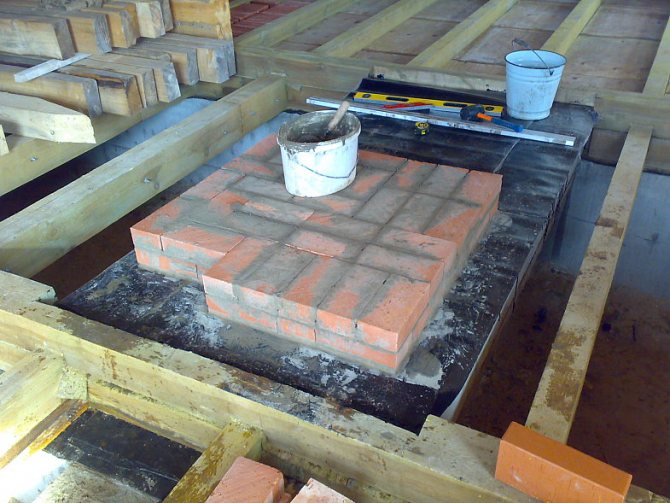
The main stages of the construction of the furnace
It is possible to build a cooking and heating device, strictly following the guidance of experienced craftsmen, in one day. For this you will need:
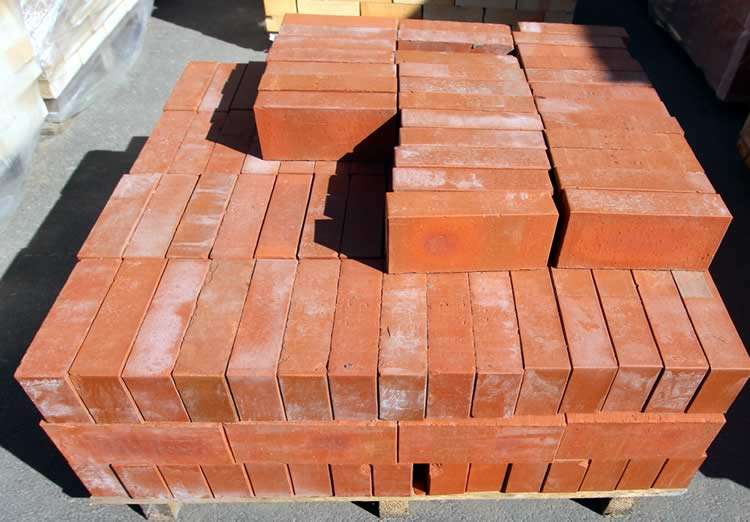
- 200-300 pcs. refractory red bricks;
- 2 pcs. doors for the blower and firebox;
- stove (it is better to purchase cast iron with burners);
- grate bars;
- steel sheet 3 mm thick;
- fire-clay;
- sand.
The main thing is to take a responsible attitude to the implementation of each of the stages.
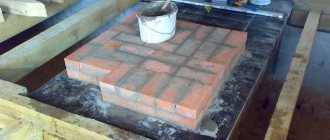
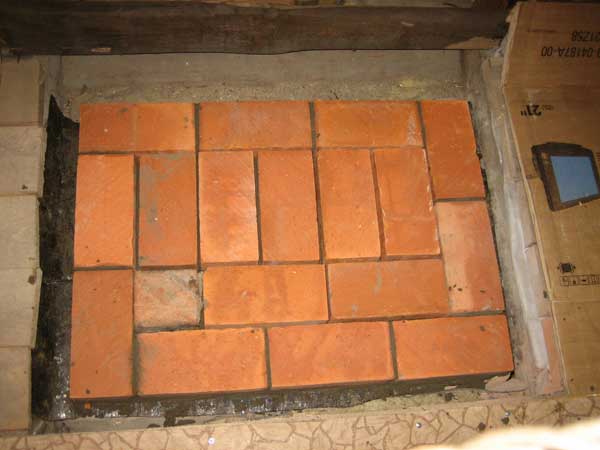
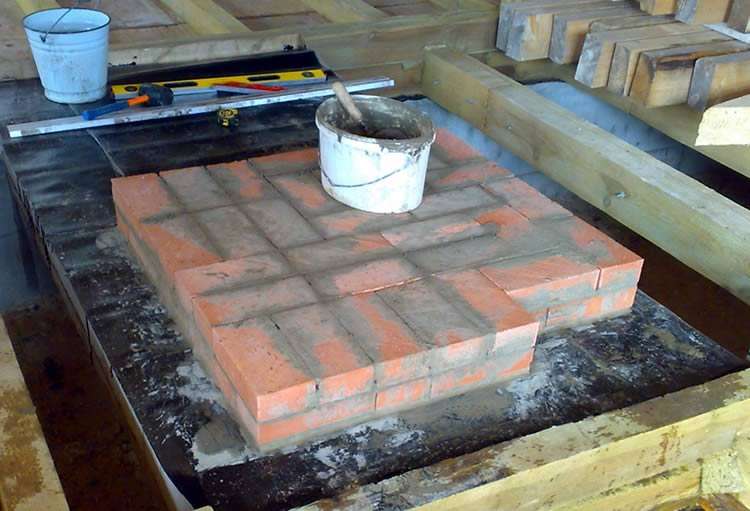
- The brick is soaked in water for a day.
- Then the foundation of the furnace is laid out from 2 solid brick rows.
- At the beginning of the 3rd line, it is necessary to mount the blower door.
- Next, an ash chamber is formed from a brick order.
- On the 5th row, grates are attached, while the distance between the masonry and the grate should be at least 5 mm.
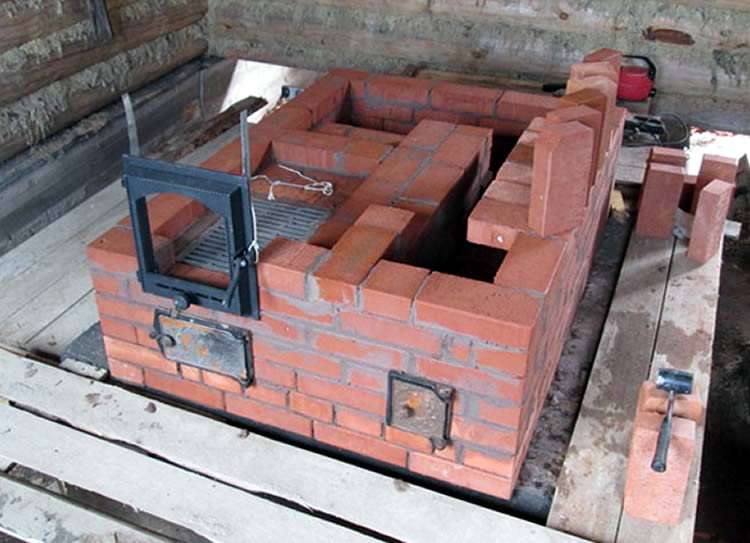
- In the next 3 lines, the firebox is formed. The doors are reinforced with steel strips and asbestos mortar.
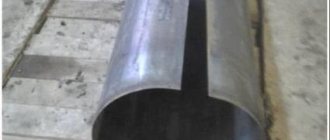
- Now you need to lay out the chimney or install the purchased iron pipe.
- The installation of the cast iron plate is carried out only after the solution has completely solidified. It should be laid on pre-prepared metal corners.
- The bottom of the ash pan will be a sheet of steel laid under the firebox. And by fixing a removable grate inside the chimney, it will be possible to cook smoked meats in the oven.
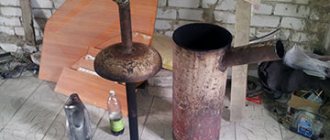
How to make a simple yet effective oven?
This option can serve as an alternative to the simplest metal heating devices - for example, a potbelly stove. Using this oven, you can heat the room, cook food, and even admire the flame.
The structure takes up just over half a square meter. Unlike full-fledged brick ovens, this one does not require a foundation. The weight of the structure is not large enough to make a strong base - just put a solid board.
The oven can be made in just a day.One of the advantages of this option is that the starting heating is possible in the evening. Certain skills are necessary, but they do not go beyond the skills of the average male representative.
On a note! No qualifications are required for the construction of furnaces. But it is necessary to observe order - this will make the structure as efficient as possible in the context of its potential.
What will it take to work?
This is not only a simple but also a budget option. To erect a structure you will need:
- brick:
- * fireclay - 37 pcs.;
- * red - 60 pcs.;
- blower door;
- firebox door;
- lattice;
- gate valve;
- cast iron hob.
Clay solution is used as a binder. In total, you will need about 20-25 liters of the mixture.
It will also be interesting: barbecue oven - types and characteristics.
Training
The first step is to determine the location of the oven. Since the mass of the structure is small, there are no limitations inherent in traditional brick solutions. By fixing solid boards or a suitable alternative material, the “foundation” is thermally and waterproofed.
The role of an insulator can be played by a non-combustible material - for example, basalt wool. Polyethylene or roofing material is placed on top of the base. The size of the latter corresponds to the size of the base plus a small allowance.
A layer of sand 1-2 cm thick is poured on top. Level the bedding. It is important to make the base even - the quality of the structure and the convenience of subsequent work depend on this.
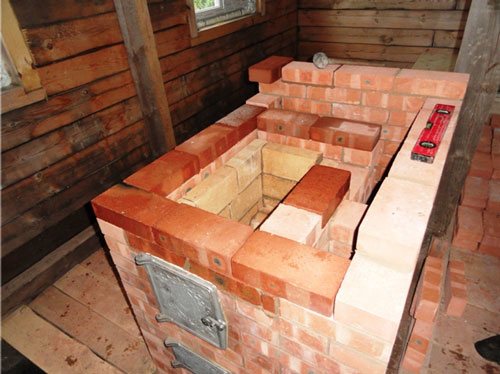
Masonry scheme
- The first row is laid on the sand without using a solution. A dozen bricks are leveled strictly. The bricks are thinly coated with a mixture, after which the blower door is mounted from the end. The door is pre-wrapped around the perimeter with an asbestos cord, which compensates for the thermal expansion of the metal.
- After fixing the door with a wire, lay the second row according to the diagram. A blower is formed.
- Chamotte is used (in the diagram it differs in a yellow tint). After laying, a grate is mounted above the blower.
- Before that, the brick was laid flat. On this row, he is placed on the edge. A flue duct is formed, inside of which the basis for the partition is made. One of the bricks (you can see it in the illustration) is put "dry" - later it will be removed. After that, the firebox door is mounted, which is wrapped several times with asbestos strips before installation. But this must be done so that the door opens well upwards. The element is fixed with a wire and a pair of bricks.
- Again lay the brick flat, duplicating the previous row.
- Again, the turn of the "ribs" is the second and last row in which the brick is laid in this way. An exception is the next row, in which one of the walls is formed by masonry on the edge. The walls of the chimney must be wiped with a damp cloth.
- The brick is laid flat according to the scheme. The back wall is made using the ribbed format again.
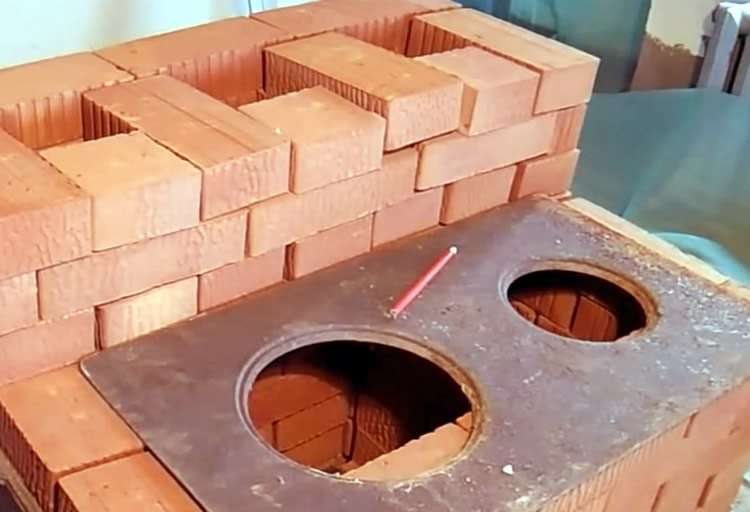
- This next to the firebox is closed. A pair of bricks should hang over the firebox so that the flame moves to the middle of the hob - in case the stove will be used as a fireplace (without closing the firebox door).
- The bricks are slightly shifted to the back wall to support the firebox door. Strips of asbestos dipped in water are laid in front of the brickwork. This ensures the sealing of the gap between the ceramic and cast iron. The cast-iron panel cannot be placed directly on the clay solution, otherwise the difference in the parameters of thermal expansion of the materials will lead to cracks.
- At this stage, the formation of the chimney starts. The latter, according to the plan, should smoothly expand towards the back. But only a chimney base is made of bricks. The rest is made of lightweight metal. Otherwise, the excess weight of the element can lead to a shift in the center of gravity of the stove.
- Here, a valve is mounted, sealed with asbestos strips. The latter are recommended to be pre-coated with clay solution.This is the final row, which completes the construction of the brick oven directly with your own hands. The remaining pair of rows is given to the chimney, which will then be docked with a lighter metal channel.
After that, remove those bricks that were laid "dry" on the 4th row. At the same stage, the chimney duct and the surface of the stove are cleaned from construction debris.
Final works
The simplest stove does not imply serious decorations. The only decoration is whitewashing. It is recommended to add a little blue and milk to the composition - this will save the coating from the formation of a yellow coating and whitening.
Important! Before work, brick and metal should be protected. If this is not done (for example, with the help of a film), then you cannot get rid of the stains.
It is necessary to grease very well the seams between the brick and the metal of the chimney, as well as the seams between the ceramics and cast iron.
It is imperative to close the joint between the oven brick and the floor. This will eliminate the ingress of baked sand into the room. It is advisable to cover the joint with an L-shaped sheet. Then a plinth edging is made, which serves as both a decor and an additional element that prevents the "foundation" filling from spilling out.
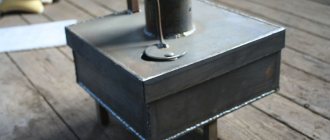
Figure 3. Functioning oven
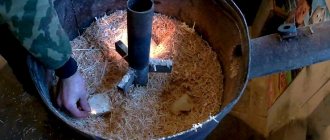
The stove is ready. The whole process took no more than one working day. Already now you can try to make a low-power kindling. Logs cannot be used - only wood chips or paper. The wood firing will create too high a temperature and the structure will crack. For a full set of the mixture, you need to give a week or two. After that, you can already drown in an adult way.
A few tips for quality masonry
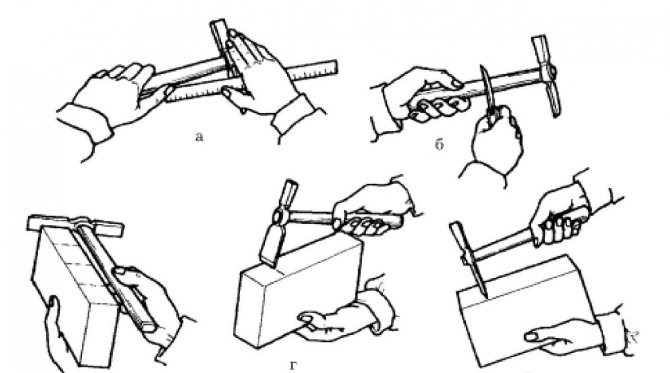
For beginners studying the description of the sequence of construction processes, experienced craftsmen recommend paying attention to certain subtleties.
- Before proceeding with the formation of the base of the furnace, waterproofing must be performed. To do this, roofing material or cellophane is placed on top of the dried screed.
- The first rows are laid without mortar. Therefore, each brick must fit snugly against each other.
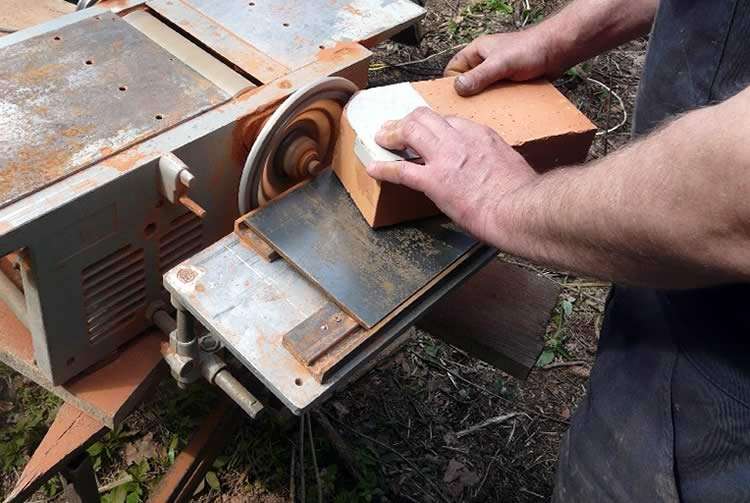
- To eliminate its irregularities, use a grinder.
- The corners of the structure must be straight. In order not to be mistaken with the degree of inclination, it is better to purchase a construction triangle.
- If the concrete is poured on a hot day, then it must be periodically moistened until it dries completely. Otherwise, the surface of the solution will be covered with cracks.
When making a dressing, it is not recommended to simultaneously use fireclay and ordinary types of bricks, since the seams between them will begin to burst from different heating temperatures.
A handmade stove will save the cost of ordering the services of specialists and will be a guarantee of high-quality performance of all stages of work. And the author's design of the structure will make it a decoration of the entire room.