A chimney is an indispensable attribute of a modern private house. With its improper design, a lot of problems arise, the solution of which will require the involvement of expensive specialists. Therefore, when starting to install or check the chimney, you should find out the features and varieties of this procedure, as well as familiarize yourself with the list of the necessary tools. All this will be discussed later in the article.
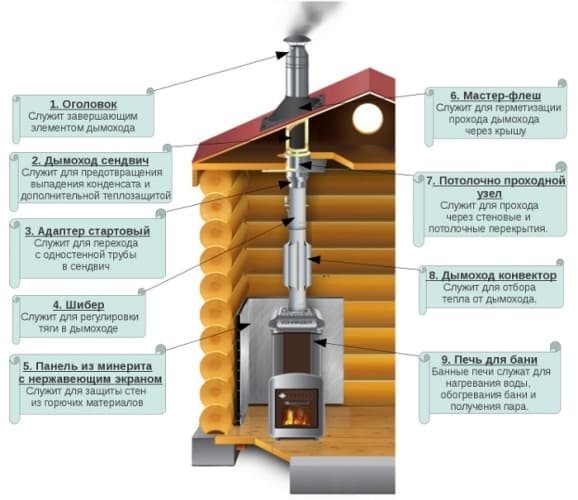
Modern chimney designs
Any chimney performs its only role - it removes carbon monoxide, harmful to the human body. But besides this, modern systems are distinguished by the following design features:
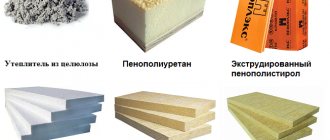
- Lightweight construction. Often, such structures are mounted in frame houses, where excessive stress will only harm the whole house. Sandwich pipes, which are made of thin-walled metal elements, ideally fall under the "light" category. Additional thermal insulation helps to keep warmth, which is why lightweight structures are constantly popular. If necessary, such a structure is very easy to dismantle.
- Compact element design. For such chimneys, ceramic blocks are used. The main advantage of such blocks is a low level of thermal conductivity. The blocks are made with special locks along the edges, which greatly simplifies the laying.
- Economical design option. Ideal for the first time, until funds are available to install a solid system. For masonry, a standard red brick is used, from which a direct-flow shaft is laid. A stainless steel product is brought into the mine and strengthened. At the same time, laying bricks does not require a special kind of mortar or the work of certain masters - everything turns out cheaply, quickly, and of high quality.
This completes the familiarization with the designs of chimneys, now you should proceed to their main varieties.
How to assemble?
The entire construction of the stainless steel chimney is very simple. Therefore, you can assemble such a chimney with your own hands. An overview of the technical characteristics and elements of stainless steel chimneys is here: https://mykaminz.ru/dymoxod/vidy/nerzhavejka/obzor-texnicheskixe-xarakteristik-i-elementov-dymoxodov-iz-nerzhaveyushhej-stali.html.
The main rule that you need to remember when assembling is to treat with special care and accuracy the connecting elements of the stainless steel chimney.
The entire structure must be reinforced with additional elements in the form of clamps. In the event that the chimney is purchased, then all elements must be included. Clamps are placed at each joint of the product - this is approximately every 1.5-2 meters.
In order to assemble a stainless steel chimney, many nuances must be taken into account. In the event that the actual experience is not enough, then it is necessary to use the advice of professionals. If there are no such specialists in the environment, then before assembling such a structure, you need to carefully study the video material presented below.
Only if the assembly of the device is done correctly, it will be possible to obtain a sealed and reliable chimney.
The main types of chimneys
Requirements for modern devices for the removal of combustion products:
- High tightness. The system should not let smoke into the room, but bring it out in full.
- High quality insulation. Hot smoke becomes the main cause of fires for wooden partitions, beams and some roofs.
- Thermal conductivity.The heated chimney becomes a source of heat in the room, which is especially appreciated during cold periods of the year.
All of the following types of smoke evacuation systems meet these requirements to some extent.
- Brick. The red brick system was highly functional when using gas or liquid fuels. Firewood, fuel briquettes give smoke at a lower temperature, so brick chimneys have gradually lost their popularity. With a modern solid fuel boiler, such a system does not have time to warm up quickly.
- Ceramic. A versatile material designed specifically for use in high temperature environments. Several layers of smooth ceramic will provide quality traction. Ceramics also withstand high mechanical loads, and their service life is on average 100 years.
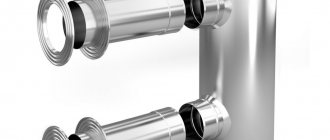
- Stainless steel systems. They are durable and resist the deposition of tar and soot on the inner walls. Stainless steel is often used when installing chimneys because of its ability to quickly heat up. Accordingly, less fuel consumption required for heating.
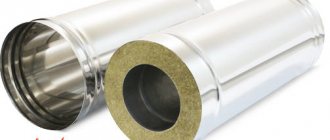
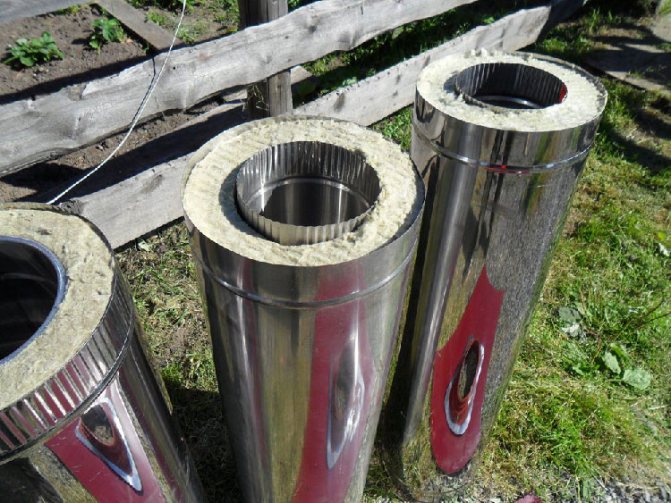
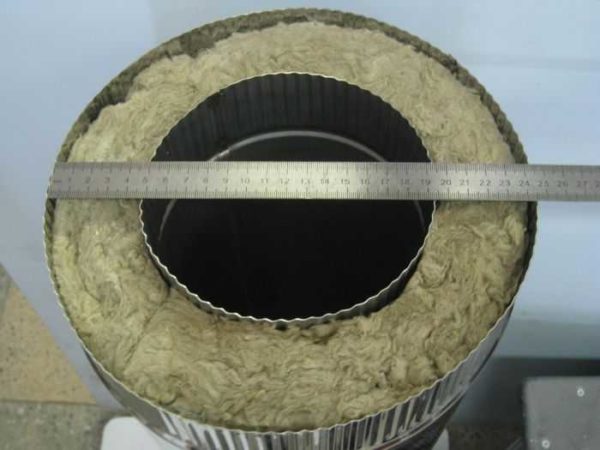
- Sandwich pipe. It is unique due to its design, which reduces the installation time of the chimney, for example, for a boiler room or in a bath. A sandwich pipe consists of three main elements: internal, external and insulation. All connections of such elements are made only using expensive argon welding. As a metal in the manufacture of sandwich pipes, both galvanized sheet and stainless steel sheets are used.
- Cast iron. In modern construction, cast iron is not often used, due to its shortcomings such as slow heating, a tendency to rapid accumulation of soot and tar. Cast iron structures must be cleaned often, otherwise the system will quickly lose its efficiency.
Video
Look at the video for a description of the characteristics of a stainless steel chimney:
Stainless steel chimney. How to do it?
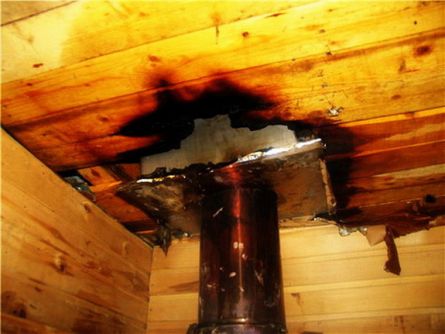
Everyone should remember that the life of household members depends on the quality of installation work. If the structure is incorrectly installed and assembled, a fire may occur, which will subsequently lead to a fire. You need to be as careful and accurate as possible.
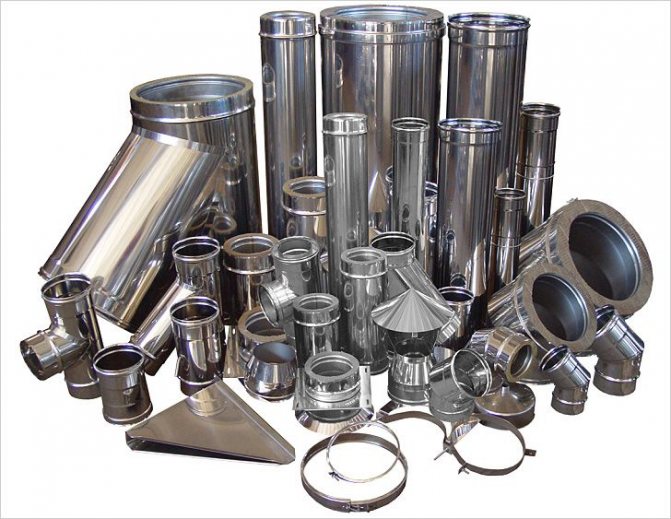
Catalog: "Pipes and elements of chimneys"
Heating equipment running on natural gas, liquid and solid fuels - boilers, stoves, fireplaces - requires the removal of flue gases.
For this, chimneys are intended, which can have different designs - from brick or concrete; steel, ceramic, stainless steel chimney pipes. Brick chimneys are arranged for the same brick stoves and fireplaces. For a number of reasons, for modern metal stoves and fireplaces, solid fuel and gas boilers, it is more advisable to mount chimneys from metal pipes. Next, we will consider the types, advantages and range of chimney pipes.
What tools will be required to work
To install a chimney yourself, you need not only patience, but also some tools. If you do everything "on your knees", then this will only lead to more waste of funds in the future. It is not worth saving on construction.
A short instruction and a basic list of tools required for installation:
- Bulgarian. The main tool for those who want to make an even and accurate system for the removal of combustion products. You should not try to replace even the simplest grinder with a hacksaw for metal. This will not lead to anything good.
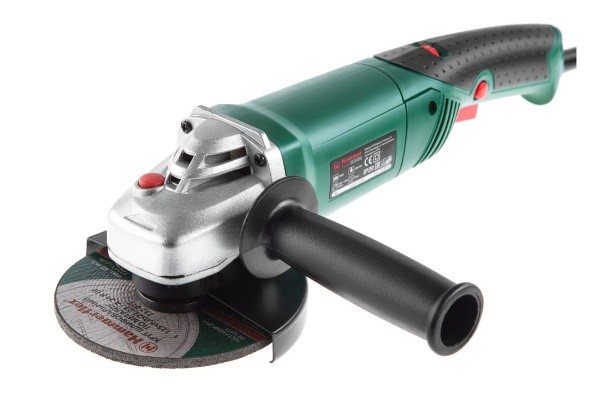
Bulgarian
- Drill screwdriver. In order not to spend extra money, you can purchase a combined option, since drilling in thin metal does not require a high power drill.
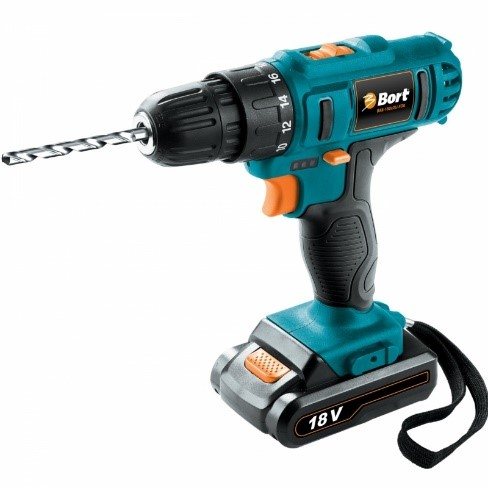
Combined version - drill / screwdriver
- Jigsaw. Only useful in a private house with wooden beams.Using a jigsaw, you can very quickly and accurately make a hole of the required diameter.
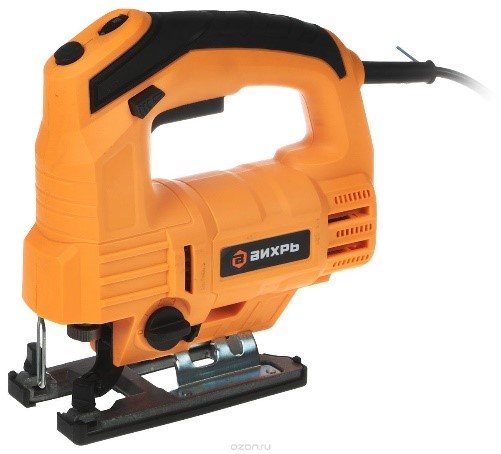
Jigsaw
- Trowel with a spatula. When it is necessary to process too large joints, these tools become indispensable. Also suitable for use with refractory sealants.
Important! No work can be started by purchasing protective equipment. Simple construction goggles with clear glass, as well as protective gloves should always be at hand. Especially when working with a power tool.
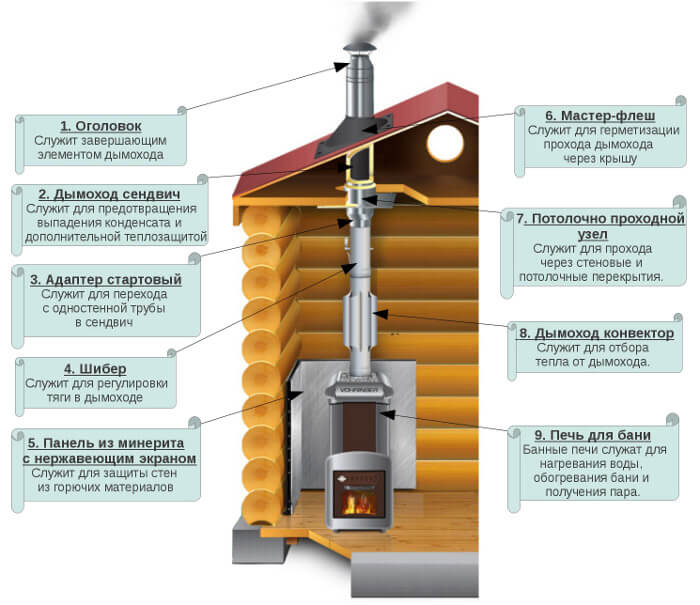
The main stages of installation of a sandwich chimney
How to install a chimney quickly? The answer is simple: get a sandwich pipe. This material is an ideal solution for a private house, especially if you don't have a lot of experience in construction. You don't even need an assistant to install this material, all the steps can be done independently.
We connect all structural elements
The sandwich pipe has one design feature - ribbed coating on both sides. Such a device allows you to connect elements to each other, simply by inserting different parts into one another. Additional tees should be installed to drain off condensate that will occur during operation.
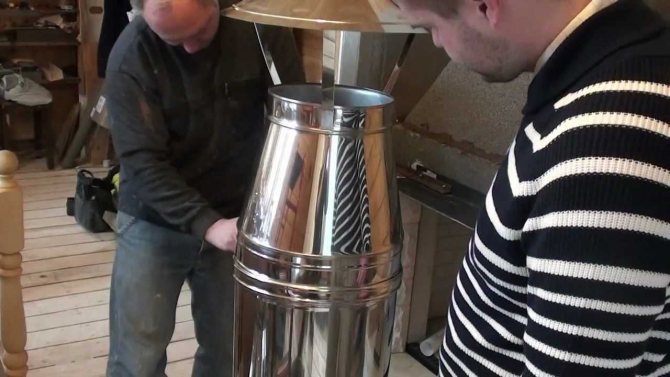
Series connection of the chimney
All joints must be properly and reliably tightened with steel clamps. To connect the starter part to a boiler, fireplace or other heating device, you must purchase a suitable adapter with two different diameters.
A simple method is used to connect internal products. One inner pipe is taken out at a distance of 10 cm, connected to the second (using a steel clamp of a smaller diameter) and pushed into the outer pipe. For greater tightness, it is not enough to use only clamps; you will also need a special sealant designed to work at high temperatures.
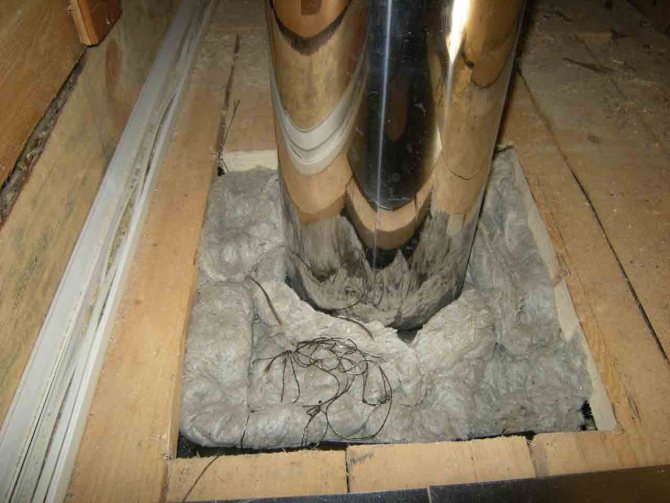
Secure the overlap
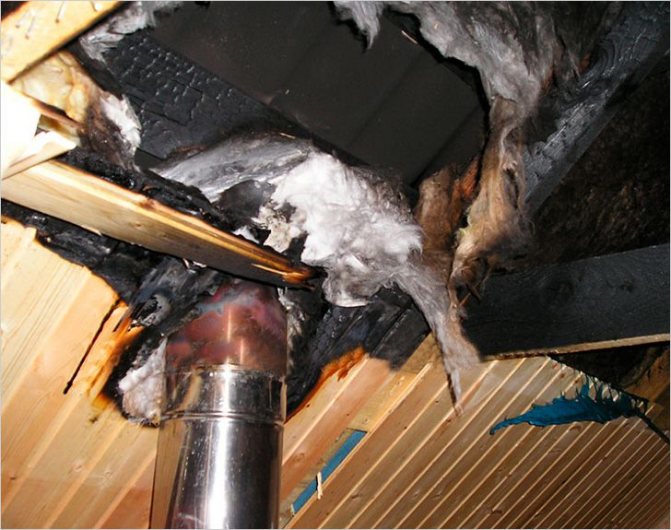
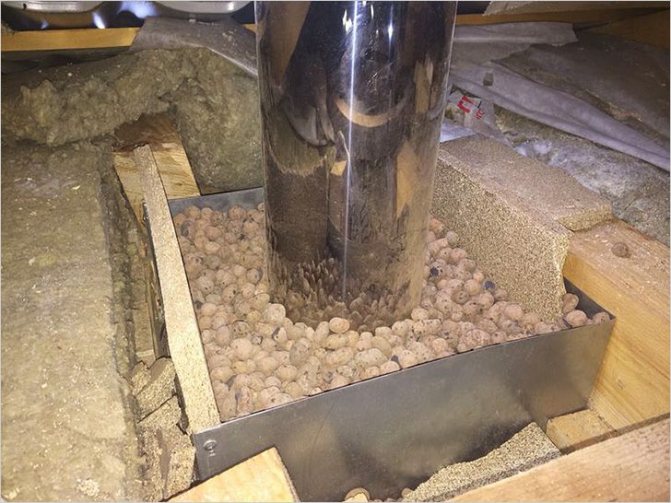
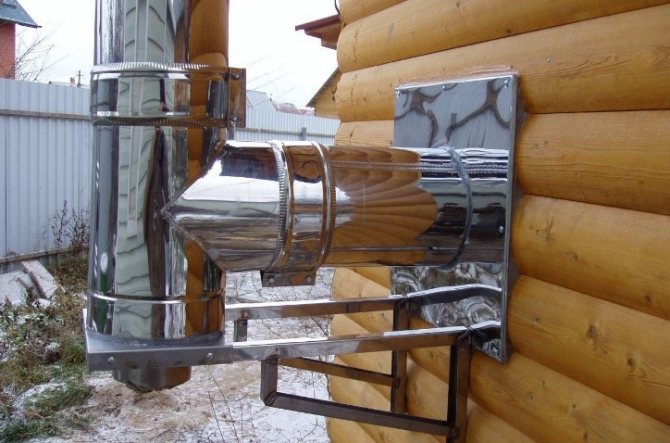
When installing a chimney made of sandwich pipes, or other material, through a wall, fire safety rules should be observed. If it is concrete or brick, then it will be enough to simply treat the joint with a sealant. It is much more difficult in wooden houses, where the contact of the chimney with a wooden wall will lead to a fire.
Sealing the pipe passage
How to secure the junction of the drainage system with overlap:
- Use galvanized sheet, which should be fixed to the floor. A hole is cut in the middle of the sheet, and a chimney is inserted into it. The galvanized sheet does not heat up completely and does not transfer excessive heat to the wood surface.
- Treat the distance from the pipe to the nearest wooden surface with insulation. Almost all modern heaters are heat-resistant - they do not ignite at high temperatures.
Instead of galvanized sheet, many builders use asbestos material. It is also highly resistant to high temperatures.
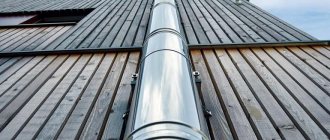
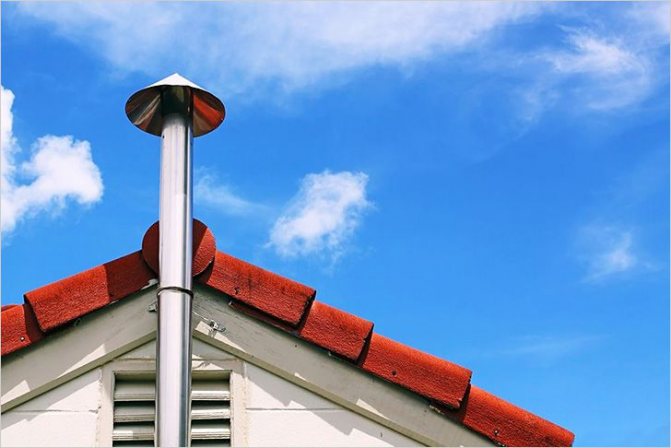
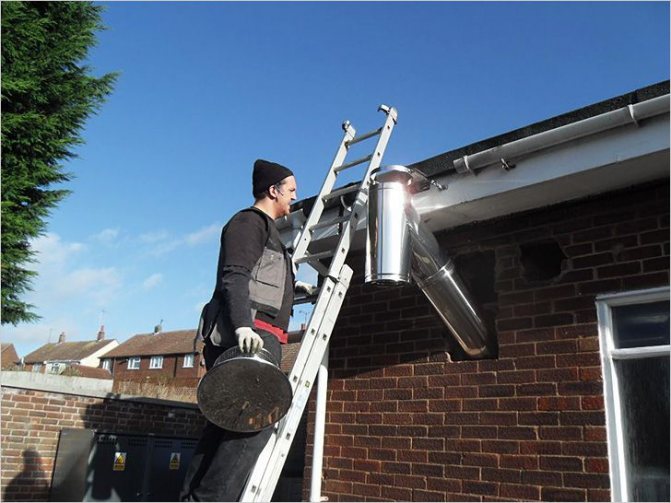
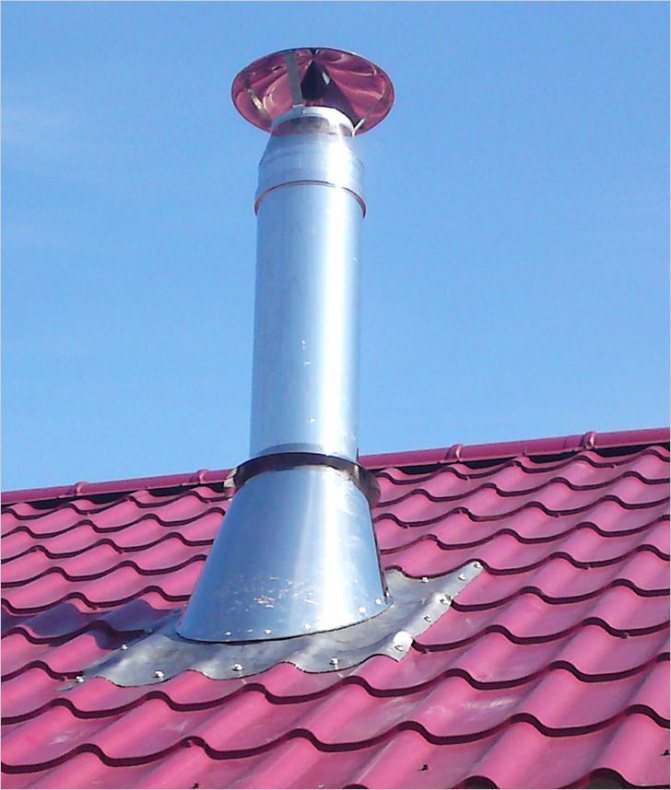
We bring the pipe to the roof
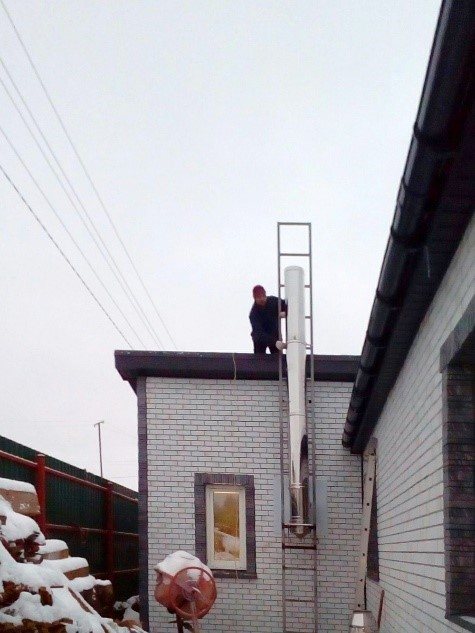
Installing a sandwich chimney and laying it through the roof is the most painstaking part of the job. Here you will need not only to apply physical strength, but also to accurately and correctly calculate everything.
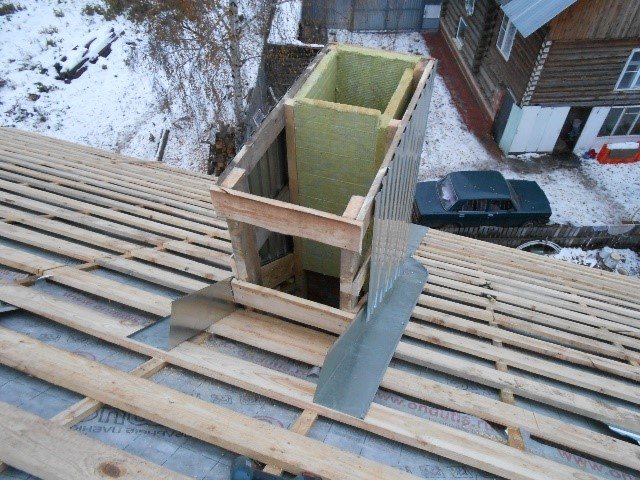
Chimney protective structure
The procedure for bringing the chimney to the roof:
- Make a hole in the roof. To make it neat, the place should be marked in advance using a construction marker. There is no need to rush, because a crooked hole will not add aesthetics to the whole structure. It is most convenient to cut the roof from the inside of it.
- An under-roof sheet is installed from the inside, securely fixed, and from the outside - a roof cut.
- It remains only to bring the outer part through the hole and reliably process the edges with a sealant.
Now you can check the quality of the structure again, and as a final step, remove all the protective film.You can safely melt a boiler or fireplace and watch all the joints and holes treated with a sealant.
Options
Sandwich chimneys are good because they have a modular structure, which allows you to assemble any configuration, with any parameters. Before you go to the store, you need to know the required diameter of the chimney, the height of the pipe and those additional elements that will be needed.
Chimney diameter
When choosing the diameter of the sandwich pipe, a simple rule applies: it cannot be less than the diameter of the boiler outlet. If your outlet is 120 mm, then the inner diameter of the sandwich should be the same or larger. It may be wider, but less - definitely not, and the narrowing cannot be done along the entire length of the chimney. If the chimney is slightly wider than the branch pipe, an adapter is purchased, which is placed directly on the boiler outlet, and then the working size is already going.
If there is no boiler yet, but you know its capacity, you can choose a chimney based on these data:
- boiler power up to 3.5 kW - inner diameter of the sandwich - 80 mm;
- from 3.5 kW to 5.2 kW - not less than 95 mm;
- more than 5.2 kW - 110 mm and more.
Related article: Wallpaper glue of the Titan brand, general information
But it is better to buy (or at least choose) a boiler, and then decide on the chimney, because many manufacturers insure themselves by making the outlet pipes wider to improve draft.
Installation of a sandwich chimney begins with determining the diameter
Pipe height
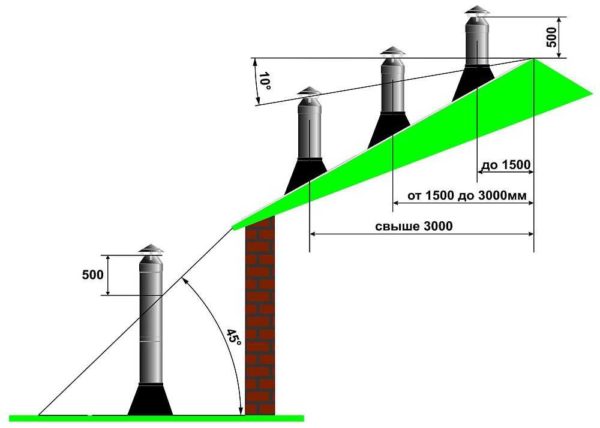
The height of the chimney above the surface of the roof depends on the place of its outlet, but at the same time its minimum height should be 5 m. That is, if the height of the house is small, in any case bring the chimney to a height of 5 meters. If the height of the house is higher than 5 m, then the pipe should rise above the roofing material to the following height:
- Should rise 50 cm above the ridge if it comes out at a distance of less than 150 cm from it.
- If the distance from the ridge to the pipe is more than 300 cm, then the pipe may be lower than the level of the ridge, but the angle should be no more than 10 ° (see figure).
- If the chimney exits at a distance of 150 to 300 cm from the ridge, its height can be at the same level with the ridge element or higher.
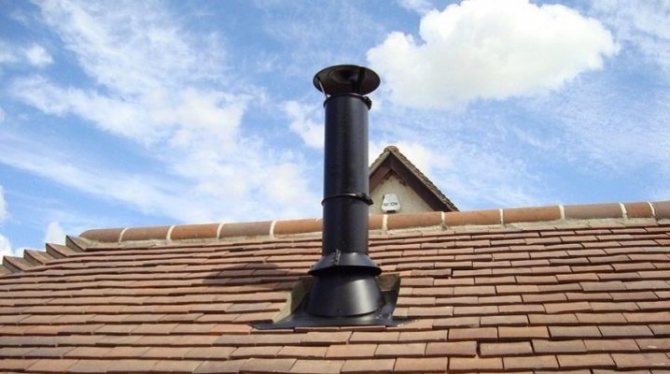
Under these conditions, normal traction is ensured. The smoke will go away normally regardless of the weather conditions. To prevent foliage from entering the chimney, they put special umbrellas, weather vans, and in windy places - deflectors, which further improve traction.
Sandwich chimney pipe height
If it is not possible to bring the pipe to such a height, they put a smoke exhauster - a forced draft is obtained. The fan will not be needed all the time, but in some conditions, when natural draft is not enough, forced draft saves the day.
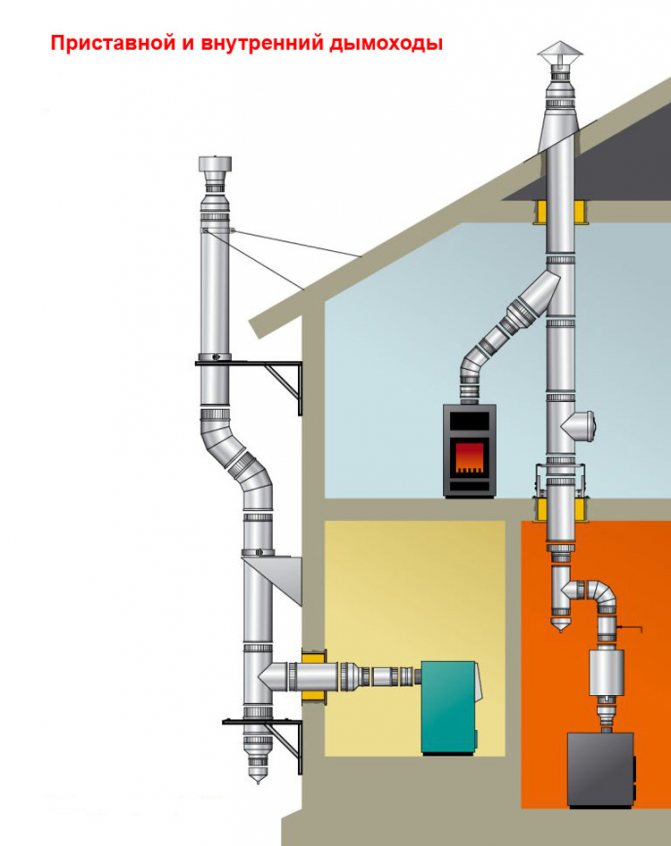
Subtleties of installing an external chimney
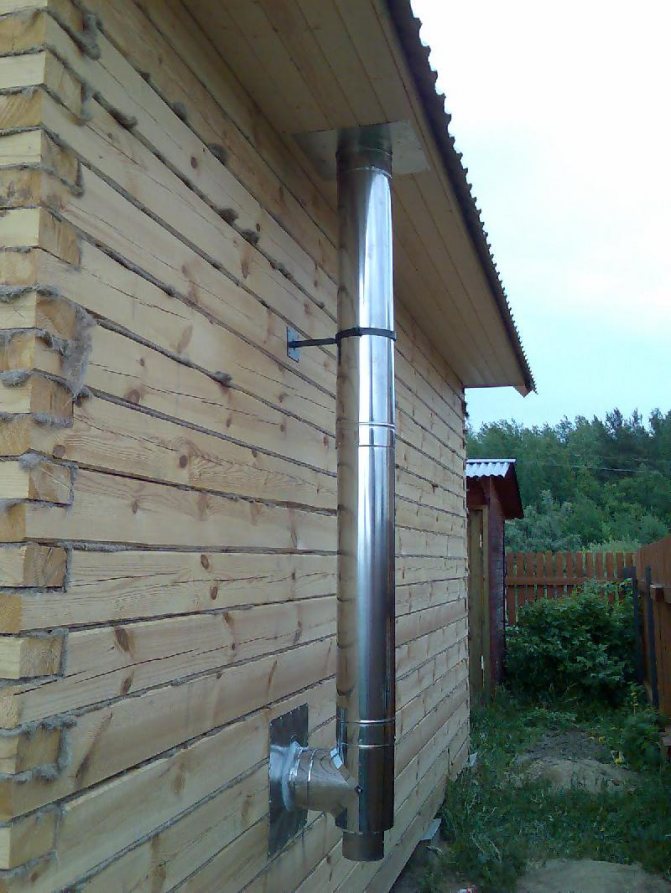
When installing an external structure, you should know some rules, since it differs from an internal installation. But it is possible to carry out an external system for the removal of combustion products, as well as dismantling (removing) chimneys, independently, without the help of unauthorized persons.
DIY external chimney installation
Installation sequence for an external chimney:
- Make a hole in the wall opposite the heater outlet. It is much easier if the wall is wooden, then you only need a jigsaw or a hacksaw for wood. If the wall is concrete or made of brick, then you cannot do without the help of a puncher.
- Fix the special brackets along the entire outer wall. It is better to use anchor bolts for fastening. The brackets must be placed at a distance of half a meter from each other.
- Bring the knee out. To do this, first, a pipe is mounted to the heating device, which then passes through the wall and is attached to a metal elbow. The place where the pipe adjoins the ceiling should be properly and reliably sealed with a sealant.
The knee is on the outside of the wall
- After that, the entire outer part of the pipe is assembled, attached to the brackets and to the elbow.The whole structure can be assembled in parts, it will not take much time and effort.
- The installation of the chimney must be carried out in accordance with all the rules of the building art, therefore, a head is installed on the upper part of the pipe.
External installation of the structure will not take much time, it is less problematic than internal installation. It is enough just to make one hole and bring out the pipe, and not to run the system through the whole house.
Installing a cast iron chimney
The combustion product removal system has its own advantages and disadvantages. The main plus is the low cost, minus - now such systems are practically not used, finding cast-iron pipes is quite problematic. Cast iron cannot be called a durable material, unlike steel pipe. It resists frequent temperature changes, but is very sensitive to mechanical damage.
Stages of installing a cast iron system:
- The preparatory stage, in which it is necessary to qualitatively fit all the pipes to each other in order to assemble the entire structure. Important! Pipes should be fitted very carefully, since cast iron is a brittle material. The slightest blow can cause chips or even cracks. To connect the elements of the system, you must use special clamps or metal braces.
- Fasten the pipe in the hole all the way to the roof. It is best to make straight-through systems, without any branches or sleeves. Then there is less chance that the chimney will clog up soon.
- Connect the pipe to the heater. To do this, you must use special cast iron adapters.
- Seal joints with high quality refractory sealant.
- After the sealant has dried, you can start covering the chimney with an insulating layer.
- Install and fix the head on the upper part.
After finishing the installation of the system, it should be checked. It is enough to melt the heating device, then inspect all joints. At the slightest smoke transmission, the joint should be re-sealed with a sealant.
"By condensation" or "by smoke"
As you know, a sandwich pipe has one side wider, the other a little narrower. The connection of the modules is carried out due to the difference in their diameters. Pivoting the wide end upward (see illustration) indicates a "condensate" assembly, which assumes dripping of liquid droplets downward.
We suggest that you familiarize yourself with How to treat walls from fungus and mold in an apartment or a country house
Insufficiently tight sealing of the joints can lead to smoke seepage through microcracks, which is a disadvantage of this method. This type of installation of a sandwich chimney through a wall is used quite often, since it requires condensate to drain downwards. Smoke leakage into the street in this situation is not at all critical.
When the narrower edge is pivoted up, the other element is put on it with the wider part. Such an assembly is called "over smoke" (see figure). With this method of installation, condensate can seep through a poorly processed joint. In this case, the smoke passes unhindered. This type of assembly is used when the pipe is located inside the building and is led out through the roof.
The unpresentable appearance of the condensate flowing down the cylindrical product compensates for the safety that is ensured by the complete discharge of the flue gases into the surrounding space. In addition, high-quality sealing of all joints does not allow condensation to leak out.