What is the best way to repair holes in an apartment - a new building in the ceiling and floor, to guarantee against leaks, and even sound insulation will not hurt?
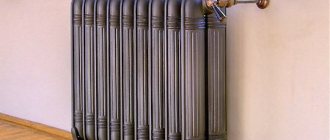
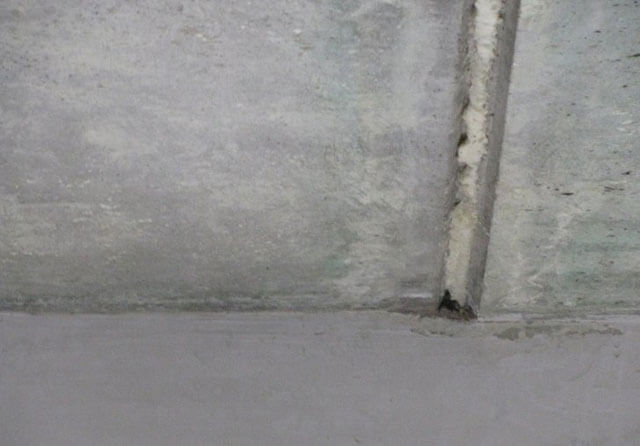
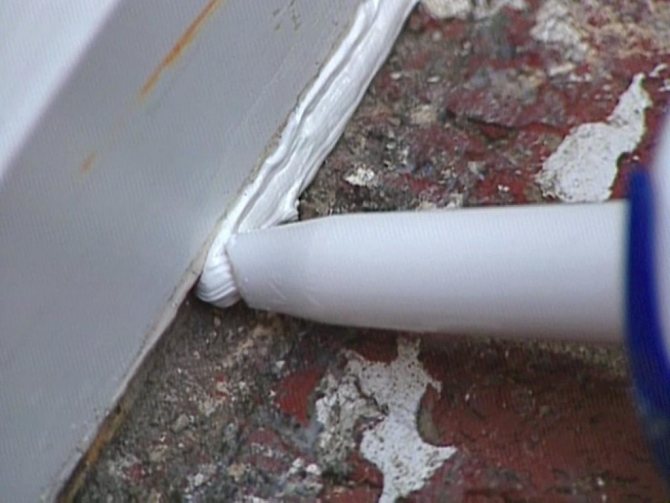
Having looked at your photos, I can say that, in principle, the installation of the risers is done correctly. The floor slabs are drilled, not punched through with a sledgehammer. The plumbing riser in the place where it passes through the floor slab is wrapped in roll material. Cold and hot water pipelines at the points of passage through the floor slabs are passed through metal sleeves that rise above the floor and ceiling plane by about 20 mm, which meets the regulatory requirements.
The only violation is an attempt to seal the holes for the passage of the riser with polyurethane foam, which is not allowed, since polyurethane foam is a combustible material. In the event of a fire, the flame can spread to the overlying floor.
The gaps in the holes between the plumbing riser and along the perimeter of the sleeves are sealed with M200 grade mortar. You can seal them with sand concrete. The gaps between the risers and the sleeves are sealed with a non-combustible soundproofing material such as mineral wool.
I wrote that the gaps between the risers and the sleeves are sealed with mineral wool, and the gaps between the sewer pipeline and the edges of the hole through which the sewer pipeline is passed are sealed with M200 grade mortar or sand concrete. Similarly, the gaps between the sleeves and the edges of the holes through which they are passed are also sealed with M200 grade mortar or sand concrete.
Sealing the gaps in the sleeves with mineral wool is necessary so that the risers can be removed when they are replaced. The sleeves rise above the floor level by 20mm, which guarantees protection against leaks. Of course, if the water level on the floor in your apartment rises above 20mm, then water can flow through the sleeves to the lower floor. But this only happens in the event of a major accident. With high-quality sealing of gaps with sand concrete or mortar, no leaks are guaranteed.
But work on sealing gaps on the ceiling can be performed only from the overlying floor, that is, by your "upper" neighbors. You just need to install the formwork so that mortar or sand concrete does not penetrate into your apartment. You can fill in the gaps that you have on the floor yourself. - 3 years ago
Ceiling defects cannot be called a rarity; they are found both in new buildings and in old houses. Most often, the owners of a living space are faced with a problem in the form of a hole in the ceiling, so you should study in more detail how to eliminate such a defect.

Reasons for the formation of a hole in the ceiling
Ceiling defects in the form of a hole arise for the following reasons:
- As a result of flooding or damage by the fungus, plaster falls in certain areas. A layer of plaster can fall off if its thickness is more than 5 cm. This happens even when using modern materials. This problem can be prevented by applying the plaster mixture in several layers with the obligatory laying of a reinforcing mesh.
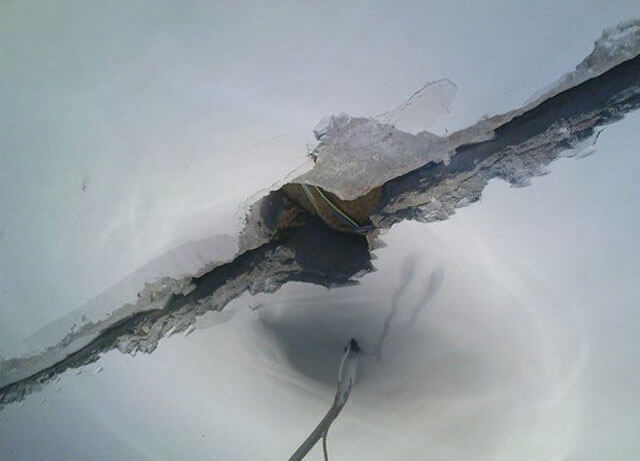
- As a result of the formation of cracks between the floor slabs, plaster delamination can also occur. Even a minor crack can be the reason for this.
- The hole can be formed by the destruction of the cement plug in the hole for communication systems, for example, for heating risers, sewers and plumbing systems.Constant changes in the temperature of the hot water riser can cause condensation to form, which destroys the grout used to seal the hole.
- A hole in the ceiling can form during the replacement of the riser of communication systems. In this case, the task of how to close the hole in the ceiling near the pipe becomes relevant.
- In addition, a hole can form in a stretch ceiling structure if carelessness is shown when moving large objects. Panels made of plastic or gypsum practically do not tolerate mechanical stress.
- A hole in the false ceiling may appear at the junction of structural elements with the walls.
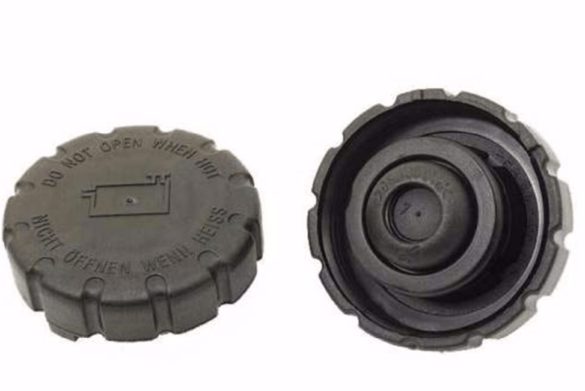
The main malfunctions of the expansion tank
During engine operation, the coolant (coolant) heats up and expands. The resulting excess coolant is removed from the system via the radiator relief valve. At the same time, the antifreeze itself has an increased resistance to thermal expansion compared to water. After stopping the engine, the coolant gradually cools down with a decrease in volume, the pressure in the system drops. If the expansion tank (RB) is leaky, air begins to flow into the radiator, reducing the quality of engine cooling and increasing the risk of overheating.

Antifreeze is highly resistant to thermal expansion
On the other hand, RB is rarely the reason for the incorrect operation of the cooling system. The main reasons for its failure:
- tank lid malfunction;
- valve sticking and wear;
- deformation of the rubber seal as a result of wear;
- mechanical damage and wear of the RB itself.
In any of these situations, air locks can form in the system, leading to a critical increase in pressure and rupture of the reservoir itself.
Expansion tank malfunction diagnosis
The most obvious symptoms of RB failure are the following situations.
- While driving, thick clouds of steam appear from under the hood due to coolant entering the hot intake manifold. In this case, the engine temperature is normal. The reason for this is a malfunction of the intake valve, as a result of which excess antifreeze leaves the system ahead of time.
- Cold air enters the passenger compartment from the stove at an elevated engine temperature. This situation occurs when air pockets form due to a faulty pressure valve.
- Traces of coolant appear at the joints of the hoses and nozzles with the reservoir. The reason for this is the rupture of the connecting clamps, pipes, hoses or the radiator itself due to increased pressure or wear.
Diagnostics of RB comes down to two stages - checking the pressure and looking for mechanical damage.
Pressure test
First check the pressure in the lid. A lid malfunction manifests itself only at increased pressure, which is quite difficult to create artificially. In car services, a special pump is used for this, with the help of which it is checked whether the valve works or not.
Checking the pressure in the tank lid is quite difficult
Without such a pump, the diagnostics of the cover is carried out as follows.
- On a warm running engine, the RB cover is gently unscrewed by hand. If there is a hissing sound indicating the presence of pressure in the system, the cover is functional.
- Tubes and hoses are inspected. If they are compressed, then either the lid does not hold the pressure, or it is too low.
You can use the old old method too. However, for its implementation, there must be sufficient free space under the hood in order to squeeze the main supply hose with one hand and unscrew the cover with the other. The cap is then screwed into place and the hose is released. If the hose returns to its original shape, the lid valve is working properly.This is not always feasible due to the fullness of the engine compartment in modern cars.
Many people use a pump with a pressure gauge and an additional reservoir. In this case, more accurate results are obtained. The procedure is as follows.
- The pump hose is connected to one of the fittings of the additional empty RB and is fixed with a clamp.
- All other RB branch pipes are closed with plugs.
- A checkable lid is screwed onto the additional tank.
- Air is pumped into the tank. At the same time, the readings of the manometer are monitored. At a certain moment, a click will be heard, and after a while - a whistle of air leaving through the plug. If at this moment the pressure gauge shows 1.1–1.5 kgf / cm2, and further air injection only intensifies the sound at a constant pressure, the cover is in good order.
Such a check is also possible on a working tank, without draining the antifreeze. The steam outlet tube is disconnected from the RB and closed with a plug, and a pump hose is connected in its place.
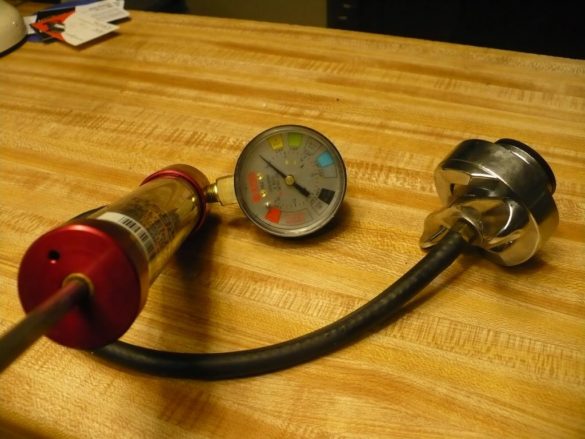
A pump with a pressure gauge is used to check the pressure of antifreeze
Checking for mechanical damage
When looking for mechanical damage, first of all, it is necessary to remove and carefully inspect the RB cover on a cold engine for cracks, chips, ruptures of sealing cuffs and other mechanical damage. Then you should assess the condition of the tank body itself, having previously cleaned it of dirt, scale and rust.
Valve does not open
The coolant temperature depends on the engine operating mode. The cooling system is completely sealed. A high pressure is created inside it, leading to the expansion of all elements to a certain level. A valve is provided to relieve pressure in the system. In addition, the valve sucks air into the system on a cooled engine. This is necessary because of the risk of decompensation with a sharp drop in pressure. There must be enough air to balance the internal atmosphere of the system.
Valves in modern cars play an extremely important role. Therefore, it is necessary to periodically check their condition. The valve can rust, clog, wear out and simply collapse. All this will prevent the system from functioning normally. The risk of depressurization and the appearance of air locks will increase. As a result, small units and parts of the system may fail and, as a result, the engine will overheat. The main symptom of a valve malfunction is an inoperative stove.
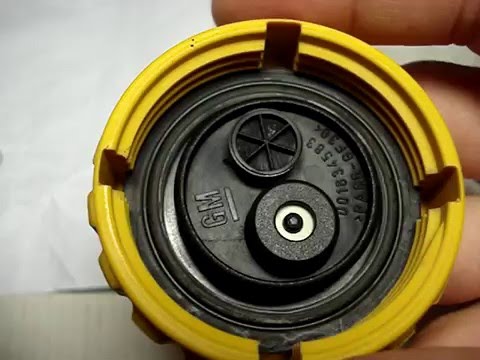
RB cover valves are important elements of the cooling system
All this is possible even with a working, but clogged valve. Increasing coolant pressure can rupture the reservoir and hoses. As a result, the engine will boil, hot antifreeze will flood the entire engine compartment, etc. Therefore, it is extremely important to monitor the serviceability of the valve. To check its performance, press it with your finger and at the same time bring your ear to the lid. When the valve is pressed, a hiss should be heard, and when released, a suction sound should be heard.
Oil in the expansion tank
Oil can get into the Republic of Belarus. This problem is especially relevant for American cars, but sometimes it also occurs on domestic ones. Oil is usually detected only when checking the coolant level in the form of oil traces on the inner surface of the filler neck. In addition, the color, consistency and smell of antifreeze change.

Oil in antifreeze is an extremely annoying signal for the car owner
Oil and coolant circulate in different sealed circuits, closed from each other. Therefore, the ingress of oil into the tank is a rather unpleasant signal, indicating a leak. The reason for this is most often:
- radiator or oil cooler wear;
- wear of the heat exchanger cuff;
- damage to the cylinder head gasket.
A heat exchanger or oil cooler is installed on a series of powerful automotive engines to cool the lubricant.
It is at these three points that there is a risk of contact between coolant and oil. So, in a heat exchanger, the possibility of their contact is explained by the purpose of the device itself. Another common reason for mixing antifreeze with oil is the chemical composition of the coolant. If the reservoir is filled with antifreeze with various additives, the structure of which is incompatible with the structure of the oil, the liquids can enter into a reaction that leads to their mixing.
The ingress of oil into the antifreeze is determined by the following criteria.
- Traces of oil appear in the antifreeze that is drained to the end. Since the consistency of oil differs from antifreeze, their complete mixing is excluded. Remains of drained coolant will be darker in color. In addition, the antifreeze will become thicker and will have difficulty flowing out of the tank.
- The coolant will become flammable. To detect this, you should soak a paper towel with antifreeze and set it on fire at a sufficient distance from the car.
- Oil filter clogged. Hard deposits will appear inside that have not passed through the filter mesh. The filter will quickly become dirty and the oil will circulate more slowly through the system.
It is noteworthy that not only the oil enters the tank, but also, conversely, the remains of the antifreeze flow into the crankcase. Antifreeze deteriorates the quality of the lubricant, and when it gets into the engine, it accelerates the corrosion process.
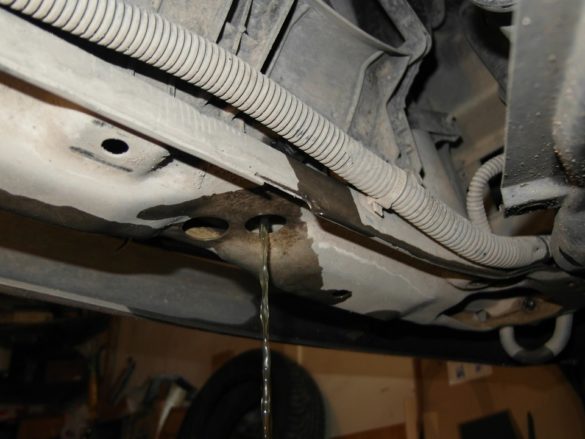
The big problem that motorists face is coolant leakage. This is especially true during the cold season. Often, the level of antifreeze in the reservoir decreases, and no apparent cause of the leak can be found. In this case, check the oil for coolant penetration. If there are light traces of foam on the grease dipstick, then there is antifreeze in the oil. If, on the contrary, traces of oil are found in the coolant, it may boil.
If a problem is found on vehicles with an oil cooler, the heat exchanger gasket is first changed. The order of further actions is as follows.
- The entire cooling system, through which the antifreeze circulates, is washed with a special solution. The solution is sold in specialized stores and is poured into the tank along with the coolant. Then the engine starts and runs for 5-10 minutes. This is sufficient for the motor to reach operating temperature. Flushing stops when the cooling fan is turned on.
- Antifreeze is completely drained from the cooling system. The drain plug is unscrewed and all the coolant flows out of the system into a specially prepared container.

Antifreeze is completely drained from the cooling system into a specially prepared container
- According to the algorithm specified in the car manual, the oil cooler is dismantled.
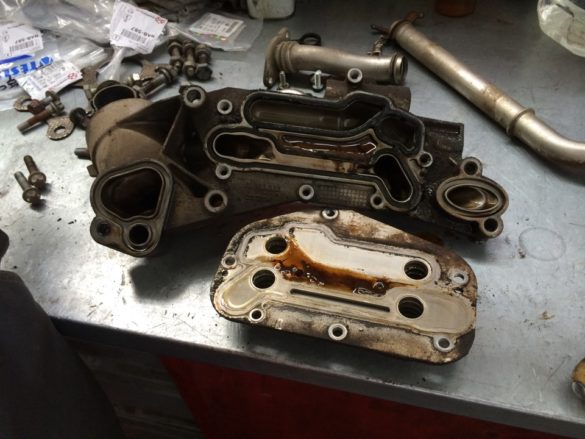
- The oil cooler is disassembled, thoroughly washed, cleaned and dried. All worn out gaskets are replaced.
When disassembling the oil cooler, replace all gaskets
- It is removed, washed and cleaned by RB. If cracks or chips are found, the tank is replaced with a new one.
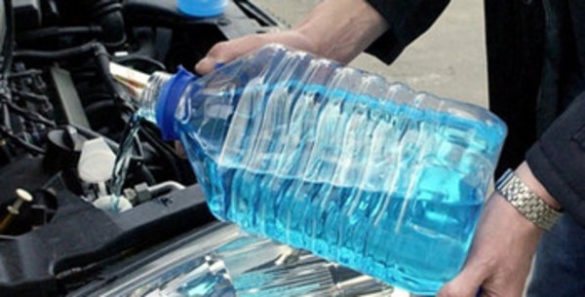
- The oil cooler and reservoir are installed in their places. To flush the cooling system, distilled water is poured into the RB, and the engine is started.
The cooling system is flushed with distilled water
- To reach the operating temperature more quickly, the stove is turned off, but all other energy consumers in the cabin are turned on. On the other hand, when the engine warms up, the interior heater turns on and the other appliances turn off. The motor must run for at least 10 minutes. After that, after waiting for the fan of the cooling system to operate, at the moment the latter is turned off, the engine is also turned off. After 20 minutes, the waste water is drained off.
The reservoir is filled with a new coolant recommended by the car manufacturer. Then the air trapped in the cooling system during flushing is removed. This will require an assistant. The procedure is as follows.
- The driver gets behind the wheel, starts the engine and presses the accelerator pedal 3-4 times.
- At this time, when the RB is closed, the assistant compresses the cooling system pipe.
- The tank lid opens, releasing excess air.
This procedure should be done several times.
Ways to fix holes in the ceiling
In search of solutions to the question of how to fix the hole in the ceiling, the type of ceiling structure should be taken into account.
The question of how to fix a hole in a cassette-type ceiling can be solved very simply, it is enough to replace the damaged cassette. Elements of this design are inexpensive and are sold in almost all hardware stores. If it is not possible to purchase the necessary element, then you can put a lamp or a ventilation grill in this place. In addition, it is possible to replace more than one damaged panel, but several elements, creating a pattern of plates in a contrasting color.
Damaged PVC panels are more difficult to replace, but in this case there is also the possibility of doing the work yourself. If such a situation arises, it is necessary to dismantle several panels due to the peculiarities of their fastening.


Expansion tank cleaners
To clean and flush RB, motorists use various means - cleaners, solvents, citric acid, washing powder, etc. If the level of contamination is so high that nothing helps, you can try the following.
- Fill the tank 15% with fine gravel.
- Pour half of warm water into the tank and add dishwashing powder.
- Shake the tank with both hands.
- Empty the tank and rinse it with water.
The tank should be cleaned.
You can use ready-made products such as DIMER wash concentrate. In this case, cleaning is carried out as follows.
- Fill the tank 15% with DIMER concentrate.
- Shake the tank by tapping on its body with your hands and leave for 10 minutes.
- Fill the tank halfway with warm water.
- Use a long-handled brush to clean the inside of the tank.
- Pour out the solution and rinse the tank with warm water.
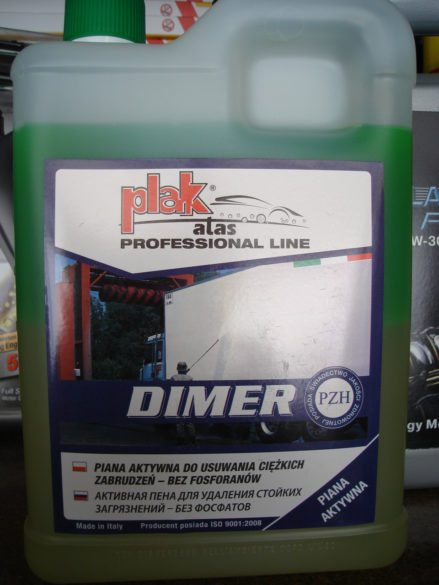
DIMER Concentrate is quite effective when cleaning the expansion tank
There are many other ways to clean up RB.
Video: flushing and cleaning the expansion tank
A serviceable and clean expansion tank is an important element of the engine cooling system. Any of its malfunctions can be easily diagnosed and eliminated by hand. To do this, you just need to carefully follow the recommendations of specialists.
- Mark Khachatryan
Good day! My name is Mark. I am 40 years old. By education - a teacher.
Sealing gaps between the ceiling and walls
If, during the operation of the plasterboard ceiling, a gap has formed between the structure and the wall, then to resolve the issue of how to seal the hole in the ceiling, you must perform the following steps:
- The edge of the plasterboard sheet adjacent to the wall is trimmed at an angle of 45 degrees.
- Fill the joint with a gypsum-based filler and dry thoroughly.
- Next, the putty is treated with sandpaper and the seam is secured with paper tape with an adhesive side.
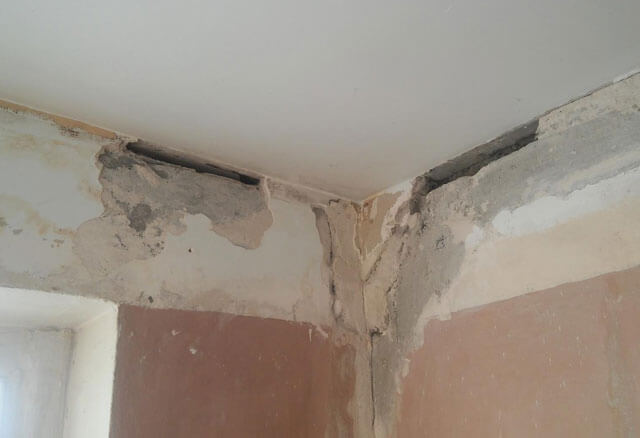
If a gap has formed between a concrete floor slab and a brick plastered wall, then the following measures are assumed:
- The resulting gap is expanded to 1 cm.
- Cover with a special primer with a brush. It is best to use concrete contact or its analogue in this case.
- Next, the gap is filled with a plaster or acrylic putty.
- Lay a serpentine tape over the putty to strengthen the seam, trying to press the material into the putty mixture.
- The corner is leveled with a spatula and left to dry completely.
- The repaired area is treated with fine sandpaper.
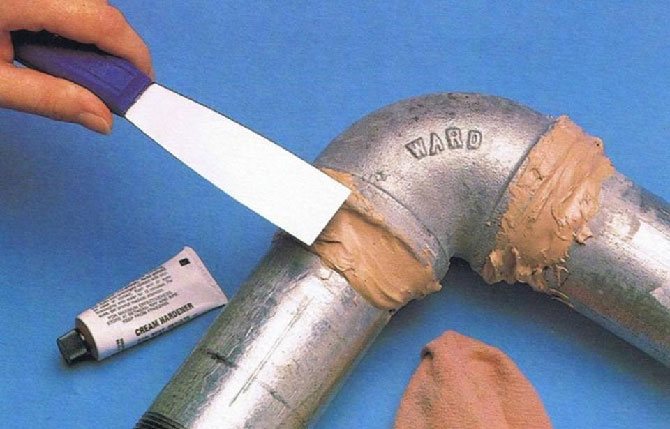
Algorithm of work when sealing cracks in the tank with your own hands
Many car owners are interested in how to seal the cracks and cracks in a plastic container.To seal the resulting defect, the following operations must be performed:
- thoroughly clean the plastic from the remnants of antifreeze at the crack with a napkin;
- degrease the welding area with solvent or acetone, dry;
- cut a strip of brass metal mesh, consisting of small cells, at least 10 mm wide of the corresponding length;
- apply a mesh patch to the sealed joint;
- evenly, in several approaches, solder the mesh to each edge of the joint, fusing the plastic with the metal and forming a reinforced layer over the entire area of the patch;
- grinding of the formed connecting seam;
- putty, primer and painting of the welding point.
For soldering, a flat-tip soldering iron with a power of at least 40 watts is used. The exact implementation of each point of the repair measures allows you to fully restore the strength and reliability of the body part.
In the absence of a soldering iron and a metal mesh, in order to repair the tank body, the craftsmen use a special polyadhesive sealant DoneDeal red for plastic.
This product has high thermal stability and resistance to oily liquids. Before applying a polyadhesive to a defect in a plastic case, it is necessary to perform thorough preparatory operations for cleaning, degreasing and removing traces of previously used substances.
How to repair a hole from a piece of plaster that has fallen out
If, for some reason, a hole is formed in the ceiling from the fallen out plaster, then you can use several methods.
There is an easiest way to solve the problem than to cover up the hole in the ceiling, it is simply covered with putty. However, there is no certainty that such a problem will not arise again.
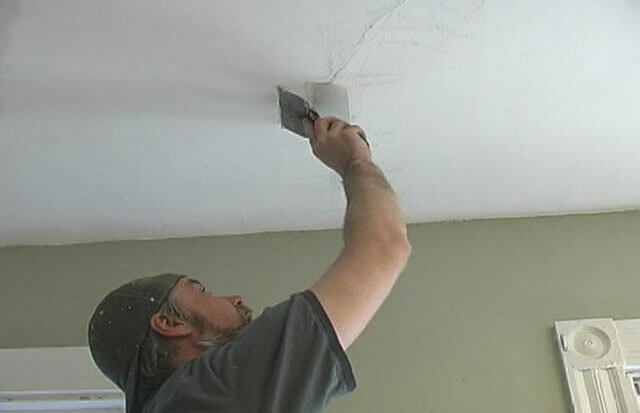
For this reason, it is best to use the more time consuming but reliable option. It assumes the following actions:
- Before filling a large hole in the ceiling, the hole is treated with an antiseptic solution, which prevents the formation of fungus.
- Then the working area is covered with a layer of deep penetration primer. As a result of this measure, the surface around the hole is strengthened and the degree of adhesion of the putty to the base increases.
- The primer is dried and putty is applied to the problem area. It is best to perform the last action 2-3 times, while each layer should be well dried.
- At the end, the treated area is sanded and again coated with a primer.
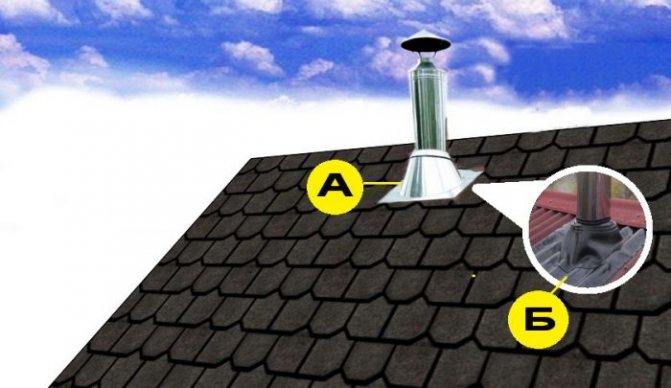
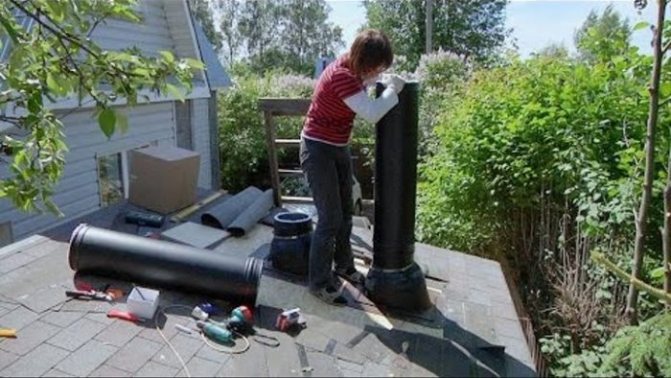
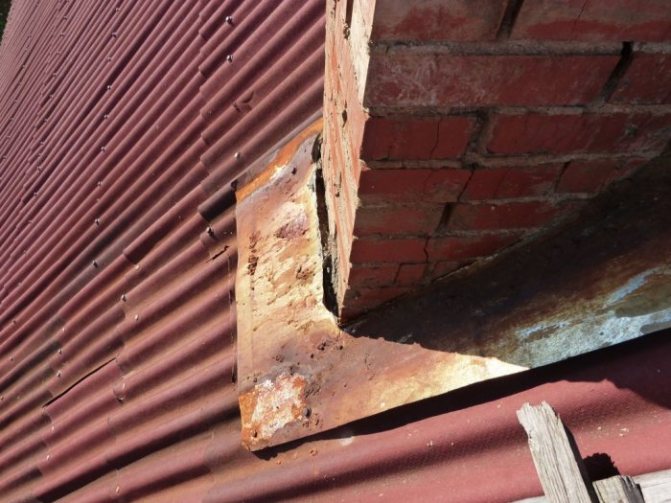
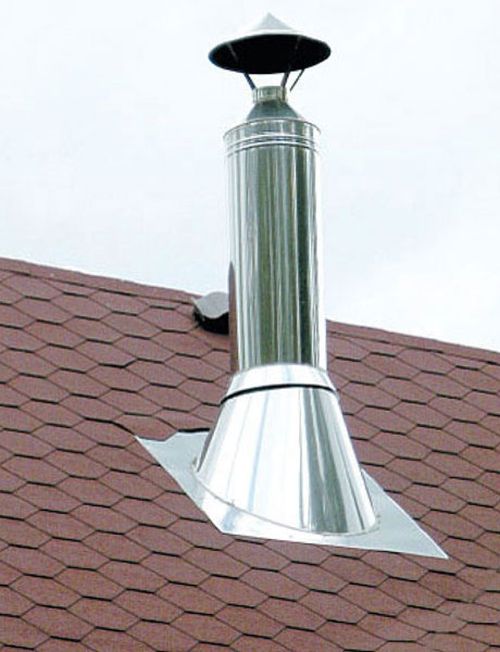
How the chimney works
If the stove is being built with the house, which is preferable, the most suitable place is chosen, the most economical heating method and, of course, the correct placement of the chimney. Otherwise, the chimney is constructed in such a way as to ensure good draft, but at the same time not disrupt the functionality of the ceilings and partitions.

The usual difficulty of the second option is the passage through the ceilings. Holes are made inside the building for the chimney on the ceiling and on the roof, they are insulated, since the surface of the chimney heats up very noticeably and poses a threat to combustible materials and is taken out.
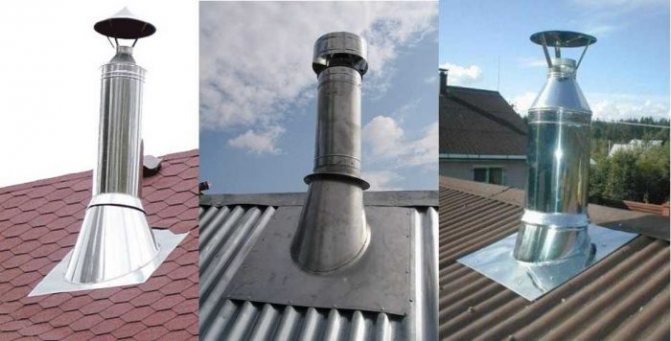
The external chimney is led outside the building, usually below the ceiling through the wall and up to the roof. This method is not recommended: the greater the difference between the temperature inside the chimney and the outside, the more destructive it affects the material, and the faster the chimney is destroyed.
The chimney device must comply with fire safety requirements:
- the distance from the inner surface to structures made of combustible materials must be at least 38 cm;
- otherwise - the distance between the outer wall of the chimney and structures made of combustible material must be at least 13 cm;
- insulation is carried out with non-combustible materials designed for operation at a temperature of 800-1000 C.
The latter condition is due to the fact that modern heat insulators often have a complex composition. So, mineral wool includes certain resin-based binders, which are sintered at high temperatures. The material loses its properties, accordingly, there is a threat of ignition. As an insulator, only heat-resistant mineral wool can be laid around the chimney - there must be a corresponding indicator on the marking.
Elimination of cracks between floor slabs
If a gap appears between the concrete slabs of the ceiling, then it is recommended to do the following:
- The seam between the plates is cleaned, trying to remove the old putty as much as possible.
- Before filling the hole in the ceiling, the working area is covered with a layer of primer and dried well.
- Fill the gap with putty, and stick the serpentine tape.
- Putty is again applied on top of the reinforcing material and also dried well.
- The dried surface is sanded, the formed dust is removed and covered with a primer.
If cracks form on the ceiling without a gap between the plates, then it is recommended to glue the problem area with a serpentine tape, cover it with a thin layer of putty and cover with a primer.
Tips for repairing a plastic car radiator
Car cooling systems are extremely important components that ensure the smooth functioning of the most loaded components and parts of the vehicle.
If in the early periods they were completely made of metal of various types, then today it is increasingly necessary to deal with plastic samples.
Although they have slightly higher dynamic stability than some metal radiators, significant problems can arise during their repair.
A liquid circulates inside the radiator, which through it removes heat from the car engine.
As a result, if this component malfunctions, the engine simply overheats above the specified rate and may even jam.
In this case, the radiator is a rather vulnerable element. Even the smallest impact can lead to significant mechanical damage.
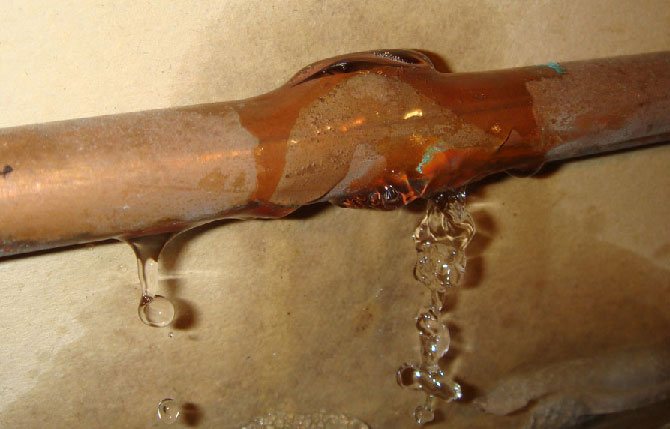
Bridging the Big Gap
When the leak is too strong and there is no option than to glue the radiator, you should immediately call the emergency service. If, due to the high flow of boiling water, it is not possible to access the battery, it can be covered using a thick blanket. This will not reduce the flow of water, but it will be possible to come closer to the radiator and inspect the details of the accident.
You can temporarily bandage the radiator with an elastic band while you wait for emergency services.
Related article: Varieties of hipped roof truss systems
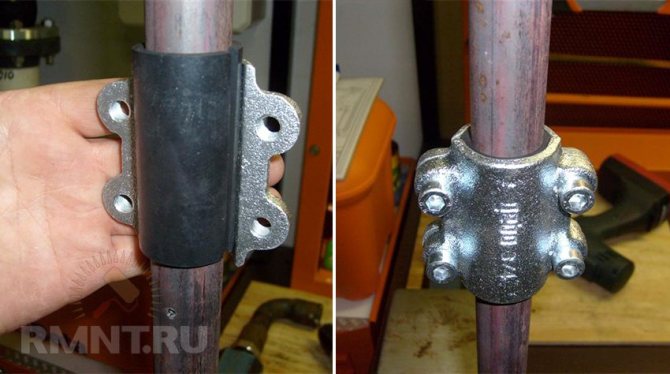
It is quite easy to deal with a situation where a leak has occurred in the place where the battery is attached to the pipe. In this case, before the arrival of the emergency service, you can use a wire and a piece of rubber, covering the hole with them. In the presence of a metal clamp, the flow can be completely eliminated.
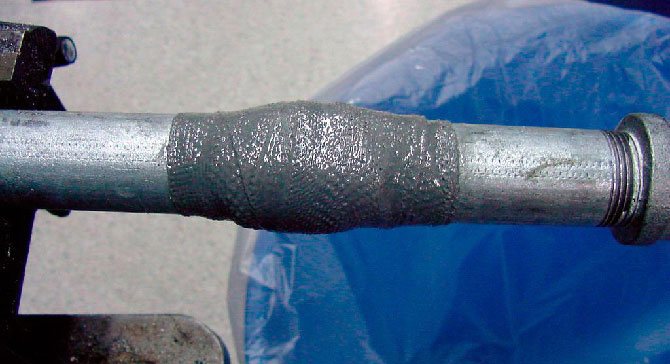
When a leak occurs at the junction of the sections, an unusual method can be used. So, the hole can be tightly wrapped with strips of fabric, previously soaked in moisture-resistant heat-resistant glue. When the glue mixture is completely dry, the radiator leak will be hermetically sealed.
Another good way to seal the radiator is various polymer and powder sealants. They are able to eliminate the leak for a while, before the arrival of emergency workers. The principle of operation of these sealants is instant polymerization upon contact with air. The sealant can withstand high temperatures, is not prone to evaporation, and can prevent leakage for a long time.
With a welding machine, leaks in steel pipes can be repaired.Before repair work, they must be freed from water. If the rupture caused a large hole to appear, an additional steel plate made of sheet material should be used. It is imperative that the welding machine be grounded during repair work.
Operating instructions
In order for the repair procedure to be successful, it is worth choosing the right method and following a number of recommendations.
Soldering
Before starting the procedure, it is important to prepare everything you need. This will require the following:
- a soldering iron with a flat tip - its power should be 40 watts;
- a fragment of a brass mesh with small cells;
- scissors for metal.
It is permissible to use a more powerful soldering iron. But in this case, you should be careful when working. Otherwise, in the areas of fastening of the metal mesh, there is a risk of a through hole appearing on the material.
It is permissible to remove the brass mesh from the car gas pipe. It is located right in the tank. This mesh is used in the vehicle power system and acts as a filter. After alignment, it is permissible to use it as a reinforcing layer. This will help stop the reservoir leak. If you can't find a brass mesh, it is permissible to use a steel mesh. This material is sold in hardware stores and is at an affordable price.
After completing the preparatory work and determining the area of localization of the leak, the tank should be thoroughly dried. This will help get rid of any remaining moisture.
Soldering is considered the most reliable method of eliminating cracks. Plastic melts easily even at relatively low temperatures. Therefore, to carry out the manipulation, it is permissible to use an ordinary soldering iron. To solder the tank, you should follow these steps:
- Place the tank on a flat surface. Moreover, it is recommended to direct the crack upwards.
- Heat the soldering iron to operating temperature.
- Cut the metal mesh so that it is slightly larger in length and width than the damaged area. Apply material to the damaged area.
- Solder the mesh into the plastic with a soldering iron tip. It is recommended to do this along the entire length of the damage.
During the procedure, it is recommended to carefully melt the plastic right in the crack. Otherwise, it will not be possible to deal with the damage efficiently. Wire mesh is considered to be an excellent reinforcing material. However, the patch will only be able to withstand pressure if the plastic layer is uniform.
Gluing
To achieve good results with this method, you must use a two-component formulation. To do this, you should do the following:
- Prepare surfaces. It is recommended to clean them from dirt. To do this, you should use acetone.
- Apply glue. A thin layer of a liquid substance is applied to the damaged area. From above it is recommended to cover this place with welding granulate from another bottle. Then again cover the surface with impregnation glue.
- Glue the details. The adhesive composition sets almost instantly. Within a few minutes after using the substance, it is permissible to return the tank to its place and fill it with liquid.
It should be borne in mind that the interaction of the liquid adhesive part and the welding granulate causes an exothermic reaction. It is accompanied by the release of steam and heat. Therefore, it is recommended to observe safety precautions.
Welding
Cold welding is considered an auxiliary method that does not provide long-term and reliable results. This method helps to achieve temporary fixation, which will ensure comfortable delivery of the vehicle to the service station. In order for cold welding to give results, the surface should be pre-cleaned.
Application of epoxy adhesive
The use of such a substance is also considered a temporary method. It will not fix the crack for a long time. To get a good result, the plastic is pre-cleaned from the remnants of dust, grease, dirt.
Repair of the radiator depending on the place of leakage
Repair of a radiator from a leak with rubber.
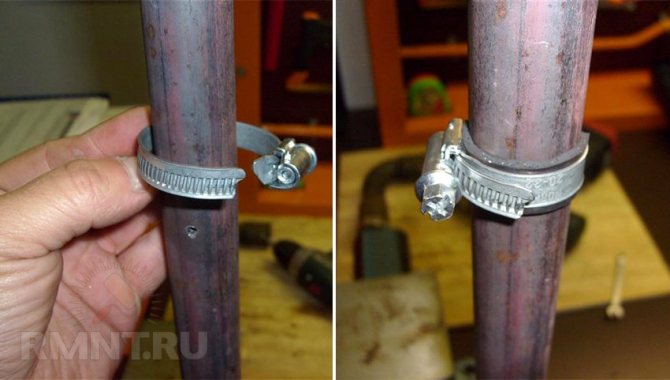
If a gap has arisen on a flat area, you can use rubber for insulation. The leak should be wrapped with a soft rubber band and tightened firmly with clamps or wire. The main thing is that the rubber band should be somewhat wider than the damaged area and close it tightly. In order for the hole to be sealed as tightly as possible, you can use a special plumbing clamp designed for pipes. Such measures will allow the damaged radiator to be operated until the end of the heating season. As soon as possible, it is advisable to seal the hole or replace the radiator with a new one.
If the rate of water leakage allows you to go to the store for tools, you can purchase a factory band fitted with a layer of sealing rubber. Clamps should be provided for clamping.
A little more complicated is the situation when a leak occurs in the place where the pipes are connected. If in this section the width of the pipe is greater than the parameters of the factory band, you can replace the sealing layer with a piece of ordinary rubber. It is wound on the damaged area in such a way that the difference in parameters is compensated. In the future, the rubber should be pressed using a special clamp. Despite the fact that the clamp may not be completely flat, this will not affect the crimping force of the problem area of the radiator.
Related article: DIY Button Crafts
Craftsmen Tips
Simple, proven advice from garage owners will help to reliably seal all cracks and gaps in garage doors.
First recommendation - polyurethane foam
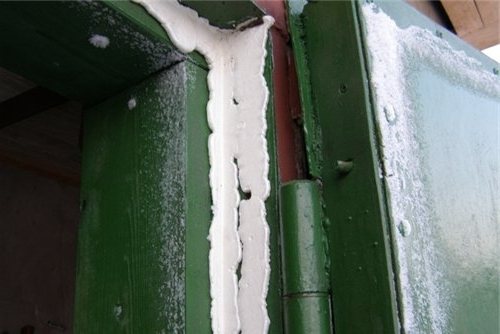
The perimeter of the gate box must be lubricated with grease or machine oil, and the ends of the leaves must be thoroughly cleaned and moistened with water from a spray bottle. You will need two cylinders of frost-resistant polyurethane foam for processing the gate.
Now we close the gate and apply polyurethane foam. We wait for the foam to expand and dry a little, and open the doors.
According to reviews, this option for sealing gaps in the gate lasts one to two years. This quick tip is good when you need to quickly eliminate gaps in the gate, but is not very suitable for reliable thermal insulation.
If there are cracks and large voids around the perimeter between the box and the wall, then first you need to clean out the voids, remove dirt, dust and loose pieces of masonry, and then seal the cracks with polyurethane foam. When the foam dries, the excess is cut off and the perimeter of the box is additionally plastered with the usual mixture of M150 cement and sand.
Second recommendation - tape and sealant
For a standard gate, two tubes of silicone sealant and a roll of wide adhesive tape will be enough. Operating procedure:
- open the gate leaves all the way;
- we clean and degrease the surface;
- along the entire perimeter of the gate leaf, glue tape tape (choose the width of the tape along the width of the gate leaf);
- along the perimeter of the box, in places where the flaps are adjacent to the box, we apply a layer of sealant (it is better to use a mounting gun, so the consumption is less);
- close the doors and wait until the sealant hardens;
- with the gate closed, in the gaps that remain, we also apply sealant.
If the gaps between the sash and the frame are large, then such sealing is performed in two steps. So that the first layer adheres well.
Third recommendation - PVA and sawdust
Strong and reliable putty for gaps between the box and the walls - a mixture of small sawdust and ordinary putty for windows, with the addition of PVA glue. As soon as this mixture begins to thicken a little, we carefully seal all the cracks in the gate.
The glue ensures tightness and protects from moisture, and sawdust and putty reliably fill all the voids in the gate. The recipe is suitable for small gaps in garage doors around the frame.
The third recommendation is porous rubber

The thickness of such a rubber seal is no more than 20 mm. The porosity of the material makes it possible to seal gaps of different sizes between the sashes and the frame, ensuring a tight abutment.
We glue the rubber on the gate leaves from above and below at the "Moment" universal. The surface of the flaps must first be degreased. In the places where the hinges are attached, we glue such a rubber seal to the end of the gate leaf.
Fourth recommendation - regular cement
If the door frame is installed in an opening with large voids, then side slopes will have to be made - simple sealing with polyurethane foam will not work. We mount the mortar formwork from narrow boards or plywood along the perimeter of the box, connect them together with wire.
Pour a cement mixture into such a formwork, preferably a thick one, made of sand, cement of the M150 brand and water. It is imperative that when installing such a formwork, so that the solution fills all the voids, we punch the screed several times with a reinforcing bar.
Let the screed harden for at least two weeks, then the formwork can be removed. Important - the cement mixture must be very thick, like soft modeling clay.
Fifth recommendation - door seals
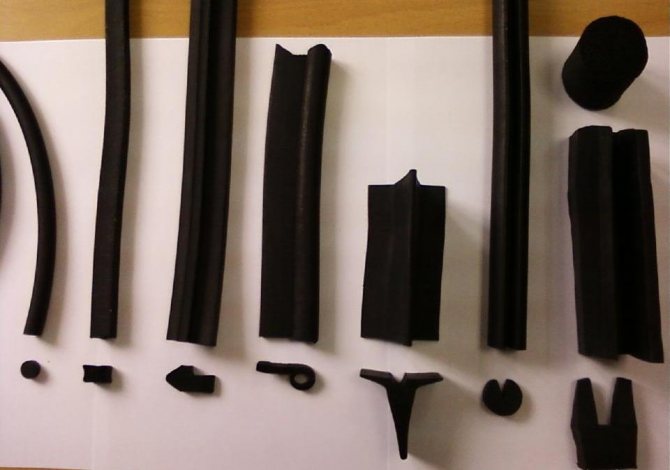
High-quality sealing and beautiful appearance will be ensured by the door seals. The price of the material is from 200 to 500 rubles per meter, depending on the width and quality of the seal. Such insulation can be easily mounted on the gate leaves and on the frame around the perimeter.
Be sure to degrease the surfaces before installing rubber or silicone seals.
Recommendation six - regular rubber hose for irrigation
Vertical gaps between the sashes and the frame can be insulated with a regular rubber hose. We attach a hose to the end of the flaps with self-tapping screws for metal. An important point - it is necessary to make holes for the screws on one side of the hose so that the screw head is inside the hose after fastening.
The minus of the rubber hose - in severe frosts, the rubber becomes hard and cracks. As an alternative to the garden hose, you can use D-shaped window seals, 12 - 15 mm. In such seals, the rubber is soft and resistant to low temperatures.
Some car owners have found a simple way out - how to remove the cracks on the garage door, the usual seal for refrigerators. It is mounted on the ends of the sash and reliably seals all joints.
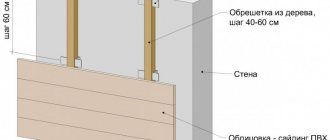
If you carry out complete insulation of the gate, then the best option is mineral wool on a crate made of metal or wooden beams. But, it is still necessary to seal the cracks, even with high-quality insulation of the sashes.