Theoretical part
Nipple-nuts are ring-type seals equipped with external threads on both ends of the element. In the inner part there are special grooves for installing a radiator key. By rotating it in one direction or another, it is possible to close or open individual sections.

The heating batteries are disassembled into sections, as a rule, in such cases:
- During the installation of the heating system.
- When the battery is built up with additional sections.
- If the radiator starts to leak.
Product design
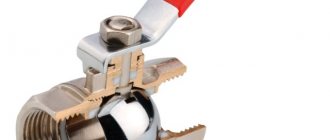
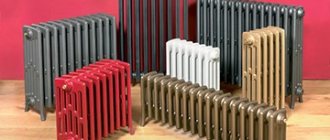
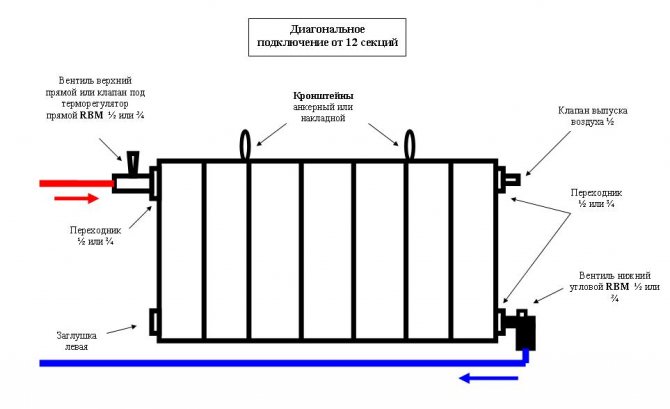
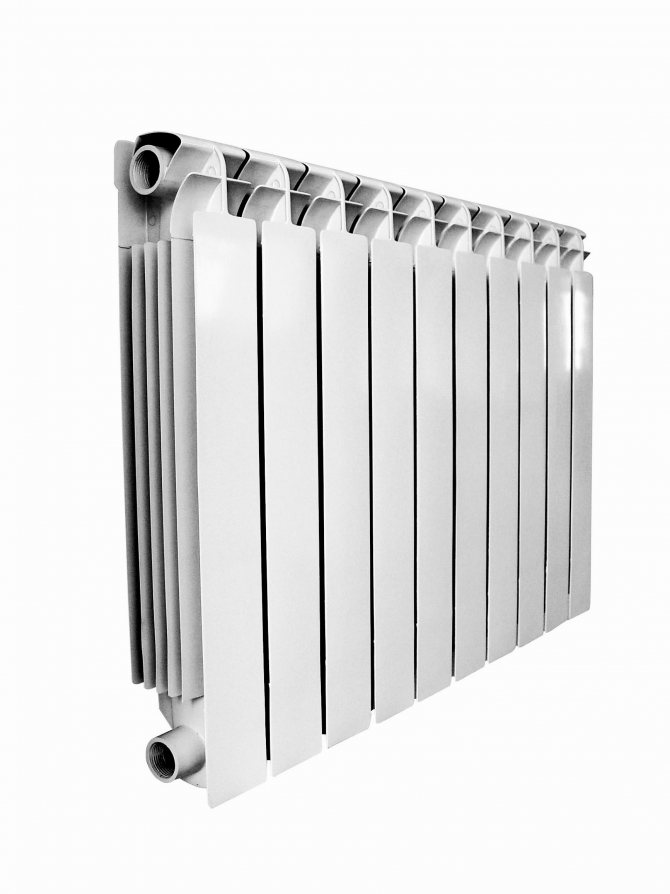
An aluminum radiator is a structure of separate sections, interconnected by means of nipple nuts. In fact, this connecting element is a cylinder, on each side of which an external thread is made. The cylinder is empty inside. Radiator sections are screwed onto each nipple-nut from both sides.
Connectors are located at both the top and bottom of the battery. Thus, each section of the radiator is attached to the adjacent one at four points. The nipple-nut is made in such a way that it is completely invisible in the assembled product.
There are projections on the inside of each connector that serve for the installation procedure. A special tool clings to them, with the help of which the nut is untwisted and tightened. In this case, the direction of the thread should be taken into account - on some elements it is right-hand, on others it is left.
In order not to play the guessing game, just pay attention to the markings in the corresponding areas. If the letter D is indicated there, it means that the thread is right-hand. The S indicates the left one. It is very important not to be confused, as an attempt to unscrew the nut in the opposite direction can lead to thread stripping and, consequently, damage to the element.
Read also: Melting temperature of rubber in Celsius
Bimetallic and aluminum batteries
Before disassembling the aluminum radiator, it is necessary to prepare the necessary devices.
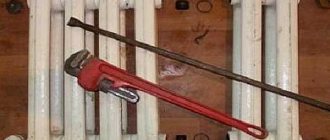
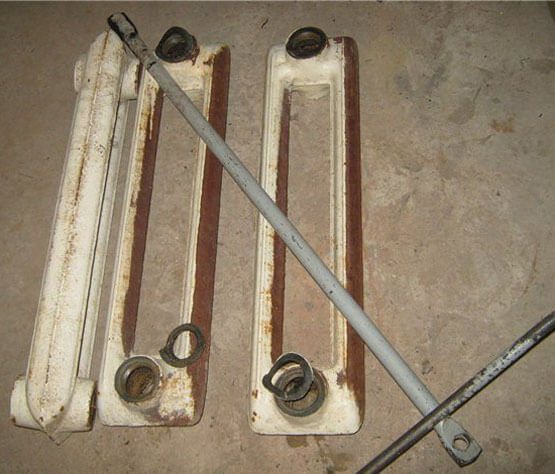
The role of the main tool is assigned to the nipple wrench:
- This is a steel bar about 70 cm long. It is necessary to weld the working part of the 24x40 mm wrench to one of its ends, and to equip the other with a through hole.
- Metal rod. It is inserted into the hole at the end of the bar, which greatly simplifies the procedure for unscrewing the nuts.
The key has a series of notches, the pitch between which indicates the width of one section.
The list of operations, how to disassemble a heating radiator with your own hands:
- Before disassembling a bimetallic radiator, you need to decide in which direction to turn the key. For this, the radiator is placed on the floor surface so that its front part is at the top. In this position, the right-hand thread will be on the right, and the left-hand thread on the left.
- There is also an easier way. You need to take the nipple and put it on in turn on the left and right. If the sides are confused, this can result in thread stripping and section breakage.
- On radiators of Western production, the foot and plugs from the front are marked as follows: the left thread is designated as S, the right thread is designated as D.
How to disassemble a heating radiator: tools, advice | Teplomonster
The need to disassemble heating radiators arises in cases when they began to leak, one of the ribs cracked or burst. In old buildings, when there was still no question of energy saving, radiators were installed in which more ribs were installed than required, so the extra ribs must be removed.
Heating radiator device.
Before disassembling heating radiators, regardless of their type, make sure that no water is supplied to the pipes. It is advisable to carry out the work together.
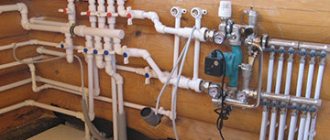
If the heating system is mounted on polypropylene or metal-plastic pipes, the couplings are disassembled.
If the heating system is assembled from steel pipes, you need to try to unwind the bends at the inlet and outlet of the sections. If it does not succeed, and it often happens in apartments of an old building, the squeegees must be cut off with a grinder or autogenous machine.
It remains to remove the battery from the hooks that attach it to the wall and put it on a flat surface.
Dismantling cast iron heating radiators
Dismantling cast iron radiators sometimes becomes a very laborious process, but necessary.
Diagram of disassembling cast-iron heating radiators: a - gripping the threads of the sections by 2-3 threads by the nipples; b - turning the nipples and joining the sections; c - connection of the third section; d - grouping of two radiators; 1 - section; 2 - nipple; 3 - gasket; 4 - short radiator key; 5 - crowbar; 6 - long radiator key.
Place the new or old radiator on a level place. On at least one side, you need to remove the usual footwear or blind plugs. On different sections of the radiators, they can be left-handed or right-handed. Typically, cast iron fittings have a right-hand thread, and plugs have a left-hand thread. If there is no disassembly skills, and there is a free section, it is better to find out, before applying force, what kind of this thread and in which direction the key should be turned. If the thread is left-handed, turn the key clockwise when disassembling the cast iron batteries.
As with unscrewing any nuts, you first need to "rip" the footwear from its place, ie. turn them a quarter turn on both sides of the battery. Then the foots are unscrewed so that a gap of several millimeters forms between the sections. If you let go of the footwear more, the whole structure will begin to bend under its own weight and due to the applied forces. This can jam the threads. To prevent this from happening, an assistant must stand on the disassembled battery, who will prevent bending with his weight.
Usually, the dismantling of old heating radiators is complicated by the fact that the footboards and sections are "stuck". In order to disassemble such a battery, you will have to use an autogen or a blowtorch. The junction is warmed up in a circular motion. As soon as it is warmed up enough, the shorts are unscrewed. If it was not possible to unscrew it the first time, the steps are repeated.
If you do not have enough strength to disassemble the battery, you need to increase the length of the key. An ordinary pipe is used, which serves as a stepping stone.
The built-in nipples for venting cast iron radiators are unscrewed in the same way.
If it was not possible to disassemble the cast-iron battery with the considered methods, it remains to cut it with a grinder or autogenous gun or break it in a supine position with a sledgehammer. You need to split or cut one section carefully. After this operation, the adhesion between the sections may weaken, the battery can be disassembled, the remaining sections will be saved.
The use of a "liquid key" or WD liquid does not give an effect, since in old cast-iron batteries the fittings were sealed with linen and paint, and liquids would not get on the threads.
Dismantling aluminum radiators
Diagram of aluminum heating radiators.
Aluminum or bimetallic heating radiators are disassembled in the same way as cast iron, but there are slight differences:
teplomonster.ru
The order of untwisting the right-side section of the radiator
How a right-sided bimetallic heating radiator is disassembled:
- The key is inserted so that its "blade" goes into the upper hole: there is a special groove for fixing there.
- Further, applying force, turn the tool counterclockwise. As a result, it is necessary to achieve a displacement of the nut from its place.
- At this stage of disassembling the bimetallic radiator, you will need the aforementioned bar. It is inserted into the ring on a nipple key, thus creating a lever. This will greatly facilitate the work, which will require significant efforts to implement.
- After making two full turns, the key must be moved to the lower section of the radiator. After that, the procedure is repeated.
- Having again installed the key from above, they make two turns: the sequence of actions is repeated until the section is completely unscrewed. Such an algorithm of actions, how to disassemble an aluminum heating radiator, allows you to protect yourself from distortions.
How to assemble and disassemble a heating radiator?
When heating is installed or repaired, it is imperative to calculate how many sections of heating radiators will be needed for each separate room. That's just, when purchasing heating radiators, sometimes it is impossible to find a radiator with the required number of sections, and buying extra sections can be quite expensive. What to do in this case?
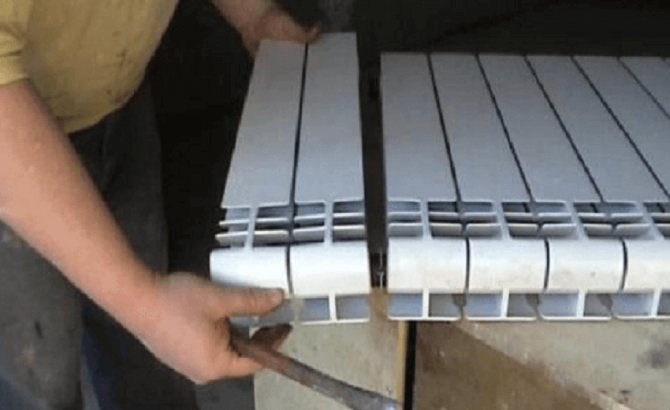
The conclusion comes by itself - it is necessary to redo the radiators for any room, adding or removing sections. The videos below show in detail how to disassemble and assemble an aluminum heating radiator. This method can be used when disassembling sections and for other models of radiators, even cast iron.
In the video, you can follow all the steps for disassembling and assembling the heating radiator using a small number of tools that replace the radiator wrench - a construction chisel and a gas wrench. When assembling and disassembling a cast-iron radiator (if there is no radiator key), construction scrap has been used in conjunction with a gas key for a long time. All the spare parts required for radiators (connecting nipples, gaskets) can be safely bought on the construction market.
Dismantling an aluminum heating radiator
Assembling an aluminum radiator
prostostroy.com
How to disassemble cast iron batteries with your own hands
Most often, old-style houses and apartments are equipped with MS-140 cast iron batteries. Nipple nuts and gaskets are also used to assemble their sections. It is especially difficult to disassemble an old battery. in the course of its long-term operation, the gaps between the sections boiled with rust. As a rule, in such cases, the key niches are eaten away by the coolant. It is also important to keep in mind a significant mass of cast iron. For example, the weight of one battery for 12 sections is 90 kg: it will be difficult to cope with such a product alone.
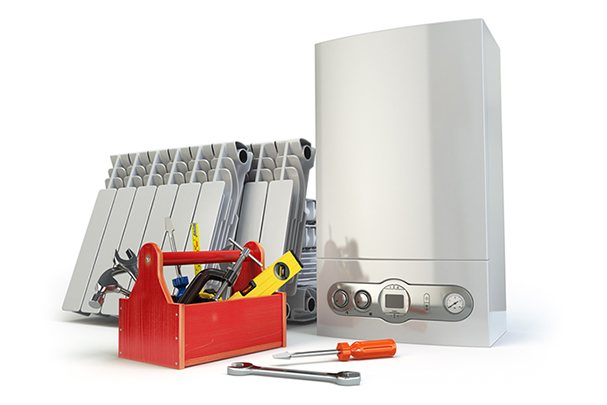
To implement the procedure, you will need the following tools:
- Nipple radiator wrench.
- Plumbing fixtures for unscrewing sleeves and plugs.
- Small sledgehammer and chisel.
- Blowtorch (it can be replaced with a building hair dryer).
- Steel brush.
- Wooden blocks for installing the battery on the floor.
In the role of a radiator key, a round metal rod with a diameter of 18-20 mm flattened at one end is used. The dimensions of the flattened part are 28 × 40 mm, with a thickness of 6 mm. A ring is welded to the opposite edge of the rod, through which the lever is threaded. The length of the radiator wrench should be as long as half of the largest 12-section battery, plus 30 cm.
How are the radiator sections twisted together?
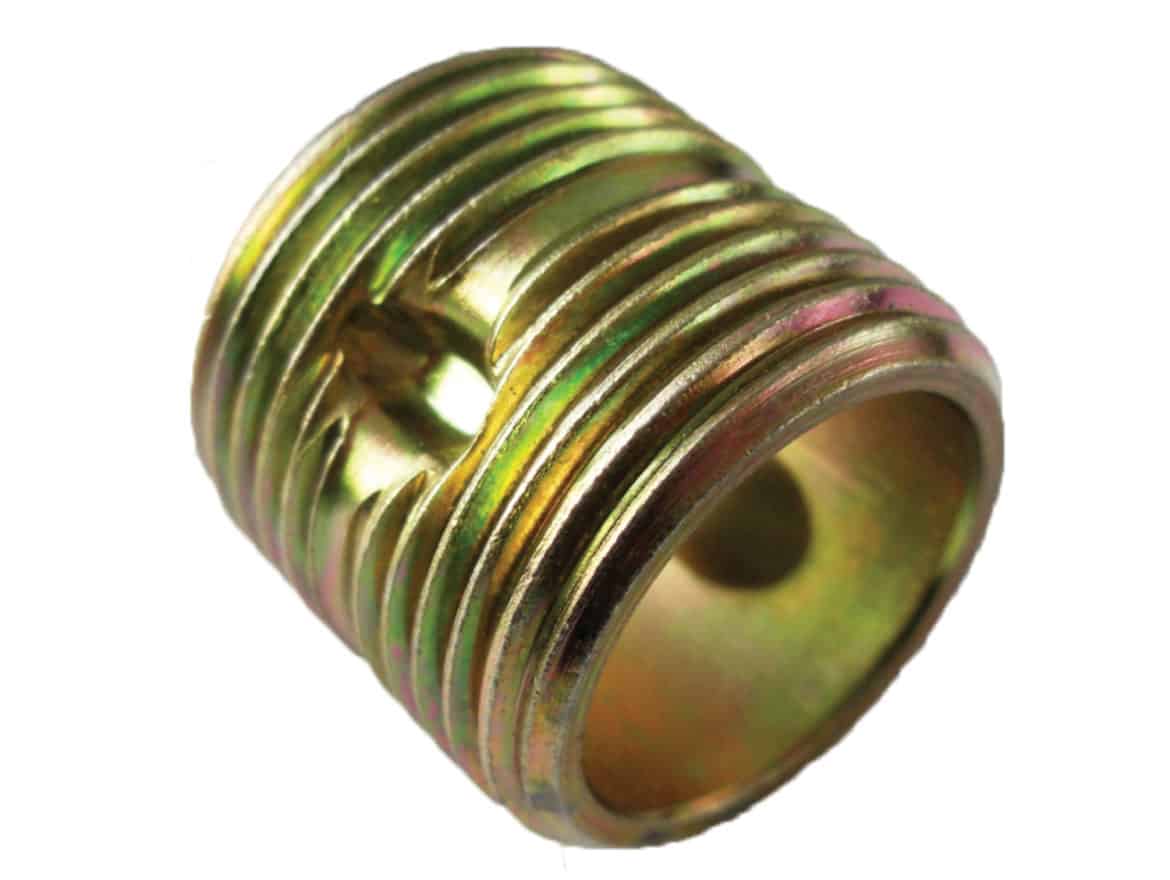
All of them are sectional and therefore they can be assembled and disassembled. Although some manufacturers specifically change the nipple so that their radiator cannot be disassembled with a regular key. So, I said an incomprehensible word - nipple. Now I will show what it is:
This is an ordinary piece of iron with a left-hand thread on one side and a right-hand thread on the other. The white ring in the middle is the spacer between the sections. In this case, it is made of silicone, but it can be made of paronite.The diameter of the nipple for aluminum and bimetallic radiators is one inch, but for Soviet cast-iron radiators the nipples are 1¼ inch in diameter. This means that these heaters require different keys. Now let's talk about keys.
Disassembly procedure
It is very difficult to separate stuck intersection joints. In some cases, they stick to it so much that even significant physical effort turns out to be powerless. In such situations, the joints are warmed up before disassembly with a blowtorch or hair dryer.
How to disassemble a cast iron heating radiator:
- Cast iron is heated with a blowtorch until it starts to emit a crimson glow. After that, you can start the disassembly procedure.
- The first step is to unscrew the plugs.
- The radiator wrench is brought to the top of the battery: its head should fall on the area of unscrewing the nipple-nut. At the end of the section, use chalk to mark the circle where the tool rod is located.
- The flattened part is inserted into the lower inner groove. Further, moving the tool in the desired direction, bring it to the marked circle.
Before starting the operation, it is important to find out in which direction it is necessary to twist the sections. If there is a nipple nut, it is screwed in turn on the right and left ends of the battery: this makes it possible to determine the direction of rotation of the nipple. If the thread moves, do not completely loosen it. To avoid misalignment, the top and bottom nipples must be unscrewed one full turn in turn.
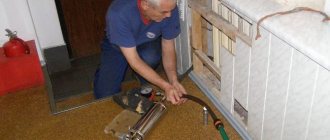
Dismantling and assembling an aluminum radiator with your own hands
The site where the radiator will be restored, covered with dense fabric... If this is a table surface, then the main work will not take place on weight. The prepared place will protect soft aluminum from getting unnecessary deformations and scratches.
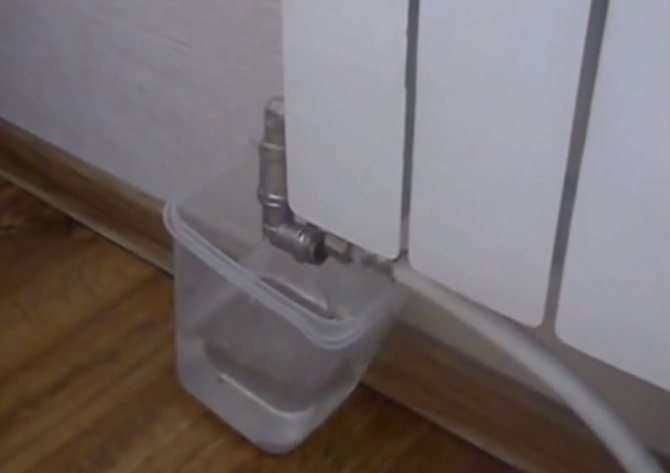
Important! Before removing the slip couplings a rag is spread under the radiatorto protect the floor from dirty liquid that may leak out during dismantling. You need to have a rag on hand to absorb any remaining moisture inside the sections.
Disconnection from the heating network
Before starting disassembly, the radiator is disconnected from the heating network shut-off valves... If the radiator has no shut-off valves, then invite a housing and communal services workerso that it turns off the heating riser for repair work.

During the heating season, after closing the radiator, pause. Since the water is still hot wait a while until the liquid cools down, and then disconnect the radiator from the heating pipes.
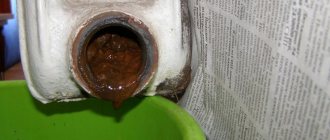
Heat carrierremaining in the battery poured into a prepared bucket and proceed to the separation of the sections. Immediately after dismantling, the inner surface of the battery is rinsed with running water.
How to disassemble and reassemble the battery
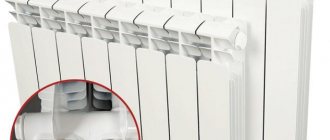
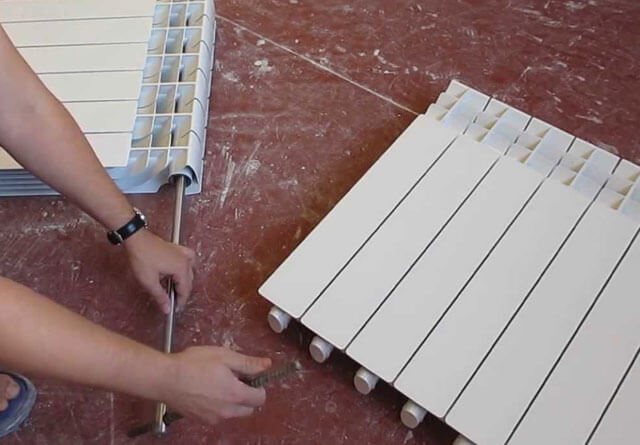
Aluminum sections, connected nipple nuts... The inner part of such a connector has protrusions for which the nut is gripped by a nipple wrench and unscrewed. The nut is like a clutch, only her thread is external... One nipple nut has both right-hand and left-hand threads. They are made in pairs for the top and bottom connection. When the nipple is unscrewed, the sections diverge, when tightened, they are pulled together.
Preliminary all plugs and adapters are twisted from the ends... The connector must be accessible from all sides for the nipple wrench.
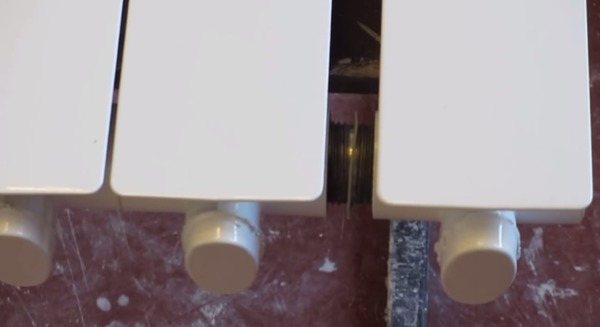
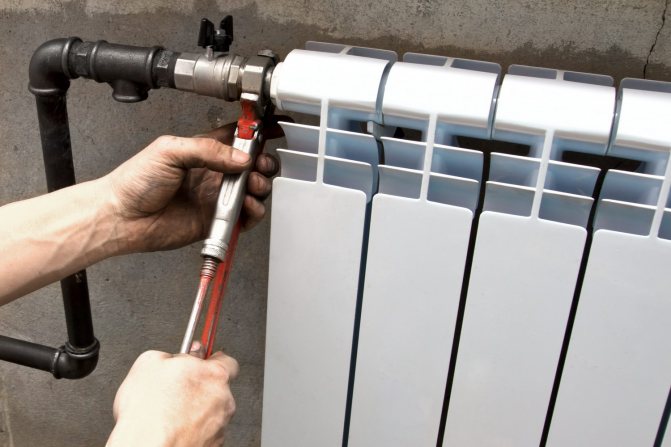
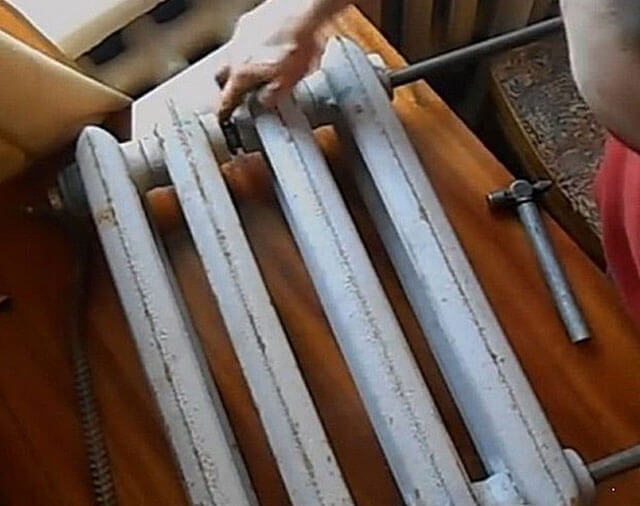
Photo 1. Fastening the sections of the aluminum radiator to each other: the nipple-nuts are unscrewed when disconnected.
To disassemble the battery, the tool blade is placed through the open end of the radiator into the slots of the unscrewed top nipple-nuts and with some pressure make a trial scroll counterclockwiseto move the connection.If the key turns the nut normally, then it is inserted into the grooves bottom nipple nut and, as in the first case, try to turn it a couple of turns.
Important! When unscrewing the connectors, follow the sequence of actionsto avoid skewing.
After disconnection, exposed thread carefully examined for cracks and chips, on thread integrity... If necessary, the joints are cleaned with fine emery cloth.
Starting the assembly of the radiator sections, onto the upper and lower nipple-nuts put on o-rings made of paronite, placed between the sections. I lightly press the sections against each other and screw them up alternately. Turning the nuts, so as not to get skewed, is limited two turns of the key.
If something went wrong
During operation joints between sections and steel nuts stick to each other... This comes from the quality of the coolant supplied to the heating system. Sometimes even considerable physical effort is useless.
Despite the fact that sticking must be dealt with, aluminum is easily deformedas it is a soft metal.
By heating with a construction hairdryer, the joints can be overcome stuck on rust... If this did not help, too, having corroded too much, then the edging machine gets down to business.
Advice. If the nipple nut does not release under strong pressure, then no need to increase the applied force with excessive leverage... In the worst case, not only the nut itself will break, but both sections, which sit tightly on this nut, will crack.
The grinder is trimmed leaky section, moreover, on the reverse side and stepping back from the edge of the connection by at least half the length of the coupling. This protects the working section from destruction and does not cut the connecting nut. The rust bounces off during trimming, making it easier to unwind the intact section.
During assembly it is desirable replace old gaskets with new ones and clean the jointspaying attention to defects and irregularities. Sealed connection protects against premature leaks.
Old battery
The process of disassembling the equipment itself is carried out in the same way as in the previous case. But you will be faced with two additional steps. Firstly, after disconnecting from the pipes, the radiator must be thoroughly rinsed with running water. You will be surprised to see how much dirt has collected inside. Especially if the radiator was used in a centralized heating system - the coolant in it is usually not very clean.
Secondly, all the connecting elements in the cast-iron battery over time become overgrown with scale and firmly adhere to each other. Therefore, it takes a lot of effort to separate them. The matter is aggravated by the fact that cast iron, despite all its external brutality, is a rather fragile material. Therefore, we need to act decisively, but carefully. There are three ways to do this:
- heat. Warm up all the stuck places with a construction hair dryer or blowtorch, and then immediately unscrew the nut. Be careful when handling so as not to burn yourself.
- saw cut. If heating does not help, then use a hacksaw for metal. It is better not to use a grinder because of the same fragility of the material,
- split. There are completely desperate situations when the desired segment cannot be separated in any way. And it remains only to take a sledgehammer, carefully split and remove all unnecessary. Naturally, you will not save the section like that, but you will be able to prepare the field for subsequent work.
For even more insight into the details of the work ahead of you, watch the video, the link to which is indicated below. Good luck!
Output
The process of disassembling radiators is quite simple, however, difficulties may arise with cast-iron batteries, due to the "sticking" of parts.But, if you adhere to the above recommendations, every home craftsman can cope with the task at hand. The only thing for this you need to have all the necessary tools, which are listed above.
You can get additional useful information on the voiced topic from the video in this article.
Did you like the article? Subscribe to our channel Yandex.Zen