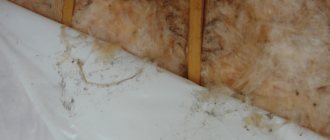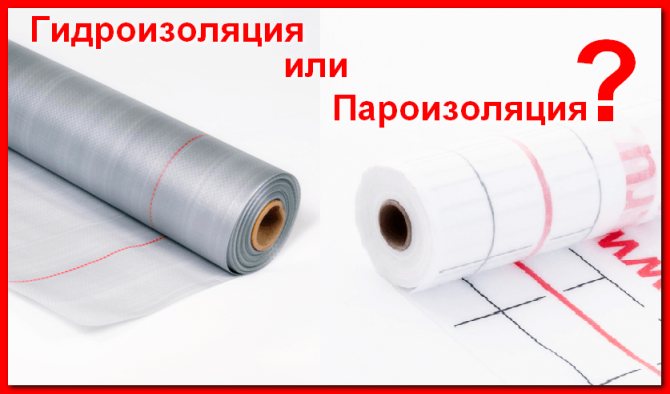
The protection of the insulation layer in the roofing cake is performed by two types of insulating materials that are different in structure and purpose. Their illiterate use, incorrect selection according to technical indicators, incorrect installation leads to wetting of the thermal insulation and to the loss of the qualities laid down by the manufacturer. As a result, instead of reducing heat loss, wet insulation will increase leaks; in rooms equipped in this way, it will be excessively damp and cold.
To avoid the described negative, we will find out how vapor barrier differs from waterproofing, how a roof insulation system is constructed using these protective films.
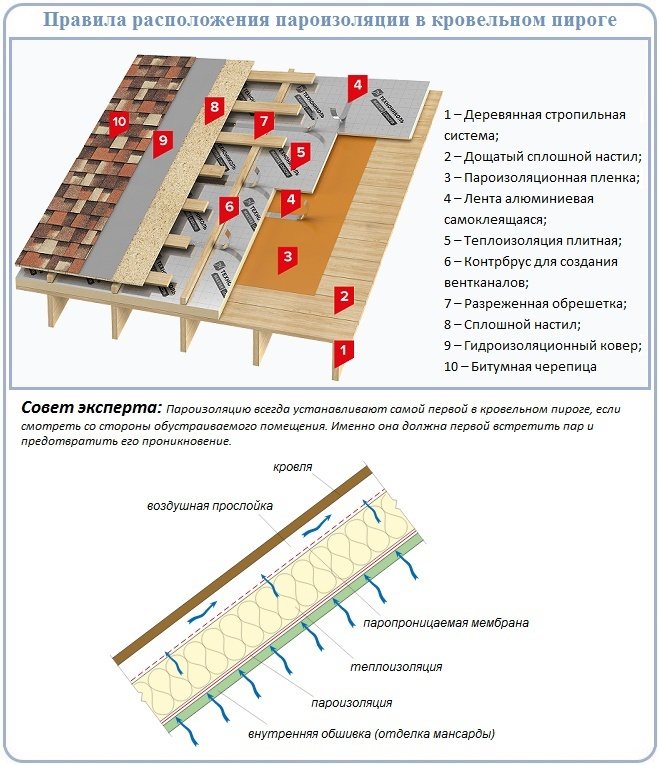
The subtleties of building a roofing pie
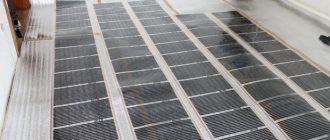
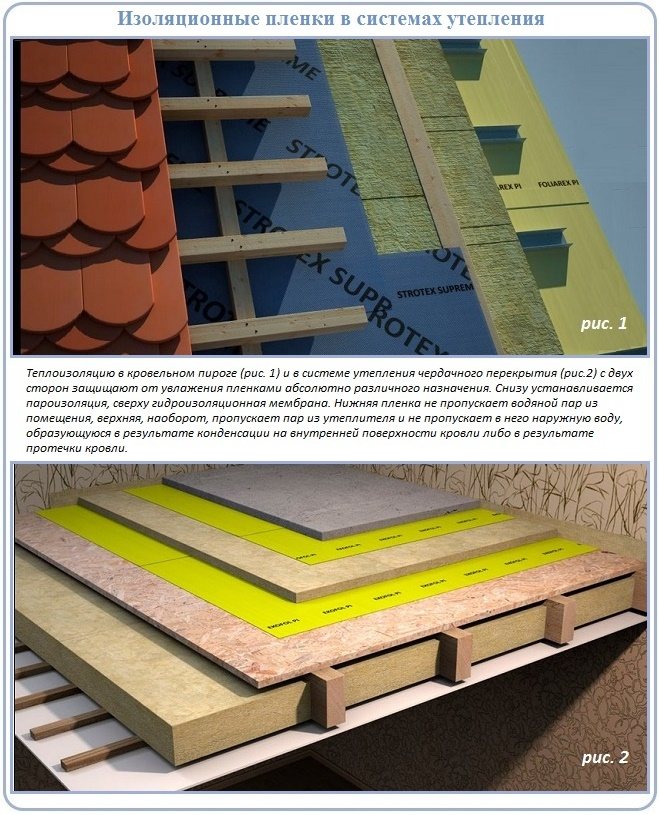
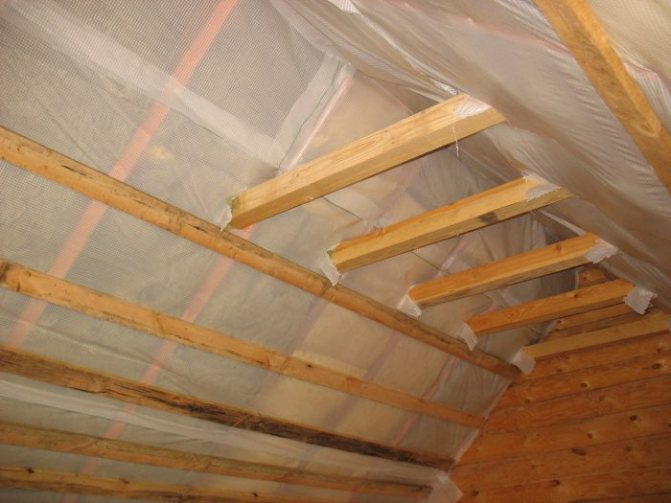
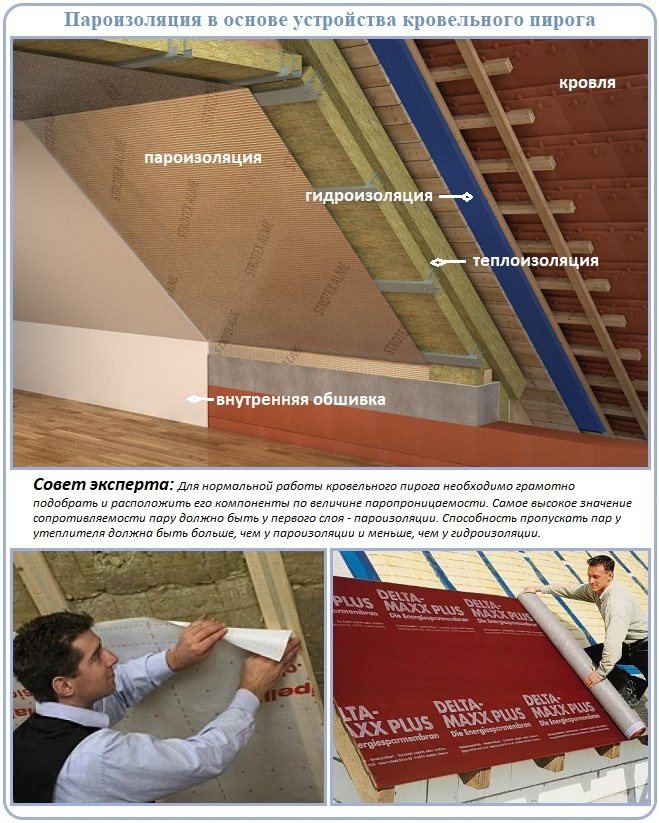
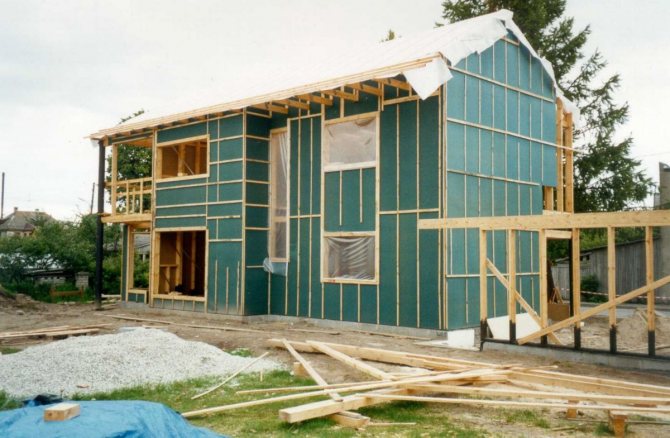
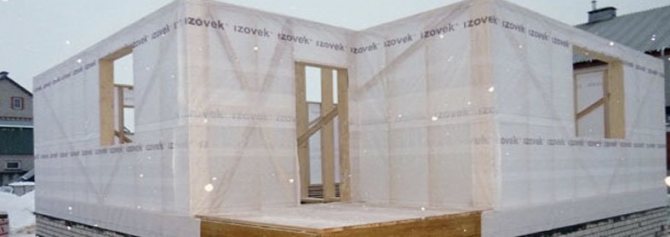
The cake of the insulated roofing system is a multi-layer structure, each component of which is obliged to flawlessly perform the work entrusted to it. Its main component is represented by insulation, to protect it from getting wet from above and below, insulating films are installed, ventilation ducts are arranged.
The upper and lower protective layer of roofing insulation perform different types of work:
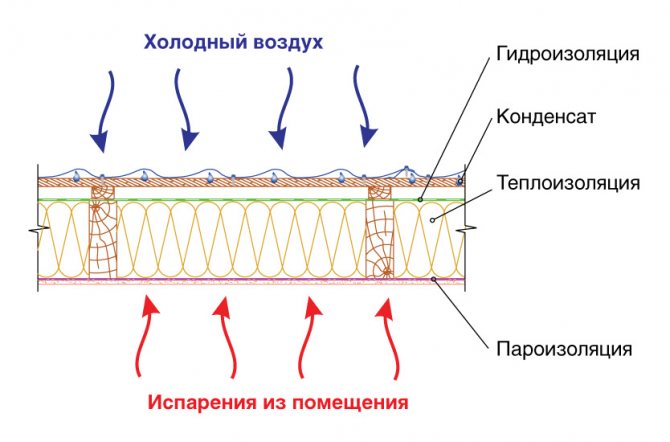
- The barrier laid on top protects the thermal insulation from atmospheric water that falls in the form of liquid precipitation and forms when snow deposits melt. This layer is called waterproofing, it prevents moisture from penetrating from the outside of the insulation system, but does not prevent moisture that has adhered from the inside to freely leave the insulation.
- The insulation installed at the bottom protects the insulation from household fumes generated during the operation of the premises, during cooking, taking hygiene procedures, etc. This is a vapor barrier designed to prevent steam from entering the thermal insulation layer.
The vapor barrier does not let in at all or allows a minimum of vapor to pass through. The functional purpose of the waterproofing is to conduct the vaporous water coming from below. Hence the difference in structure, and differences in the work performed by the materials.
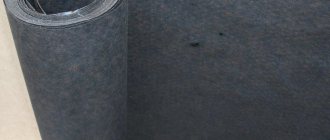
Waterproofing materials
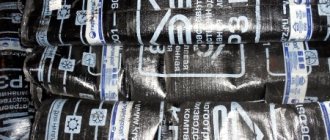
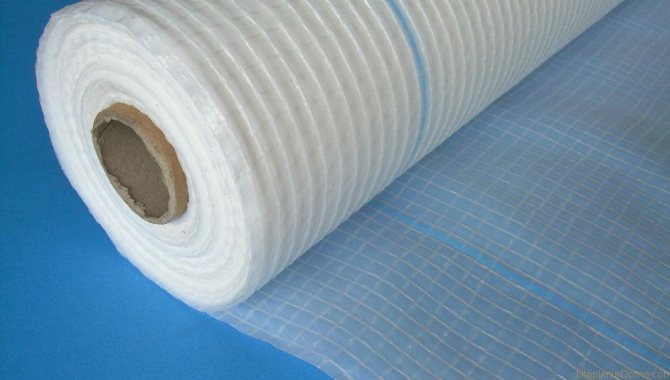
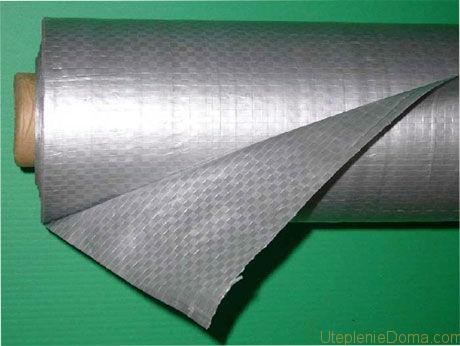
These are also mesh-reinforced film coatings made of the same polymers. They are of the following types:
- universal
(never letting water through and in any form); - anti-condensation
(equipped with a layer of viscose and cellulose cloth, perfectly absorb water and retain it, while drying quickly); - micro-perforated
(have low permeability, require special installation); - with membranes
(protects from moisture from the atmosphere, but does not release steam from the room).
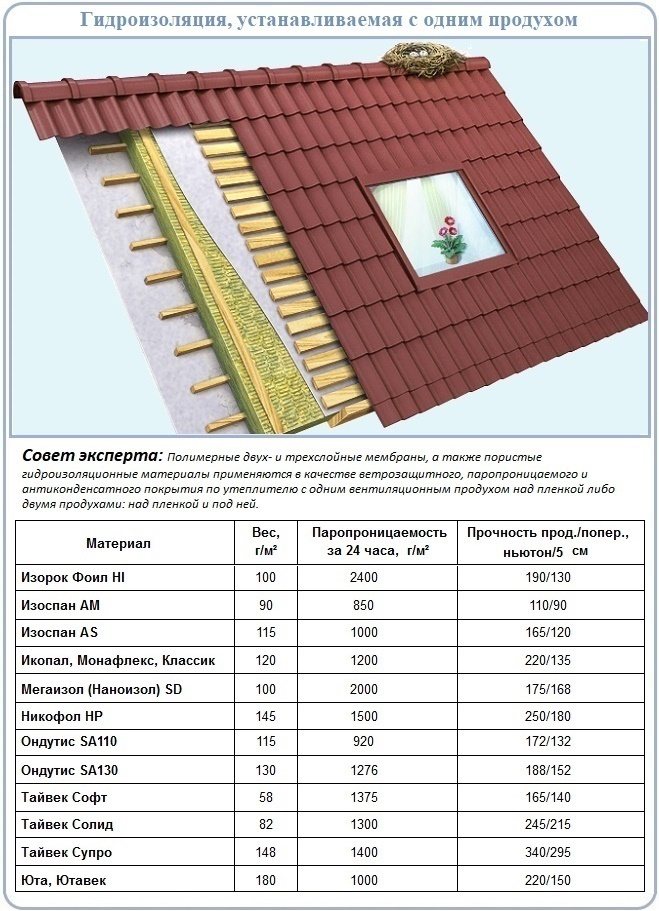
Water vapor permeability as the main indicator
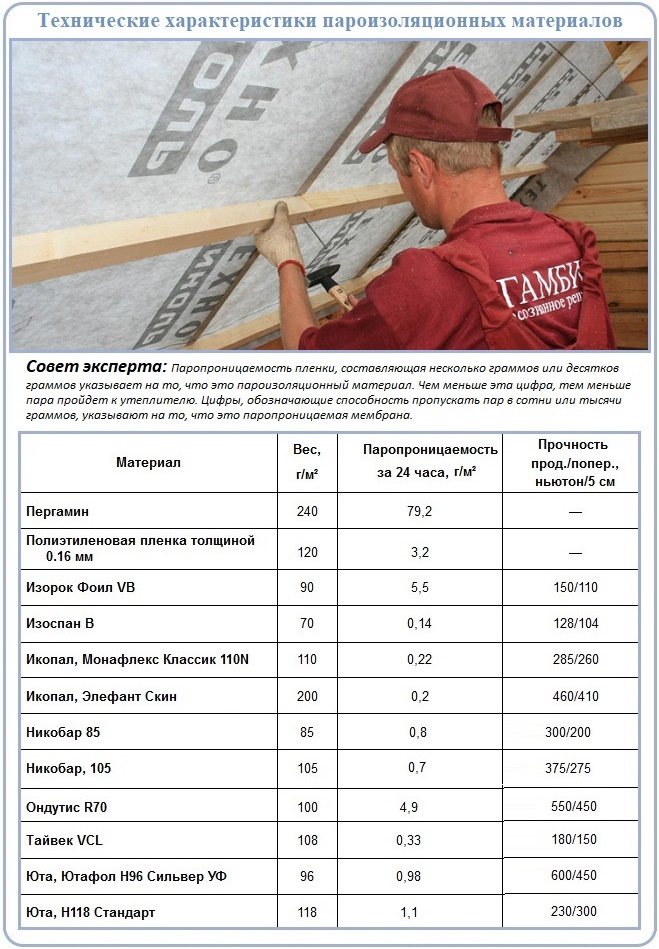
Water vapor permeability is one of the main characteristics of insulating roofing films, influencing the choice and determination of the place for their installation. It is indicated by the manufacturers of materials in the technical documentation, it is indicated in grams or fractions of a gram, which 1 m2 of roll insulation can carry out per day (mg / m² per day).
Based on the ability of protective materials to pass steam, they are divided into two main classes:
- Vapor permeable. Includes all types of waterproofing membranes. The ability to conduct steam is calculated in hundreds and even thousands of milligrams.
- Vapor tight. Includes polypropylene and polyethylene films, anti-condensation membranes. Their ability to pass steam is equal to fractions of a milligram, several units or tens of milligrams.
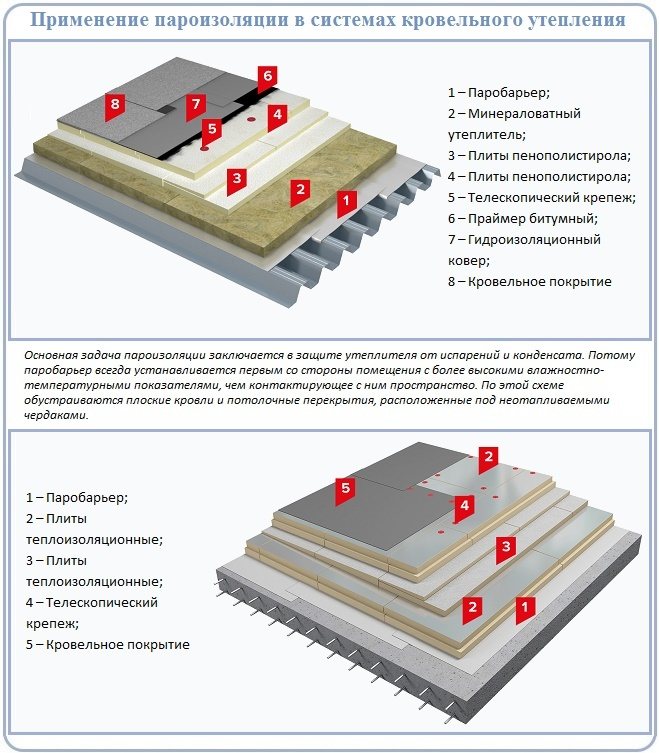
According to building regulations, the components of the roofing cake are selected so that their vapor permeability increases from the inside to the outside. Those. the lowest vapor permeability indicators should be possessed by the lower film.
The insulation should be endowed with more steam permeability than the vapor barrier, but they should be less than the waterproofing. The described structure of the roofing cake is necessary so that all moisture that may be in the thickness of the thermal insulation does not linger there and is freely removed outside the roofing system.
In a well-arranged pie, everything that managed to break through the vapor barrier rushed through the insulation to the waterproofing, which freely passes steam outside the structure, but excludes the penetration of rain drops and melt water into the thermal insulation.
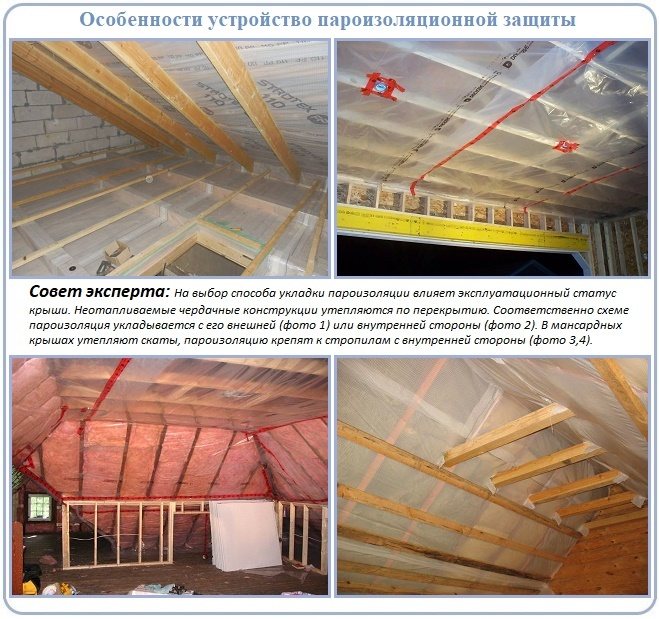
A similar principle is observed when arranging partitions and ceilings installed between rooms with different operating conditions. Simply put, between the heated rooms and the cold attic, a thermal insulation system should be arranged, deployed with a vapor barrier to the dwelling.
If, within one floor, a room with standard operating conditions is adjacent, for example, to a steam room of a Russian bath, then a partition is insulated between them by installing a vapor barrier film first from the steam room.
However, for the flawless organization of the roofing system, it is not enough to divide the materials into classes according to their ability to block or easily part with steam. It is imperative to find out what materials are used as undercoat films, what is the difference between the methods of vapor barrier and waterproofing, how the technology of their laying is implemented.
The main differences between vapor barrier and waterproofing
Vapor barrier protects the structure from internal factors affecting the structure in the form of accumulated moisture, or condensate released during life, or temperature drops. Waterproofing is designed to protect buildings from the external effects of precipitation and groundwater. The main task is not to let water inside the house. Waterproofing has a wider spectrum of action, not only does it perform functions of isolation from external factors, but it must also have properties and remove accumulated moisture outside. In addition to its protective and protective functions, any structure itself also needs protection, while acquiring the properties of a multilayer cake. The more layers are used, the higher the protection. In addition to the protective properties of products, one should not forget about ventilation. Ventilation can be natural or forced. The higher the ventilation capacity, the more reliable and durable the structures will be used. Natural ventilation is used in the construction of roofs, the use of insulation materials for walls and in basements. Its features are the construction of special air spaces between the insulation and waterproofing for air penetration and removal of accumulated moisture in the insulation. Air cushions are arranged exclusively from the side of waterproofing materials, since waterproofing implies not only protection from external factors, but also moisture removal from the inside of the room. Vapor barrier, on the other hand, has the function of exceptional protection against moisture both from the inside and from the outside.
Types of vapor-tight options and their characteristics
Previously, the only vapor barrier option was glassine, which permits an average of about a hundred mg / m² per day. For the construction of a vapor barrier from it, the roofer had to show miracles of dexterity, because the material was easily damaged during installation.There was a problem when joining strips of glassine into a single canvas and when wrapping structures of an uneasy shape.
Glassine was replaced by polyethylene, later polypropylene, more precisely, a film made of it, was introduced into the vapor barrier sphere. It was they who became the basis for the development of an extensive line of polymer membranes used in vapor and waterproofing. The new generation of insulating materials is ahead of its predecessors in terms of strength, UV resistance and unstable temperatures.
The list of polymer vapor barrier types includes:
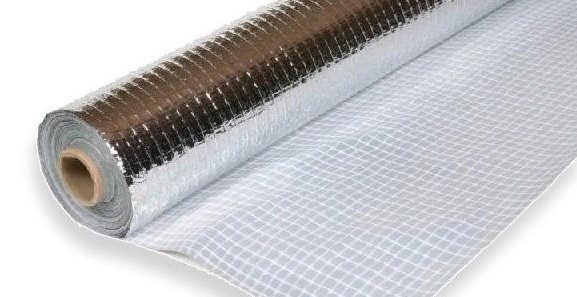
- Foil membranes... Materials with a metal sheath arranged on the working side. They are used in the arrangement of hygienic premises requiring the preservation of the temperature obtained during heating: saunas, steam rooms. The foil surface can serve as a reflector of heat waves if a gap is left between it and the skin without ventilation.
- Anti-condensation films... Roll materials, one side of which has a rough texture, the other is smooth. A rough surface excludes the formation of dew on the vapor barrier, a smooth surface prevents the return flow of moisture that has penetrated or formed in the insulation.
- Films made of polypropylene and polyethylene... Most often, these are reinforced analogs of outdated polyethylene and polypropylene options. They are used in low-cost construction, although at a price per 1 m2 they do not differ too much from new polymer vapor barrier materials.
Vapor barrier materials with a vapor permeability of several tens of mg per 1 m2 per day are still used in thermal insulation systems for cold attics, insulated with backfill material, for example, expanded clay. If there are real restrictions in the construction budget, then this type can be used in the arrangement of heated attics.
However, the difference between the cost of polyethylene with propylene and membrane barriers is such that there is little sense in such savings. In addition, new types of vapor barrier protection are much stronger, they are difficult to damage if carelessly moved during installation. Anti-condensation membranes serve almost as long as roofing, i.e. during the entire operation of the roof, it will not be necessary to carry out major repairs.
Video of installation of vapor barrier materials
The line includes hydro and vapor barrier films and superdiffusion membranes. The film Grand Line H98 has a number of advantages - the installation pattern, side of installation, overlap boundaries are indicated on the roll. Manufactured from primary raw materials.
Folder products contain several types of material:
- Folder Steam Regulator - This material can provide controlled vapor transmission, keep the vapor barrier level and allow excess moisture to pass through as much as possible.
- Alum H90 is a reinforced film with a foil layer that allows you to keep heat in the room and at the same time remove excess moisture.
- H98 - has a laminated layer, can be used with any thermal insulation material.
The Tyvek line includes two vapor barrier membranes:
- Tyvek® AirGuard® Reflective is completely air-tight. This membrane has been designed to work more efficiently for thermal insulation. Condensation is minimal.
- Tyvek® AirGuard® SD5 is a material with limited vapor permeability, thereby reducing the risk of condensation and condensation.
- DELTA-DAWI GP is a simple single layer polyethylene film.
- DELTA-NEOVAP 20 is a film with a reinforcing layer, due to which the risk of damaging the vapor barrier becomes much lower.
- DELTA®-REFLEX PLUS / DELTA®-REFLEX is a film with almost zero vapor permeability. This ensures that condensation does not enter the thermal insulation. This material also reflects heat back into the room.
Insulation from Icopal Fel'X is a material consisting of three layers - polypropylene, sbs-modified bitumen and a non-woven base. These layers provide strength, water resistance and protection to the roofing cake.
The assortment includes several products:
- Izospan FS - consists of dense non-woven and metallized polypropylene film. Protects the structure from steam and also reflects heat into the building.
- Izospan B has two layers, the first layer is smooth, the second is rough, capable of retaining condensate.
- Izospan D is a two-layer membrane. Serves as a hydro and vapor barrier. The material is very durable and has high UV stability.
- Izospan DM - this material combines the functions of wind protection, waterproofing and vapor barrier. Consists of three layers.
One of the economical materials. The line includes Optima B - vapor barrier, Optima C - provides vapor and waterproofing and Optima D - universal waterproofing and vapor barrier material with increased strength.
A three-layer membrane, has a high vapor permeability, quickly removes moisture and protects the insulation.
It is a fabric with the addition of a UV stabilizer and a protective layer.
- Ondutis B (R70) Smart is a classic film. It performs all the necessary functions, protects insulation and removes moisture.
- Ondutis D (RV) Smart - this film can be used as a vapor barrier on a warm roof and as a waterproofing for a cold one.
You can see more details about the installation of vapor barrier materials in the next video.
Properties and types of vapor-permeable membranes
The main difference between polymer membranes for waterproofing and materials for vapor barrier is that they freely let out steam and condensate formed in the thickness of the insulation due to the difference in temperature indicators under and above the insulation system. A material has not yet been invented that can prevent the appearance of moisture in thermal insulation. However, there are technologies that allow you to get rid of water in the roofing cake, and materials for the implementation of such schemes.
As already mentioned, waterproofing is placed on top of the insulation. Place it under the roof. Between it and the heat-insulating layer, a ventilation gap is arranged or not, depending on the material used in the organization of the system.
The types of vapor-permeable, otherwise called vapor-transparent materials that are in demand in construction include:
- Perforated Films... Roll materials with specially shaped holes that allow steam to escape, but do not let water through from the outside. They serve mainly as insulation of stingrays above cold attics, because cannot fully perform waterproofing and windproof functions.
- Porous membranes... Materials with a fibrous structure, similar in structure to a filter. The vapor permeability indicators of this type depend on the pore diameter and the ability of the fibrous tissue to transmit vapor. This type of waterproofing is not used where there is a possibility of clogging the pores from excessive dust content.
- Superdiffusion membranes... The thinnest multilayer membrane systems, each layer of which does a specific job. There are no holes in their structure that can be clogged with dust, therefore the materials of this group have the highest resistance to all kinds of pollution.
Super diffuse membrane insulation is available in two or three layers. Two-layer varieties are inferior to three-layer brothers in terms of strength, because one of the reinforcing substrates has been removed from their structure. In terms of cost aspects, both options are not very different, therefore, if possible, it is better to choose a three-layer material.
Porous and super diffusion materials, together with waterproof duties, play the role of wind protection. They prevent the winds from "washing away" the heat from light fibrous wadding insulation. Perforated films do not do this work, therefore, when using mineral wool for insulating slopes, they require an additional windproof carpet, which sometimes nullifies the initial savings.
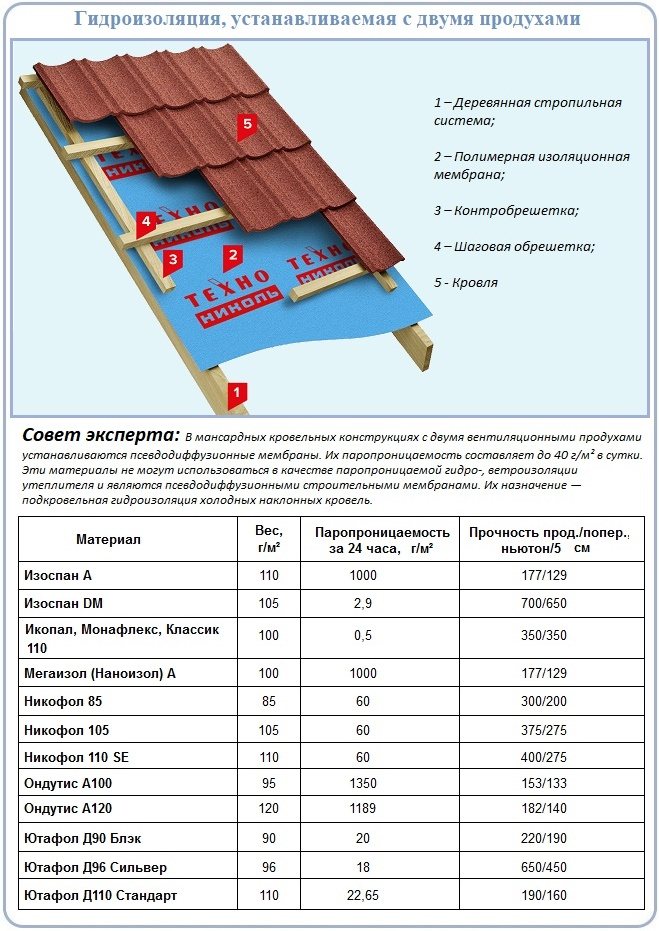
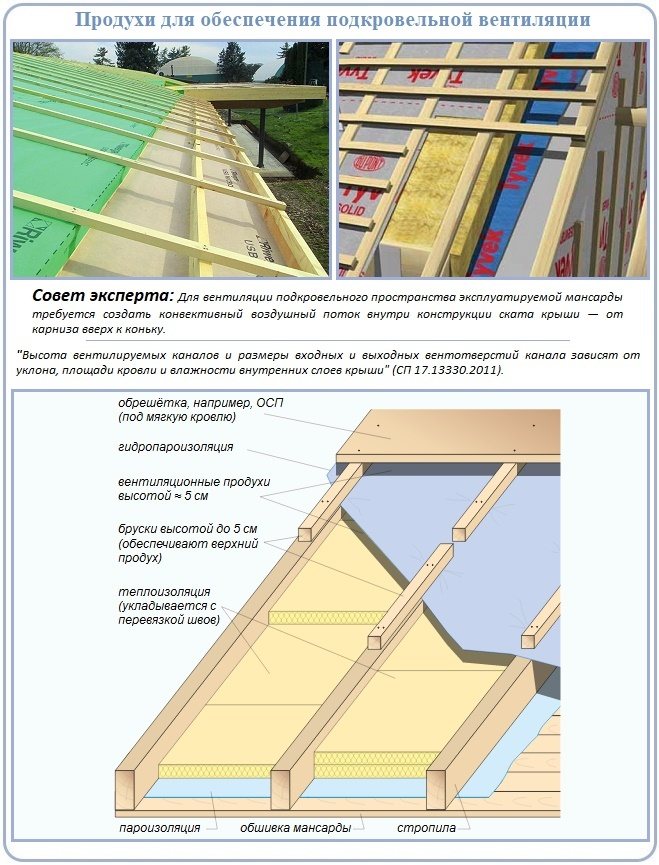
The installation of under-roof waterproofing must be accompanied by the device of a ventilation system, which is:
- Sibling... Predetermining the organization of ventilation ducts, air vents, between the waterproofing barrier and the roof covering. It is arranged using superdiffusion and porous membranes, which are not forbidden to come into close contact with any type of insulation.
- Two-tier... Assuming the organization of two levels of vent. channels located between the thermal insulation and the hydro-barrier, then between it and the coating. the scheme is typical when using perforated films
Air - ventilation ducts located parallel to the pitched roof are arranged by installing a wooden slat with a wall height of at least 4 cm. For a two-level system, the river is fixed in two tiers: above the insulation and above the waterproofing. The lathing formed with its help at the same time fixes the roll insulation, and also serves as the basis for laying the roof or solid flooring for soft types of coatings.
What's the difference?
Steam from water is constantly generated in nature. It rises in the bathroom during water procedures, any washing, cooking almost any food. Even breathing is essentially steam. And if there is no special protection from it in the room, then the existing insulation will absorb moisture, which will then condense and lead to the walls becoming covered with mold, darkening from dampness, and the insulation itself will simply fall off. What is the difference between vapor barrier and waterproofing? Everything is elementary. The first protects the house from internal moisture. And the latter does not allow water from the external environment to get inside, protects insulating materials from any condensation, precipitation formed under the roof. These can be the consequences of heavy rain, melted snow, any pipe leaks. It is waterproofing that is designed to extend the durability of the building and enhance its reliability, to ensure a convenient and high-quality use of equipment and buildings.
The nuances of laying under-roofing films
We found that waterproofing materials covering the cake from atmospheric negativity can be installed with one or two ventilation gaps. They are needed so that moisture does not accumulate in the multilayer roofing system, but is freely removed by the air flow through the vents formed by the slats.
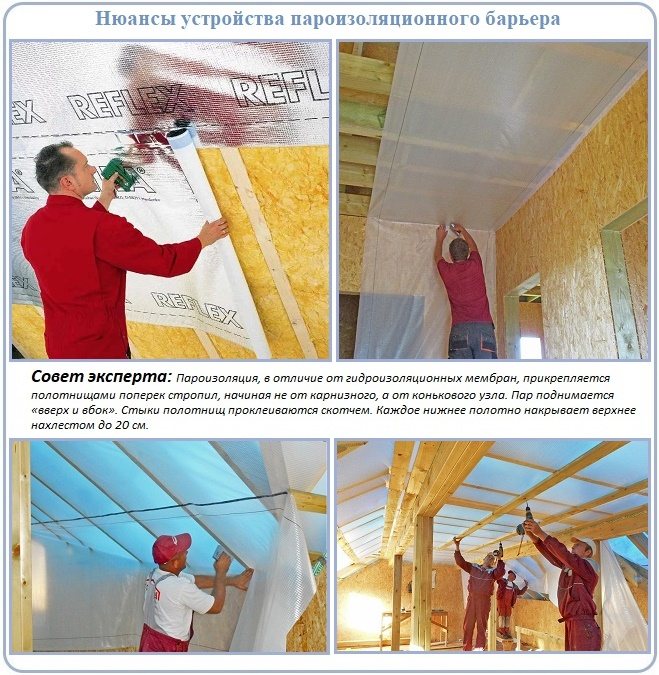
An equal function is performed by ventilation gaps accompanying the installation of vapor barrier films. Regardless of the structure and composition of the material, they are installed with two tiers of ventilation located on both sides of the vapor barrier. Due to its low vapor permeability, this layer requires enhanced ventilation.
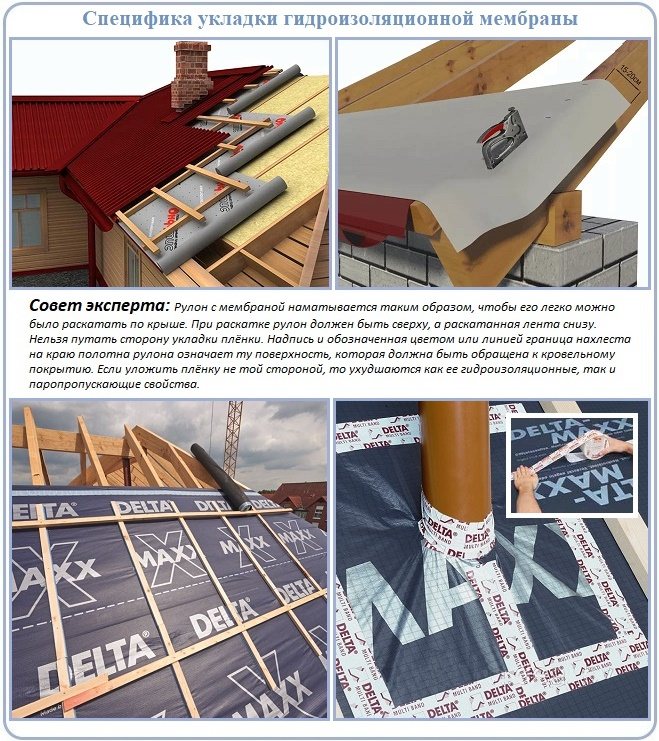
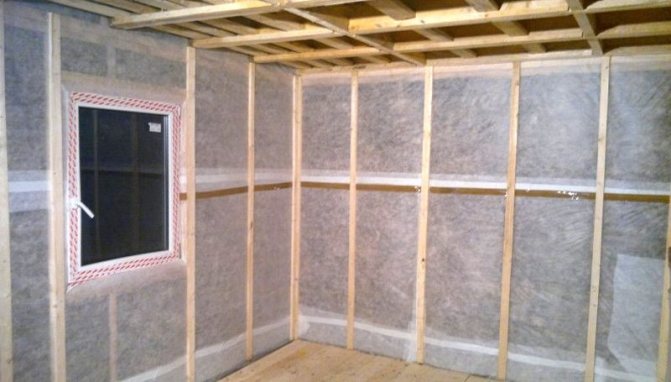
Most roofing films do not stretch under tension. Therefore, they are laid on the rafter frame so that the roll insulation sags somewhat in the space between the rafters. Sagging is necessary to prevent the material from cracking under tension during the standard movement of wood systems.
The sheets of waterproofing are spread depending on the steepness of the structure. On steep roofs, the material is laid along the rafter legs; on flat roofs, it is placed parallel to the ridge run. The vapor barrier strips are installed exclusively parallel to the ridge.
The strips are laid with an overlap, the size of which is indicated by the manufacturer of the insulation product. On the rolls, the side according to which the strips should be installed must be indicated. It is strictly forbidden to change sides, because as a result, the steam and water insulation properties will change.
When installing a water protection, laid parallel to the ridge rib, they start from the line of the cornice. For proper arrangement, the edge of the starting waterproofing strip should protrude from the edge of the cornice by 10 cm at a minimum. It is then taken out under a drip or cornice bar.The strips are laid so that the overlap of the upper panel overlaps the edge of the lower one.
The construction of a vapor barrier begins from the ridge rib. Each next panel must overlap the edge of the previous one. If you follow the described technique in the device of both types of insulation, a minimum of water gets into the insulation.
Types of vapor barrier films
Laminated vapor barrier.
Consider the types of vapor barrier:
- reinforced - a film into which a polymer mesh is pressed under high temperature;
- laminated - polypropylene yarn fabric laminated with polyethylene;
- with aluminum spraying - additionally fulfills the tasks of reflective insulation.
The production method does not affect the principle of operation of the vapor barrier, but only determines the mechanical strength of the material. One of the main requirements for films is a high degree of strength. Most popular manufacturers:
- Izospan;
- Polinet;
- Izovek;
- Technohaut;
- Juta.
The price of the cheapest roll is a little over 1 thousand rubles, the highest price can reach about 7 thousand per roll, while it is not a fact that by paying more, you are guaranteed to get the best effect. In our country, there is no single protocol of film testing methods, so a constructive comparison of different manufacturers is simply impossible. First of all, this concerns the declared characteristics of materials, which are determined by everyone as they please, just to get the desired (necessarily high) result.
If you need to quickly close up a leak, then cold welding for radiators is the best option.
You can read everything about the device of the radiator tap here.
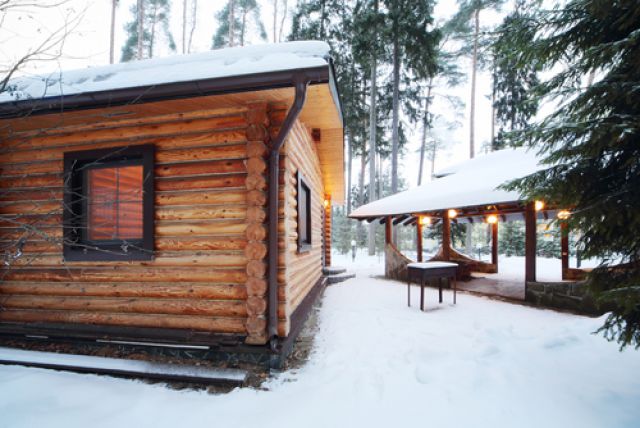
Bath building algorithm
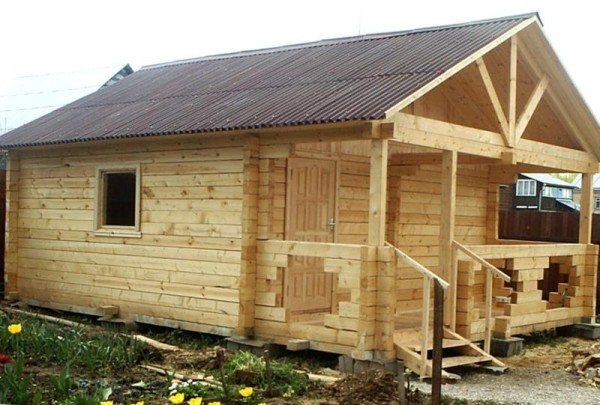
Do you want to build a bathhouse, but do not know what material is best to use to implement your idea? Then be sure to pay attention to the timber. A bath made of this material will be environmentally friendly, reliable and durable. At the same time, you can handle the construction of such a structure with your own hands.
There is absolutely nothing complicated in self-building a bath from a bar. This material has many advantages over its closest analogue - a rounded log (log house). Among the main advantages of the timber, the following points should be noted:
- all work on the construction and further decoration of a bath from a bar can be performed without the help of outside specialists;
- timber gives minimal shrinkage compared to all other wood-based materials;
- the construction of a bath from a bar will require a much more modest financial investment compared to most other popular materials;
- prefabricated timber may initially have fasteners and you will only have to assemble individual elements into a structure of the desired size, like a designer.
However, in order for a timber bath to fully demonstrate all its advantages and serve for the longest possible period, you must responsibly and competently approach the choice of building material.
The most important operational parameters of the finished steam room directly depend on the quality of the wood. First of all, pay attention that the logs are intact. No cracks or other defects are allowed. Even minor damage can lead to big troubles in the future, as a result of which the wood will rot and collapse.
Log and bar profiles
Make sure that there are no blue spots on the surface of the wood. Such defects indicate the presence of rot inside the material, the development of which, in most cases, is provoked by a variety of pathogens. It is impossible to use such material for the construction of a steam room and any other building.
There should be no noticeable traces of damage by beetles and other pests on the timber.
A high-quality timber has a perfectly flat and smooth surface. It is strongly recommended to refrain from buying material with distortions and any other damage - when laying the crowns, all deviations will clearly manifest themselves.
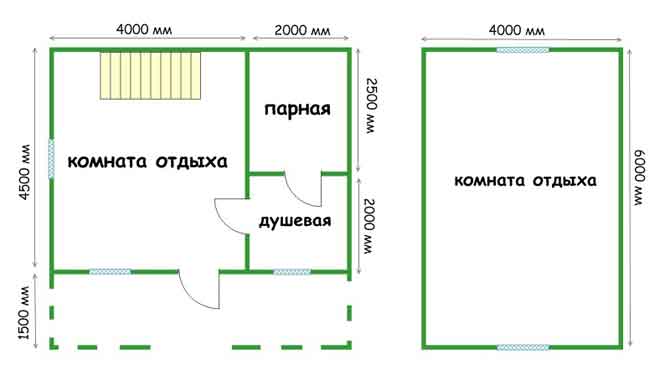
Pre-compose yourself, order or find a bath project in an open source. Calculate the required amount of building materials for the project and start building a bath from a bar. Start by arranging the base.
The first stage is the foundation
The finished wooden steam room will have a relatively low weight, which makes it possible to abandon the arrangement of monolithic buried foundation structures. A timber structure will feel great on an ordinary strip or columnar foundation.
To equip the base of the tape type, dig a trench around the perimeter and under the walls of the future structure, fill the bottom of the pit with a sand and gravel mixture, lay a reinforcing mesh, install the formwork and pour concrete. The optimal foundation depth is 70-100 cm. When choosing a specific depth, be guided by the soil freezing indicators for your region.
Strip foundation - erection procedure
The structure of a monolithic strip foundation
The foundation should rise above the ground by at least 50 cm - this will provide the necessary protection of the lower rims from excessive moisture.
Place sand and gravel strips within the perimeter of the base strip. In the future, you can fill them with concrete or build a wooden floor - choose a specific option at your discretion.
To arrange a columnar foundation, it is necessary to erect supports made of bricks or concreted asbestos pipes around the perimeter, in the corners and under the future inner walls of the bath. Under each such support, you should first equip a concrete "pillow". Place the posts in 150 cm increments.
The device of the support-column foundation
Regardless of the type of base chosen, it must be subject to additional reinforcement.
Features of a columnar foundation with a grillage
Varieties of schemes for constructing a columnar foundation
Let the concrete gain strength within 3-5 weeks and proceed with further work.
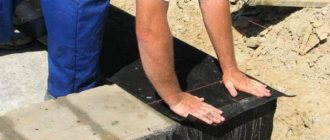
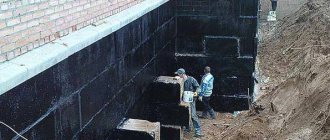
The second stage is waterproofing the foundation
Waterproofing the strip foundation with a special compound
Apply molten bitumen to the surface of the base, and on it - a layer of roofing material. Let the bitumen harden and repeat the operations done. As a result, you get a reliable two-layer moisture protection.
Before proceeding with further work, saturate all wooden elements with an antiseptic. Such processing should be carried out after the preparation of the cuts for fastening the beams, if such cuts were absent initially.
Third stage - first crown
Laying the first crown from a bar
Start laying the first crown of the walls. To do this, first place slats up to 1.5 cm thick, pre-treated with an antiseptic, on the waterproofed base.Place the slats in steps of about 30 cm.
Place the first circle of beams on the slats. Thanks to the slats, contact of the timber with the bath foundation will be excluded. This will provide additional protection against wood decay and will significantly extend the life of the material.
Assembly diagram of the first crown of a log house for a house from a bar
Lay the first crown without securing it yet. Make sure that it is laid correctly and evenly using a square and a level.
Align the lower rim bars if necessary, and then attach them to the foundation. There are several ways of fastening. The most optimal and frequently used method involves fixing the timber with anchor bolts.
However, developers quite often refuse to attach the lower beam to the foundation.In practice, the structure stands perfectly well without fixing the lower crown, supported by its own weight. The advantage of this solution is that in the future, if necessary, the bar of the lower rim can be replaced with much less effort.
Blow out the space between the first crown and the base with polyurethane foam.
Bath from a bar with your own hands
The fourth stage - the rest of the crowns
For laying out the walls of the bath, a wooden beam with a section of 15x15 cm is perfect.
Cover the first crown of the bar with thermal insulation material. Jute or moss are traditionally used for insulation. You can also use tow. In the case of using moss or tow, the thermal insulation should be laid out with a 10 cm overlap along the edges. In the future, you will use the raised edges for caulking.
How to build a bath from a bar
Lay the second crown of the timber and fix it with wooden dowels. Pre-drill the mounting holes of the appropriate diameter. Usually the length of one dowel is enough to fasten 2-3 rows of timber.
Lay out the walls to the required height. Every 3-4 rows, check the structure with a square and a building level. Place a seal between the rims.
How to assemble the walls of a log house
The two upper rims do not need to be fixed. The wood will shrink. Ceiling beams can only be installed after the wood has shrunk. To install the beams, the upper rims will need to be dismantled.
Fifth stage - door and window openings
How to make door and window openings
There are two options for arranging openings for mounting doors and installing windows.
In accordance with the first variant, the aforementioned holes are created after the completion of the construction of the log bath. To do this, you must first leave small gaps in the crowns in the places where doors and windows are installed. The dimensions of the gaps depend on the dimensions of the installed products.
Door and window openings
After the completion of the construction of the bath, you will simply have to make openings with a chainsaw for mounting doors and windows.
In accordance with the second method, the openings for doors and windows must be left even during the construction of the bath. This option requires more time and effort. To accomplish the task, you will need to use special grooves and bars with end cuts.
Therefore, whenever possible, experts recommend giving preference to the first method of creating openings.
Sixth stage - caulking
Leave the finished lumber box for "wintering" for 6-7 months. During this time, the wood will shrink sufficiently. For the period of "wintering" cover the timber with boards and slate.
If you used tow or moss as a mezhventsovy sealant, you can skip this step of the instructions - you will most likely not need an additional caulk in your bar bath.
However, experts recommend that you still study the state of the structure. If you find noticeable gaps, be sure to caulk. To do this, twist the tow or moss into a bundle and insert the material into the gap, followed by compaction.
You can also use jute sealer to fill gaps. By most indicators, this material is superior to tow and moss, but it costs a little more.
Seventh stage - roof
The roof should become a reliable protection for your log bath. You can start arranging the roof structure only after the wood shrinks, otherwise the roof will lead and it will be significantly deformed.
First step. Place timber beams on top of the top wall rails.
Second step. Attach the rafter legs in 100 cm increments to the fixed beams. To connect the rafters in the ridge part of the roof, cut them at the required angle.
Installation of a gable roof for a bath
Step three.Nail a solid plank flooring to the rafters (if soft roll material will be used for finishing) or build a sheathing (if you plan to trim the roof with tiles, slate or other sheet material).
Methods for joining rafters
Fourth step. Install the final roofing according to the instructions for the selected material.
How is the roof of the bathhouse made
Fifth step. Cover the ridge with galvanized iron. This will protect it from adverse environmental influences.
Sixth step. Sew up the roof gables with suitable materials at hand - clapboard, wooden board or siding. In this moment, focus on your individual preferences.
After completing the roofing work, proceed with insulation and other insulation work, interior decoration and arrangement of the steam room in accordance with your project.