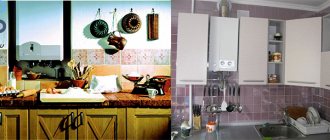
Problem number 1: inflow does not work. How to check ventilation?
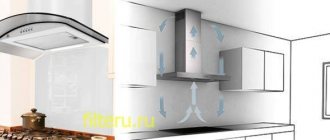
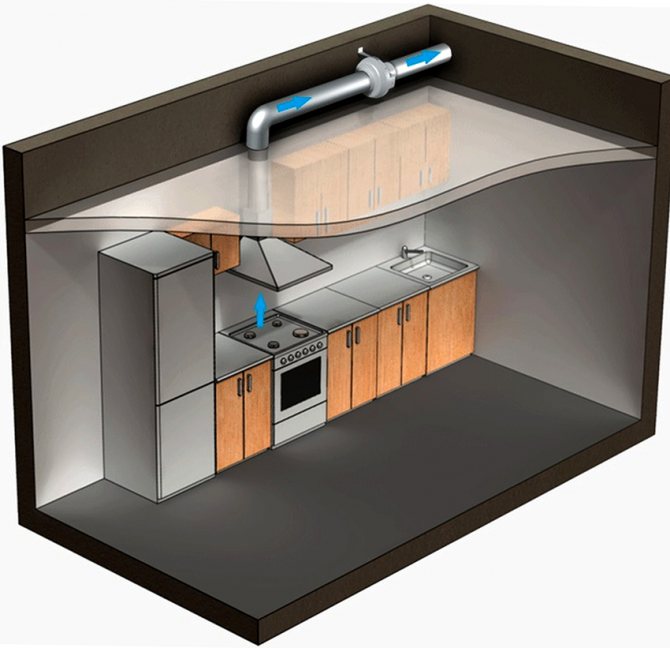
Ventilation is proportional air exchange.
The inlet acts on the hood, “pushing out” as much air as it has received.
But often the flow in our apartments is simply not enough. The reason is that in an effort to insulate their homes, almost all residents of apartment buildings install plastic double-glazed windows.
Windows with sealed frames, unlike wooden ones, do not allow air to pass through. They really allow to reduce noise from the street, prevent drafts, and look more aesthetically pleasing. But at the same time we are left without ventilation.
How can I check this? Try to open a window and attach a piece of newsprint or napkin to the ventilation grill. The leaf will be attracted. And if you close the window (that is, remove the inflow), the napkin will immediately fall to the floor.
That is, we provide an inflow = we start the hood.
However, keeping windows or vents constantly open is not the best solution, especially in the Ural climate. We simply run a "piece of the street" into the apartment (with fresh air, but at the same time with cold, and at the same time with dust and noise of city streets).
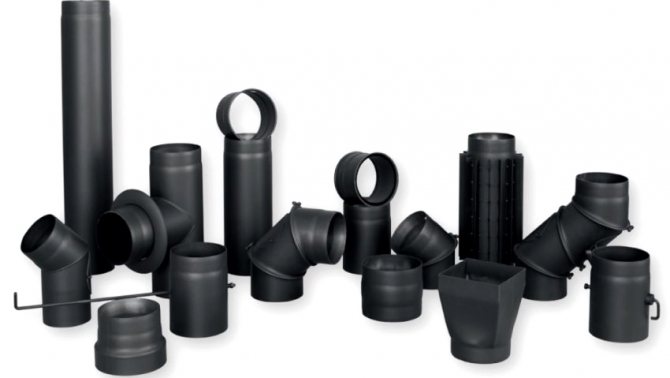
Hood pipes: tips and tricks for choosing
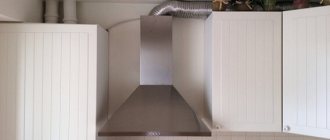
When choosing pipes for an air duct, most consumers are primarily guided by aesthetic considerations, which is quite justified. Therefore, before buying, it is recommended to determine exactly how the box will be mounted: outside or behind furniture, behind a false wall or above a false ceiling.
A shiny corrugated pipe definitely spoils the interior of the kitchen very much, so if we are talking about an open location, then most often they choose smooth plastic pipes that can be painted in a color that matches the design of the ceiling or walls. A rectangular or square pipe for the kitchen fits most beautifully into an open interior. A round hood is less aesthetically pleasing, but it creates minimal resistance to airflow, minimizing noise.
If we are talking about a hidden method of laying, then it is better to give preference to a corrugated metal pipe. It is much easier to mount, since no adapters and angles are required. If it is necessary to overcome an obstacle on the way to the ventilation duct, it is enough to simply bend such a pipe. However, additional costs will be required to mask corrugated products. In addition, if access to the duct is required, then the entire conspiracy will have to be dismantled.
Forms and sizes of ventilation pipes: selection rules
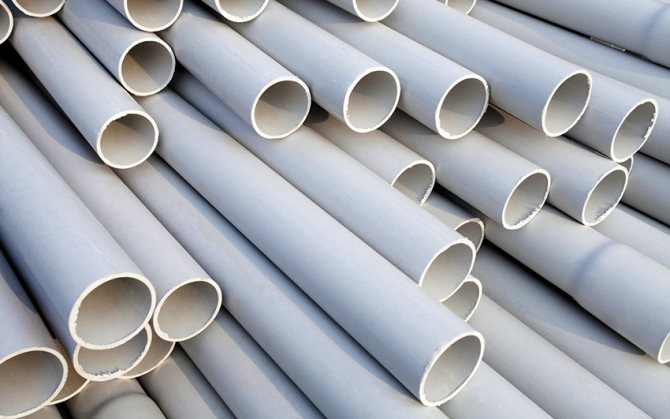
The diameter of the round ventilation pipes should correspond to the section of the outlet on the kitchen hood. It should be remembered that it is the round ducts that create the minimum resistance to the air flow. As for the shape, a straight pipe is optimal, however, sharp corners are not allowed when installing the air ducts.
Plastic pipes with a circular cross-section can have a diameter in the range of 10-20 cm
The ideal duct length should be no more than 3 m. If this figure is higher, then the fan must be of maximum power. The diameters of the corrugation used in household ventilation are 10, 12.5 and 15 cm.
The standard sizes of plastic pipes for square and rectangular ventilation are as follows: 8 × 8, 10 × 10, 12.5 × 12.5, 5.5 × 11, 5 × 12, 6 × 20.4 and 9 × 22 cm.Diameter plastic pipes can be 10, 12.5, 15 and 20 cm.
Useful advice! Choosing between plastic and metal products, it is better to give preference to a plastic hood for the kitchen. Such pipes have a lower resistance to air flow, they are easier to clean, and they fit much more organically into the interior. If a concealed ventilation duct installation or operation at high temperatures is expected, then it is recommended to use flexible pipes.
How to calculate the minimum dimensions of a plastic pipe
The cross-section of square and rectangular plastic ventilation pipes should be equal to the cross-sectional area of the round exhaust pipe. If the diameter is narrowed, the performance of the system will deteriorate, the fan will be overloaded, and the noise will increase. As a result, vibration will occur and the mountings will weaken. The minimum section size is allowed only when a powerful fan is installed in the hood, but at the same time it is not used to the maximum.
Correctly selected pipe size affects the quality of the hood
It is best to take a pipe with a cross-section slightly larger than the diameter of the pipe. If the pipe diameter significantly exceeds the cross-sectional area of the nozzle, then this will entail additional costs and problems with its masking.
It is not necessary to calculate the size of the section of the hood duct. It should be equal to the diameter of the outlet. If the hood has a certain power reserve, but at the same time it is not used at full capacity, then the section can be slightly narrowed. The formula will help to calculate its minimum value:
Smin = Sр * (Qр * Qmax), where:
Smin is the minimum cross-section indicator; Sр - section of the branch pipe indicated in the product passport; Qр is the volume of air to be removed; Qmax - the maximum indicator of the volume of air to be removed, it is indicated in the hood's passport.
Qp is calculated by another formula: Qp = Vkitchen * 12 * 1.3 m³. Vkuhni is the area of the room. According to sanitary standards, 12 is an indicator of air exchange, that is, the air in the kitchen should be changed 12 times per hour. 1.3 is the coefficient of power loss in the duct and ventilation shaft.
The size of the plastic pipe can be calculated using a special formula
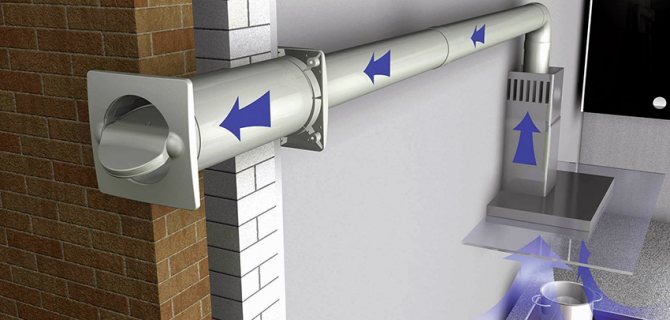
How to solve the problem and let in fresh air without opening the windows?
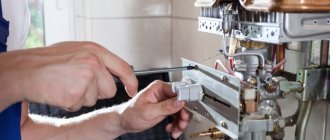
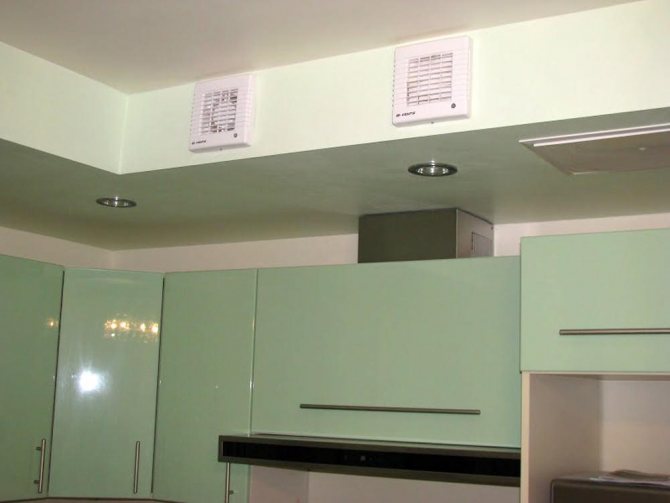
If the reason for the inoperative ventilation is insufficient supply, then some kind of supply device will help. Today there are many of them. The simplest and most inexpensive is the KIV-125 or KPV-125 valve. These are often installed in modern new buildings.
However, such ventilation does not prevent heat loss - albeit not as significant as with open windows, but part of the heated air through the ventilation shaft will be "thrown" into the street. The apartment will become cooler.
Another option is ventilators (Tion breathers) - they also perform the inflow, besides, they well clean the air from dirt, dust, exhaust gases, and even heat it up.
But they also have a drawback - significant energy consumption (in heating mode) and effective operation only when the hood is running.
You can also install air handling units. They provide the entire apartment with fresh air. Optimal for large objects. Their main disadvantage is that they are installed before finishing work and can also consume a lot of energy.
But do not forget that all these devices will be effective only if the hood is in good working order!
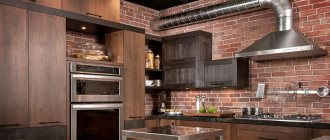
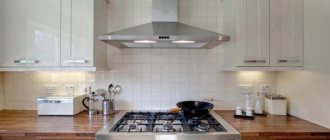
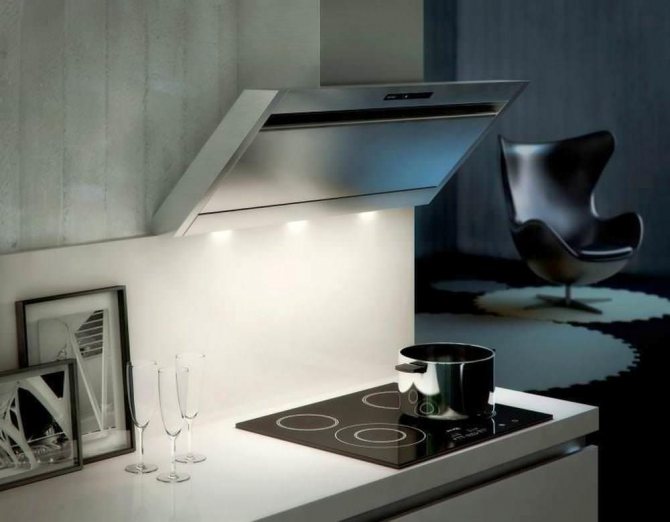
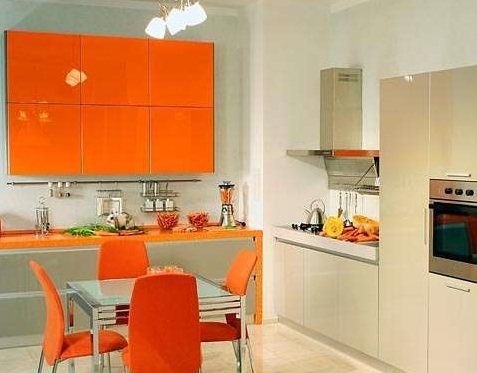
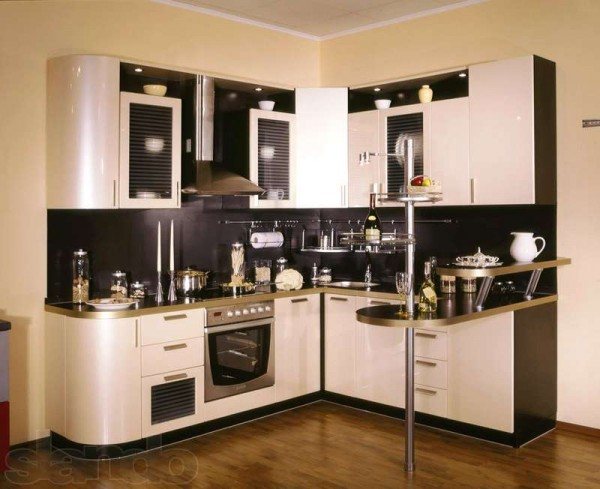
Varieties of kitchen hoods
By the principle of work
Hood types based on the principle of air movement
All hoods can be divided into two main types:
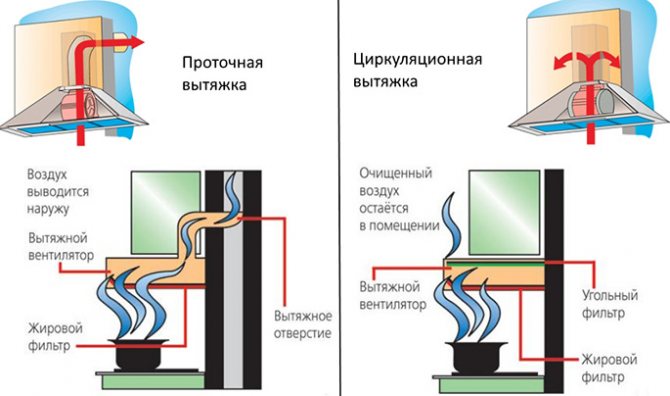
- Circulating or filtering. These are hoods operating on the principle of air recirculation. The sucked-in gas volume is filtered by various (charcoal, grease-absorbing) filters and returned to the room.
- Evacuation or retracting.Such devices draw air out of the kitchen in full. Usually they are connected by a special duct with a ventilation hole that leads to the ventilation duct of the building. An option is also possible in which a separate hole is made in the outer wall of the apartment and the air duct is brought out directly to the street.
Circulating hoods are less efficient. In addition, they require timely filter replacement. If the filters are not changed, this can lead not only to a decrease in the efficiency of the device, but also to its breakdown.
Since when the filter is clogged, the load on the fan motor increases many times, which, ultimately, can cause its winding to burn out or other types of malfunctions. The filter change mode must be indicated by the instructions for the hood.
The filter hood is suitable for heating food or for occasional cooking.
Filter hoods are advisable in those kitchens where there is no daily preparation of food, especially fried foods, soups or meat snacks, and food is only warmed up or cooked from semi-finished products.
Therefore, further we will consider hoods that remove air outside the kitchen.
The principle of operation of the evacuation hood.
Evacuation hoods are more efficient. But there are a number of difficulties here too:
- The air ducts for the hood in the kitchen must correspond to the power of the device, and this applies not only to the part that is installed in the apartment, but also to the entire ventilation duct;
- When a powerful evacuation hood is operating, adequate ventilation is required to provide an inflow of fresh air equivalent to the volume of gas evacuated from the kitchen;
- Ventilation ducts in Soviet-built houses do not meet the standards for which modern kitchen hoods are created;
- If a powerful hood evacuates the manufacturer's declared 600 - 1000 m³ / hour from your apartment, then with the windows and doors closed, this volume will be compensated for by the back draft ventilation of the bathrooms and bathrooms, filling the apartment with not the most noble smells;
- Punching an additional ventilation hole in the exterior wall of the house may require permission from the relevant authorities responsible for the proper maintenance of the building.
Important! Most of the listed difficulties are relevant for restaurant kitchens or canteens. You have probably seen large-diameter metal duct pipes coming out of the walls or windows of such kitchens. For an ordinary kitchen serving the needs of an average family, a low-power hood is enough, a Soviet-style ventilation duct for which should be enough.

Problem number 2: the hood does not work.
If the ventilation duct is not blocked, and exhaust ventilation is still not carried out (the napkin falls even with open windows, without being attracted to the ventilation grill), the reasons may be:
- blockage of the ventilation shaft (to eliminate it, you must contact the management company),
- damage to ventilation by one of the neighbors, for example, during repairs (this is also diagnosed by housing offices),
- installation in an apartment on the floor above or below equipment that carries out forced exhaust through a natural ventilation duct. For example, a powerful fan, cooker hood, etc.
In this case, the exhaust air from the neighbors is drawn out well (with a sufficient amount of inflow). But the air flow becomes so fast that it creates an air damper and prevents exhaust from other apartments.
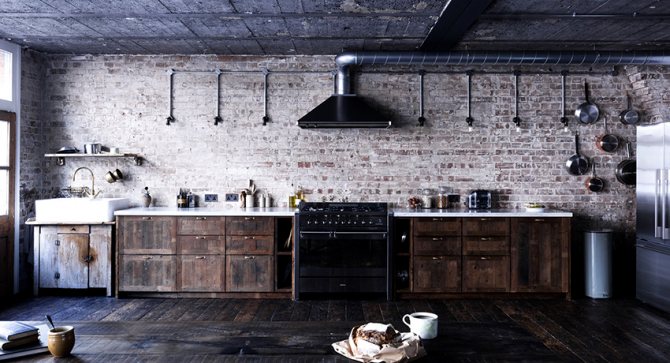
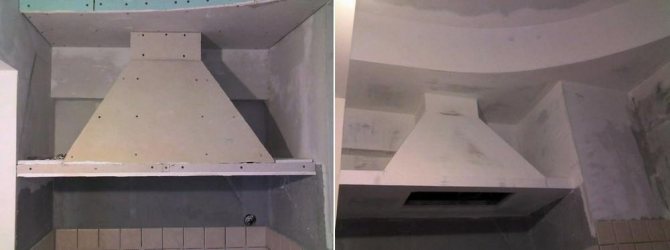
Types of decorative masking of ventilation ducts
Designer finds
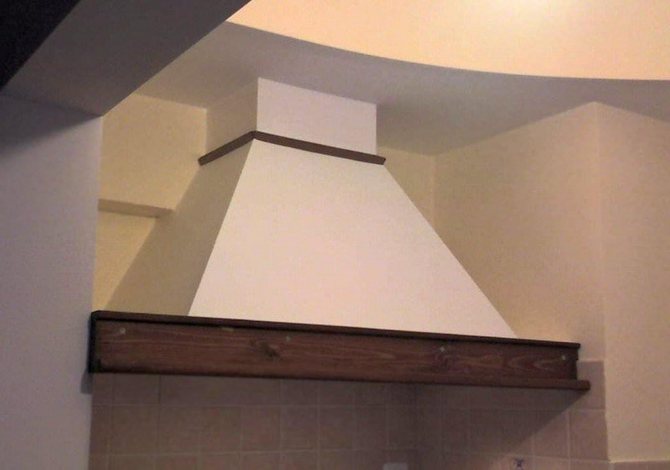
Typically, the ventilation duct, which is located in the corner, fills a large area of the workspace. This disadvantage, however, can be transformed into an advantage - the design may well have a functional purpose.
We recommend installing at this location:
- shelves for storing various spices;
- or a bracket for placing a small TV on it.
In addition, by competently developing a kitchen design with a ventilation overhang, you can build an interesting and stylish project that attracts the attention of others.
- a decorative fireplace installed in the area of the ventilation duct will look convenient and beautiful;
- another spectacular option is to decorate the box in such a way that its appearance will resemble an antique column.
Ventilation boxes must have a functional purpose
More types of decoration for ventilation ducts in the kitchen
Very original design options:
- decoration of the ventilation box with multi-colored ceramic mosaics;
- pasting the box with mirror tiles;
- if the interior of the kitchen is designed in the "loft" style, the protruding structural element can be decorated with brick tiles made of concrete.
If desired, the ventilation box can be combined with a kitchen apron, which is tiled. In this case, on its surface, it will be necessary to build a strip of tiles at the level of the lined surface, which is located between the headset cabinets. And the part of the structure located below the apron should preferably be of the same shade as all kitchen furniture.
Imitation of natural stone and brick
When imitating natural stone and brick, we recommend using gypsum tiles attached to liquid nails or tile adhesive. At the same time, no special preparation of the surface of the walls is required.
The material should be laid out in an array, starting from the ceiling, ending with the floor, or allocate them a significant fragment of the ledge. Squares with contrasting shades, scattered on the surface of the box in a chaotic manner, look very impressive. This design option is perfect for a kitchen made in a classic or English style.
Typical kitchen design with a ventilation shaft
Country style decoration
We recommend decorating ventilation boxes in country-style kitchen areas:
On the boxes located near the sink, it will be possible to build a railing system, and then hang on it:
- ladles;
- mugs;
- potholders;
- towels;
- other kitchen utensils.
You should know! If the ventilation duct is located near a gas stove, it should not be decorated with slides or wallpaper.
How to solve the problem and provide exhaust ventilation?
Ask the management company to check the operation of the exhaust duct, if necessary, clean it. If these measures did not help to achieve the desired effect, you can install an exhaust fan or other device in the ventilation duct.
However, it is also important to bear in mind here that a single hood without supply is not enough.
In addition, the amount of supply and extract air must be balanced.
And finally, it is important to harm your neighbors by blocking the ventilation duct with your hood! Installing a device that is too powerful or that works 24 hours a day is justified only on the upper floors.
It is also important to remember that the more intensively the hood works, the faster the inflow comes in, and the colder it becomes in the apartment. The air may not even have time to get polluted - it will fly away so rapidly.
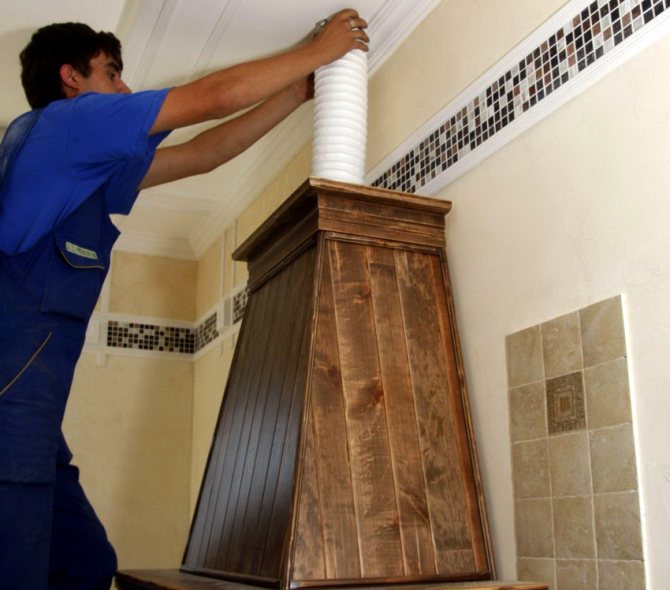
Installing a hood with an external ventilation box: it worked out well
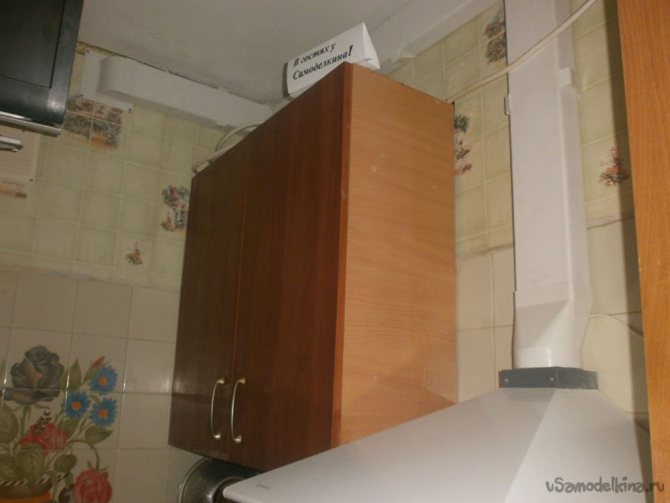
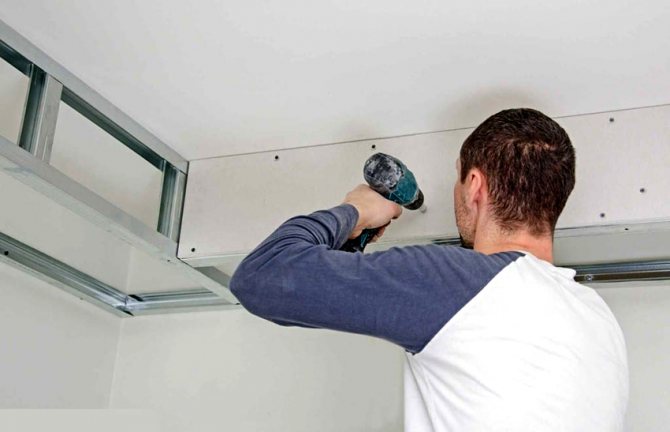
I decided, morally and financially, to replace the kitchen. I drew a sketch, counted the cut, was already ready to order it ... But a friend who had his own shop for the manufacture of cabinet furniture suggested: first hang up the hood if you plan to make an external ventilation duct, then everything else. Practice shows that almost certainly the final drawing is no-no, but a little corrected.Looking ahead, I will say that my case is no exception.
But I digress a little. The hood was chosen cone-shaped and as powerful as possible, so there was practically no alternative. I did not find detailed reviews on it, so I bought it at my own peril and risk. On the other hand, its price does not "bite" at all, so I ordered it.
But while it was going on, I came to the conclusion: I don’t want to use the classic ventilation corrugation, which means that the installation of an external ventilation duct turns into a “choice without choice”. Moreover, the seller of the elements, in order to lay it, turned out not to be a "teapot with a whistle", but a competent owner of the corresponding assortment, who gave good and detailed advice. Actually, this entire master class is based solely on his advice and recommendations.
In my case, the ventilation shaft in the kitchen, and the place where the stove is located is on adjacent, but still different walls.
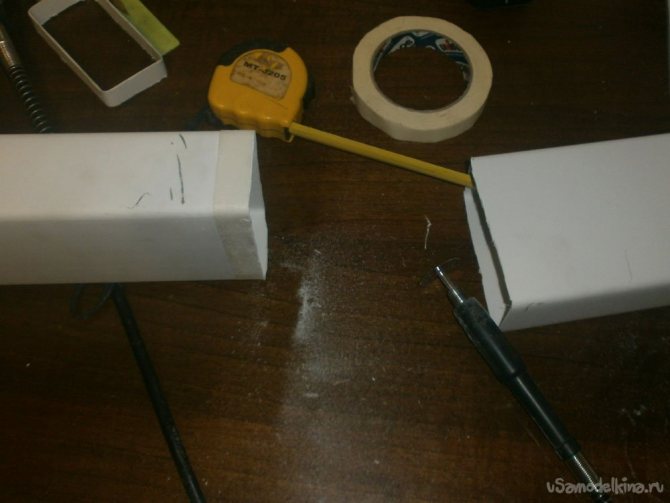
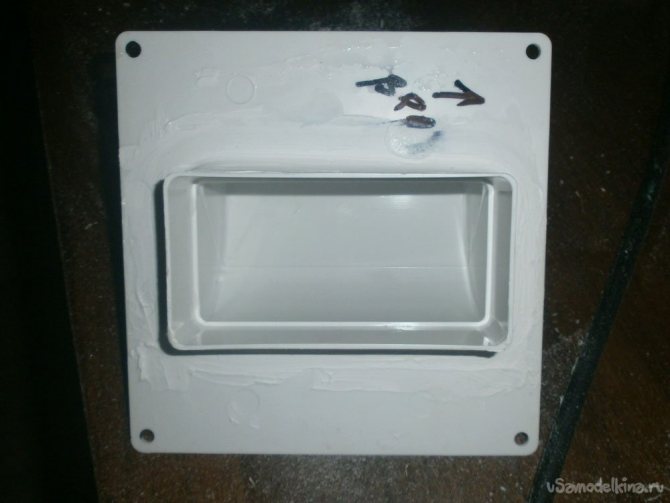
Therefore, I had to buy: • three pieces of a box per meter: a section size of 50 by 100 mm for a four-burner stove is enough for a head; • one adapter circle-rectangle from the hood itself to the box; • 2 + 1 corners of 90 degrees, allowing to bend the box; • five fastening brackets for the box made of the same plastic; • overlay on the wall; • 14 self-tapping screws and the same number of dowels.
Plus - two tiny screws and a sealant: what they are for - at the very end.

From the tools I used: • a drill with a victorious drill; • a screwdriver with a cross head for tightening - you can do with a screwdriver; • any hacksaw capable of cutting plastic; and masking tape mark a straight line; • tape measure, level, pencil and marker for marking; • use a screwdriver to tighten the screws and hammer in the dowels with a hammer; • "liquid nails" glue the patch and one corner: in principle, you can use any other glue.
That's all. We start directly with the hood itself. Installation is as easy as shelling pears: two self-tapping screws.
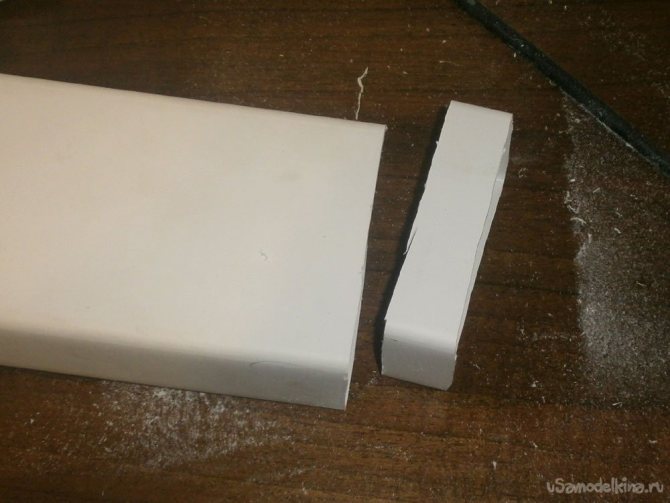
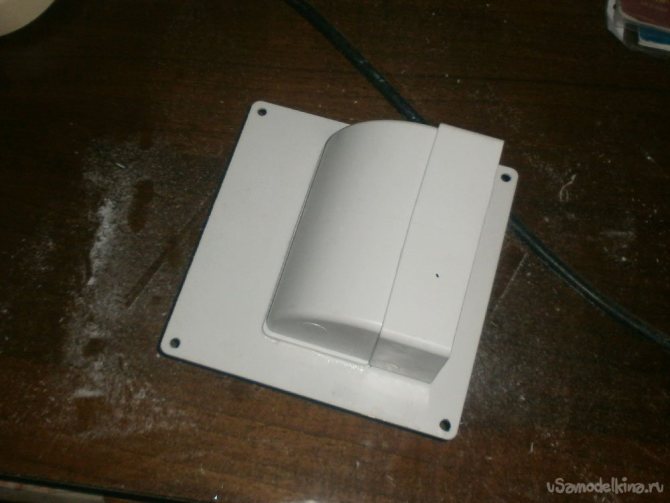
Directly, the hood is on and on. Now let's move on to the box: the device from the kit, which does not have a back wall at all, causes at least a grin from such savings class = "aligncenter" width = "1000" height = "750" [/ img] Cutting plastic is incredibly simple,
and the first piece of wire was ready in a minute.

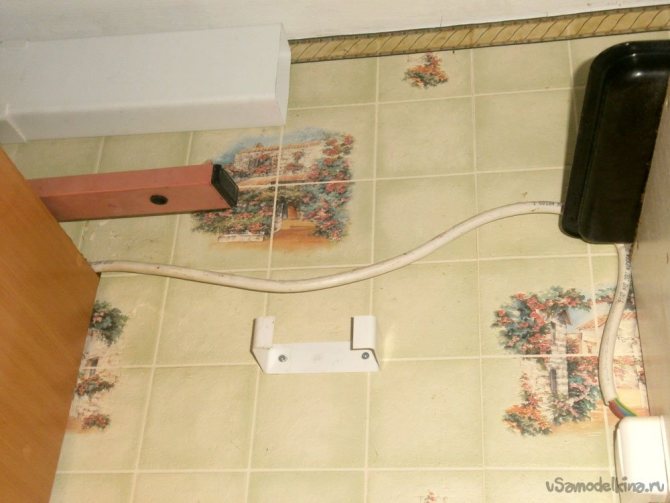
Just having figured out how he would go further, I realized that he should not go under the very ceiling, you need to retreat 3 cm so that the overlay on the wall fits in without skewing and it is easier to drill holes for it. No sooner said than done: minus three centimeters.
By the way, the hole for the corner attached to the wall is a little, but still had to be finalized: the hole in it is designed for the box, and I will insert the corner, which is slightly wider than it.
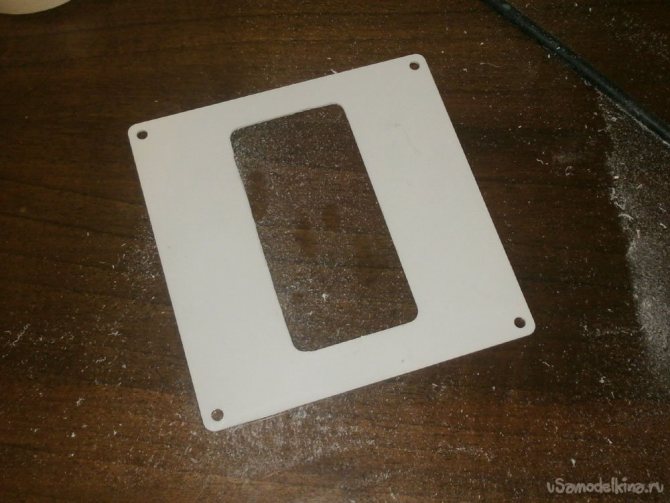
For fastening I used "liquid nails": so it will completely seal everything, even the smallest gaps,
and when dry, both parts will become one.
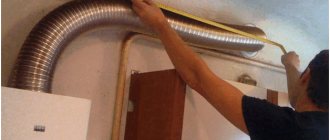
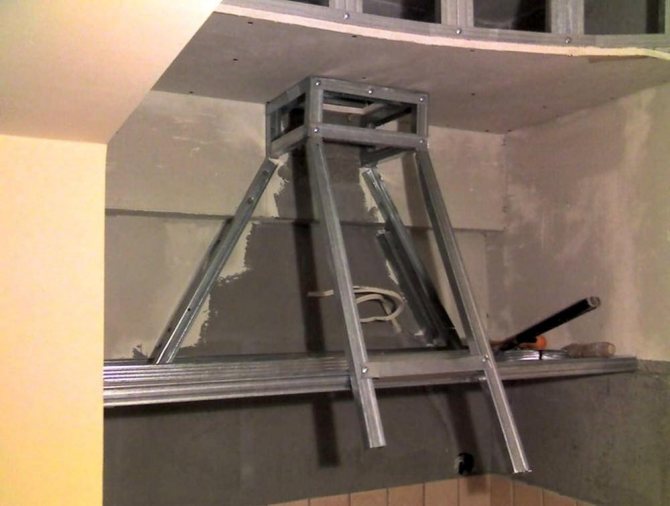
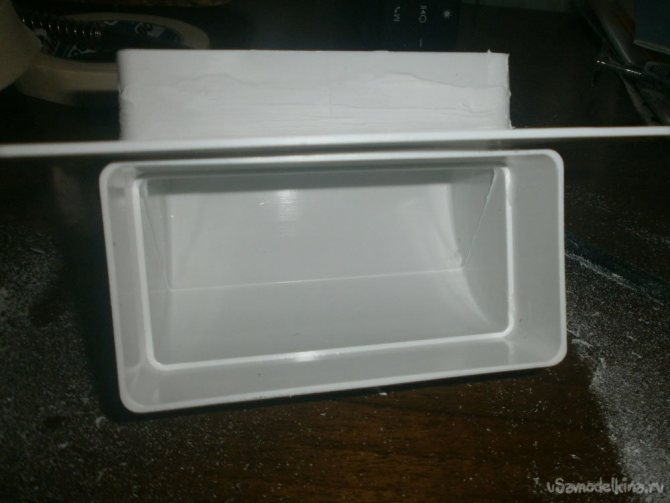
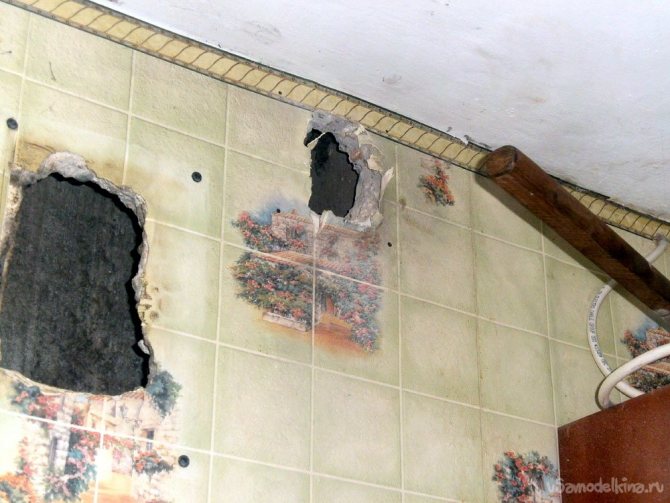
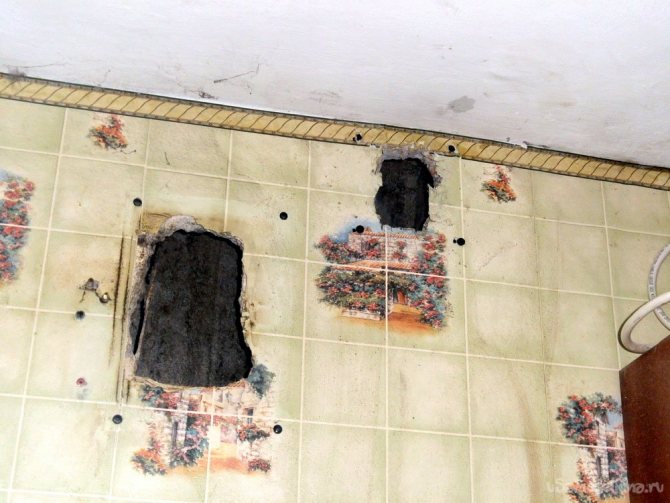
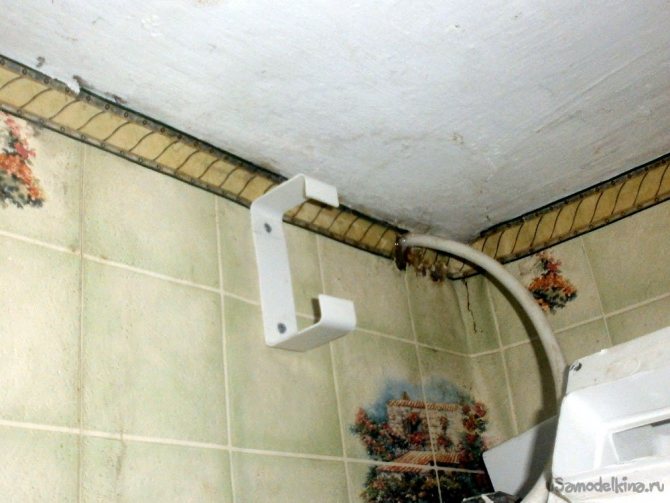
The part is ready, now it is worth making a hole under it in the ventilation shaft.
I did not use the one that already exists, but made another one. Moreover, given the completely thin wall, it took quite a bit of time.
Now we apply it to the wall and mark the four mounting holes. We drill the byrki and insert the dowels.
We fasten the cover on the ventilation shaft.

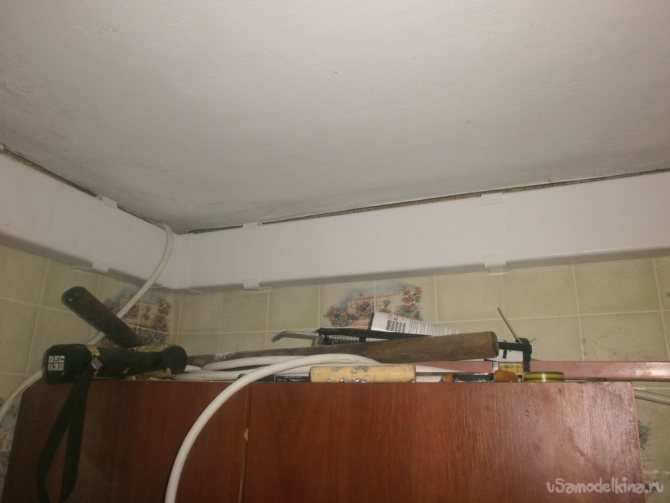
We mount the ventilation shaft. Where the length of a fragment is about half a meter, one eyelet is enough,
and where there is more, it is better to use two.
Moreover, as suggested by the owner of the store where I bought all these components, when installing them, you need to move in the opposite direction, from the ventilation shaft to the hood. To clarify why this is so, I did not, but simply follow the recommendation.
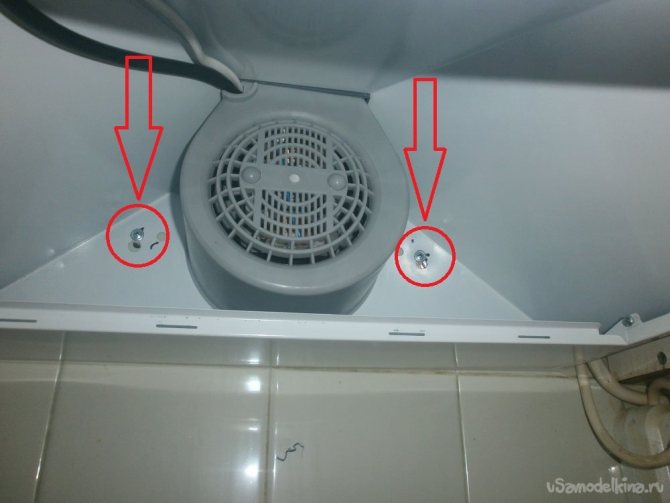
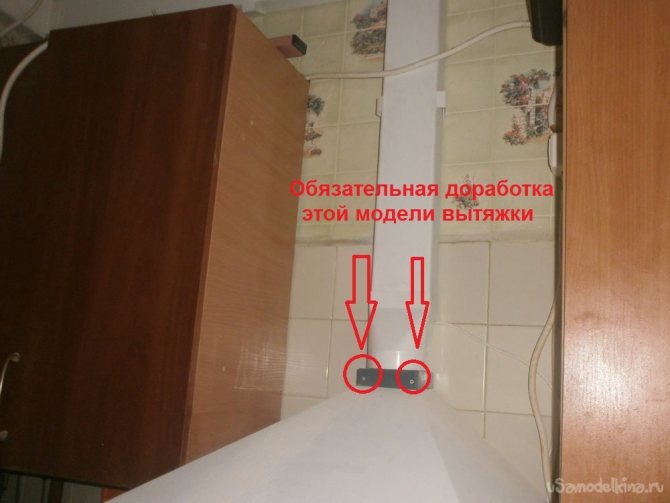
The final part of the box is connected, you can insert the hood into the network and test the result. But the first test on the second (this model has three) showed that the vibration is crazy. Moreover, the hood itself is screwed to the wall very tightly; you don't even need to lay a strip of sheet rubber to reduce vibration.And the hood rattles here:
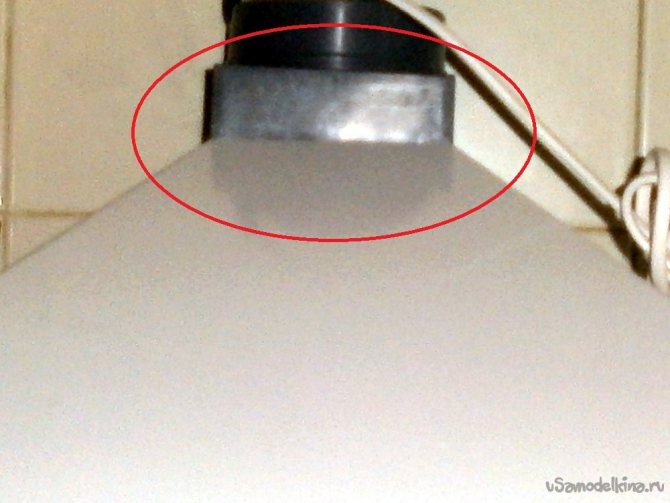
Therefore, the simplest option is to coat the joint with sealant and tighten two small screws. After such a simple refinement, vibration and noise emitted during operation have decreased significantly.
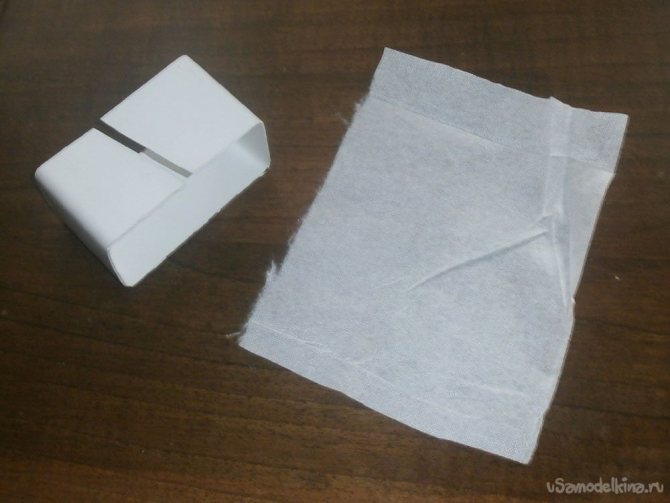
Installation of the hood and installation of the ventilation duct were successful. And already at night one more revision came: between the ventilation shaft, the mounted box, the hood itself, there is only one filter: directly, in the hood itself. The wife, who is simply panicky afraid of cockroaches and other inhabitants of hidden corners in the house, demanded to do something about it.
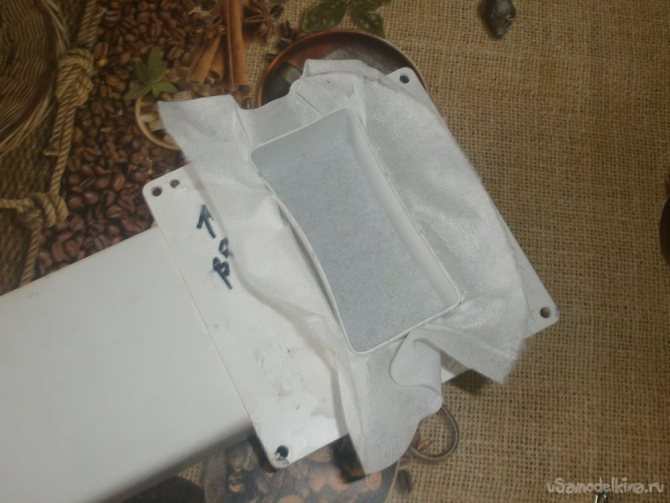
The idea was born by itself: a net is put on a piece of the box (I took a piece of non-woven fabric, the same one that is sold in a sewing store, although a piece of women's tights is perfect for this role),
and inserted from the inside of the box:
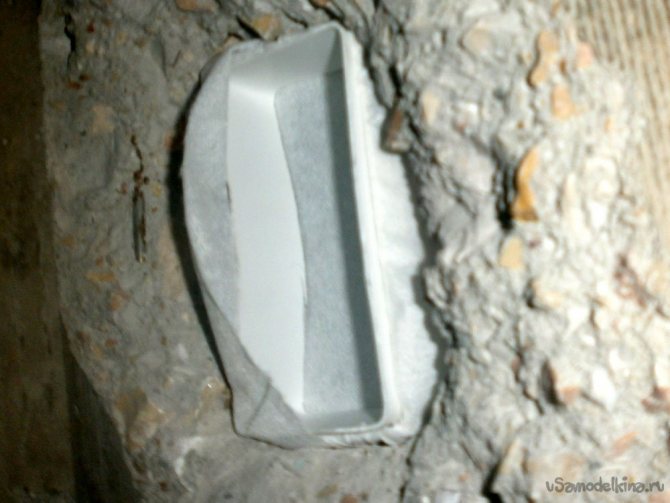
But as I realized later, even it could not be removed, but crawled through the standard ventilation hole. Anyway, several times a year I take off the ventilation grill and either wash it or simply change it to a new one.
So, the labor costs for the current maintenance of ventilation, if added, are not at all significant. Now, in my case, it is worth correcting the sketch of the kitchen and ordering the appropriate cut.
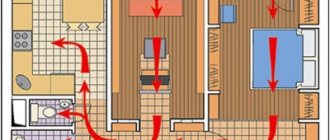
How can you solve both problems (both insufficient supply and poor exhaust)?
You can do without a ventilation duct, and without vents. In this case, we "lock up" all the heat in the apartment. The penetration of foreign odors is limited. And the air will be renewed with the help of special supply and exhaust ventilation devices.
They will keep the air warm in winter or cool in summer. And at the same time they will provide effective air exchange in your home. Options for such devices:
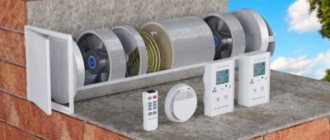
1) that do not require air ducts (decentralized) - for example, a ventilation valve with a recuperator. Two valves, working in pair, provide supply and exhaust.
2) centralized - ventilation units with a rotary recuperator. They are carried out along one air duct - the inflow, on the other - the exhaust. They take exhaust air from the kitchen, bathroom, bathroom, and supply fresh and clean fresh air to the living rooms.
Both those and other devices retain heat from the hood, and then transfer it to the inflow, thanks to the heat exchanger plates.
There is only one drawback of this method - if there is a power outage, you can be left without ventilation. Exit - install an uninterruptible power supply.
With high-quality ventilation with reliable filters, the air in the apartment will be as fresh and clean as if you live outside the city or in the forest. You no longer have to open neither windows nor vents.
You can ask your questions and get expert advice by phone. We supply equipment, design and install ventilation in Yekaterinburg and Chelyabinsk (as well as in the region). We provide discounts. Detailed information - in the offices of the group and by phone.
Video:
The group of companies Terkont copying without link to https://terkont.ru is prohibited
Differences between ventilation and exhaust systems
Many people confuse ventilation with an exhaust hood, naively believing that it is one and the same thing. That, by installing an exhaust dome over a stove without a fan and connecting it with an air duct with a standard channel of the ventilation unit, they will get two in one - both ventilation and an exhaust. Will this ventilation work? Of course not.
First, the main opening of the ventilation duct is blocked with an air duct. Secondly, the hood of the hood will be located approximately in the middle of the height of the kitchen, which significantly reduces the effectiveness of natural ventilation. Thirdly, such a system without a fan is absolutely useless and unable to cope with vapors, most of which, together with warm air, bypassing the exhaust dome, will rise to the ceiling.
There are two options for using the ventilation system and the exhaust system at the same time. Complementing each other, they will create a comfortable microclimate in the kitchen:
- Using a circulation type hood.
- Installation of a flow hood with a check valve.
Scheme of the principle of operation of two options for the hood
Warning. In old multi-storey buildings, one ventilation duct was installed on all floors. The use of such a ventilation unit for a flow-through hood significantly reduces its performance. In modern houses, ventilation units are installed with a separate duct for each apartment.
Hood in the kitchen, as an important element
There are always odors in the kitchen that not everyone finds pleasant, and high humidity can gradually worsen your health. This is further proof of the need for a through-the-wall kitchen hood in a private home to clean your space. Therefore, please review the following requirements for this add-on before installing.
- The essence of airing is to mix pollutants in the kitchen with clean air as soon as possible. After that, they must go through the withdrawal procedure and completely leave the room using the hood.
- For the correct functioning of the cooker hood, you need to know the maximum available number of working burners for the gas stove. If the kitchen area is more than fifteen square meters (15 m), then four burners will not prevent the hood from doing its job. For twelve square meters (12 m), the number of burners should be no more than three, for eight meters (8 m2) - only two burners.
- You also need to reckon with certain norms that are regulated by a special document. It says about the correct speed and quality of air exchange in the kitchen. This is about 140 cubic meters per hour for gas stoves and 110 cubic meters per hour for electric stoves.

Before installing the hood, you should carefully study the documents
These three small precautions will help you achieve the correct and quality ventilation task from your hood.