Materials for external wall insulation from OSB
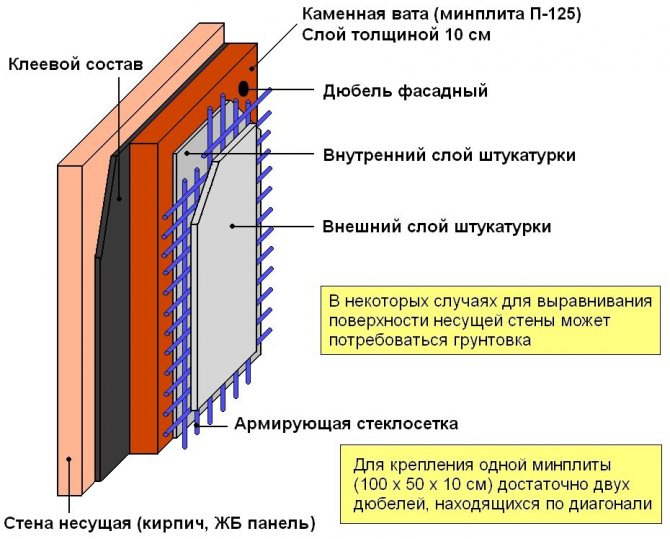
As a heater, it is better to choose material in slabs with a thickness of 50 mm or more. Walls sheathed with OSB (OSB, OSB) from the outside are most often insulated with foam, as the cheapest insulation. Expanded polystyrene, mineral wool, ecowool, and other materials are quite acceptable for this purpose.
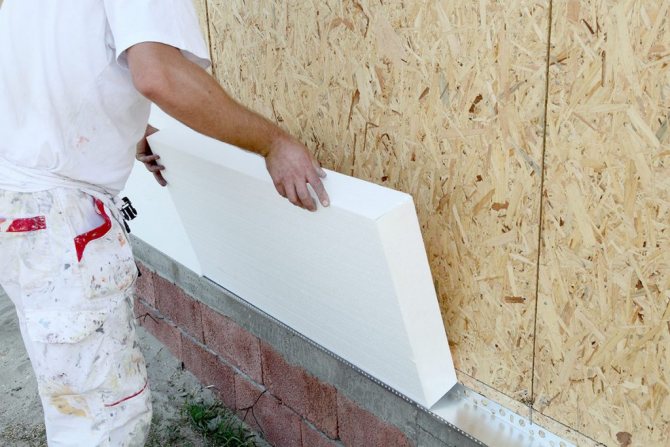
The facade foam PSB-S M-25 F has proven itself well as a heater. In terms of thickness and density, it has optimal parameters.
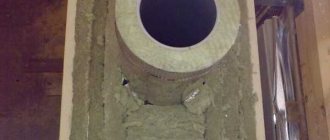
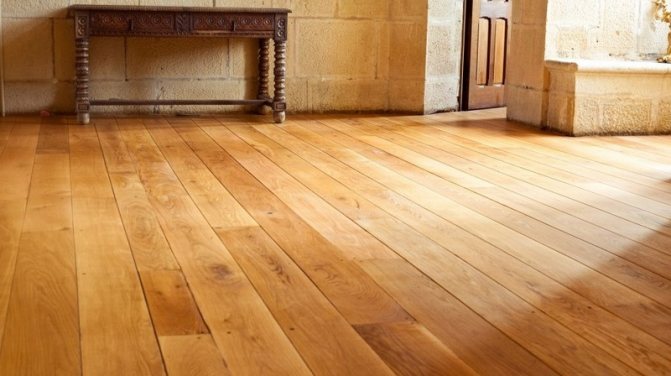
Thermal insulation of a wooden floor: how to do it correctly
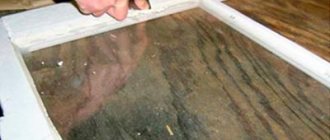
Wooden coatings are most often found in country, country and cottage houses. If the building was erected a long time ago, then the floor, most likely, has lost its original properties.
A worn-out coating is inconvenient, first of all, because it loses a lot of heat in the cold season. This negatively affects the comfort of living in the house. In the immediate vicinity of the wooden floor, a draft begins to be felt.
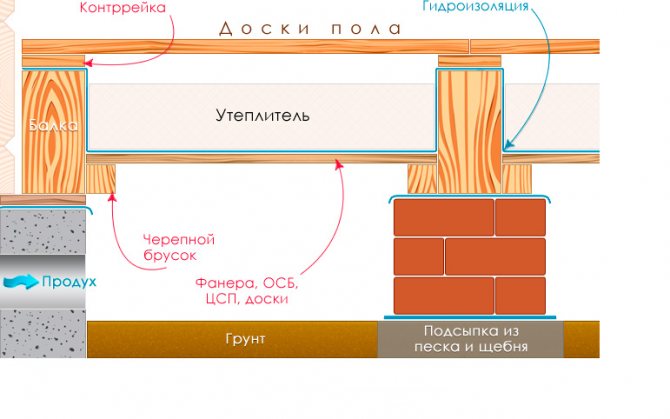
Wood covering can also be found in old low-rise buildings, where it consists of boards laid on logs. During operation, cracks begin to appear on it, and a large amount of condensate begins to accumulate directly under the boards in the absence of high-quality insulation.
High humidity contributes to the rotting of the logs of the wooden covering, which leads to significant heat loss. That is why there is no way to do without such a special procedure as the insulation of a wooden floor.
It should be said right away that the process of warming wooden coatings is not any difficult job, even for amateurs. Carrying out such an event is even easier than insulating a concrete floor.
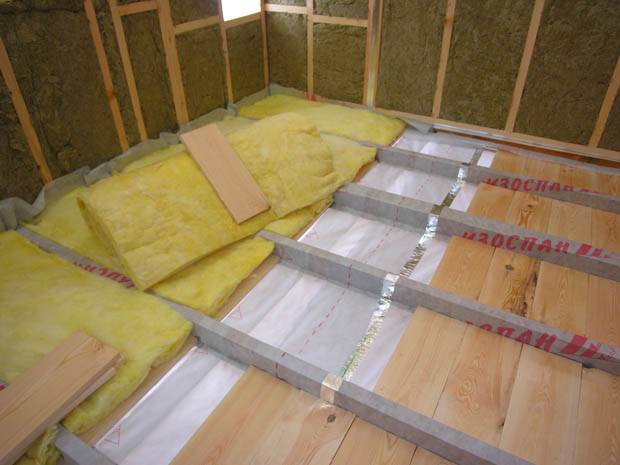
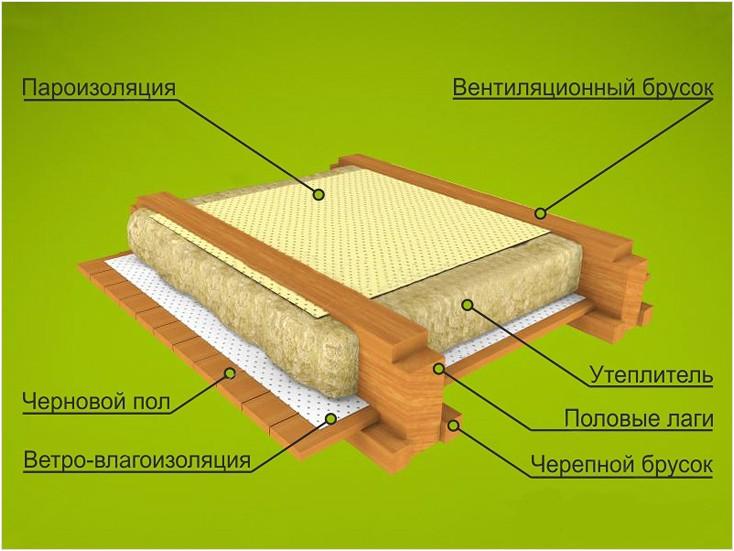
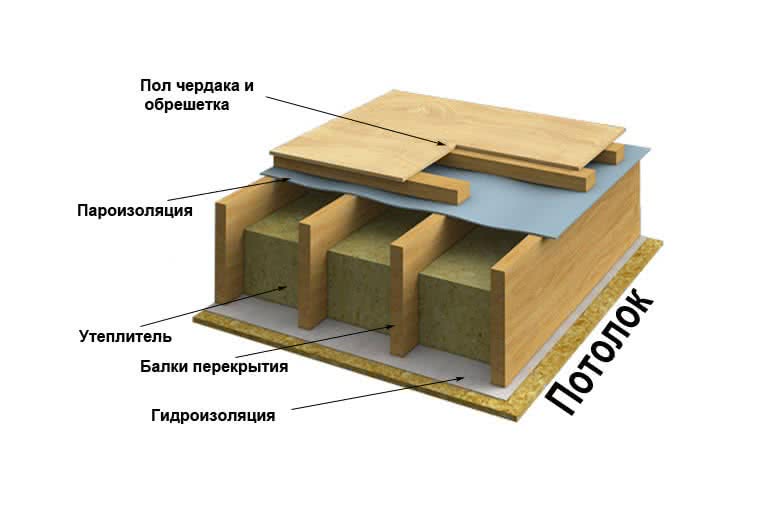
The term “wood floor insulation” means the creation of a high-quality and reliable heat-insulating layer that prevents warm air from escaping. In other words, a layer of insulation is placed directly under the wooden covering, and with it a vapor barrier layer, which prevents moisture from entering the room.
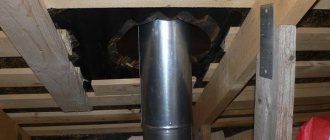
To insulate a wooden floor, you can use the technology of the so-called liquid foam. With the use of this heat-insulating material, it is possible not only to fill all the gaps on the coating, but also to insulate its entire area, if it is located, for example, in the attic.
Theoretically, you can use other heaters, but in terms of basic parameters, they are significantly inferior to liquid foam. Regular styrofoam is known to burn well and is also completely unable to withstand rodent exposure.
Mineral wool, as well as fiberglass, absorbs a large amount of moisture, staying wet for a long time after that. All thermal insulation materials, including liquid foam, require a vapor barrier.
What is the purpose and function of a vapor barrier? Leading experts strongly recommend equipping it so that the thermal insulation material retains its original properties during operation. If you do not install a vapor barrier, then moisture will begin to get into the insulation, which sooner or later will completely lose its unique characteristics.
That is why, when insulating a wooden covering, you should use ordinary plastic wrap, which will act as a vapor barrier. It perfectly resists moisture, although it somewhat impairs the heat transfer of the floor.
Insulation technology on top of OSB
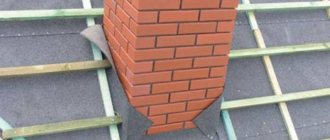
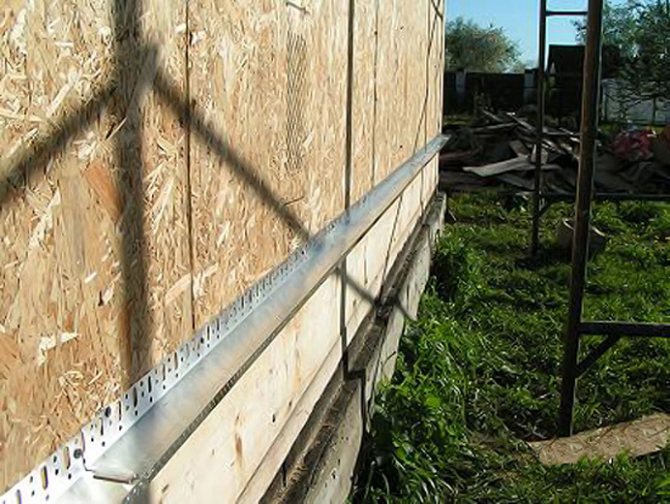
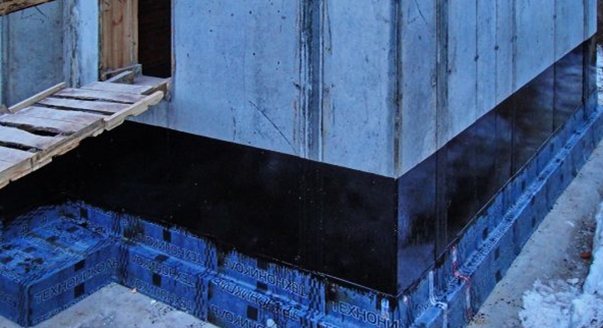
In the technology of wall insulation from OSB with any material, there are common points. Before installation, it is necessary to select the base.It is drawn up last. The height of this zone in a country house is at least 20 cm. With a lower plinth, the wall is threatened with wetting during snow melting.
The plinth is separated from the main facade by installing a special strip. The width of the plank should be such that the insulation does not go beyond its limits. The profile is attached to the base of the base with dowels spaced 300 mm apart. Along the perimeter, they are leveled by installing washers of the required thickness.
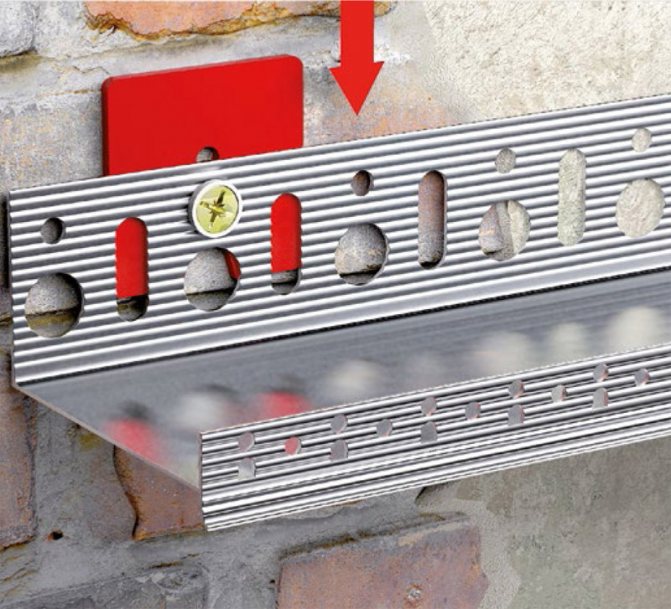
Basement strip, it is also a basement profile.
The initial row of insulation rests on the bar, and the subsequent ones are simply aligned horizontally. In order to avoid the appearance of deviations, control is applied by means of a two-meter level.
Insulation of OSB with polystyrene foam and expanded polystyrene
For outdoor insulation, OSB foam is an ideal material. The only problem is that the adhesion of the surfaces of both foam and OSB is insufficient for high-quality gluing. In order to insulate walls made of OSB from the outside, there are three ways of attaching foam or expanded polystyrene plates to them:
- on polyurethane foam;
- by applying a concrete-contact primer to improve adhesion;
- gluing with KS glue and reinforcement with dowels.
Whichever option is chosen, it is recommended to walk on the OSB plate with sandpaper. This will remove the varnished top layer and increase the adhesion. Additional processing of the boards with fire retardants and antiseptics will increase fire resistance and provide biosecurity.
Certain requirements are imposed on the adhesive for expanded polystyrene. The main one is the absence of aggressive chemicals in it:
- gasoline;
- acetone and similar solvents;
- formaldehyde;
- kerosene;
- benzene;
- toluene;
- aggressive resins;
- formalin.
The main difficulty when insulating with expanded polystyrene is that you need to observe the exact gaps between the plates. They are necessary to compensate for the thermal expansion that OSB is subject to. The joints of the slabs are decorated with foil tape or special adhesive tape.
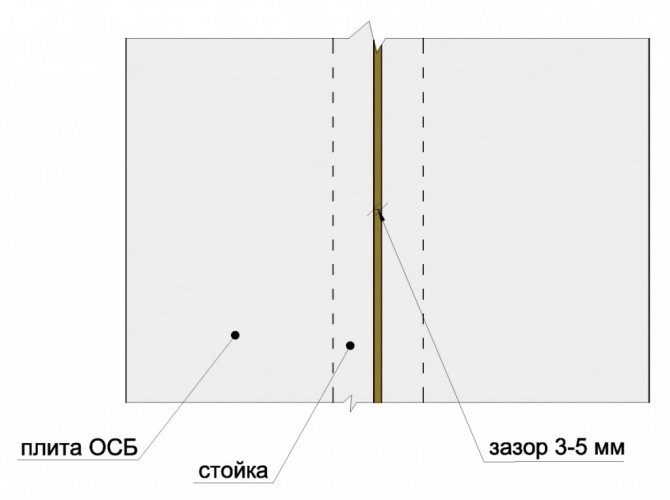
The gap between the OSB plates can increase and decrease due to the expansion and contraction of the OSB.
How to wear fleece?
It would seem that this is a fairly simple question, but there are some subtleties, observing which you will help the fleece "work" correctly, while maintaining comfort for yourself. Fleece can be worn as outerwear, for example, jackets, as well as an insulating layer.
Here it is worth remembering the "layering" principle.
- The first layer, basic: thermal underwear (special tight-fitting jackets and pants) + thermal socks. Absorbs and wicks moisture away.
- The second layer is fleece, which insulates and protects from the cold.
- The third is a membrane jacket (gortex) protection from wind and rain.
Depending on the weather and season, the set may change and the number of layers may decrease, if it is spring and autumn, or if it increases, respectively, winter, then another layer may be added - down.
A fleece jacket often fits under outerwear, so if possible, try putting a windbreaker or membrane jacket on it right away to appreciate the comfort of such a set.
Sweatshirt as a separate layer
As a second layer
Both an independent layer and a middle layer under a membrane jacket
Fastening the insulation to the foam
The most expensive and fastest is the first option - gluing on polyurethane foam. In addition to insulation, only polyurethane foam is required, but in large quantities.

Application of glue-foam to polystyrene.
In preparation for gluing, glue is applied to the foam sheet along the perimeter, stepping back from the edge no more than 15 cm and not less than 10 cm.Further, two glue strips are made in the center, after which the glue is allowed to stand for two minutes.
The polyurethane foam will begin to cure in about five minutes. This pause should be used to correct defects.Later, it is problematic to tear off the obliquely glued sheet of insulation from the OSB surface. When the foam grasps, remove the rest of it with a sharp knife.
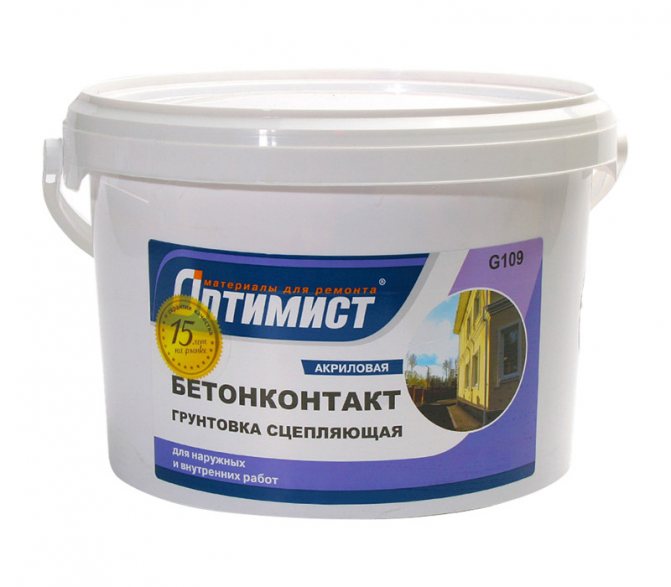
Application of primer concrete-contact
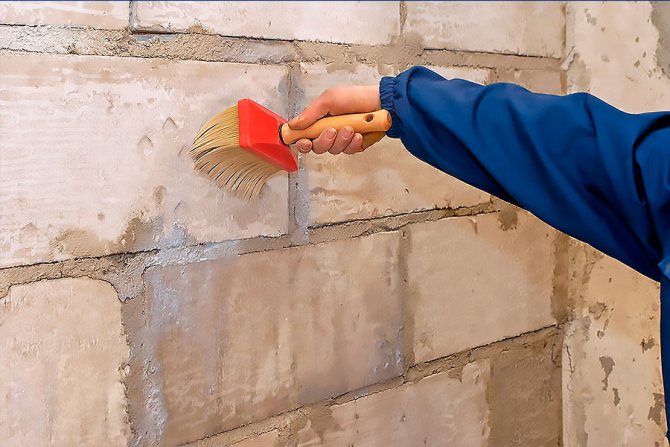
This method in the price category occupies an average position, but very laborious. The glue used here is inexpensive - ordinary mounting. The surface of the OSB boards is specially prepared. A layer of a special mixture is applied to it - concrete contact. It is a primer that gives a smooth surface a rough structure, which improves the adhesion of surfaces.
The concrete contact contains sand and it settles to the bottom. For this reason, the primer is thoroughly mixed before use.... The concrete contact dries out quickly, after which you can glue the foam to the treated sheet.
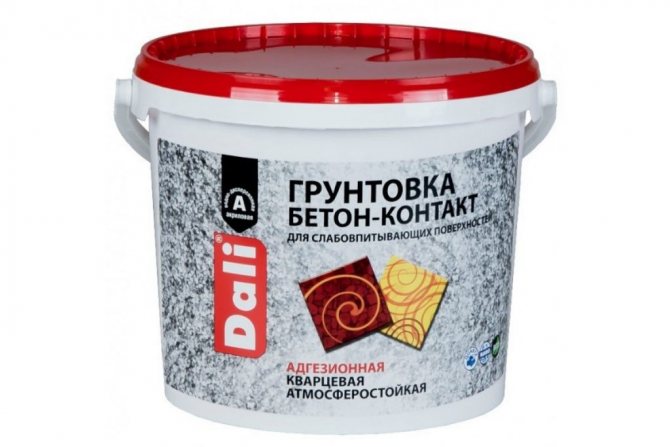
Primer concrete contact.
Warming in this way has its own nuances:
- When applying the primer, it is better to use a bristle brush, because priming with a roller is not very high quality.
- After rubbing the primer into the pores of the OSB, give 2-3 hours to dry, and then apply another layer.
- Glue is applied to the primed surface.
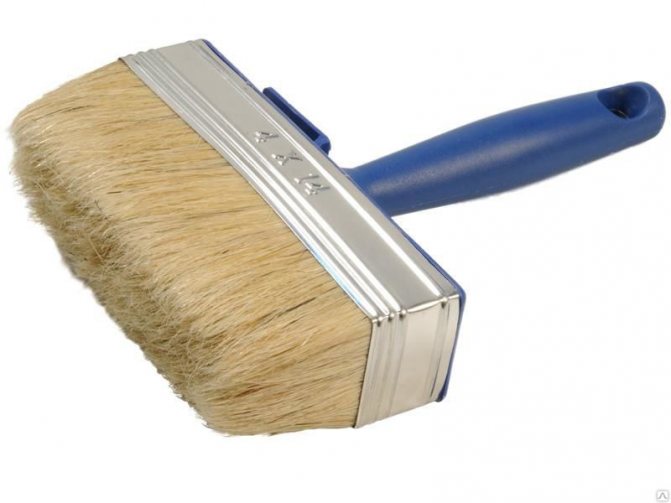
The small brush differs in the width and thickness of the brush.
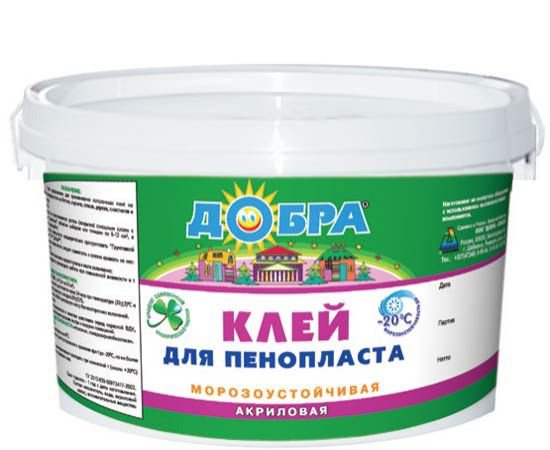
Foam adhesive.
In the process of gluing, you need to ensure that the seams of the foam and OSB do not match. To do this, it is better to even cut off the insulation, otherwise the effectiveness of the insulation will deteriorate significantly.
How to keep warm in cold weather
Brrrr! When winter comes, it becomes completely unbearable to live and work in sub-zero temperatures. But with some tweaks, you can stay warm even in cold weather. 1. Keeping warm outside
1.1 Put something warm under your clothes. This is an easy way to keep warm without too much effort. You just need to put extra clothes under your main one. This bottom layer of clothing can be of different types, but either way, it will help you stay warm without too much effort.
The most common underwear items include leggings, thermal shirts, and long underwear.
It is important to remember that in a warm room, you will be uncomfortable if your bottom layer of clothing is prying. You can try other options if you know you might be in this situation.
1.2 Wear waterproof clothing. If you know you have a chance to get wet, it is very important to wear waterproof clothing to keep you warm. If water penetrates through the clothes, the clothes will become a source of cold. You may be exposed to rain, snow, or simply splashing (for example, if you are riding a boat or there are many puddles on the ground).
You can wear a raincoat under a warmer but less waterproof jacket, for example. When buying a jacket, pay attention to the material that is waterproof and warm, such as neoprene.
1.3 Wear heat-retaining clothing. Besides the fact that you should protect your body from moisture, it would be nice to find things made of material with thermal insulation. You've probably heard of fleece, but this material isn't for everyone. Find out what else will be acceptable to you, and then go shopping.
Wear wool if possible. This is one of the best thermal insulation materials, although things made from it can be expensive. You can wear wool instead of buying a wool jacket so you don't have too many things on. Many inexpensive woolen products can be found in regular stores.
Other warm materials include down, tanned leather, fur and neoprene.
1.4 Protect your limbs. It is not true that you lose a large percentage of your heat through your head, legs, or whatever. However, the truth is that without covering these areas, it will be difficult for you to keep warm. When outdoors, try to keep your head, legs, and arms covered with a scarf, gloves, a hat, and thick socks and boots. You can also wear two pairs of socks or leggings underneath your jeans. It is unlikely that you will look like a trendsetter, but you will be warm.
It is important that all these garments are waterproof, as they are worn in areas where there may be high humidity and cold. For example, buy tanned leather gloves if you can.
1.5 Protect yourself from precipitation. If you have to go outside, watch out for rain, snow, puddles, ice and wind. These are the things that make you freeze, because just with the temperature of the air, your body and your clothes will cope with a bang. Move quickly between buildings, use your car when you can, and try to walk under awnings.
1.6 Carry warm clothes with you. You can carry small heat sources with you if you find it difficult to stay warm. Small items like hand warmers can be put in pockets if gloves aren't enough. Other items, such as travel soup mugs, can be used to keep warm from the inside.
You can even make your own heating pads if you find it difficult to buy them. There are many instructional sites out there, and they are very easy to build with the right source material.
1.7 Wear the correct size clothing. We understand that you want to look sexy, but the Eskimos wear such wide jackets and trousers for a good reason. If your clothes fit your figure, they won't be able to keep you warm. Conversely, if you want to stay warm, wear loose clothing. This creates a protective barrier of warm air against the honey on your body and the environment on the other side of the fabric.
1.8 Move to keep you warm. If your clothes can't keep warm, let your body generate heat. The movement will burn energy in the body, which will be expressed in the release of heat. Try to do some exercises, or at least just don't stand still.
Wiggling your limbs is a good option if you are indoors. However, it can be dangerous outdoors due to the slippery surface. The best way to keep warm when you're outdoors is to do small jumps that are less likely to slip.
2. We keep the room warm
2.1 Wear as many layers of clothing as you can comfortably adapt to any environment. The most basic thing you can do to keep you warm both outdoors and indoors is to put on multiple layers of clothing. Ask anyone who has lived in harsh climates like Alaska or Norway and they will tell you: wear multiple layers of clothing. This will allow you to be prepared for both a frosty day outside and the hot atmosphere of your office.
You can wear, for example, stockings, jeans, a long-sleeved shirt, a button-down shirt, a sweater, and a jacket. By wearing all of these things, or a combination of several, you can easily adapt to both a warm classroom, a cold office, a neutral store, and freezing cold outside.
2.2 Insulate the house. Make sure your home is well insulated. You can cover walls and ceilings with thermal insulation. Or even easier - hang thick curtains or even blankets over the windows.
Microporous curtains are quite effective at keeping cold air out of the window and are usually less expensive than other curtains.
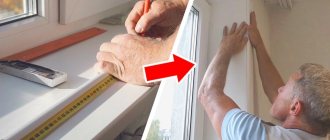
You can also insulate windows and glass surfaces on doors with insulating foil, a transparent plastic material that adheres to any glass surface.
2.3 Close all rooms you are not using and focus on heating the central room. It is usually easier and cheaper to heat one room than to heat an entire apartment or house. Choose one room your family can stay in during the day and isolate it from other rooms. Close the doors and cover them with blankets. Centralize heating and other heating methods for the room. This will help you save effort and not heat up rooms that you don't use much.
2.4 Close the cold air slots.You should make sure that there are no cracks and holes that allow cold air from the street to pass through, or violate the temperature regime between rooms of varying degrees of thermal insulation. The most common cracks are under the door, but you may also notice drafts from windows or rooms above the basement letting cold air pass through the floor.
Curled rugs or blankets can help ease this problem.
2.5 Make your bed. You want your bed to be at least a little warm before you go to bed. Ice sheets are not to everyone's liking. There are many ways to prepare your bed before bed. A bottle of warm water placed under the duvet at the bottom center of the bed will do a great job. Alternatively, dry the duvet for 10-20 minutes on a medium or high setting.
2.7 Drink hot drinks. Let it be a cup of hot lemon tea or Mexican coffee, but the hot drink will help warm you from the inside out. Turn on the kettle and take out the cups, because soon you will be very warm.
You may have heard that adding alcohol to a warm drink will help keep you warm, but it really isn't the best option. Alcohol lowers your body temperature, even though it leaves behind that burning sensation. If your home is dangerously cold, you should avoid alcohol.
2.8 Take a hot shower or bath. A hot shower or bath will help your body return the required level of heat. Do you get cold again after 5 minutes? Do not forget to wrap yourself up in warm home clothes, a dressing gown and warm slippers as soon as you get out of the shower. This will help the body keep warm from the shower.
Advice
If you are going to be outside for a very long time, use heating pads in gloves or mittens (mittens are best, as you can wrap your whole hand around the heating pads). They are inexpensive and sold at any sports store or department store that has a sportswear section. Boots are irreplaceable in winter. Try to buy at least 2 pairs: a pair of waterproof boots for wet weather, and a pair of warm stylish boots for dry but cold days. Try to wear a lot of clothes. This way, you will always have enough stuff. It’s not very pleasant to freeze in class because you don’t have extra clothes. If it rains or snows, make sure your shoes are waterproof. If your feet are cold and wet, it doesn't matter how warm you are dressed ... you will still be cold. Wear one or more pairs of gloves.
For best protection, wear thinner gloves under the mittens so that if you have to do something with your fingers, they are not numb. Wear clothing that covers your ears to keep them warm. If you go to school and your feet get cold, wear tights, for boys, two pairs of socks. You should always have a warm place in the room where you can keep warm. You don't want to be outside if it gets unbearably cold. In order not to slip on the ice, you can purchase rubber pads for boots, which are convenient to take off and put on, and which will not particularly burden your bag. If you are walking somewhere and are frozen along the way, pause (if time permits) and warm up in a nearby building before moving on. It is important to dress warmly. You should dress in layers at the top, such as a T-shirt, sweater, jacket, and scarf. A pair of fleece-lined jeans will come in handy so you don't have to wear long underwear. They are produced by only a few firms. The most stylish ones are called Winter Blues Jeans. Also remember to wear a hat, as a lot of heat goes through your head. If you are cold, go inside immediately. Your breath is your personal little heater. Button up the jacket completely and breathe in and out. This will give a little warmth. However, remember that your breath is wet and can make the fabric of your clothing wet.In very cold weather, put on a balaclava, which allows moisture to escape and does not let the wind through. If you are caught outside by dire weather conditions, take cover immediately. If you cannot find a building or other place that can provide warmth, use natural shelters, such as a row of growing pine trees. They will shield you a little from the cold wind and you will be warmer.
Warnings
What you need Winter jacket (wool or fleece) Boots (insulated) Something to keep your feet warm Something to keep your hands warm Gloves
Well-fitting boots Layers of clothing Ear warmers with fur Hat
Bonding foam with KS glue
This third option is the cheapest, but is not inferior in efficiency to the first two. Insulation is glued with KS universal glue designed for any surfaces. Its consistency is slightly thicker than that of others, it is sold in banks.
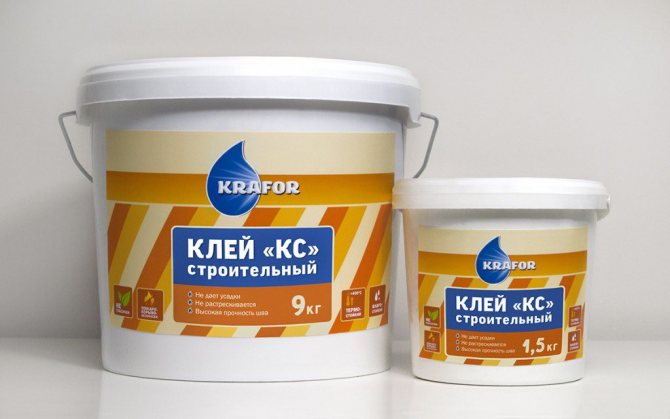
KS glue.
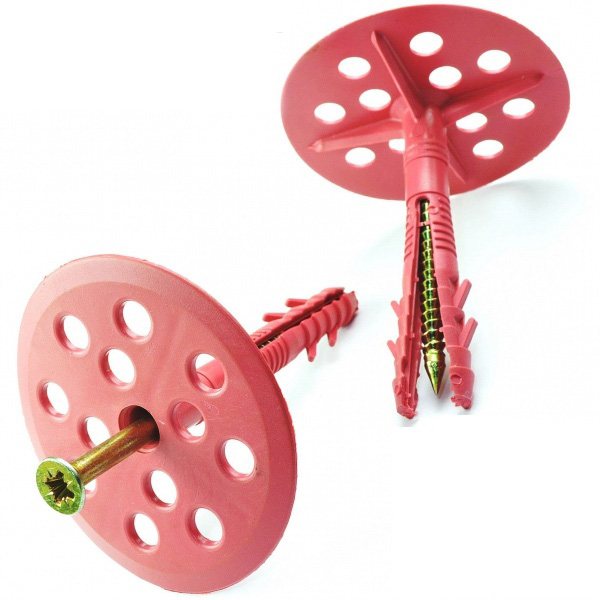
To strengthen the structure, after gluing the insulation, each sheet of foam is additionally secured with dowels or hold-down washers and self-tapping screws.
Self-tapping screw and pressure washer for insulation.
Features of the technology of insulation using the universal glue KS
Glue is applied around the perimeter of the foam sheet, then a few strokes are made in the middle. After that, the foam is glued and additionally strengthened by screwing in dowels.
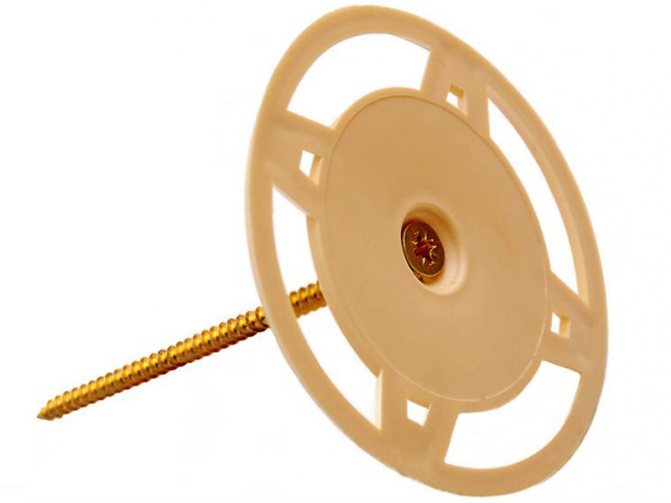
Disc dowel.
For this, there are special disc dowels used in the construction of frame houses, but you can also use ordinary dowels. With a sheet thickness of 50 mm, the optimal dowel length is 45 mm. A self-tapping screw is inserted inside it and screwed in with a screwdriver so that the cap is drowned. At the end, all dowels are coated with glue. This option provides a fairly sturdy and inexpensive design.
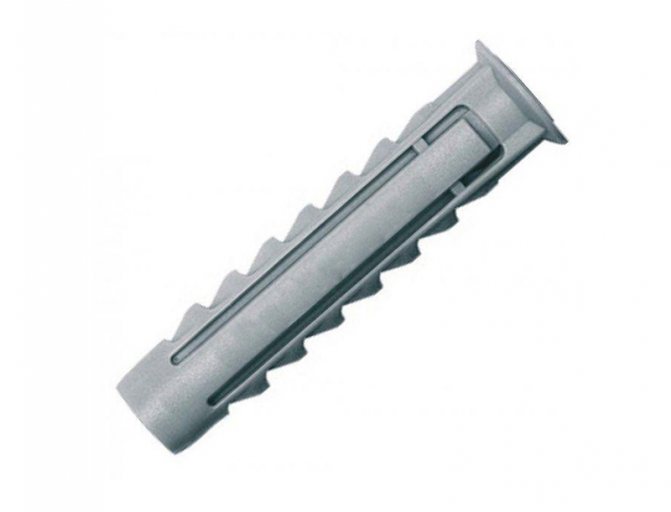
Often, instead of a disc dowel, a conventional one is used.
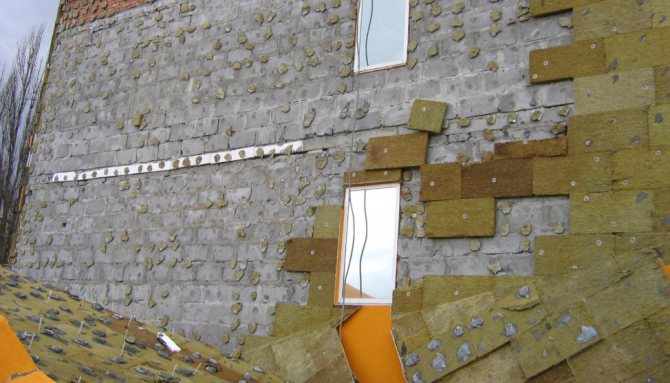
Insulation of OSB outside with stone wool
Before installing the stone wool slabs, the OSB walls are primed. Well suited in this case, the primer "Betonokontakt". It is applied with a brush in two layers; a not very high-quality layer is obtained with a roller.
Primer "Betonokontakt".
The plinth is separated by a plinth strip, it is also a plinth profile. The thickness of the profile is taken not less than the thickness of the insulation.
Basement profile.
Osnovit glue is well suited for gluing stone wool to oriented particle boards.... It is applied to the prepared back surface of the slabs. The cotton wool is mounted in a checkerboard pattern, lightly tapping on the plate so that the glue paths diverge. The remains of it are removed.
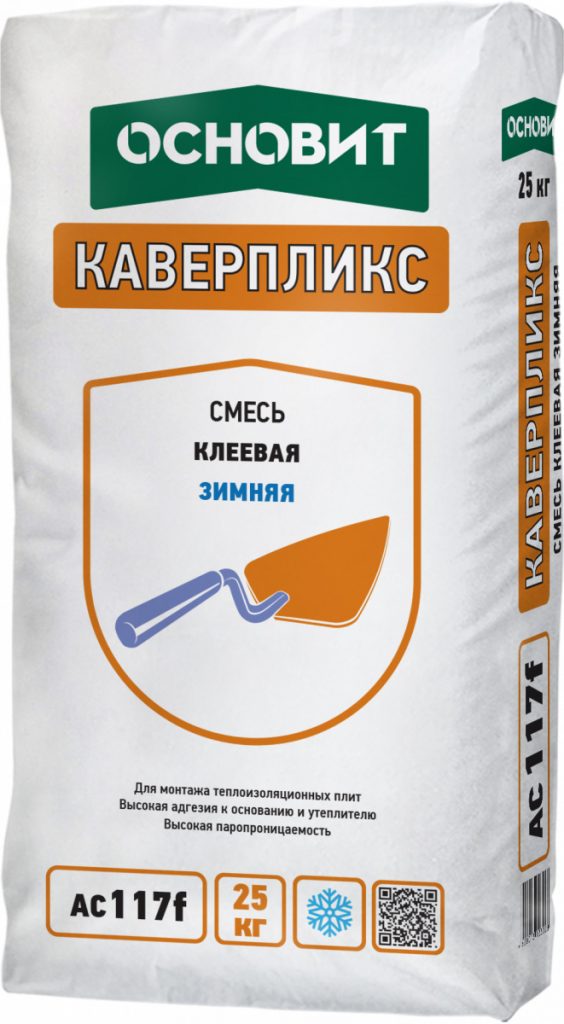
Glue "Osnovit" for the installation of thermal insulation boards.
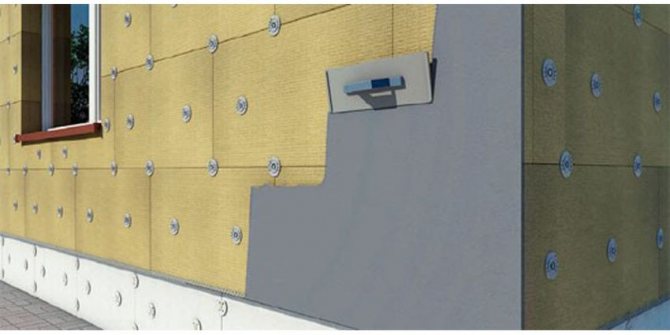
In addition, self-tapping screws are taken and, stepping back from the edges of 15 mm, they are screwed into the plates (from 8 pieces per 1 plate), sinking the caps. The weight of a stone wool slab is 2 times that of a Styrofoam slab. Therefore, additional fixation is indispensable. Additional fastening is performed not immediately after gluing, but only after 24 hours. Usually the slab is fixed in the center, as well as in the "bandaging" zones.
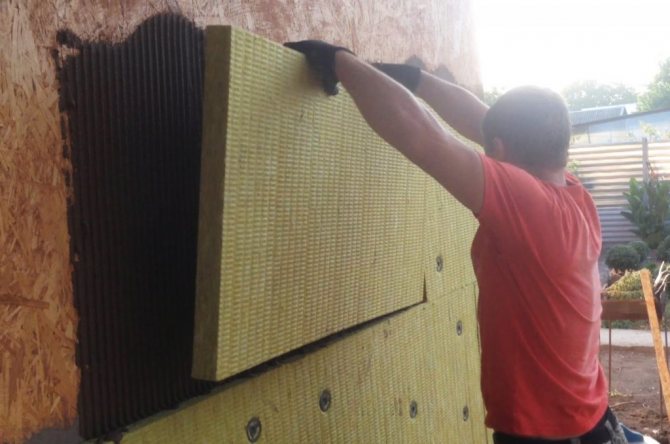
Bonding stone wool to OSB boards.
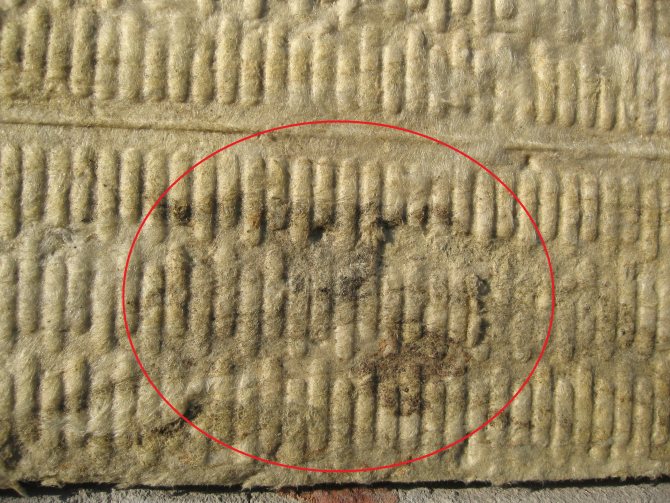
In the process of gluing, it is necessary to monitor the tightness of the joining of the sheets. Stone wool is fixed like brickwork - with bandaging of vertical seams.
It is impossible that the joints of the slabs coincide with the edges of the window receptions. If this is allowed, cracks will appear on the structure. That's right, when the insulation, as it were, flows around the window.
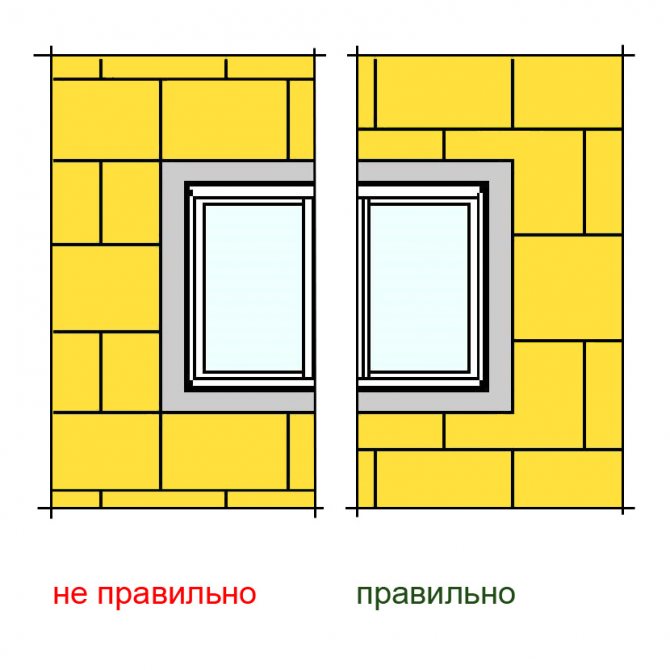
The joints of the insulation boards do not match the corners of the windows.
At the end of the installation, remove the bumps and protrusions on the surface. Leveling is carried out using special grinding brushes or an abrasive trowel.
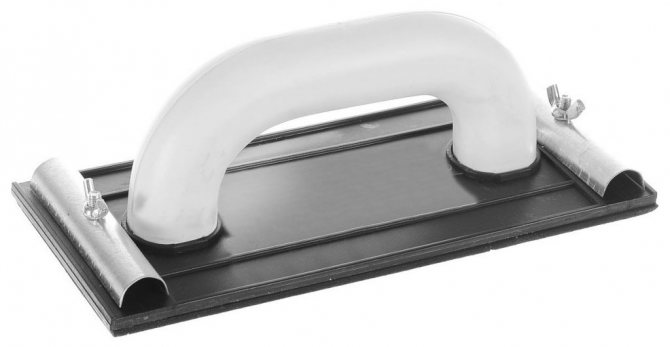
Abrasive trowel.
All about construction and tools
How to properly insulate a house tips
- Work associated with the use of heat-insulating materials cannot be carried out during snowfall or rain, unless special preparation of workplaces has been carried out.In winter, the cutting of slabs, as well as the manufacture of complex structures, should be carried out in a warm interior.

- Do not glue individual insulation boards if the air temperature drops below –20 ° C. Thermal insulation structures that require "wet" processes should be installed at an air temperature of at least +5 ° C.
- Do not insulate damp surfaces, for example, basement walls, before the concrete gains the required strength. All work required for thermal insulation of walls that are below ground level should be carried out only after the completion of waterproofing work.
- It is not recommended to use those heat-insulating materials, the quality of which is suspicious. The main indicator of unfitness is humidity.
- Do not install thermal insulation materials on a surface that has not been previously prepared. Concrete walls and foundations should be primed. If you need to lay several layers of insulation boards, then the seams in the first layer need to be filled with crumbs from the same material, then clean the surface of debris, coat with bitumen, and then stick the next layer sprawling.
- Do not use dowels when the glue is not completely dry, and install them in increments of more than 30 cm. Dowels cannot be used without washers.
- It is not recommended to install and glue the insulation boards without bandaging the seams or providing a serrated pinching at the inner and outer corners. The outer corners of the house, as a rule, need to be reinforced with additional nets from plastic corners with the release of a reinforcing mesh.
- The joints of the slabs must not be located in the places of door and window openings.
- The joints between the insulation boards must not be filled with glue.
- When installing three-layer wall structures equipped with insulation and lined with bricks, silicate bricks must not be used when facing the parapet, basement and cornice. When installing a protective brick wall, it is imperative to fill in the horizontal and vertical seams.
- When insulating wooden houses, do not use expanded polystyrene. It will prevent water vapor from escaping to the outside, which will lead to rotting of the wood. It is better to give preference to mineral wool slabs.
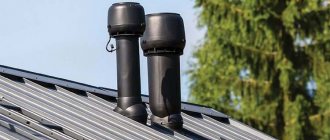
- To protect the insulation in a ventilated space, do not use vapor-proof materials - plastic wrap or roofing felt. The best choice is a windproof, vapor recovery membrane made of highly durable non-woven polyethylene. In the structure of the fibers of such a material, there are a large number of micropores, which provide a free exit of condensate from the inside and protection from water from above.
- You should not begin work on thermal insulation of floors until the completion of construction work on a specific site, including the sealing of interpanel seams, the installation of ventilation holes, as well as plastering of brick parapets, etc.
- You can not use iron guides when using insulation materials as sound insulation, arranging floors in multi-storey buildings. Metal conducts both sound and heat well. For intermediate floors, it is best to use backfills or mineral wool rolls or slabs.
Other methods of insulation
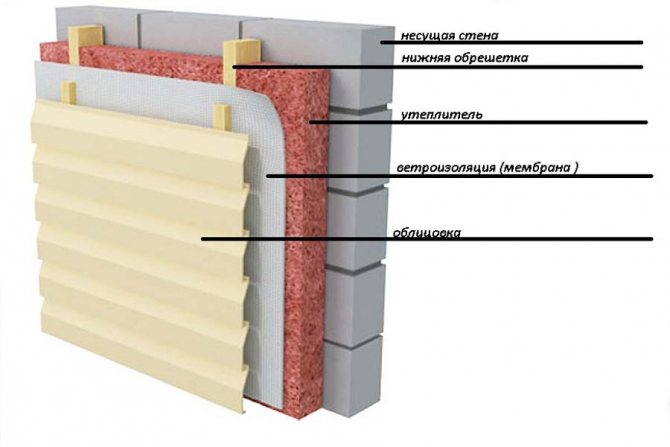
Another way of wall insulation is OSB cladding with a ventilated facade or ventilation facade. It is easy to install, but it costs more. This method has many advantages:
- universal mounting technology;
- the admissibility of installation on houses of any number of storeys;
- quick installation;
- protective and aesthetic properties;
- durability and maintainability.
The ventilation façade will serve for more than half a century, but only under the condition of competent installation and selection of materials. Such facades are most often faced with siding.
The technology for installing a ventilated facade on OSB is similar to walls made of other materials and is described in detail in a separate article: types of ventilation facades.
Depending on the purpose of the product, fleece is divided into:
- Polartec (thickness 100-300 gsm) is considered the most popular and versatile type of fleece. Suitable for use with a windbreaker or membrane jacket as it does not provide wind protection.
- Polartec Bipolar (thickness 200-300 gsm) is an improved look of the classic fleece with a thicker inner layer. The top layer is thin, but at the same time, jackets made of such material are durable.
- Polartec PowerStretch is a two-layer material with a nylon top layer and a velor-like inner layer. Thermal underwear, as well as jackets and pullovers are sewn from such fleece.
- Polartec Windblock is wind and moisture resistant and is therefore considered the most reliable material. This is the warmest kind of fleece.
Fleece Tourist HELLY HANSEN 2020 daybreaker fleece gray
4 490
Buy
-30%
Sweatshirt Tourist Arcteryx 2019-20 delta lt zip neck women’s illuci
5 495 7 850
Buy
-30%
Sweatshirt Tourist Arcteryx 2019-20 kyanite hoody men’s sambal
9 940 14 200
It is worth noting the fact that Polartec is the name of a whole series of modern materials, patented by Malden Mills (USA). Polyester shavings are more densely located on the knitted fabric, and this is a double-sided fleece: pile on the inside and outside. The pile imitates the wool of polar animals.
Today the Polartec company is known as the most famous manufacturer of fleece fabrics. Its very name has become a household word - many outdoor enthusiasts call their fleece sweatshirts with the word "polar", and the black label with a red triangle has become a real sign of quality.
Finishing of insulated walls
Finishing of walls on polystyrene
The foam insulation layer must be protected, otherwise it will collapse under the influence of the environment. Long-term operation is provided by plaster. It protects brittle foam from mechanical damage, moisture, UV rays, and fire.
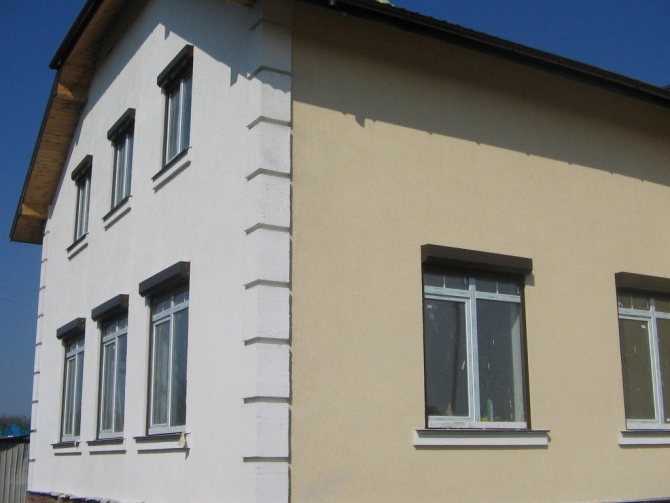
Plastered facade.
There are special facade plasters for finishing expanded polystyrene. Among them, there are two main groups:
- Acrylic plasters. They have protective properties, a high level of adhesion, and are decorative. This finishing material is distinguished by a wide range of colors, the possibility of textured finishing.
- Mineral plasters. They are based on cement and sand. They are inexpensive, but they do not differ in durability either. A layer of plaster can be cracked in three years.
To fix the plaster layer, a mesh is mounted on the foam. The plaster adheres better to a dense mesh (130-160 g / m²). First of all, corners, windows, doorways are trimmed. A grid is installed at the corners in the following sequence:
- The mesh is cut into strips 300 mm wide. The length depends on the corresponding slope parameter. For the corners of the building, the strip length is 1 m.
- Deflection is made in the center of the mesh.
- A solution is applied to the wall.
- The mesh is applied to the corner, leveled with a spatula, making movements from the middle to the edge and from top to bottom and completely immersing the mesh in the solution.
The mesh is mounted on the walls using the following technology:
- Cut the net into pieces with a maximum length of 1 m.
- For each meter of the wall, 90 cm of mesh is glued, the rest is glued to the joints.
- After applying the mixture, the mesh is applied to the wall, pressed down, leveled with a spatula.
- Further installation is performed with an overlap.
When the mixture is completely dry, grout the surface with a special float or emery cloth. In this case, movements are performed along a circular trajectory against the clockwise movement.
At the next stage, a leveling layer is applied. After four days, when the leveling layer is dry, grout is carried out, and then a primer. After the latter has dried, they proceed to the decorative finish. It is performed with special facade plasters.