In the 50s of the 18th century, a technology for the serial production of ceramic tiles was developed.
Since then, ceramic tiles have begun to occupy their niche in the building materials market, which they have been steadily holding up to now and are not going to admit anyone to this segment of floor coverings.
Is it possible?
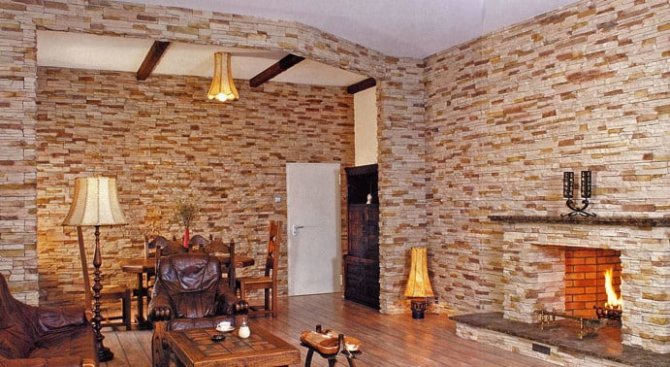
Experienced builders assure that it is allowed to lay tiles on a brick without first plastering it. True, there are certain nuances due to which it is not recommended to do such work on your own.
So, they are faced with tiles:
- a wall of brick material without a plaster layer. It is better if the surface is flat, but minor differences are corrected with an adhesive solution. Naturally, its consumption will increase, which will entail a rise in the cost of repair work;
- pre-prepared wall. The surface is leveled with plaster mortar and a primer mixture, all that remains is to lay the tile material with a minimum consumption of glue. The option is cheaper, takes less time.
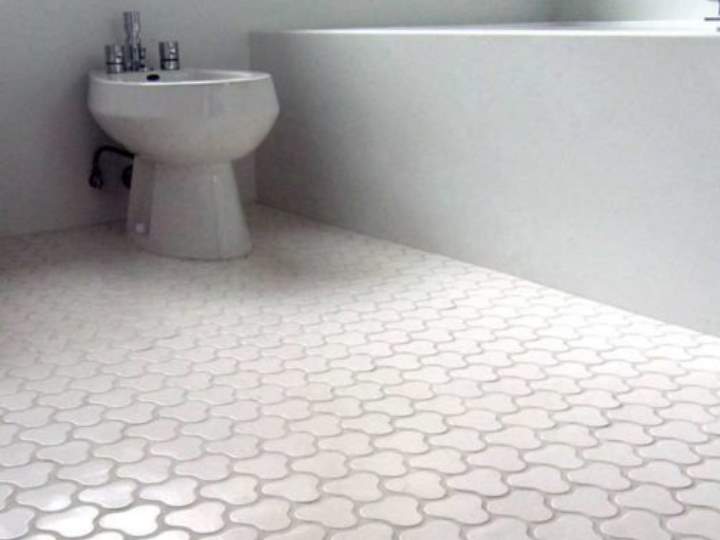
Floor tiles
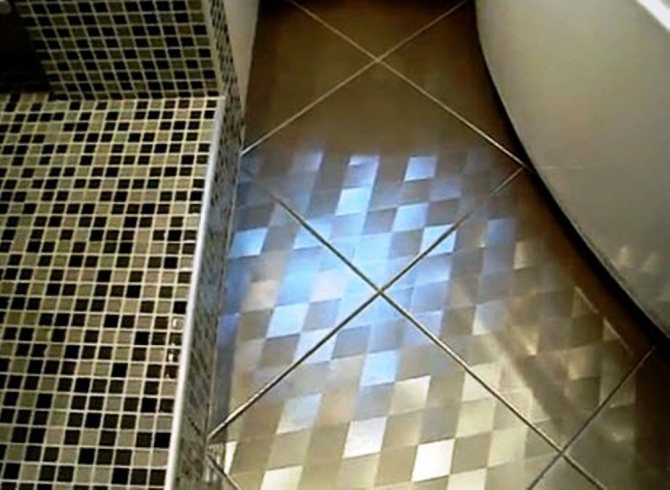
The bathroom floor is used differently, completely different from the walls, so the tiles for decorating it with your own hands must meet other criteria:
- Floor tiles should be 9-12 mm thick.
- The main characteristics for laying on the floor are the coefficient of friction when wet, abrasion class, strength.
- Give preference to large and medium-sized tiles so that there are as few tile joints on the floor as possible, as they get dirty and spoil the appearance of the room.
- Porcelain stoneware is suitable as a floor covering due to its strength.
- Low porosity for floor tiles is a big plus.
Floor tiles
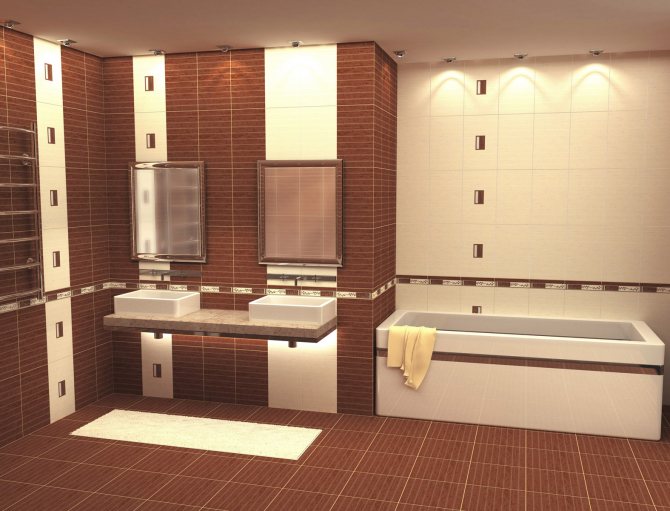
Bathroom tiles
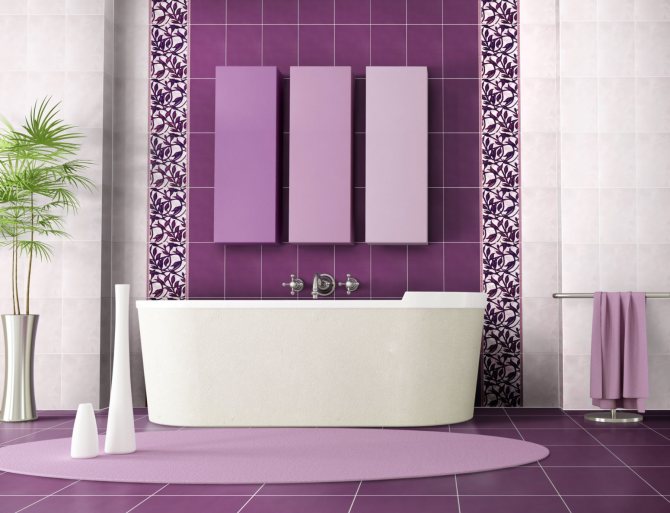
On a note! The floor gets dirty faster than other places in the bathroom, to make it easier to keep it in order, do not use tiles a couple of shades darker than the color of the walls to finish it, and in no case use a light grout.
Before laying ceramic tiles in the bathroom with the help of hired workers or with your own hands, carefully study all the possibilities so as not to regret your choice.
Which tile to use
The building materials market offers the consumer a large selection of tiles designed for laying on a brick wall.
The final choice is determined taking into account the purpose of the premises and the characteristics of its further operation.
The main types of ceramic tiles are:
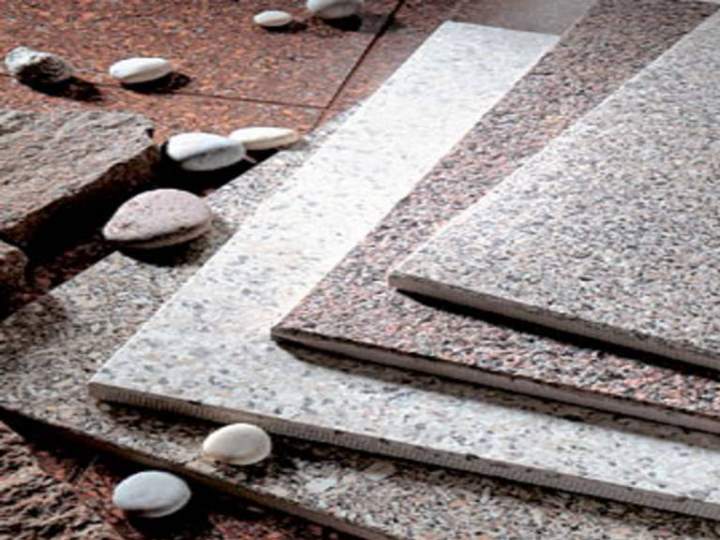
- porcelain stoneware. Practically does not absorb moisture, resistant to low temperatures. The tile, not covered with a glaze layer on top, resembles a stone of natural origin, but the physical characteristics and the level of strength are much better;
- clinker. Excellent material for pool cladding. Does not absorb moisture, successfully resists the effects of chemical components;
- cotto. Products are made from red clay raw materials, used for decoration. After the completion of the firing procedure, the elements are coated with a special compound that prevents the penetration of water.

Determining the option for purchasing ceramic tiles
The ceramic tile market is constantly renewing and expanding the assortment; at present, the retail network offers whole compositions for decorating living space in the aggregate of decorating floors with walls. Peculiar “studio»Ceramic tiles, where you can order a whole ceramic surface with a specific composition to your taste, so every year it becomes more difficult to navigate this variety of colors, gloss and textures.
This state of affairs determines the beginning of the analysis of the requirements for ceramic tiles with the technical characteristics of the tiles, which will gradually reduce the number of choices. The analysis is best done in the following order:

First, we proceed to the analysis of the probable operational loads in the room on the floor and the purpose of the room, for this purpose, focusing on the PEI groups, we determine the tile by wear resistance, we determine the type of surface required (with or without glaze) and determine the type of ceramic surface (glossy or matte). Using this approach, we remove from our project at least 70% of the possible tile options;

On a note!
Do not try to impose excessive operational requirements on the tiles, this will increase the purchase price, reduce the choice according to the design criteria, and the properties of any tile in terms of strength are already higher than that of any base on which the tile is laid.
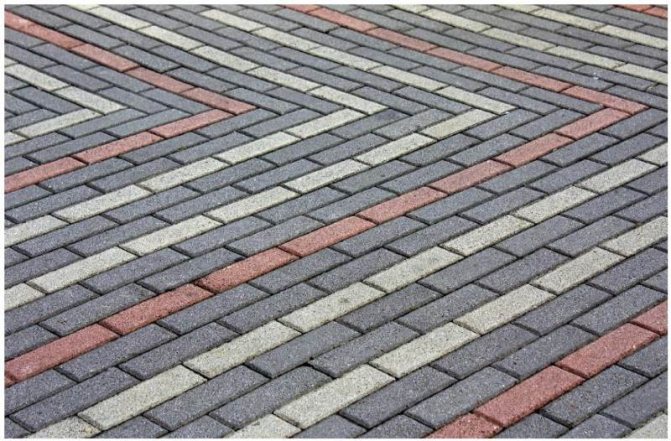
- after we have established the technical requirements for the ceramic / tile surface, we move on to the aesthetic component of the floor that we want to see after the renovation. If we have chosen a monochromatic type of surface, then we proceed to calculations by the volume of tile purchases. If we are planning an ornament, pattern or composition on the floor, then in this case it is necessary to clearly know the dimensions of the room along the contour of the floor, the contour of the floor itself, as well as the relief features of the future ceramic / tiled surface. Next, we sketch the surface, break this sketch into sections according to the size of the tiles, which we determined according to the technical characteristics (the most popular square sizes are 30x30 cm, 33x33 cm, 40x40 cm, 60x60 cm, rectangular 25x40 cm, 30x60 cm, 33x66 cm, etc.).
Advice!
When sketching a patterned, ornamented, or compositional surface, start with the corner pieces of the canvas and then place the longitudinal pieces. After creating a sketch, we proceed to ruling the surface by tiles. To fit the tiles to the ornament, you can vary the size of the tile or the thickness of the tile joint.
- then we proceed to the calculation of the purchase of flooring components, which includes: the number of tiles, primer for the base, adhesive for tiles, "crosses" (to adjust the thickness of the joints), tools / accessories, grout for joints, as well as "consumables" for forming the corners of the joint floors with walls (special decorative strips);
It is important to know!
For laying ceramic tiles on a wooden surface or a fiberboard / chipboard surface, it is necessary to add to the costs the costs of antiseptics, for processing, materials for insulating wood from moisture from glue.
For a note!
When laying ceramic tiles on an untreated concrete floor, it is necessary to perform a rough screed of the base surface in order to level the surface (without blockage), localize concrete chips and remove protruding elements from the floor surface.
An additional concrete floor primer and a rough casting mortar must be added to the purchase calculation.
The use of a rough fill does not exclude the use of a primer under the tile adhesive.
On a note!
When calculating the total number of tiles, it is necessary to multiply the number of tiles calculated based on the size of the floor area by a factor of 1.25 - 1.5, depending on the area, configuration and shape defects of the floor. That will allow you to avoid additional trips to the store, and in the case of exclusivity of the tile, it will exclude the search for the required ceramic tile.
- On the Internet we are looking for sites of the necessary manufacturers, their distributors or outlets in your city and, according to price lists, we determine a profitable option in terms of price and quality;
For reference!
On sites on the Internet, in addition to the current price lists, there are offers for discounts, bonus programs, installment programs, etc. In many cases, these options are only available to site visitors and offer matching coupons. Therefore, do not rush to a decision, even if you find a profitable option according to the price list, look at other sites, maybe there, taking into account discounts, the option will be more profitable or there are favorable delivery conditions that will save a greater amount than the price difference.
- After you have decided on the purchases, you need to make a decision on who will mount the ceramic surface of your room and for the ceramic surface, this decision is very important, if you have even the slightest doubt about your abilities, contact the craftsmen, let them do this work For you. This solution will most likely save your budget due to the fact that if you find an error in the process of laying ceramic tiles on the floor, then the entire floor will have to be redone, and this is already double costs, and if, after your mistake, turn to the masters, the costs will increase even 2-2.5 times, because someone else needs to remove the wrong layer.
Attention!
When contacting the master for laying ceramic tiles, be sure to consult his advice on the selection of tiles, the calculation of their quantity, the variety of additional materials and their quantity.
Surely he will make adjustments and it is not necessary that these adjustments will consist in increasing the repair budget, most likely the responsible foreman will tell you on what and how to save money and check his competence for one.
- During the purchase process, if you have not decided on the option of ceramic tiles or decided to install the floor with your own hands, be sure to consult with the seller, a consultant on the quality of ceramic tiles, on the selection of additional materials so that they fit your choice of tiles and according to the methods of laying the tiles you have chosen, for each the type of tile has a peculiarity for its laying. It is especially necessary to pay attention to the choice of grouting the joints of the ceramic surface.
Advice!
Ceramic tile grouts in retail trade are very widely represented, both in terms of manufacturers, and in terms of material properties and tinting. Therefore, before deciding to buy grout, read the instructions for its use and consult the seller's consultant.
On a note!
When calculating additional materials, be sure to leave space in the budget for the purchase of decorative transition (corner) strips, this will allow you to make the floor and decoration of the room more elegant, remove additional niches for the spread of microorganisms and simplify the maintenance of the room.
Decorative strips, as well as grout, have their own design solutions for a specific tile in color and texture. There is one more argument in favor of corner strips, no master can make the corner more accurate. than a corner equipped with a decorative strip.
Laying steps
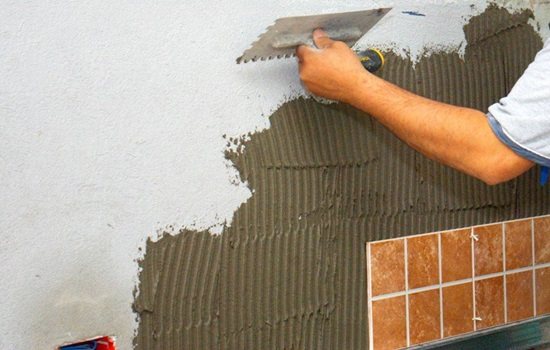
Laying tiles on an unplastered brick wall is a tricky job. First, you should prepare a primer mixture, a brush, tile material, glue, building level.
The technology implies the sequential execution of the following stages:
- the surface of the wall is thoroughly cleaned from dirt and dust. Oily stains and foreign particles are removed;
- a primer is applied, time is given to dry;
- the level will check the evenness of the wall surface;
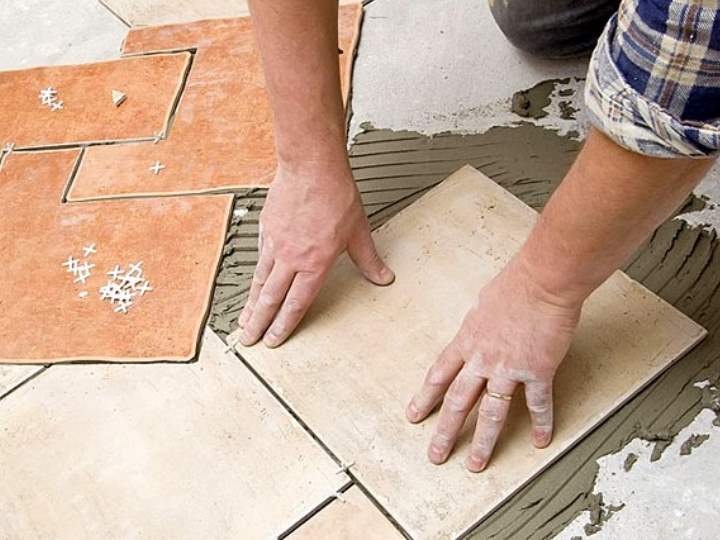
- an adhesive solution is applied to the back of the tile, the thickness of which is determined taking into account the existing irregularities;
- the ceramic product is tightly pressed against the wall, checked for correct positioning with a level.
Preparatory work
Before you start laying tiles on a brick wall, carry out the appropriate calculations that determine the need for materials. The wall does not have a layer of plaster, and everything should be done correctly in order to avoid unfortunate consequences.
First of all, the wall area and the size of the tile material are measured. Please note that a certain amount of tiles will be required for trimming so that the laying is done symmetrically.
The best option is to model the tiled rows on paper, respecting the scale.
Having finished with the calculations, we proceed to practical actions. For ease of installation, it is recommended to reinforce a profile guide or a regular wooden lath, from which the first row will begin.
The flatness of the resulting plane is adjusted according to the fastened self-tapping screws stretched at a five-millimeter distance from the surface to be trimmed. In the future, the adjustment process is carried out with an adhesive mass.
The main condition is to strengthen the first tile element, on which the final result of laying tiles on unplastered bricks will depend.
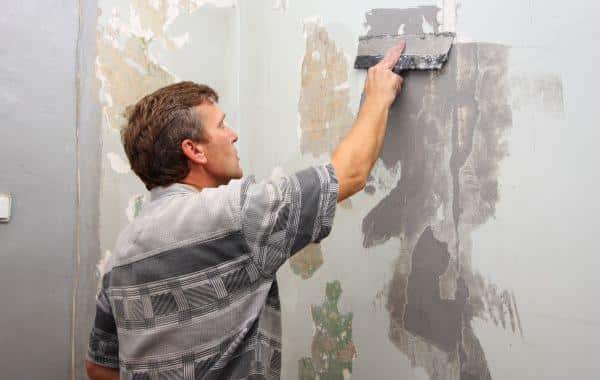
The primer is applied with a brush or roller. The first option is preferable, because the mixture is better rubbed into the brick pores, providing reliable adhesion. A spray gun is not used for such work.
In order for the glue to adhere better to the surface, do not wait for the primer to dry. It is allowed for reliability to apply a second layer in order to properly clog the porous areas, but in this way you will create an obstacle to the quick hardening of the adhesive solution. It can crack and flake off as moisture is absorbed quickly.
The second time, the walls are primed about an hour before laying the tiles, so that they have time to dry out a little. You should not immediately process the entire surface - it is better to do this in sections, given the speed of the facing work.
Expert advice
Before you start tiling the walls, they need to be leveled and cleaned.
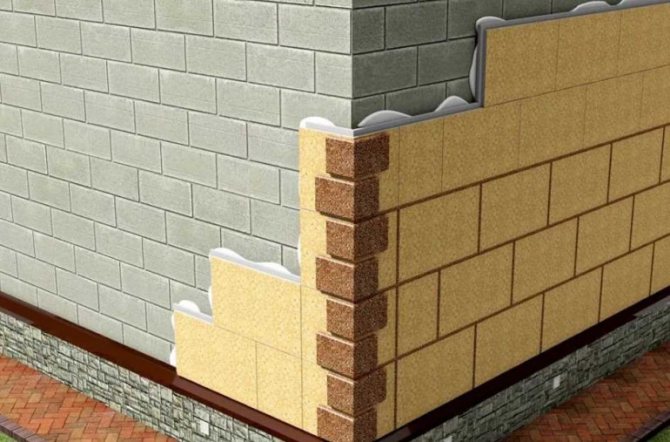
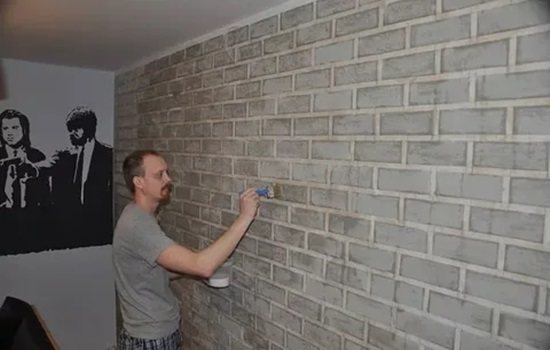
The use of decorative tiles when laying is distinguished by some features, the observance of which is very important. The material can be used to finish any surface, including brick, concrete and even wooden walls, but preliminary preparation is required, which simply cannot be dispensed with. The wall must be dry and even. Plaster, paint, greasy stains must be removed before installation. If there are significant irregularities, then it is required to apply a fresh layer of plaster, which will allow these errors to be eliminated. After plastering and drying the surface, it is necessary to apply a layer of primer, which will improve the penetration of the adhesive, adhesion to the surface.
You must follow these rules:
- After processing and drying the primer, it is required to apply a thin layer of liquid tile glue, to fix the metal mesh, which acts as a reinforcement.
- Next, the wall is marked. If the tiles will not be used to finish the entire surface, but only to decorate individual areas, then the thickness of the seams should be about 1 cm.
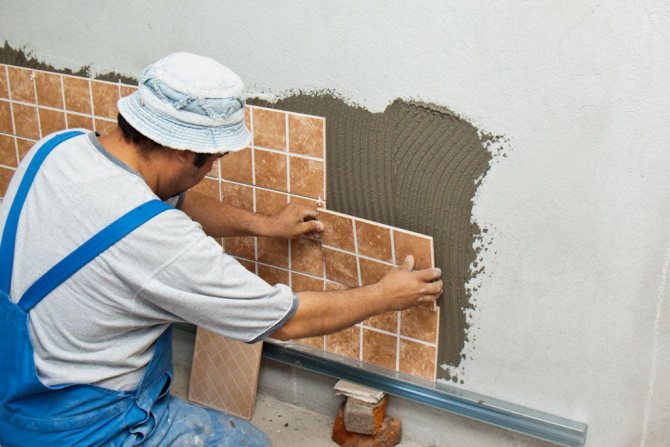
- The solution can be applied in two ways: previously on the wall or on the seamy surface of the tile. Both of these methods are of equal quality, but it all depends on the convenience of the work.It is better to lay the direction of laying from the bottom up, be sure to monitor the horizontal position with the help of a building level.
- It is necessary to lay down with pressing movements, it is necessary to start from the outer corners. If the tile is heavy and massive, then glue must be applied to the wall and to the tile itself in order to ensure the highest quality fixing.
- Facing tiles can have element sizes that are slightly different from each other. But it is quite simple to solve this, nippers and a hacksaw will help to give the plate the desired shape. Gypsum is easy to cut without the need for great effort.
- A special grouting mass is used to fill the joints; it is used in a semi-dry form. It is better to take a grainy, slightly sticky composition. Grout, when used, is brought to the state of thick sour cream. It is more convenient to apply it with a spatula. Its movements should be pressing, smoothing.
- All excess mortar that remains on the surface of the tile must be removed immediately using a plastic stiff brush. It is impossible to use a metal scraper, as you can quickly damage the surface of the cladding.
Today, various cladding options are used, among which brick tiles can be distinguished. This option is distinguished by great variety, attractiveness, style. The tile can be made with your own hands from plaster and glue, and laying it usually does not cause any problems.