Waterproofing wooden floor
The main stage in the arrangement of a wooden house is considered to be the protection of the floor from water. Material that has not been properly processed, with regular exposure to moisture, begins to swell, and mold and fungal lesions form on its surface. They pose a health hazard to residents. That is why it is necessary to approach isolation with great responsibility.
New technologies have made it possible to develop several options for waterproofing. They differ not only in price, but also in their features, technical data. To select a suitable insulation method, it is necessary to take into account the type of room, the main finish and other features.
Vapor barrier of a floor in a wooden house: materials and schemes
Specialized vapor control membranes were originally developed for a multi-layer roof insulation system. The material has demonstrated excellent performance characteristics, so it was actively used for the floor.
What is a vapor barrier for?
Let's first figure out what a vapor barrier material is. Unfortunately, many people understand this term as a fabric layer, which provides complete insulation of the floor or walls from water and its vapors. Taking advantage of this mistake, unscrupulous sellers and craftsmen suggest replacing a specialized product with ordinary plastic wrap, liquid rubber and other analogs, which are more suitable for the name "waterproofers".
The vapor barrier is a two- or multi-layer synthetic material - a specially perforated membrane with selective permeability. Simply put, the canvas allows steam or gas to pass in one direction, but not in the other. In practice, this is manifested in the following:
- The forming condensate from the insulation and the wooden frame is “drained away”;
- the penetration of particles of the heat insulator into the dwelling is prevented;
- the normal moisture level of the wood is maintained, which avoids the formation of dew, the development of rot, mold, fungi.
Why waterproof a wooden floor
Do not ignore the need to waterproof your wooden floor. This is especially true for wet rooms and buildings located in regions with high humidity. This will save not only time, but also finances for permanent repairs or replacement of floor parts.
But floor waterproofing may not always be required. It is required in the following cases:
Kitchen and bathroom
... In these premises there is a water supply and sewerage system. Even with the use of modern materials, the likelihood of an emergency remains. The consequences of pipe breaks are always significant. There is a risk of spoiling not only the finish of the bath or kitchen, but also the neighboring rooms. Neighbors living on the floor below also suffer from the flood. Waterproofing will not completely prevent leakage, but significantly reduce the volume of water and minimize the consequences of an accident. Thus, timely waterproofing will save financial resources, and repairing plumbing and eliminating the consequences of an accident does not cost little money.
Premises
located in high-rise buildings. In this case, it is not intended for permanent protection, but is used only to prevent flooding of neighbors when pouring the floor. This does not require capital insulation. It is enough to use ordinary plastic wrap.
Private houses
... The floor, regardless of whether the house is on a strip foundation or piles, contacts the ground to varying degrees. To prevent the ingress of moisture from the soil, waterproofing is applied. Its absence leads to damage not only to the rough coating, but also to the main one. In a short time, the tree becomes covered with mold, begins to rot, decay. After a few years, expensive and complex repairs will be required.
In all of the above cases, it is imperative to waterproof the floor. This will save money and time in the future.
Why do you need waterproofing
In fact, a wooden floor is a multi-layer structure, which includes logs, insulation, lathing and a finishing coating. And these elements need reliable protection against moisture penetration.
The fact is that in the room where life is carried out, the level of humidity is high. And this is fraught with the following consequences:
- boards will periodically swell and dry, and this will lead to deformation;
- with high humidity, condensation forms on the logs, and this will lead to rotting or deformation. As a result, it will be necessary to change the flooring.
- over time, the floorboard is sure to be affected by mold and fungus, and this has a detrimental effect on the microclimate in the room.
In addition to the fact that excess moisture affects the wood from the outside, the lower part of the floors is also affected by it. And in some cases, it becomes harmful. This usually happens in two cases:
- When the room is on the ground floor and the floors are laid without screed, the tree suffers from soil discharge.
- If the room is above the bathroom or kitchen, excessive vapors penetrate the ceiling and attack the wood.
Thus, waterproofing the floor in a wooden house is necessary. Coating elements must be processed and reliably protected from water. Only in this case the coating will last a long time and will not cause problems.
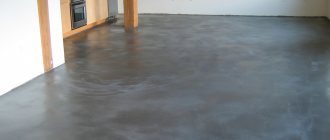
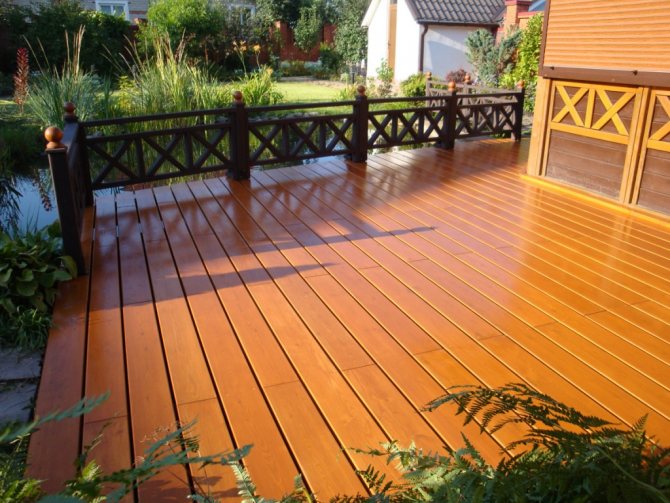
Wooden floor
Types of suitable waterproofing coatings
The coatings used as waterproofing are varied. Their choice depends not only on the cost, but also on the characteristics of the room, the method of application. But when using any type of insulation, it is important to know that the coating is applied not only to the area of placement of pipes, but also to walls to a height of 20 cm. This is necessary to protect the surrounding structures and finishing from moisture when splashing.
Consequently, the coating should be applied not only to the floor, but also to the walls along the entire perimeter.
Paint shop
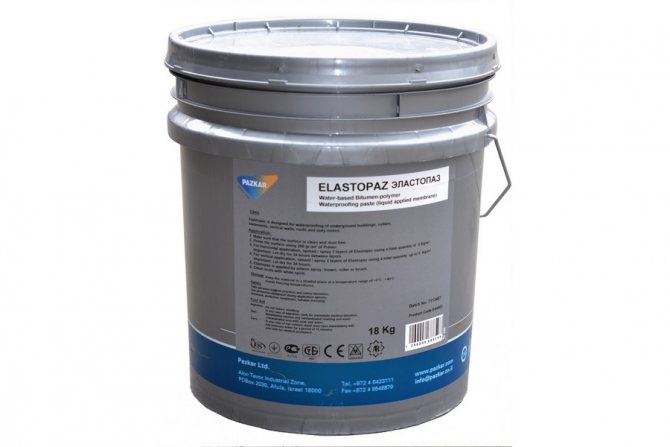
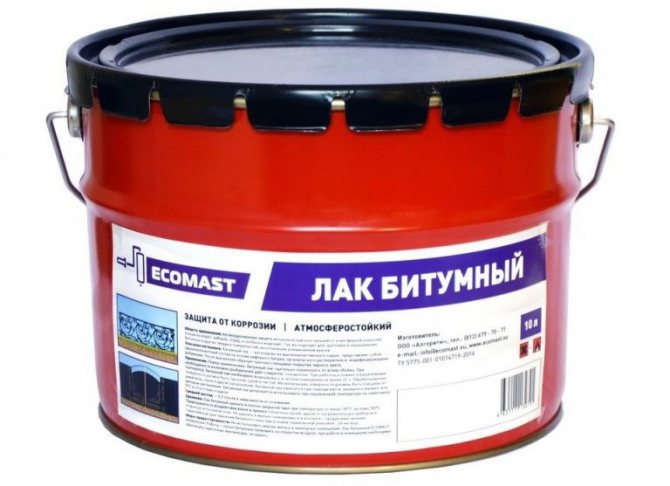
Waterproofing a wooden floor can be done with special paints and varnishes. They are considered the most inexpensive and not difficult to use.
The wood can be saved with varnishes based on polymers or bitumen. In addition, they are used to emphasize the structure of wood and create a unique, environmentally friendly interior.
But the disadvantage of this type of insulation is its fragility. Over time, paint or varnish wears off, and the work must be repeated. On average, the service life of the insulation is 3 to 5 years.
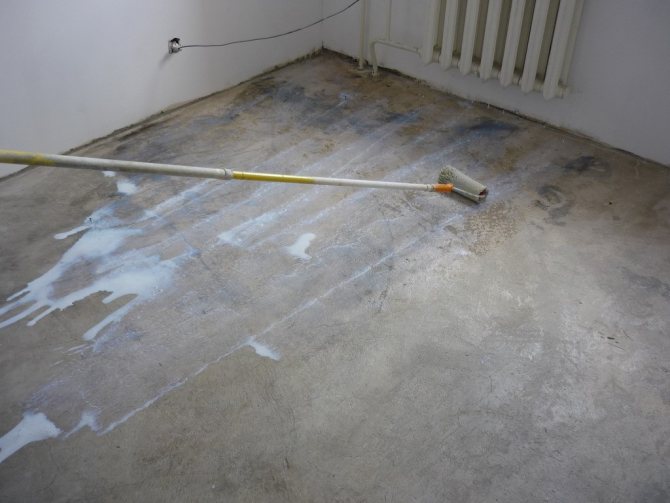
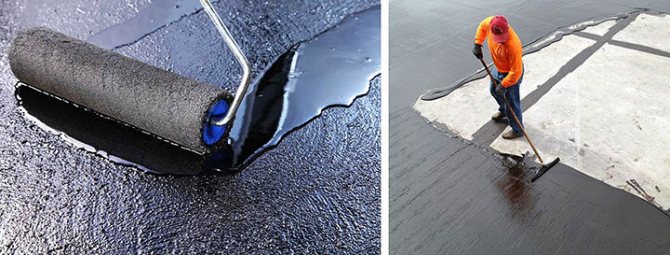
Waterproofing the floor in a wooden house is applied only to a leveled and clean surface. For this, a roller or brush is used. Experts recommend painting in two layers. Allow 2-3 days between applications so that the first layer is completely dry.
After work, the room needs to be ventilated, since the coatings usually have an unpleasant, pungent odor. Therefore, the work must be carried out using personal protective equipment and with great care.
It is possible to increase the service life of the waterproofing with the help of linoleum, which is fixed with a special glue.
Coating
Waterproofing of the floor in a wooden house is carried out using coating materials. There are several types of them:
- Primers. Used as a primer. They can be purchased separately or diluted with mastic with water.
- Paints. For the purpose of waterproofing, materials based on rubber are used. Apply from a spray can, roller, brush or spray gun.
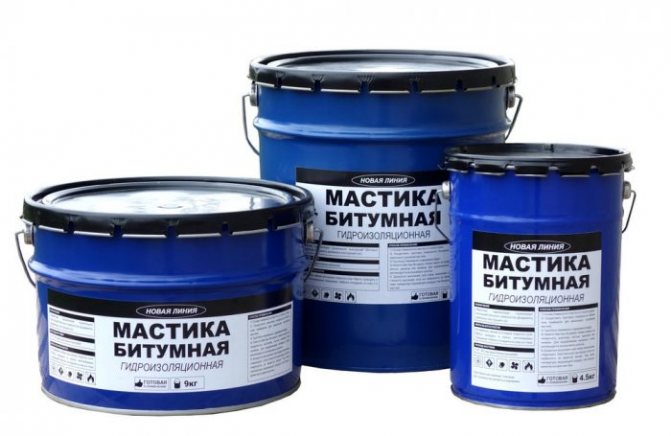
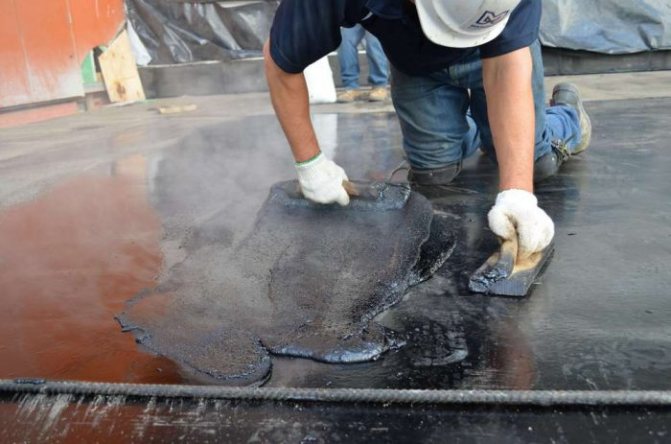
- Mastics. Insulation is carried out with mastics based on bitumen, polymers or cement. One-component formulations can also be used. They do not require special preparation of the solution, they are able to serve for a long time, and are easy to use.

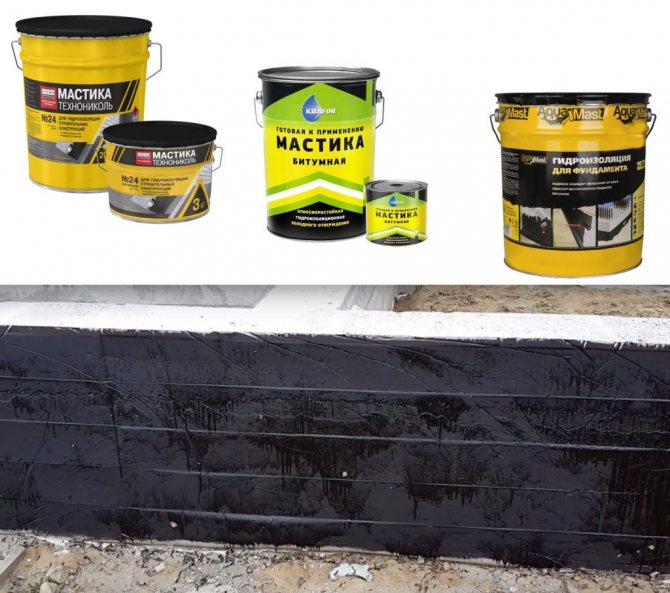
It is better to apply lubricants in two or three layers, applying them one by one, letting each layer dry. First of all, the solution is applied to the joints of the walls and floor, then around the risers and only after that the rest of the surface of the wooden floor is covered
Penetrating
Apply in the same way as mastics. But the main advantage of the materials is their high penetrating power. This is the only technology that allows you to protect the tree from both sides at once.
The disadvantage of materials is their cost. In addition, they appeared on the market quite recently and did not have time to gain popularity. Usually used to protect reinforced concrete structures.
Okleechnaya
Before use, the surface should not only be cleaned of dirt and dust, but also degreased with a mastic or primer. They allow you to increase the adhesion of materials, since in rolls it is quite low, even in spite of the presence of a self-adhesive layer.
They are used for mineral-based structures. Applicable:
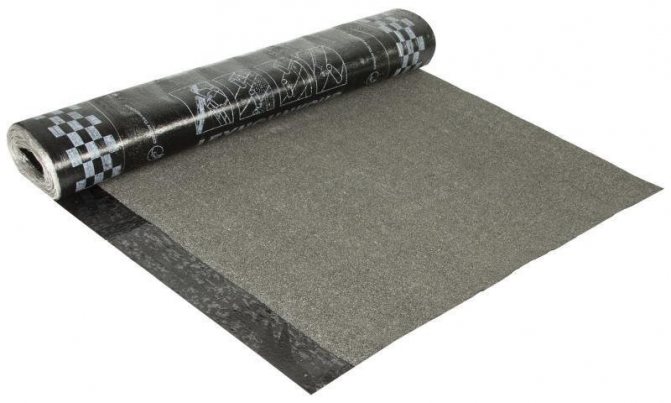
- Materials in rolls based on bitumen. Their service life is no more than 5 years.
- Films. They can last a little longer, up to seven years.
- Membrane. They are considered the most durable.
Complex processing, when mastics and gluing materials are applied, allows extending the service life of the waterproofing up to 20-50 years. But usually the sub-floor needs to be repaired much earlier, which should be taken into account.
The advantage of film coverings is that tiles can be laid directly on top of them using only glue. There is no need to prepare the screed.
Impregnations
They consist of fine sand, cement with a water-repellent property, and chemical additives. This allows you to reliably clog the pores of the wood.
The composition forms a protective shell that prevents moisture penetration. But impregnation is not recommended for use in residential premises.
Sprayed
This type of waterproofing allows you to create a smooth, seamless finish for a wooden floor. But to work with the material, special equipment is required. The insulation cures quickly when exposed to air.
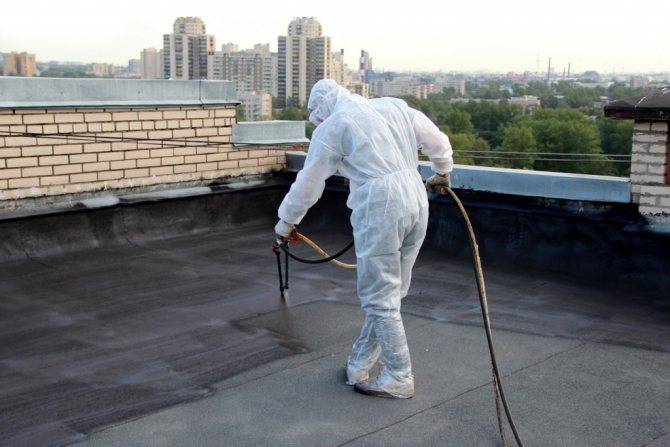
Their use is not beneficial for small spaces. Also, the disadvantages include a high probability of damage. But it is compensated, since the main coating is laid on top.
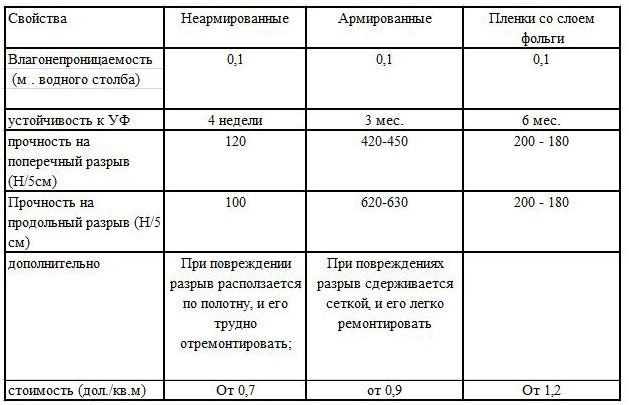
Types of vapor barrier materials
Materials differ in the amount of vapor permeability
There are many different types of insulation materials. Each has its own advantages and disadvantages, so it is important to study all the characteristics and, based on the analysis, choose the most suitable option.
Vapor barrier materials differ in structure and coefficient of diffusion resistance (Sd, m). The value of vapor permeability is relative and depends on temperature and humidity.
The material, which has a diffuse resistance of 0.02 m, forms a resistance to water vapor, like an air layer of 2 cm. A resistance of 0.04 m is the lowest threshold of a membrane with high vapor barrier characteristics.
The indication of the Sd value is a guarantee of the original products of a certain brand.
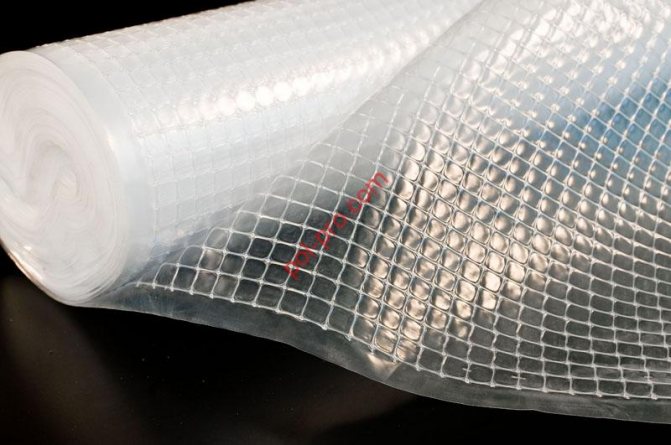
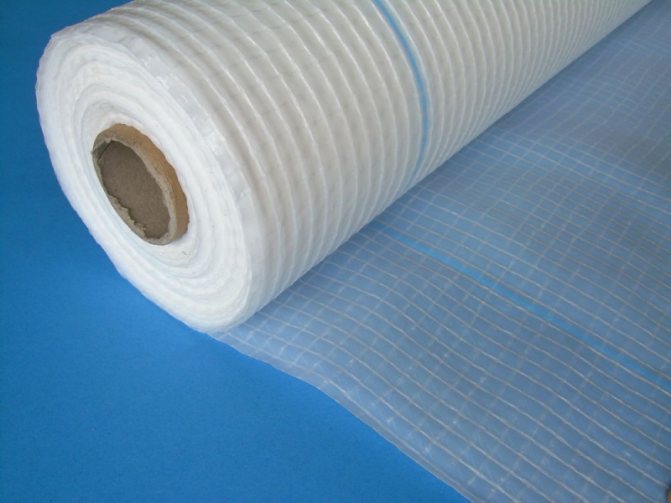
Polyethylene film

Vapor barrier film reinforced with woven threads
Related article: How to install ceramic bathroom skirting boards
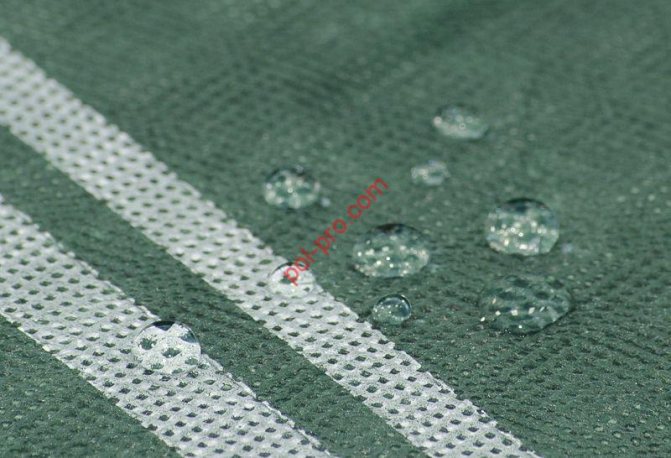
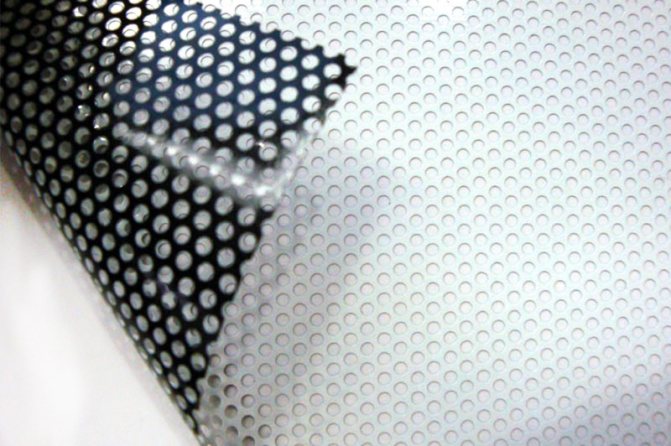
The most common and economical option that comes in rolls. To increase the tear resistance, the film is reinforced with fabric threads. The material is produced with and without perforation.
The perforated type has micro-holes in its structure, due to which it has high vapor barrier performance, while it has a diffusion resistance of 1-2 m. It is capable of passing a small amount of steam. Most often used as waterproofing.
Non-perforated films have a resistance index of 40-80 m and are a good barrier to the passage of steam, as well as protect against condensation.
Double-sided film has a smooth surface on one side, and a fleecy on the other. Roughness retains moisture, does not allow condensation to drain onto the insulation. The main disadvantage is that the film does not breathe and tears easily.
Polyethylene with reflective layer
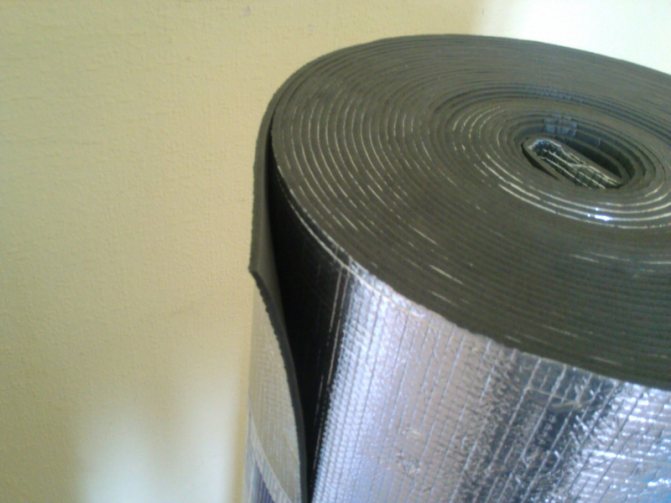
The film with an aluminum layer is most often used in rooms with high humidity: bathrooms, baths, saunas and kitchens.
It is a good barrier to the passage of steam Sd = 200 m.
The aluminum layer reflects infrared rays, thereby retaining heat in the room.
Polypropylene
Polypropylene withstands temperature changes well
Polypropylene films have sufficient strength, withstand temperature extremes, and at the same time have a higher cost.
The best quality option is reinforced propylene with a cellulose or viscose insert. It features a slightly loose matte surface that is able to retain a sufficient amount of moisture. Thanks to this layer, the condensate does not flow to the insulation, but gradually evaporates from the surface of the material.
When installing a vapor barrier with an antioxidant layer, leave a small gap for air exchange.
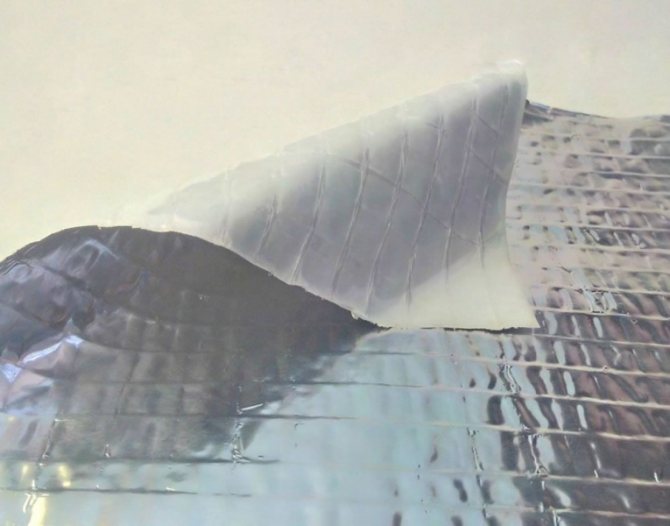
Foil material
The combined two-layer material consists of two layers:
- the base (expanded polystyrene, mineral wool, foamed polyethylene) works as a heater;
- the foil-clad aluminum coating reflects the infrared spectrum and has a high vapor barrier performance.
It is laid with a foil layer in the room. The aluminum coating melts when exposed to high temperatures.
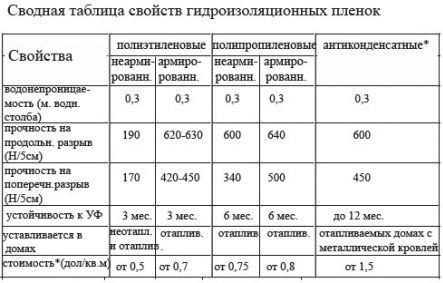
Film properties depending on the structure:
Related article: Arrangement and calculation of reinforcement in a strip foundation
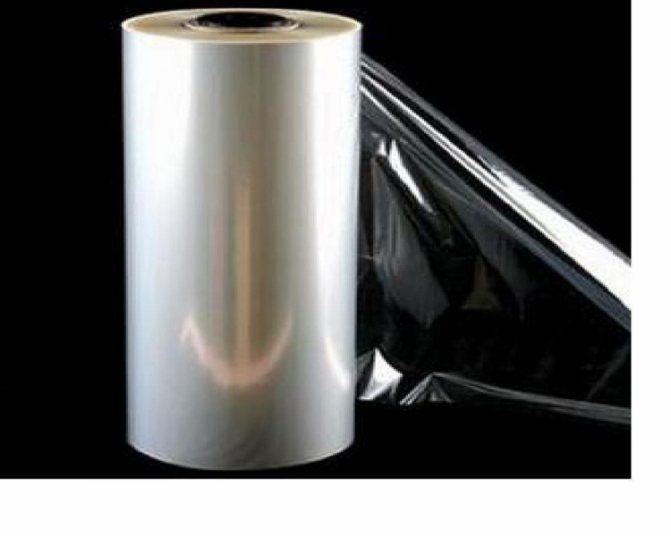
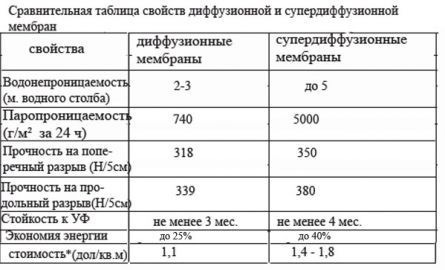
Membrane materials
Breathable diffuse membranes are made from artificial fibers.
These are the highest quality, but at the same time, expensive materials.
They have a long service life, high levels of vapor barrier and strength.
Produced:
- one-way types that discharge steam in one direction;
- double-sided are capable of venting steam from both sides.
Each of these types can be single-layer or multi-layer. The more layers, the more moisture the material can retain.
Before laying a one-sided membrane, be sure to follow the instructions, it is important not to confuse which side to lay the material on.
Intelligent membranes
Intelligent membrane materials are capable of regulating humidity and temperature and at the same time perform the function of waterproofing.
They do not require a ventilation gap and are easy to install.
The models have the highest cost, but they justify themselves with a long service life and a combination of several functions.
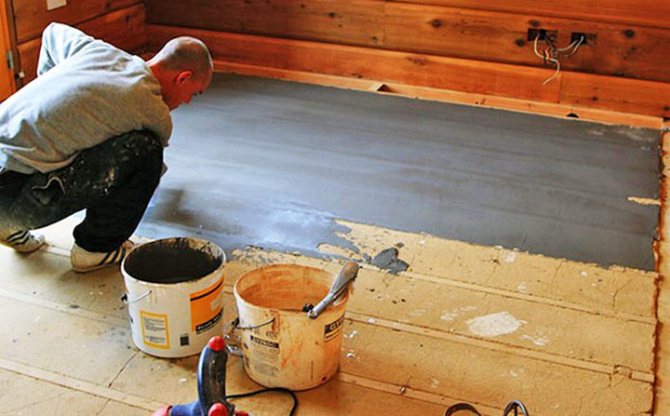
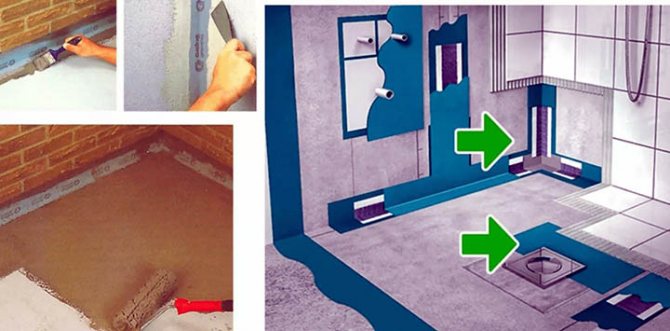
Surface preparation
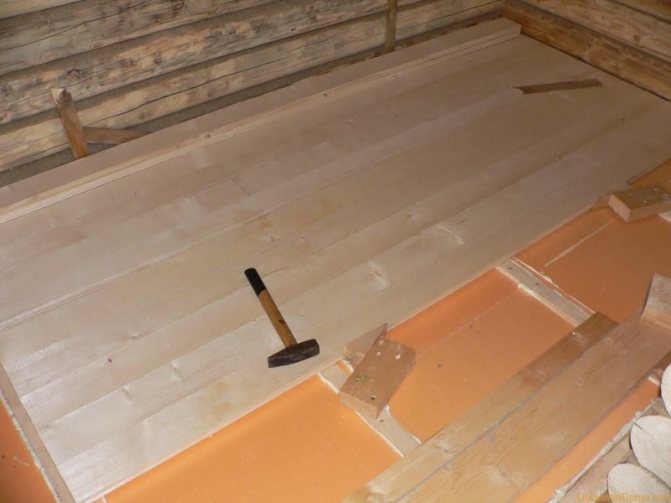
Before waterproofing a wooden floor, it is important to properly prepare the base. First of all, it should be cleaned of debris, dirt and dust. Then, all the cracks are sealed. For these purposes, mastic is used for woodwork. Lags are treated with an antiseptic solution, then a protective impregnation is applied.
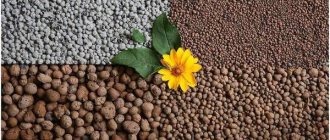
In order to insulate and increase sound insulation between the logs, expanded clay or mineral wool is laid. The choice of insulation depends on the characteristics of the room, financial costs and individual preferences.
Plywood pre-treated with moisture-resistant impregnation is laid on top of the insulation. After fixing on the floor, a waterproofing primer is applied to the sheets. It should dry well enough, and dirt and dust should not get on its surface.
The primer is also applied to the walls, at a height of 25 cm around the entire perimeter. This will protect them from splashing water.
How to waterproof a floor in a house using a reinforced concrete floor?
Consider how to make a floor waterproofing in a house on a reinforced concrete floor using a coating method. In this case, you should adhere to the instructions for the use of a particular material for waterproofing.
Namely:
- Comply with the composition exactly. Many materials are sold in the form of dry mixtures, the slightest violation of the solution preparation technology can spoil the highest quality product;
- Accurately observe the curing time... Each waterproofing material has a specific cure time. Haste in this process will result in a loss of strength and durability of the waterproofing.
Work order:
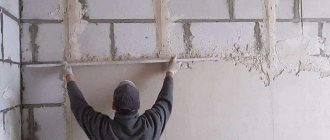
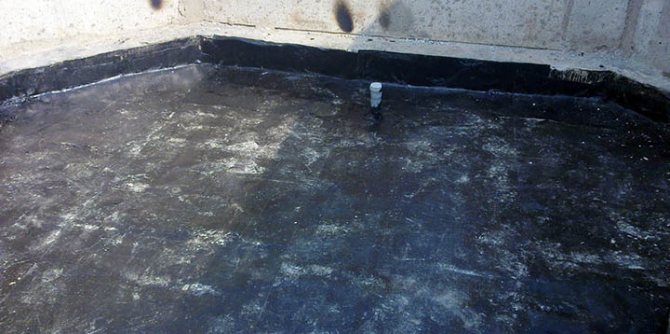
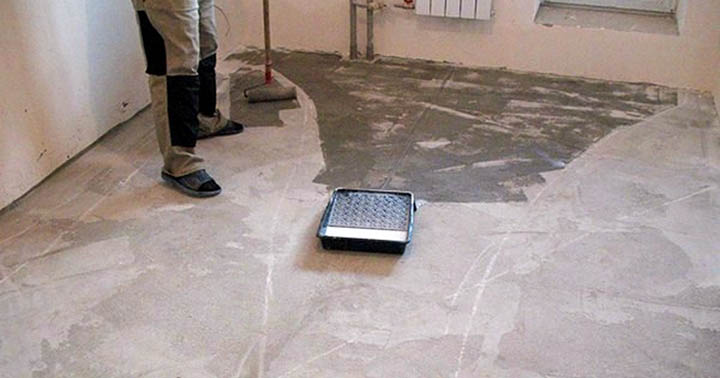
The waterproofing of the concrete floor must be on a solid foundation, without chips, cracks or potholes. In many houses, a reinforced concrete slab, which serves as the base of the floor, almost always has bumps, depressions and differences in height, therefore, a concrete floor screed is made on such a surface. In this case, the floor is waterproofed in front of the screed.
(1) The surface should be cleaned of debris using a wire brush, the cracks should be repaired with plaster and dried.
(2) Before applying the coating waterproofing, the floor surface should be covered with a layer of bitumen-water emulsion (primer) of deep penetration, which holds the small particles of the insulated surface together and promotes strong adhesion of subsequent waterproofing layers.
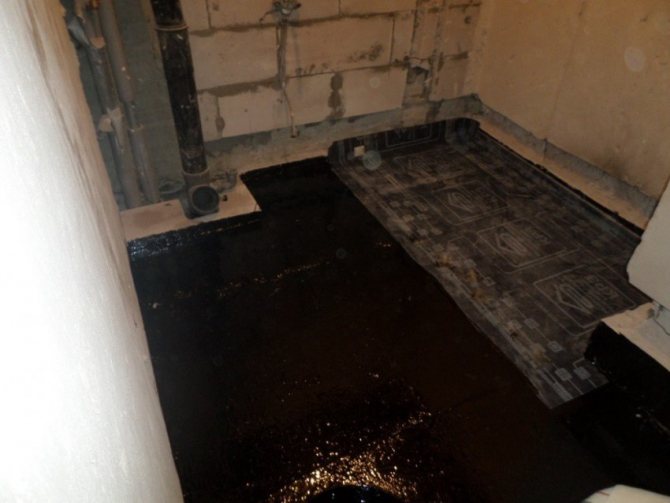
(3) Next, a bitumen-water emulsion is applied to the floor. The waterproofing compound is applied in several layers with interruptions to dry. At the same time, the continuity of its application is strictly observed, otherwise the waterproofing will lose its meaning.
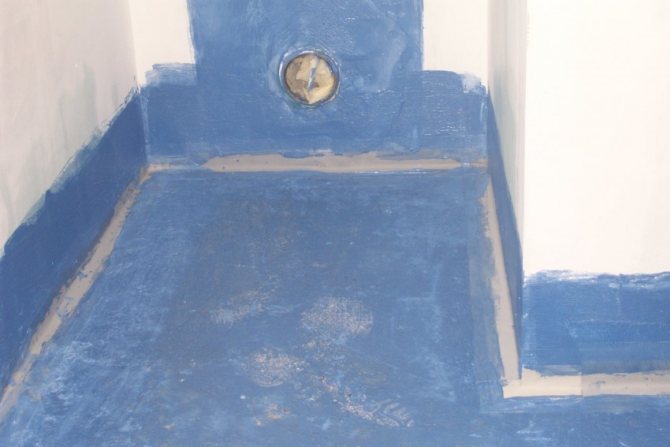
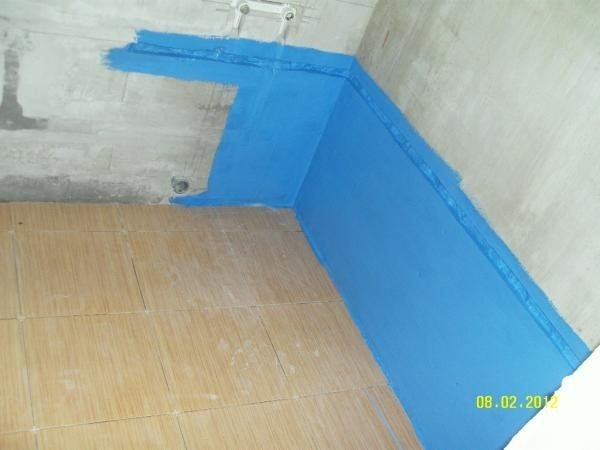
The joints of the floor with walls, steps or other protruding objects should be coated with a protective layer to a height of up to 30 cm.
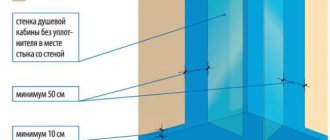
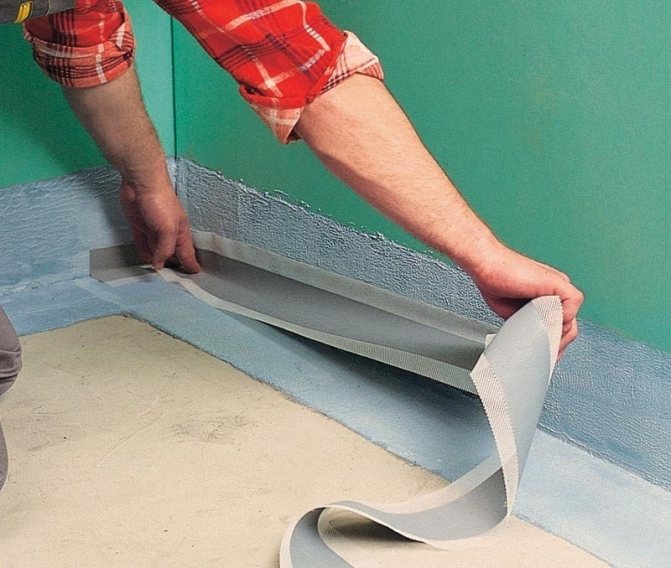
Shower floor waterproofing has its own characteristics. Above all, the joints between the walls and the floor should be protected from water penetration. For this, a sealing tape is used.
The order of work is as follows:
- Waterproofing the joints of the joints should be smeared with a layer of waterproofing;
- At the joints to the waterproofing, glue (press in) the sealing tape with an approach to the floor and walls;
- Liberally coat the edges of the tape with waterproofing;
- Apply waterproofing to the floor surface;
- On top of the waterproofing, tiles are laid on the floor with an adhesive solution.
Important! If the tape will lie near pipes with hot water or a heating system, then choose a tape that can withstand temperatures of + 70 ° C.
Waterproofing the floor in a bath or shower is carried out with materials based on polyurethanes or rubbers.
Remember: in damp rooms, not only the floor, but also the walls need protection from moisture. Therefore, it is advisable to carry out comprehensive waterproofing.
That is, the sealing tape is glued along all the joints of the walls. And the waterproofing materials offered to you perfectly fit on concrete, plaster, drywall and gypsum fiber board for the floor.
Wooden floor waterproofing process
Waterproofing a wooden floor is carried out in several stages. Their sequence should be carefully followed and each step should be followed correctly.
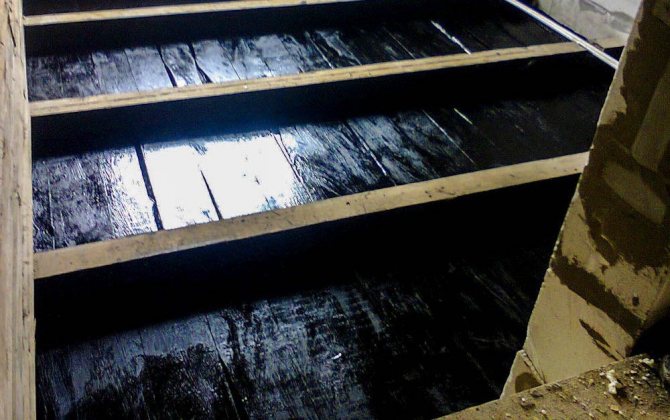
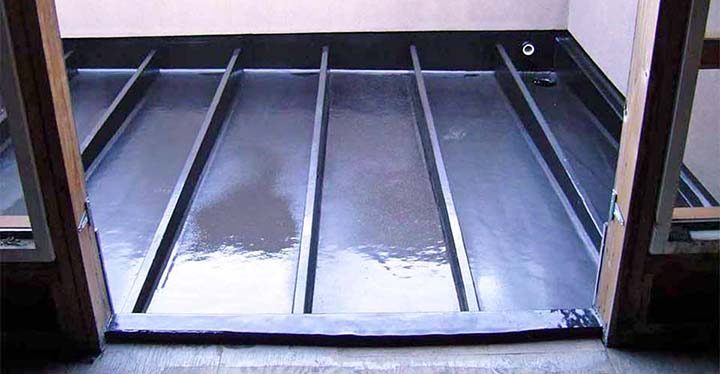
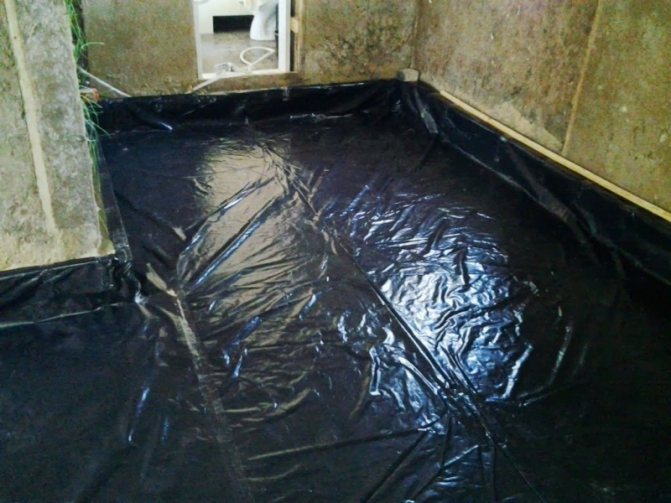
| Apply mastic, based on bitumen, to a wooden floor, walls to a height of 20-25 centimeters.To perform the work, use a roller or brush (special brush). After 4-6 hours after applying the first layer, apply the second one. In this case, the roller must be moved in the opposite direction. In the process of drying the solution, it is necessary to exclude the ingress of dust and dirt on it. |
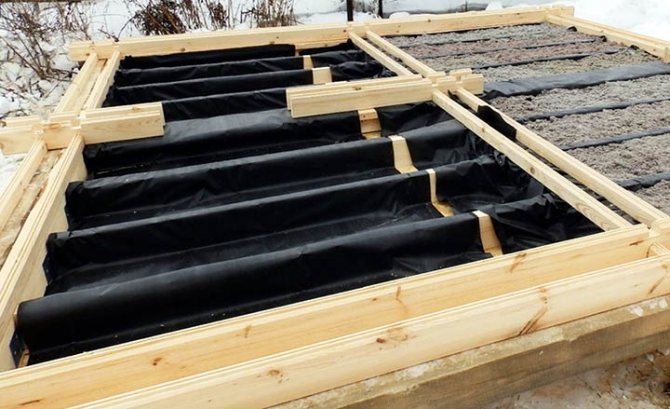
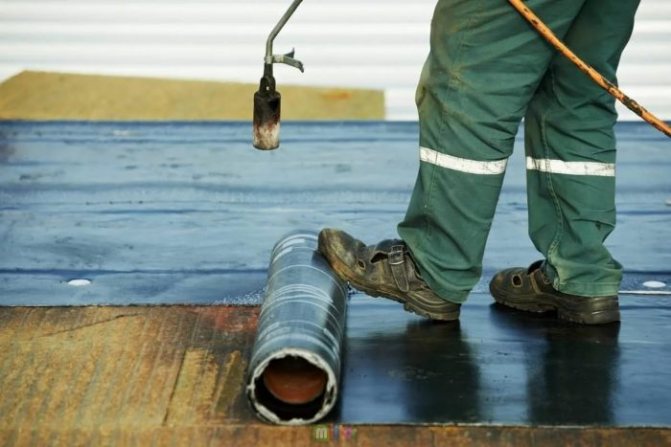
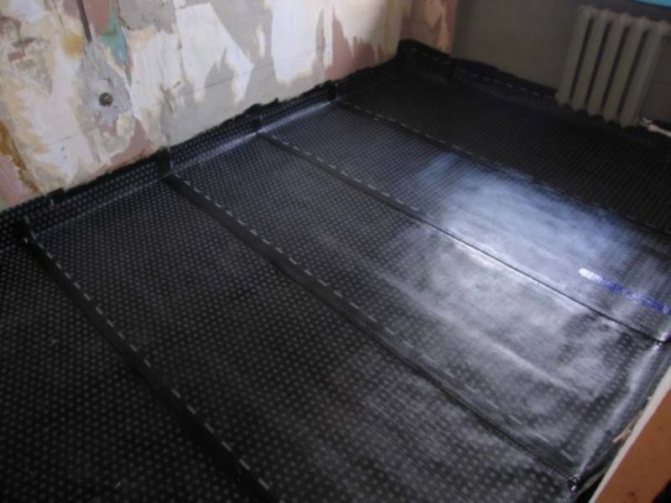
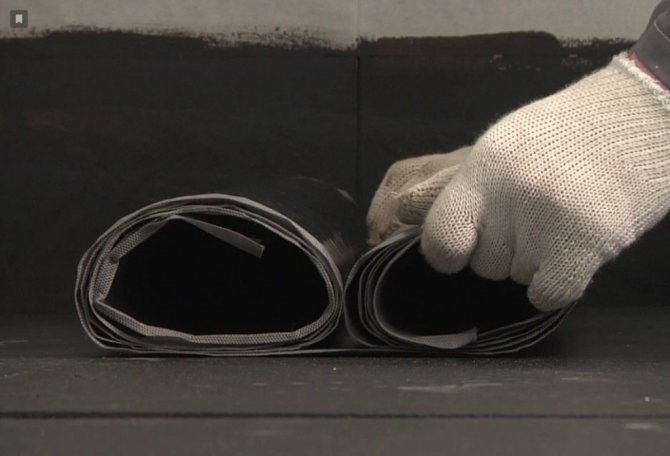
| Cut the roll material into strips. Their length should be equal to the distance from wall to wall. In this case, it is necessary to take into account the approach to the walls (add 40-50 centimeters). |
| Roll material from both ends towards the middle. There should be two rollers. |
| Unroll one roller gradually. Put mastic on the base in front of him. The material is fixed with a special roller. The second side is laid in the same way. This is necessary so that voids do not form between the surfaces. |
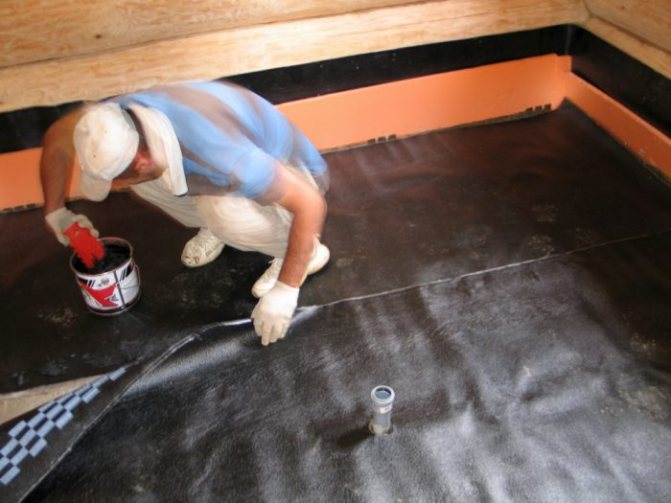
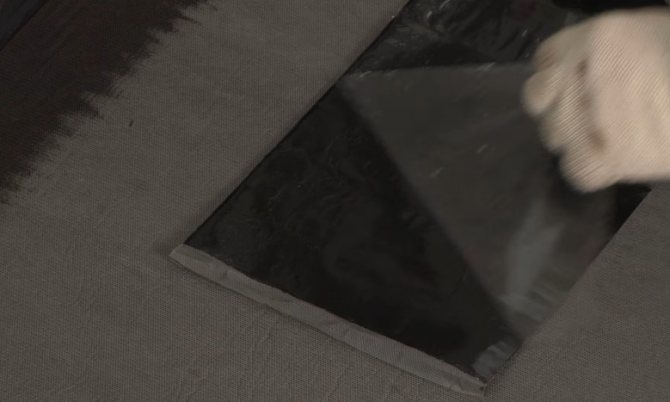
| When using a self-adhesive waterproofing material, remove the film as it rolls out. It can be removed easily enough and does not require effort. |
| Subsequent canvases are laid in a similar pattern. In this case, one edge of the previous one should overlap at a distance of 10-15 centimeters. The junction is coated with mastic between the materials and from above. This improves adhesion and waterproofing properties. When using thermoplastic materials, a special welding machine is used for these purposes. But before using it, it is important to carry out tests on the trims in order to find the best temperature regime and heating time. The result can be verified using a tensile test. The material should not diverge at the seam. |
| All corners must be glued with roll material, from which strips are pre-cut. Their width can vary between 30-35 centimeters. The edge is laid on the floor, and the rest is brought onto the wall, carefully gluing. |

After the work is done, you can start thinking about the appropriate finish coat option.
Work on waterproofing a wooden one takes a lot of time and effort. But its correct and high-quality implementation will increase the service life of the subfloor and topcoat by 20-50 years and avoid the need for expensive repairs or replacement of wooden logs.
Do-it-yourself floor vapor barrier
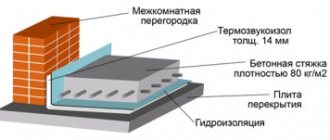
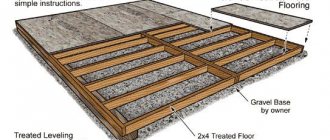
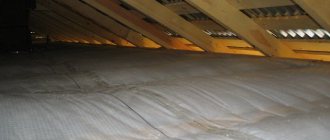
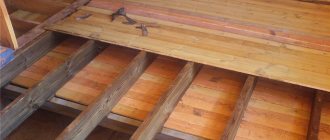
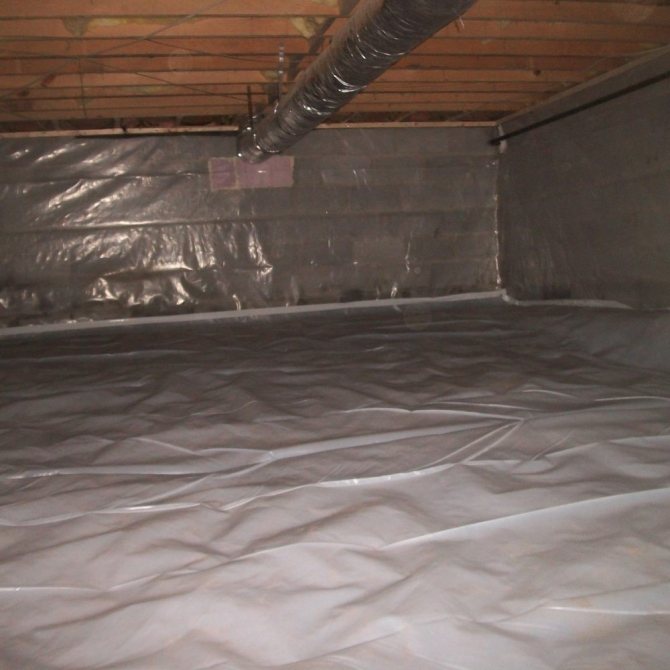
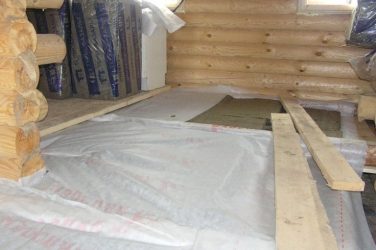
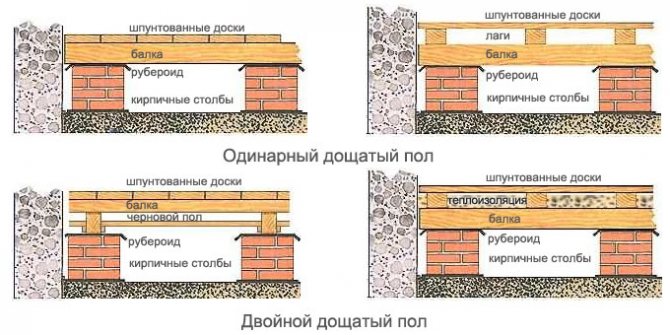
In a wooden house, the floor is equipped with several layers:
- An air gap remains between the soil and the subfloor. The underfloor is self-ventilated.
- Lags are made from thick timber.
- Laying waterproofing, insulation, vapor barrier.
The best option is to install insulation during the construction phase. In this case, less labor costs. It happens that during operation or repair it is necessary to lay the floor waterproofing. For information on how to put a vapor barrier when installing a sub-floor, see this video:
Preparatory work
When building a house, we treat all wooden materials with antibacterial compounds against fungal infections and pests.
Subfloor boards and logs are most susceptible to moisture.
We put a vapor barrier layer on the rough boards and put thermal insulation on it.
If the vapor barrier needs to be installed during operation, we disassemble the floor to the rough boards. We check the condition of the floorboards. We replace the deformed boards damaged by mold or pests. We treat the logs and the first layer of the floor with protective compounds.
Insulation laying
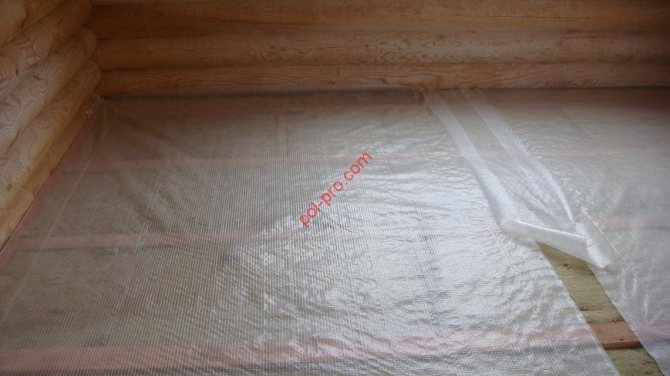
Laying the vapor barrier material is easy to do with your own hands. To do this, you need to follow the installation instructions for the selected material and know the sequence of actions.
Related article: Hunting style in the interior
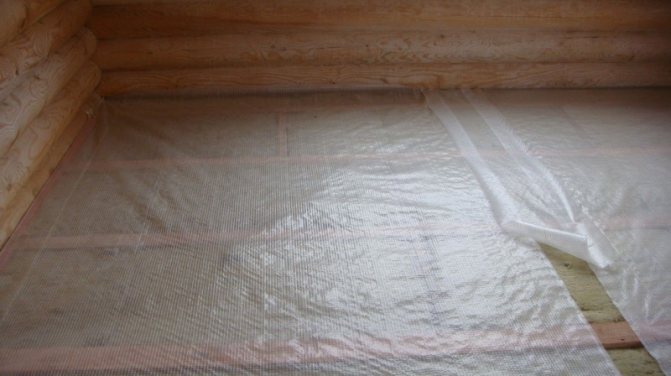
Stages of laying a vapor barrier layer:
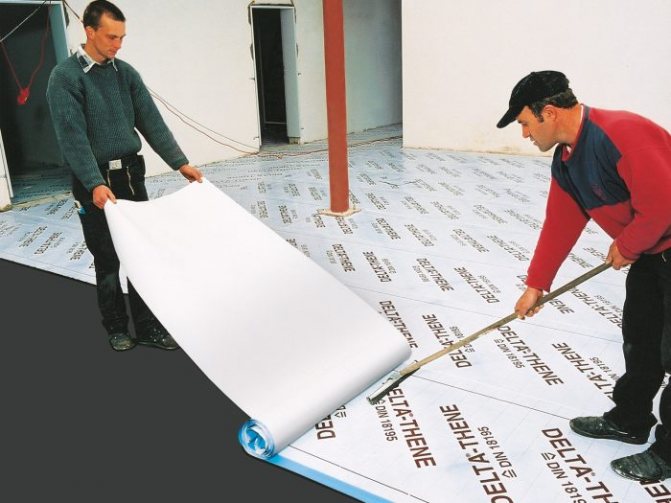
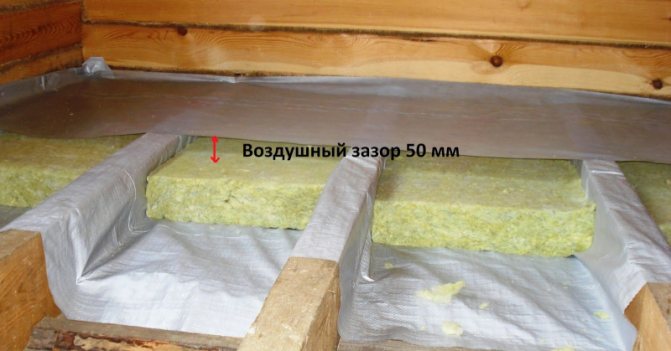
- Spread the selected insulating material on the subfloor floorboards so that it lies freely. The strips should overlap by 150 mm. Models can be mounted on galvanized nails, staples, adhesive tape. We glue the joints with double-sided tape.
- We mount the logs strictly in the horizontal plane.
- We install thermal insulation (mineral wool, expanded polystyrene, polystyrene). We make sure that there are no gaps between the logs and the insulation. If, nevertheless, a space has formed, we fill it with polyurethane foam.
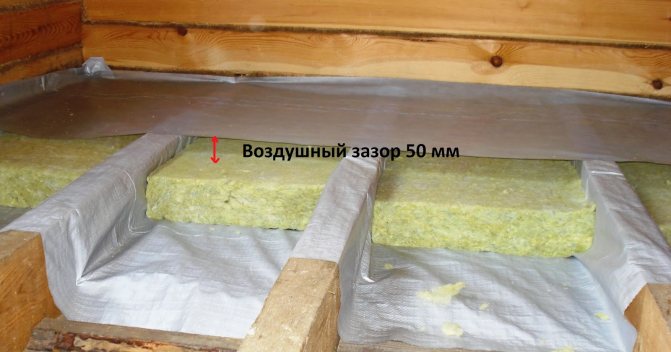
- We put a layer of vapor barrier material on the insulation, it will be an obstacle to the penetration of steam from the room. We lay the film so that there is a small ventilation gap. No gap is required when laying the membrane.
- We mount boards with a 2 cm gap between the vapor barrier and the floorboard.
- We lay the topcoat.
When laying the vapor barrier material, it is important to lay it on the correct side.
Professional advice
Waterproofing a house is a job that requires not only financial investment and time, but also accuracy.
Professionals recommend:
- Do not use flammable materials.
- Leave a ventilation gap between the subfloor and finish floor. This will reduce the likelihood of condensation, mold and fungal infections.
- When choosing a material for waterproofing a wooden floor, you should take into account the presence of a basement, subfloor, type of insulation, moisture level and the material from which the subfloor is made.
- Be sure to treat the tree with an antiseptic solution.
- When working, use personal protective equipment, since many solutions have a pungent or unpleasant odor, which can cause a headache.
- Each layer of solutions should dry well before applying the second.
Experts recommend following the sequence of work. But there are times when there are slots on the floor that are approximately the same in width. They form when wet boards are applied. This is not allowed during construction, but such a violation often takes place. Deck floors can be used to remedy this situation.
They have dark stripes between the boards, and with the help of modern materials, it is possible not only to waterproof, but also to create a unique design coating.