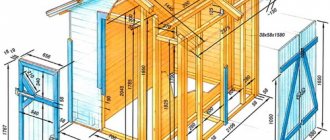
Basic rules for assembling a wooden floor in a garage
According to SNiP standards, when designing garages, the choice of materials and methods of their installation should be made taking into account the floor load of 400 kg / m2. Therefore, when assembling the flooring in such structures, you must follow some rules.
It is believed that when using 2 cm boards for flooring in a garage, the logs should be placed at a distance of 30 cm from each other. Moreover, under them it is supposed to use boards with a section of 5x15 cm.
When using sawn timber with a thickness of 3.5-4 cm, it is allowed to mount logs in increments of up to 50 cm. In this case, it is also allowed to use a board of 150x50 mm for supports. But it is better for such a flooring to still take a beam of 100x100 mm.
Wooden floors in garages are usually not strictly horizontal. To facilitate cleaning, the flooring is knocked down with a slight slope towards the gate. In this case, it is taken into account that at the entrance, the coating should lie flush with the threshold. Indeed, otherwise, it will be simply inconvenient to drive into the garage by car.


Features of the choice of materials
The main thing when choosing is to determine how you can insulate the floor to maintain the optimal temperature, since in conditions of excessive heat, the car will be even more damaged than in severe frost. Therefore, when choosing materials, it is necessary to take into account the requirements of SNiP 21-02-99 ("Parking lots") and remember the regulatory properties that the garage must comply with:
- winter temperature up to + 5º С;
- good ventilation with an inflow of 180 m3 / h.
Both indicators are of equal importance for creating optimal storage conditions for the car, therefore, it is strongly not recommended to close the ventilation holes in winter to increase the temperature. In addition, it is important to take into account that modern materials for floor insulation are planned to be laid independently and to choose a simple installation technology. Additionally, it is necessary to choose the optimal ratio of the efficiency of the heat insulator / the price of the products, to study the properties of the material and the features of its application in practice.
Before you start doing floor insulation with your own hands, it is recommended to pay attention to the installation technology, depending on the material chosen. At the stage of choosing materials, it is imperative to take into account the requirements that the heat insulator must meet:
- Good sound insulation properties.
- Long-term preservation of structure and shape.
- Resistant to heavy loads.
- Good fire resistance properties.
- Low coefficient of thermal conductivity.
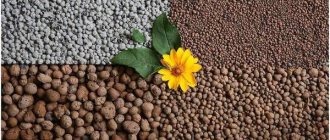
All thermal insulation materials for the garage floor, depending on the components, are classified into several groups:
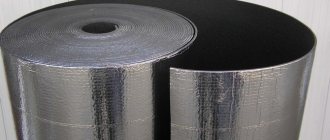
- polymer: plate heaters (polystyrene, other derivatives), liquid or roll polymers with a foamed structure (penoizol, penofol), reflective (foiled with aluminum), heat-insulating paints;
- mineral: expanded clay, mineral wool, solutions with modifying additives;
- silicate (glass wool);
- wood-shaving: ecowool, plywood, chipboard, clean sawdust.
The most popular for a garage is the technology of floor insulation with a group of foam insulation - extruded polystyrene foam, classic and liquid foam. The latter belongs to serious and effective heaters, however, the installation process is laborious and involves the use of a special mechanism that will create the necessary pressure and supply foam insulation to the installation site. An important condition for reliable heat preservation is the correct selection of insulation, depending on the type of construction and properties of the heat insulator:
- water absorption;
- air and vapor permeability;
- moisture, thermal diffusivity;
- chemical and biostability;
- fire resistance and fire resistance.
Before performing manual floor insulation, it is necessary to provide measures to protect the heat insulator from moisture - ground moisture, assembly moisture and precipitation. Otherwise, the air in the material will be replaced by moisture with a high coefficient of thermal conductivity and, accordingly, the properties of the heat insulator will deteriorate. When choosing a material, be sure to take into account both the "pros" and "cons" of popular heat insulators:
- glass wool from glass production waste is an inexpensive material with low thermal conductivity, when choosing which it is recommended to take into account the disadvantages: it can burn, is afraid of moisture, requires compliance with personal safety measures during installation;
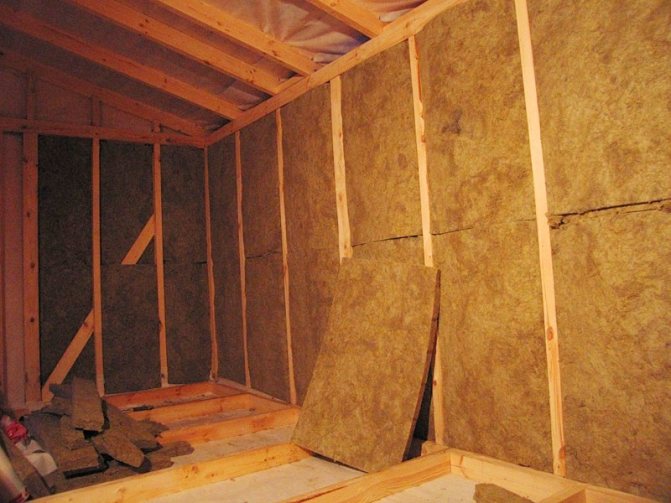
- mineral wool from basalt rocks has a range of advantages: low thermal conductivity, long service life, easy installation. However, the mineral wool must be additionally protected from moisture and provide for the cost of film materials;
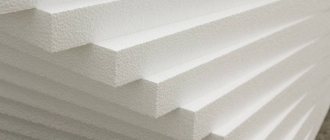
- polymer heat insulators are waterproof, easily attached to any surface, do not burn, and are resistant to mold and mildew. At the same time, expanded polystyrene and polystyrene foam have additional advantages: cheap price, low thermal conductivity.
Popular polyurethane foam with a very low thermal conductivity has a characteristic useful for the garage floor - it does not lose its properties in a humid environment, so additional costs for moisture protection are not required. Advantages of polyurethane foam - the material is easily applied by spraying, instantly hardens and "wins" all methods of floor insulation in terms of installation speed. In addition, the material will last for a long time, fill any volume, including inaccessible or narrow places, and forms a seamless, even surface.
Stages of assembling wooden flooring with your own hands
Insulated floors of this type are mounted in the garage using the following technology:
- deepen the earthen floor somewhat (by about 20-25 cm);
- pour concrete or lay out brick support posts under the logs;
- level and compact the earth between the posts;
- make a dump with crushed stone in 5-15 cm;
- fix the lags on the posts;
- the space between the pillars is covered with a waterproofer;
- roofing material is covered with expanded clay at the lag level;
- stuffed on the board supports;
- finished floors are painted or varnished in several layers.
Of course, instead of expanded clay, you can use some other, more modern insulators - mineral wool or, for example, expanded polystyrene - to insulate the floor in the garage.
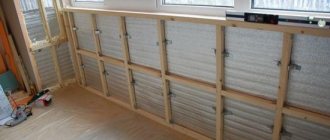
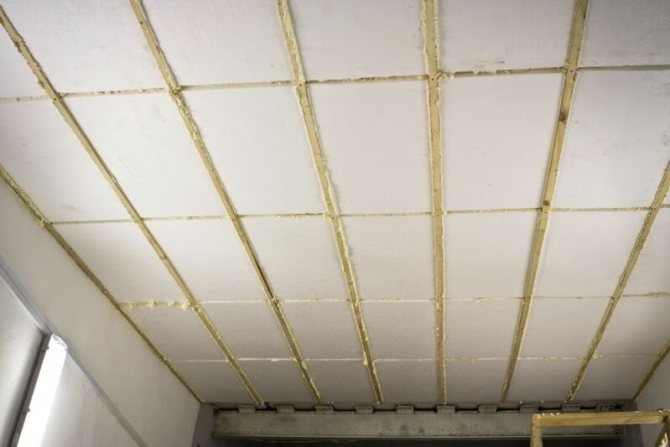
Ceiling insulation
The basement ceiling in the garage is insulated with plates inserted between the load-bearing elements. If the floor of the garage is a concrete slab, the foam is glued to it with special compounds. To protect against external influences, the insulation layer is plastered over the mesh. Although for the ceiling, this may not be done.
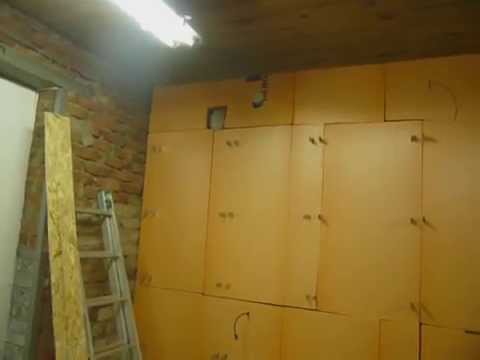
When filing the ceiling along the frame, the slabs can be inserted into the resulting boxes. In this case, one must remember about the increased attention to the material of rodents. For protection, an ultrasonic barrier will be the best tool.
From the side of the garage, the coating must be isolated from the ingress of flammable substances. They can cause a fire, which can be a big problem in an underground room.
You can insulate the basement in the garage with foam plastic yourself. Plates are cut with an ordinary knife or sawed with a hacksaw. The material itself is lightweight, therefore the procedure can be carried out by one person. The main thing is to comply with all the requirements of the technology so that money and time are not wasted.
Installation of posts
Supports for logs are usually cast from concrete. Preliminary markings are made for them. Next, holes are dug under the posts about 40x40x40 cm in size. Sand is poured into the bottom of the holes in a layer of 5 cm with tamping with water. Crushed stone is laid on top of the sand in a layer 15 cm thick.
The pillars under the logs are poured with a solution prepared in the proportion of cement / sand / crushed stone as 1 * 3 * 2. Formwork from chipboard or boards is installed in the pits, measuring out the horizontal with a level.
Next, reinforcement cages are mounted. They can be made for each column from several rods and wire. At the final stage, concrete solution is poured into the columns. It is allowed to lay the logs on the supports made in this way no earlier than after 2 weeks.
Brick posts are laid out under the logs in the usual way with bandaging the seams. In this case, the formwork in the pits is installed in such a way that it protrudes about 5 cm above the ground.
Floor insulation on the ground
The technology of installing a heat insulator on the floor located on the base of the building is the most difficult, therefore, before starting work, it is necessary to study how to make the floor insulation on the ground and take into account that the high insulating properties of the material depend on the observance of three conditions:
- competent design;
- effective heat insulator;
- high-quality installation.
When insulating the floor, it is necessary to provide for a minimum thickness of insulation and choose a material that will retain its properties under intense exposure to moisture and stress. A proven option is to make the floor insulation with foam or its derivatives. Conventional inexpensive foam is a rational solution, since the material can be used in extreme conditions: low temperatures, mechanical stress, exposure to moisture.
Work order:
- Pour a cushion on the ground - a layer of gravel 30-40 cm. The gravel cushion must be leveled and tamped.
- Spread a layer of sand 10 cm over the gravel and press well.
- Arrange a sub-floor of reinforced concrete, let dry for 1-2 weeks.
- Lay the waterproofing agent - plastic wrap.
- Lay foam with a thickness of 10 cm or more.
- Lay a layer of waterproofing material.
- Perform a finishing screed with a thickness of 5 cm or more.
The classical technology of floor insulation with foam plastic does not require special skills in construction science from the performer and can be performed even by a beginner. First, you need to apply the glue to the foam and the floor with a notched trowel, then put the sheet down and hold it for a while. For reliable fixation, the sheets can be planted on dowels, having previously drilled holes in the middle and at the corners of the foam.
Installation of lag
Before laying the logs under a wooden insulated garage floor, the posts should be covered with two layers of roofing material. The installation of supports under the wooden flooring is carried out as follows:
- lay the two most extreme logs at opposite walls;
- stretch the orientation cords between them;
- mount intermediate logs.
In order to avoid a large difference in the heights of the supports, for example, well-dried wooden wedges can be used as a lining. The lags are fixed on the posts, usually using metal corners and dowels. So that the floors do not subsequently begin to creak, it is advisable to fix the supports in this way from both sides.
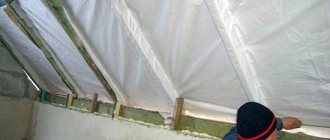
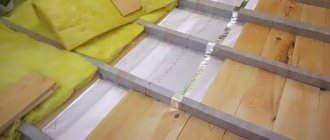
Roofing material and insulation installation
In order for the soil moisture not to have a negative effect on the insulation in the future, the space between the posts after installing the log and filling with rubble and sand must be laid with roofing material. Along the perimeter of the garage, this material should be mounted with an overlap on the walls. A warming layer is arranged on top of the roofing material. At the same time, expanded clay is simply filled up between the logs.
Mineral wool or expanded polystyrene is mounted in the same way. At the final stage, the laid heat insulator is closed from above with roofing material right on top of the lag.
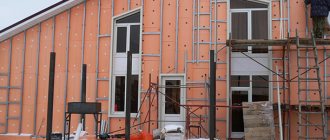
Insulation of the walls of the garage basement from the outside
The technology of the external insulation device is the most correct. In this case:
- freezing of walls is excluded;
- dew point outside the structure;
- the useful area of the room is not taken away;
- in case of fire, smoke will not accumulate in the room.
The density of the foam is different, but fragility becomes an obstacle. With the seasonal expansion of soil masses, they can break the product, which will lead to its coloring.
Seams appear between the slabs. Even capping with foam will not help to cope with the penetration of cold and moisture. Therefore, before installing the insulation, the foundation surface must be waterproofed. For this, a coating waterproofing or weld-on is used. It should fit snugly against the wall, because insulation will be mounted on it.
After installing the insulation, it should be protected in order to avoid deformation by soil. For this, steel racks are driven in along the perimeter of the wall. Sheets of galvanized metal are screwed to them. All metal products are treated with anti-corrosion solutions.
The disadvantage of this method is:
- an increase in the volume of earthworks;
- the cost of additional materials;
- increasing the installation time due to the device of the fence.
For outdoor work in the ground and on the plinth, extruded polystyrene foam is used. It has the best tensile and compressive loads. Plates do not crumble and are easy to process.
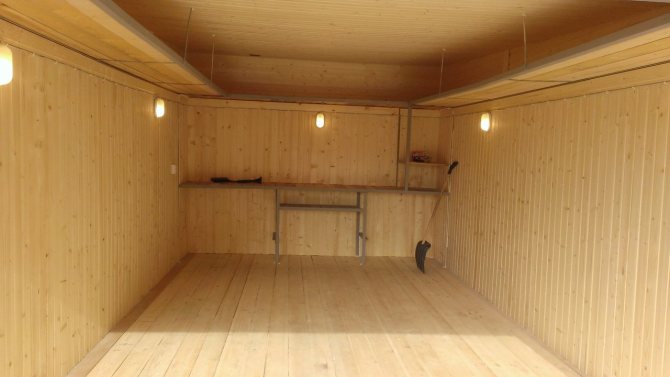
How to install floors
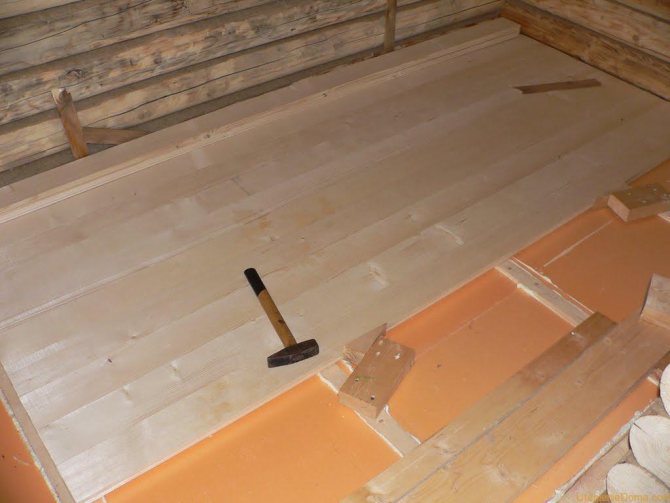
To assemble the coating itself in the garage, you can use both a grooved board and a regular edged board. In the latter case, nails are simply stuffed on top of the boards. The grooved material on the logs is fixed using a screwdriver and self-tapping screws into the groove at an angle. Lay the boards in both cases so that their ends fall on the logs.
So that there are no gaps in the flooring in the future, it is mounted using the following technology:
- next to the board to be laid, at a short distance from it, a piece of timber is nailed to two logs;
- two wooden wedges are driven in between the timber and the board in such a way as to press it as tightly as possible to the previous board;
- hammer in nails or screw in self-tapping screws;
- rearrange the block for the next board.
The flooring is also mounted in such a way that a temperature gap of about 1 cm remains between the garage perimeter and the walls.
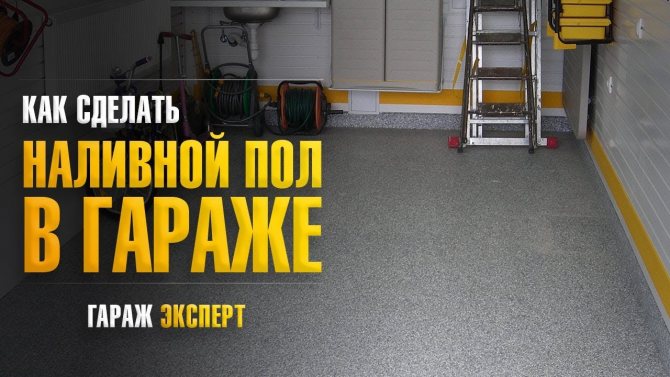
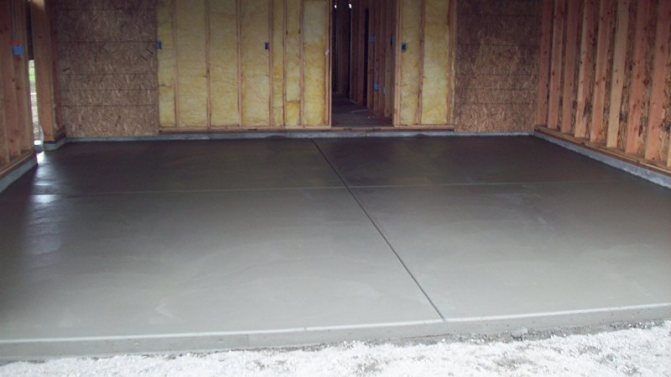
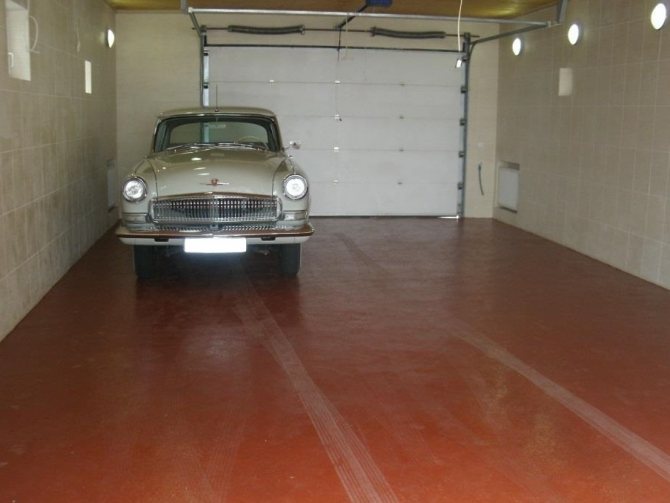
Pouring concrete floors in the garage
The installation of wooden flooring in the garage is thus not too difficult. However, as you know, the floors in such rooms are often subject to serious pollution. For example, gasoline, oil or other car care products may be spilled in the garage.
For a tree, contact with such compounds, of course, is not very useful. Therefore, most often the floors in garages are insulated by their owners using a concrete screed that is more resistant to chemicals.
In this case, the installation of the floor will look like this:
- the earthen floor in the garage is deepened and equipped with a crushed stone-sand pillow;
- lay a waterproofer;
- mount insulation;
- install a reinforcing cage;
- beacons are mounted on some supports;
- perform the pouring of a concrete screed.
Insulated floor design options
Depending on the insulation materials used when arranging the floor in the garage, there are:
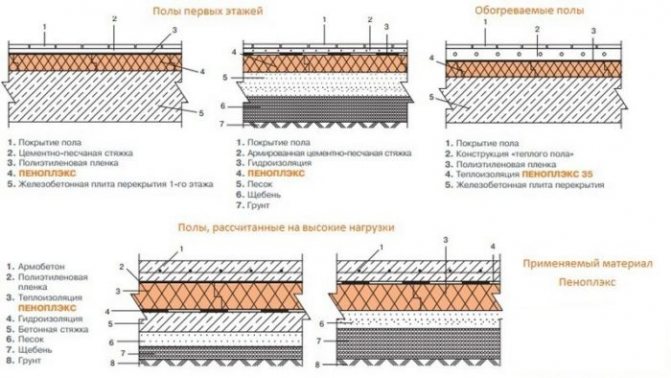
- Thermal insulation of concrete foundations with styrofoam, polystyrene foam, polyurethane foam and other high-tech materials for insulation.
- Thermal insulation of wooden floors using mineral wool or expanded clay.
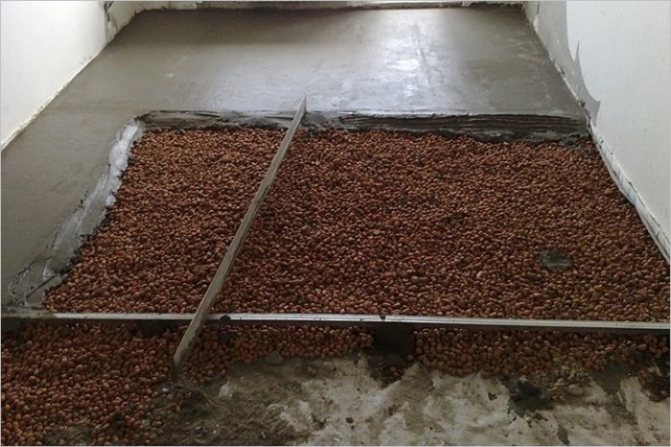
Insulation of the concrete floor in the garage with expanded clay
If expanded clay is used as a heat-insulating material, the work algorithm will look like this:
- Around the entire perimeter of the garage building, you need to dig a shallow pit - 40-50 centimeters.
- The soil at the bottom is carefully rammed, a drainage layer of coarse sand is filled up.
- A waterproofing layer is laid on top of the drainage layer.Roofing material or other materials of similar quality can be used.
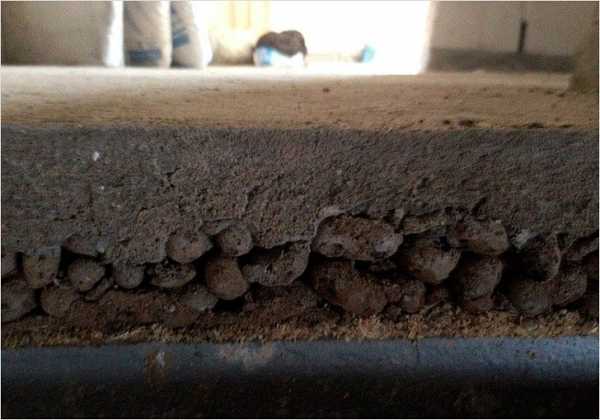
- To make the plane of the floors according to the required level, it is necessary to install beacons under the concrete and, focusing on them, fill in the insulating material.
- Expanded clay must be leveled and the top layer of granules should be shed with a liquid sand-cement mixture.
- It is necessary to lay a metal mesh on top and fix it.
- Then the concrete screed is poured according to the markings of the floor to be equipped.
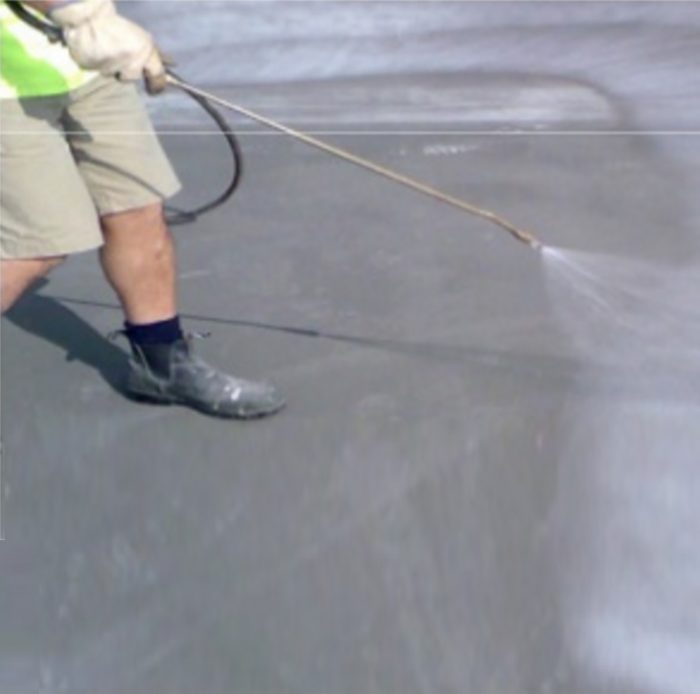
Professional recommendation: after the concrete solution has already been poured, its surface requires periodic moistening until it fully gains strength. The procedure helps to prevent cracks on the finished screed.
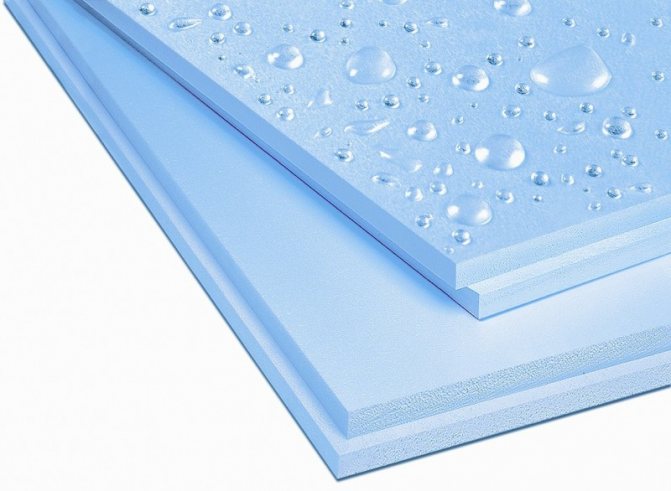
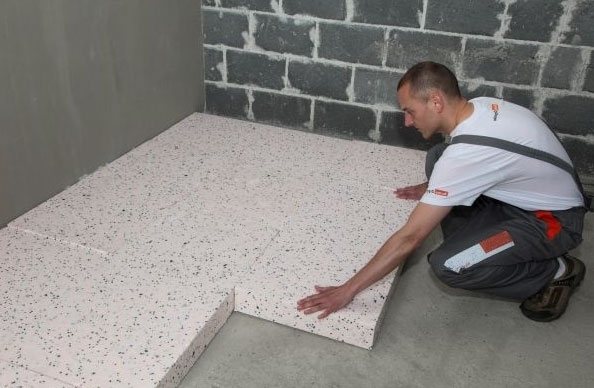
Do-it-yourself insulation of a concrete floor with penoplex
Penoplex is a building material made on the basis of polystyrene and having a structure with a high content of air bubbles.
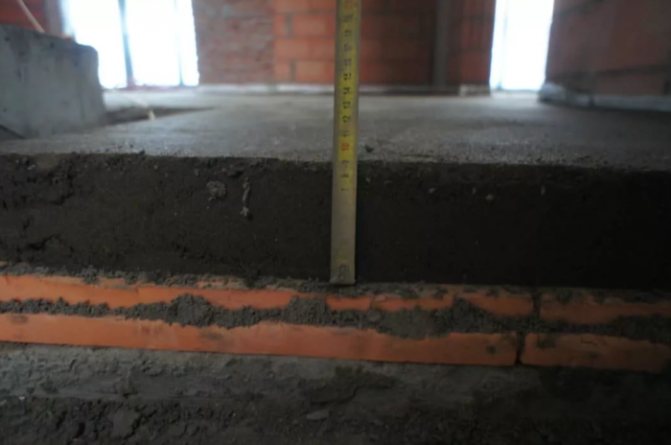
If the insulation of the concrete floor in the garage is made with expanded polystyrene, then the procedure is as follows:
- Substrate surface preparation. The upper earthen floor must be removed, deepening five to ten centimeters, and the prepared site must be compacted.
- Beacons are installed according to the required floor level.
- A layer of a rough screed based on a cement mixture is poured over the future base. The recommended layer thickness is five to seven centimeters, after which it should completely harden and gain strength.
- After the screed has completely solidified, a waterproofing material must be laid on the surface. Roofing material is well suited for this purpose. The joints of the material with each other, as well as the base and walls of the building, must be glued.
- On top of the roofing material, foam is laid. For gluing the sheets, use foam for mounting or a special adhesive composition.
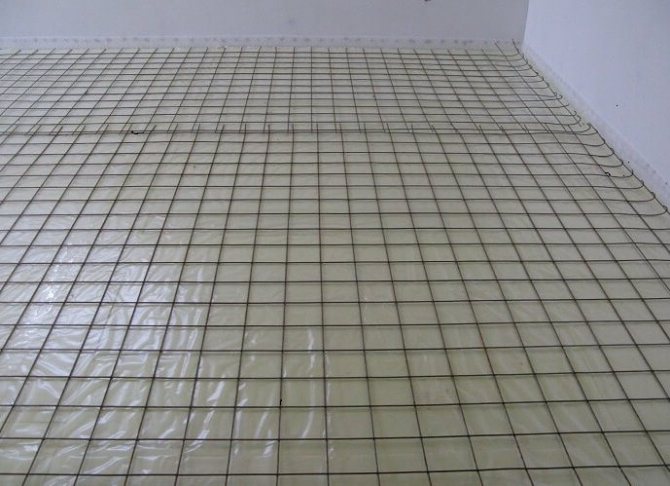
- Now it is necessary to equip the second waterproofing layer of dense polyethylene film, the joints of which are reliably sealed with adhesive tape.
- A special reinforced mesh must be laid on top of the film material, and securely attached to the supporting structural elements.
- On top of the whole "pie" of insulation, a concrete screed is made, with a reference point to the previously mounted beacons for pouring.
Thermal insulation of a wooden floor with expanded clay
Due to the specific positive qualities of expanded clay, including the low level of material cost, it is often used in arranging the thermal insulation of unheated garages with wooden floors. The work algorithm as a whole resembles the creation of a concrete floor, but there are a number of significant differences that significantly affect the insulation process.
Work on the thermal insulation of the floor slab is carried out as follows:
- Digging a foundation pit. Its depth must be calculated in such a way as to correspond to the total indicators of the thickness of the rough concrete pouring, the log beams and the thickness of the boards of the final floor covering.
- The entire area of the foundation pit must be tamped, and then a rough concrete screed is poured.
- The waterproofing layer is being laid. For this purpose, roofing material is used. It is imperative to properly seal the joints of fragments of material and places of contact with the foundation and walls of the garage by gluing them.
- A layer of waterproofing is laid. For this, roofing material is used, the joints of sheets and places of abutment to the walls and foundation are glued.
- Lag beams are laid on top of the protective layer.
- Insulating material is poured between the elements of the floor structure, which is then leveled according to the upper level of the log.
- A wooden flooring is being arranged.
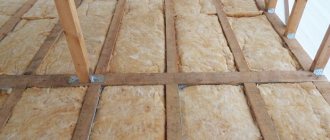
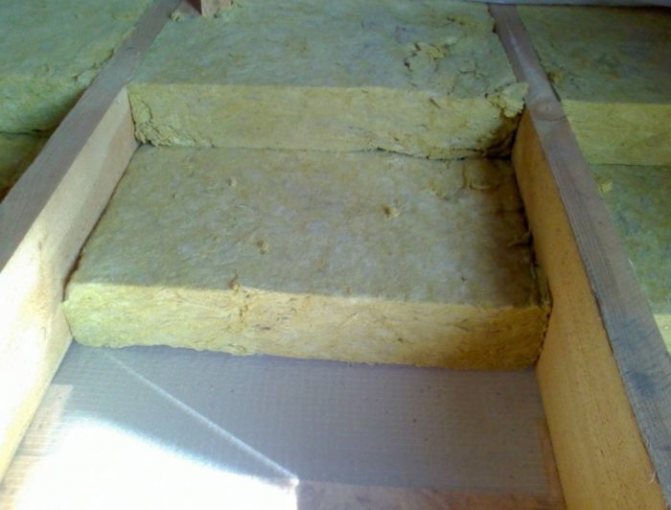
Thermal insulation of a wooden floor with mineral wool
Another type of insulation suitable for insulating wooden floors is mineral wool.A feature of this product is its high tendency to moisture absorption, due to which the floor overlap may begin to deteriorate over time. If mineral wool is chosen as the material for insulation, it is extremely important to equip reliable waterproofing, which will block the access of moisture to the heat insulator itself.
The sequence of work in this case will look like this:
- Substrate preparation, including leveling and compaction of the soil layer.
- Next, you need to mark the level of the future floor base in relation to the walls.
- A rough concrete screed is poured.
- On top of it, a waterproofing layer is arranged, consisting of roofing material or glassine.
- The joints of the waterproofing sheets to the walls and its joints are carefully glued.
- The lag is being arranged. The distance between the beams should be equal to the width of the selected type of mineral wool - a roll or a slab.
- Mineral wool is laid between the mounted lags, sealing the joints with adhesive tape or adhesive tape.
- The second waterproofing layer is made of dense polyethylene. Its fragments must also be securely connected together with tape or adhesive tape.
- The final stage is the installation of wooden floors on top of the equipped logs.
Arrangement of crushed stone cushion and installation of a waterproofer
The layer of crushed stone under the insulated screed in the garage should be at least 10 cm, and the sand - 5 cm. The thickness of the insulating layer will be about 10-20 cm. In accordance with these indicators, the depth of the pit for the insulated floors is chosen.
After excavating the excess earth, the floors in the garage, as in the assembly of wooden flooring, are compacted and covered with rubble. Sand is laid on top of it. Both layers must be tamped and leveled.
The waterproofing agent is laid on top of the pillow in two layers. The overlap between the strips of roofing material is made at least 15 cm.Also, the waterproofer, of course, must be brought onto the walls to the height of the future floor cake.
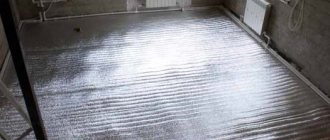
How much does a semi-dry floor screed cost?
Semi-dry floor screed is the most popular floor leveling option for residential and industrial premises. When equipping it, a cement-sand mixture with the addition of plasticizing additives and a small amount of water is used. This mixture in consistency does not resemble a solution, but wet sand, and it is not so much poured as it is filled up.
Since the percentage of water in the mixture is small, it dries much faster than a wet screed.
Plasticizing additives also contribute to this. After 12 hours, you can walk on the screed, continuing the finishing work in the room. It takes about 25 days for the mixture to dry completely.
When leveling the floor with a semi-dry method, the surface is perfectly flat; it does not require any additional finishing or chipboard flooring. Reinforcement allows for amazing strength. At the same time, due to the low cement content in the mixture, a screed of this type has a much lower weight than a wet one.
The disadvantage of a semi-dry screed is that special equipment is required for its arrangement - a pump-blower of the mixture and a trowel for leveling the floor.
With the help of the latter, you can achieve a perfectly even coating. And although such a floor can theoretically be made by hand, a semi-dry mechanized screed is much preferable. By the way, the method allows you to save on lifting the material to the floor, since the mixture is made in a mixer on the street and fed to the desired height (up to 30 floors) through a special hose.
Materials for arranging a semi-dry screed are relatively inexpensive - about 250-350 rubles per square meter, depending on the thickness of the layer.
This price includes sand, Portland cement, fiberglass, plasticizers and plastic wrap.The cost of work without material is from 250 rubles per square meter. The larger the area for pouring, the cheaper the cost of materials and work.
The cost of arranging a semi-dry turnkey floor screed by professionals is from 350 to 750 rubles per square meter. This amount includes both work and materials. The larger the area of the object, the cheaper the price of a semi-dry floor screed will be.
Insulation installation
Insulation of concrete floors from cold in garages is usually done using expanded clay. Before filling it on top of the waterproofer, it is advisable to expose beacons. After laying expanded clay with a layer of 20 cm, the latter will simply need to be removed with the backfill of the space they leave.
Also, the screed in the garage is sometimes insulated using expanded polystyrene. In this case, the most dense material is supposed to be chosen as an insulator. After all, the load on the floors in the garage is actually very large.
Most often, PBS-S-50 expanded polystyrene with a thickness of 10-15 cm is used for screeds in such rooms. Styrofoam for insulating a screed in a garage in any case will not work. After all, the material is quite loose.
Plates of dense polystyrene foam when arranging floors in the garage are laid on top of the waterproofer simply end-to-end, without cracks. On expanded clay, the concrete screed is subsequently poured directly - without using roofing material. Expanded polystyrene plates are additionally covered with another layer of waterproofing agent.
Wet screed prices
Wet screed is a classic method that has been used for decades.
The technology itself is relatively simple - a prepared and primed base is poured with a liquid concrete or cement mixture along special beacon strips. Spreading, the mixture evens out the floor, although after hardening, some additional work is required to finish sanding the surface.
But a wet floor screed has several significant drawbacks: it can crack if you do not follow the technology and maintain the correct indoor climate, and such a floor dries for a very long time, up to 4-6 weeks, depending on the thickness of the coating.
The cost of materials for arranging a liquid screed - a dry sand-concrete mixture for preparing a solution, beacons, a metal mesh for reinforcement and a primer - is approximately 350 rubles per 1 square meter of area. It is worth adding to this the cost of delivery of materials to the object, and this figure can vary significantly depending on its location, floor height, amount of material, etc. Delivery and lifting of materials for a wet screed can reach 25-30 thousand rubles (in the case of a large area of the room).
The cost of the work on the arrangement of the wet screed is about 450 rubles per square meter, it also includes the cost of renting a compact concrete mixer, without which it is impossible to prepare a mixture for pouring the floor.
On a note! Currently, the technology of wet screed in apartments is not often used, but it is still used in industrial premises.
Reinforcement installation and screed filling
As with the assembly of wooden floors, the screed in the garage is usually poured with a slight slope towards the door. Reinforcement mesh is installed on halves of bricks or some other supports. It should be located in the thickness of the screed at the end of the work approximately in the middle.
Lighthouses above the reinforcing mesh before pouring the concrete mixture can be installed, for example, on the "mushrooms" intended for fastening the Technoplex. It is, of course, necessary to expose such supports by level.
As the beacons themselves for concrete screed, a metal profile is usually used. Along the line of the "fungi", flush with their cap, a strip of concrete mortar is first laid. In the future, the profile itself is fixed on it. Next, the screed is poured using the rule of sufficient length.