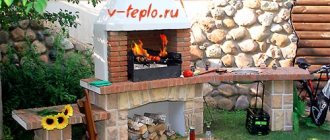
Facing methods of ovens made of bricks
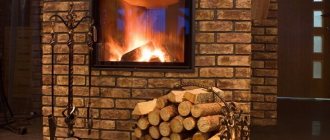
Even if there is the presence of modern heating systems, as before, many homeowners of private houses prefer to keep classic wood-burning stoves in the house. They are erected even in new buildings - fuel regularly rises in price, and the situation with firewood is somewhat easier.
A wood-burning stove will always remain a very profitable option for heating your cottage.
And since an attractive interior in a house is very important for the good mood of those living in it, a lot of homeowners are also interested in cladding for the stove.
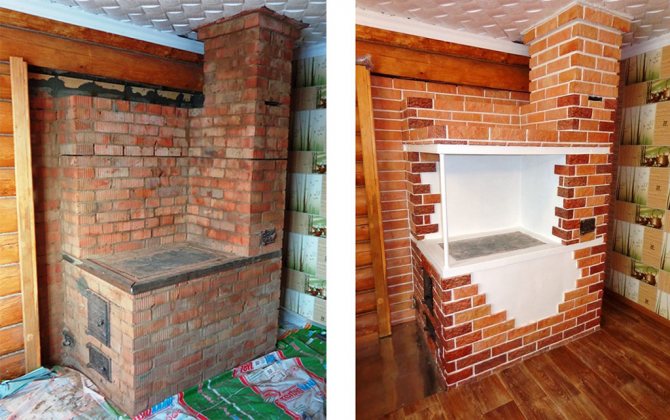
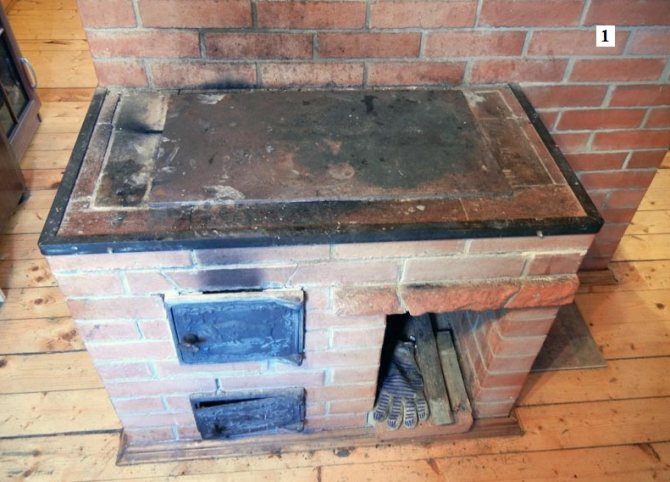
How and with what is it possible to decorate the stove? Facing in most cases appears to be a necessity. Often, stoves are laid out of bricks with good operational properties, but completely unsightly. Furnaces without facing are covered with layers of dust for a certain period of time, and it is very difficult to remove it from a rough surface. Also, due to the additional mass formed by the lining, the heat capacity of the furnace increases. Methods of execution are selected depending on the owners' own desires.
Combination of materials
A rather interesting result can be obtained by combining various finishing materials. This technique allows you not only to create a unique appearance, but also save on materials. You will be able to use cheaper finishes for parts of the stove that are subject to less wear.
This question is of interest to home craftsmen who decide to lay a stove or fireplace. It is also very relevant for everyone who has stove heating in the house. The decoration of the hearth with simple plaster does not differ in high aesthetics and, after a dozen years of operation, asks for replacement.
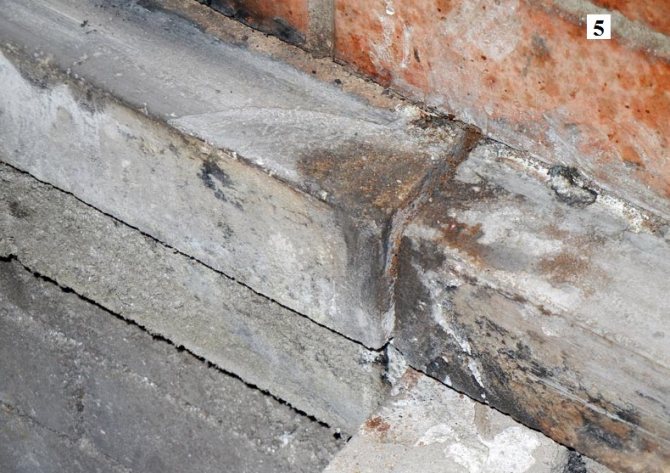
Of course, cracks and flaking of the finishing layer can be repaired. However, after such a procedure, the stove does not look the best and after a short time it starts to crack again.
We will show you how to tile a stove or fireplace so that they look great, give off heat well and do not require repair for a long time.
Finishing options for stoves made of bricks
Whitewashing and painting
When choosing the classical method, the surface on the outside of the brick stove is rubbed to reduce the roughness and is wetted with water. Treatment with a penetrating primer mixture will not be unnecessary. The stove must be painted with glue-based paint. You can also whitewash with slaked lime with the addition of blue, ocher or red lead. Metal elements such as a cast-iron door can be painted with a fairly heat-resistant black paint.
Plastering
For good adhesion of the plaster to the brick, a metal mesh is used.
The simplest type of cladding is a hut. This is the name of the rural lining of the furnace walls, which is an uneven coating by hand with further whitewashing, on which hair cracks are allowed. At the end of the heating season, the hut requires an "economy class" repair every year - the cracks that have arisen are treated with a mixture of clay, cement and sand with water, and whitewash is applied on top. Most of the manufacturers of dry plastering compounds recommend ready-made dry mixes, but grandma's recipes have not lost their popularity. Such mixtures are based on sand, cement, asbestos.
Good advice: to prepare the mixture, dry components are sieved through a sieve and mix well with each other. The resulting composition is mixed with a thick solution of lime or clay water. Separately from the mixture, gypsum is diluted, intended for addition to the finished lime solution.Since the gypsum solution sets very quickly, you need to prepare a similar amount of the mixture, which can be lubricated in 5 minutes.
To avoid premature cracking, plastering should be started after the brickwork is completely dry.
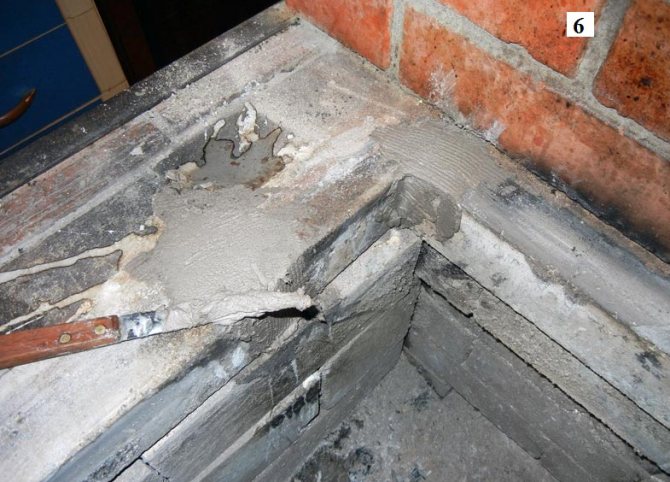
You need to start plastering only after the oven masonry is completely dry and settled. The surface of the brick oven is perfectly cleaned of dust and clay with a metal brush, the seams are cleaned to a depth of 5-10 mm. In such seams, the plaster solution can wedge perfectly. A metal mesh is fixed on the surface, the cells of which are 10-20 mm. The oven must be well heated before plastering. On a hot surface moistened with water, the made solution is applied in two layers, of which the second should be thicker than the first. Each layer should have a thickness of approximately 4-6 mm. Throw the plaster over and rub evenly. After plastering, the brick stove is painted or whitewashed.
Surface finish with tiles
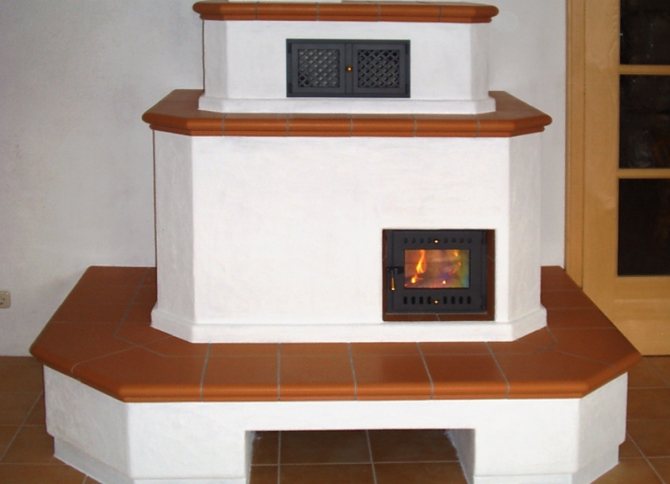
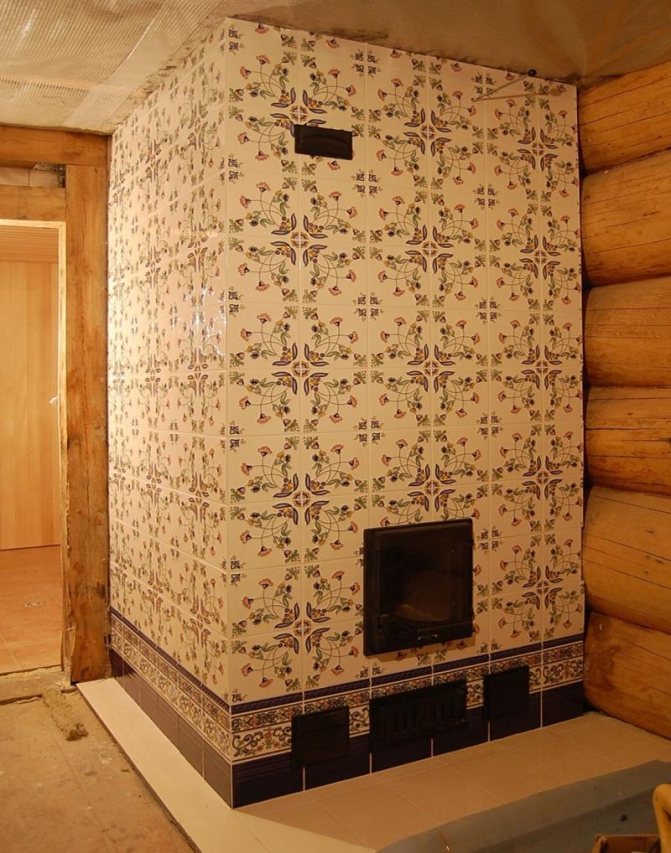
Decorating the stove with tiles, in addition to increasing the heat capacity, makes it look solid and old.
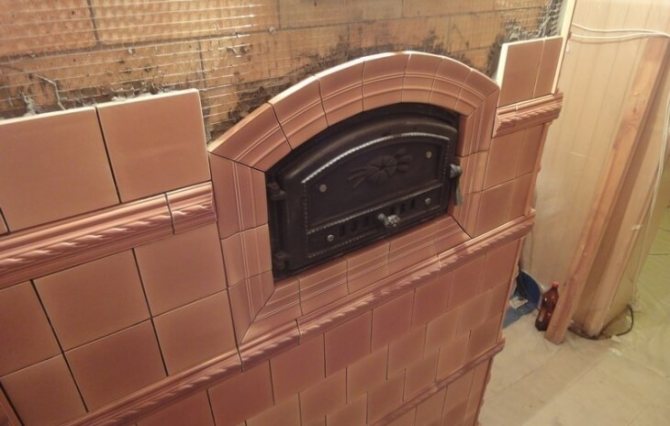
Tiles - handmade tiles. This finishing material is produced with a tile box on the back. It is necessary in order to make installation in brickwork. Tiled cladding is considered an ancient and respectable type. A surface of this type is quite easy to wash and wipe when dust appears, and the penetration of flue gases into the space of the room is practically excluded. The absence of dust makes for greater and better heat dissipation. Since the mass of the finishing furnace is very large, its heat capacity also becomes larger. Because of this, the entire heat supply that accumulates in the furnace will be given off much longer.
Tiles, if done in good faith, must be made, fired and signed by hand. Thanks to this, one should not be amazed that they have a wide spread in shape, color and size. It can even be in the same batch or box.
Selecting and sorting tiles
Tiles for the stove are made by hand, so you must always sort them by shape and shade.
Tile cladding begins with sorting the tiles by shape and shade. Products must be chosen so that they do not have noticeable imperfections, and with a slight impact, they would emit a large, clear sound. This confirms that there are no internal cracks in the product. Sort the tiles by color shades. To do this, they are spread directly on the floor or on a wide workbench. The selected products must be processed. Previously, it was done like this: a specialist chopped them off with a knife to the required state, then hewed them and carried out manual grinding. It was necessary to saw through the hard tiles by hand using steel wire. Also - by hand - neighboring samples rubbed against each other. At this time, with the help of mechanization, everything has become much very simple. The horizontal edges are slightly grinded inward, so the finished tiles on the wall will not be supported by glaze, but by the edge of the tile edge.
Correct laying of tiles
When laying tiled tiles of any of the rows, you need to start from the corners. They begin to put a row by moistening the corner parts in the water mass and starting laying from them. A thick solution is placed under the tiller. The neighboring tiles must be held with one hand, and the mortar must be placed between the trompels, after which the bricks must be pressed in. The tiles are fastened using pins made of knitting wire, the diameter of which is 4 mm. The pins are inserted vertically into the holes on the horizontal shelves of the tiller.
You need to start laying stove tiles with corner pieces.
The pins are tied together with a knitting wire (diameter 2 mm). Additional pieces of wire are tied around the pins, then they need to be hidden in the masonry seam. These pieces are called lobes. The ribs of the box rods are held together by metal clamps. There should be no joints larger than 2 mm between the tiles, which are overwritten with stucco. So the tiled stove becomes, as it were, a solid monolith, which is repeatedly reinforced with stove wire. Attention! The tiles should not hang on the brickwork - they rest on the very foundation of the stove.
Facing with tiles, tiles
Facing with tiles, tiles of ovens made of bricks has been used for a long time. Very often, the following options are used to decorate stoves made of bricks:
- Terracotta - pressed ceramic unglazed tiles. Famous since antiquity, it is made of special types of clay;
- majolica - pressed tiles, covered with glaze on the front side. It has been used since the Middle Ages;
- brick facade tiles are created from a mixture of highly plastic clays of various types. The product is relatively new; during the manufacturing process, the tiles are fired at high temperatures and pressed.
It is undesirable to handle the stove with tiles of impressive size, as well as the likelihood of its cracking increases.
When decorating stoves, the main problem is the unequal heating of various sections of the stove surface and stove walls at a depth. The geometric dimensions of the oven change all the time - alternating compression and expansion over time can lead to the fact that the tile, glued firmly, will crack, and the one glued loosely, on the contrary, will be able to fall off. Attention! Large-format tiles should not be used - they have a very high probability of cracking. Tile cladding should be started only after the combustion chamber has been lined with fireclay bricks. Such an operation is necessary in order to reduce temperature fluctuations on the furnace surface.
External cladding with tiles should be carried out over the plaster applied on the grid. In most cases, a mesh (1 more layer) is attached to the plaster layer specifically for the tile. It is carried out in such a way to communicate good reliability - another layer of mesh is precisely in order to strengthen the adhesive for the tile. The mesh is attached with self-tapping screws and washers.
There are a lot of glue mixtures that are designed specifically to decorate stoves with tiles. They stand out for their very high resistance to high temperatures and retain little elasticity throughout their service life. After grinding the seams, it is enough to apply a heat-resistant organosilicon impregnation to them, but it does not protect against subsequent contamination. The same can be attributed to porous terracotta tiles, and to wild stone with porous rock.
Do-it-yourself high-quality drying oil from sunflower oil
When the stove for a bath or sauna has already been built, you can proceed to its lining. How to decorate the stove so that it looks beautiful and does not lose its functions? The most popular materials for this are natural stone, ceramic tiles and special tiles, which are most often called tiles.
The choice of material depends mainly on the operational properties of the stove and the surrounding space (interior design and style). To carry out all the facing work, the help of specialists is not required, they are easy to carry out on their own. But do not rush, since as a result of facing, every mistake and even a small flaw is noticeable.
Facing the stove with tiles with your own hands is not difficult for a layman. If you have already decided how to decorate the stove in the bathhouse or at home, having made your choice in favor of tiles, listen to the advice below.
It is recommended to choose glazed floor tiles that are resistant to temperature drops as a material.Its thickness should be at least 6 mm, and the shape can be any, both rectangular and square. For ease of use, it is recommended to choose a tile that has special notches on the back side for strong adhesion to the mortar.
Currently, you can find special stove tiles for a bath on sale. It has special grooves and ridges on the side edges, which makes it possible to clad the sauna stove without seams.
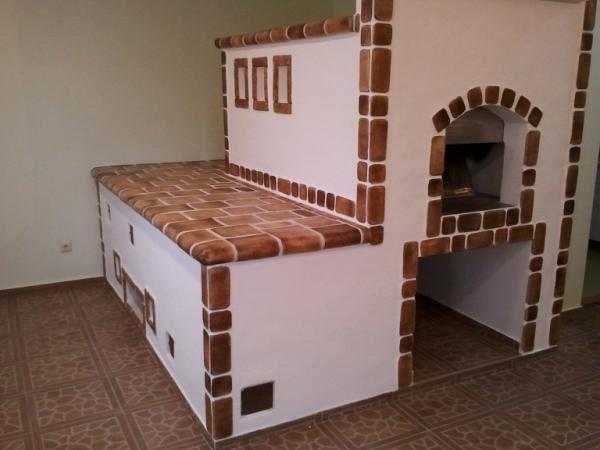
For laying tiles on a stove in a steam room, it is recommended to use a clay or clay-cement mortar.
It should be remembered that the strength of clay, in contrast to cement, increases with increasing temperature.
There are two ways to finish a brick oven - traditional and using corners.
Method 1. Traditional cladding
This method is the usual cladding of vertical surfaces. Before revealing the stove with ceramic tiles, to prevent cracking of the tiles due to high temperatures, the entire base of the stove must be covered with a regular mesh-netting on dowels and carefully plaster. And the tiles themselves must be laid directly on the plastered surface.
Method 2. Cladding using aluminum corners
For cladding, you can use special aluminum strips with holes, which must be installed in the vertical seams of the brickwork of the sauna stove. Then, to these strips on bolts, you need to fix the T-profile - aluminum corners, between which ceramic tiles will be laid.
Having decided how you can decorate the stove, and giving preference to tiles, you need to choose which tile you are going to use for facing. For tiling the oven with your own hands, you can use the following types of tiles:
- majolica, which is a pressed tile coated with glaze, with a colored base and a printed pattern;
- terracotta, similar to majolica, only without glaze, characterized by strength, characteristic rounded shapes and a highly porous base;
- clinker tiles, which are made from heterogeneous types of clays with the addition of a special dye, chamotte and energy melters.
There are two main types of tiles - enameled (glazed) and unenameled. The enamelled material is double fired, making it more durable.
Given the complexity of its operating conditions, it is recommended to choose a glazed option for finishing sauna stoves, since unenamelled tiles do not tolerate temperature extremes quite well and fail faster.
The base of the tile for the sauna stove should be with a smooth base. The less pores the material contains, the less moisture it will absorb. And for a bath, this is of fundamental importance. Choosing a tile with a non-porous base, you will not have to worry about fungus, mold and other unpleasant phenomena. In addition, it will take less time to air and dry the room, and the material itself will last much longer.
Finishing tiles are available in the form of rectangles or squares, six- and eight-sided options are less common, but they often look much more attractive.
In the absence of professional skills, it is recommended to use the most familiar option, that is, to lay rectangular tiles.
Choosing how to tile the stove, and opting for clinker tiles, you will save a lot of money. Clinker tiles are 1 cm thick strips made of fired clay.
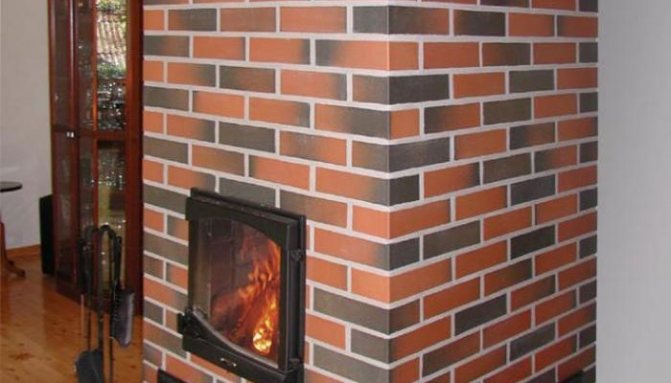
Look at the photo of stoves lined with clinker tiles: this type of finish is relatively inexpensive, and looks no worse than lining the stove with tiles.
Installation of the frame.Since the sauna stove is always operated in a hard mode, especially when firing quickly, therefore, in order to avoid the appearance of cracks in the lining, it is necessary to enclose the brick sides of the stove in a frame made of a metal corner. Such a frame protrudes beyond the masonry plane by no more than its thickness, i.e.
Re-plastering and applying a second layer of mesh. After the mesh is fixed, you can level the walls of the stove again using plaster. But at high temperature loads of the sauna stove, it is recommended to add another layer of mesh. It must again be wrapped around the oven and plastered. Thus, it will be guaranteed that the tiles are securely fastened in the most problematic places - in the area where the corners are located.
Facing with tiles. For cladding, it is recommended to use special glue for fireplaces and stoves. You need to be especially careful when laying the first row. To obtain an ideally horizontal row, it is recommended to put sheets of gypsum fiber board (gypsum fiber sheet) under it, and the installation itself should be started from the corners of the furnace. It is best to separate the seams with cut pieces of GVL. Thus, the distance between the tiles will be the same.
Grouting. Once the oven is fully tiled with clinker tiles, you can start grouting. But it should be remembered that you cannot start the grouting process until the glue has completely set.
Dry grout must be diluted with water in the ratio indicated on its packaging. For the most complete joint filling, it is recommended to use a special sealant gun.
Heat-resistant impregnation. After finishing the lining of the walls of the sauna stove, it is necessary to thoroughly wash, dry, and then apply a thin layer of heat-resistant silicon-organic impregnation on them. Thanks to its use, neither tiles nor white seams will get dirty.
Nowadays, it is popular to make facing of stoves with stone. For this, both natural and artificial stone are used. When facing a stone bath stove, porcelain stoneware is most suitable, which, due to the composition of its mixture and manufacturing technology (it is baked at temperatures up to 1300 ° C until it becomes monolithic), is hard and non-porous. Therefore, porcelain stoneware has good strength, does not bend, is abrasion resistant and has low water absorption.
We suggest that you familiarize yourself with How to properly assemble the rafter system of a gable roof
The lining of the sauna stove with natural marble, which has a granular structure and contains a large amount of quartz, is of particular beauty and durability. This stone has been used for facing furnaces for several centuries, since this material has a unique structure and has a wide variety of colors due to the content of natural salts in the environment of its formation.
The process of lining the stove with a stone with your own hands is quite laborious and costly, but the result always exceeds all expectations. A bathhouse with a stone-faced stove looks very impressive, and with the right choice of accessories, it will become even more stylish.
Often, the surface of the stoves is faced with stove tiles or glazed tiles.
Look at the photos of stoves with tiles: many of them look like real masterpieces.
Before facing stoves with tiles, it is necessary to select and sort the tiles. They must be matched to the shades of the glaze color, as well as the height and width.
Before properly revetting the stove, each tile should be tried on to the adjacent one, which is in the same row, simultaneously undercutting and pressing it in height and width. Uneven edges should be sanded on a grindstone after fitting.
Each horizontal row of cladding should begin with the installation of corner tiles, after which it is necessary to select and fit all the elements of the row first dry. Especially carefully it is necessary to arrange the first (lower) row, from which the entire surface will be veneered.
Each horizontal row of cladding must be installed simultaneously with the laying of the main array. Beforehand, each tile should be moistened by dropping it into a bucket of water. Initially, it is necessary to correctly set the two corner tiles, placing a thick clay mortar under their heads. Then install the intermediate tiles dry.
What can be used to overlay a brick oven?
- Choosing a finish
- Natural stone
- Ceramic tiles
- Majolica and tile
- Facade tiles for brick and ceramic granite
- Furnace cladding material and tools
- Brick stove decoration
Most owners of private houses and summer cottages put wood-burning stoves to winter comfortably. After completing the work, the owners think about how to overlay the brick oven. After all, it occupies a significant place in the very center of the house, and therefore must have a beautiful appearance and fit the image of the room. But not only as an interior decoration, decoration is needed. Brick, as is clear from practice, cools quickly. Thus, so that the expensive heat from the stove is not lost very quickly, and this layer of insulation is needed. Consider several options for insulating and decorating a brick stove using different cladding materials.
Furnishing of the stove is very often done using tiles, real stone or tiles.
Terracotta finishing
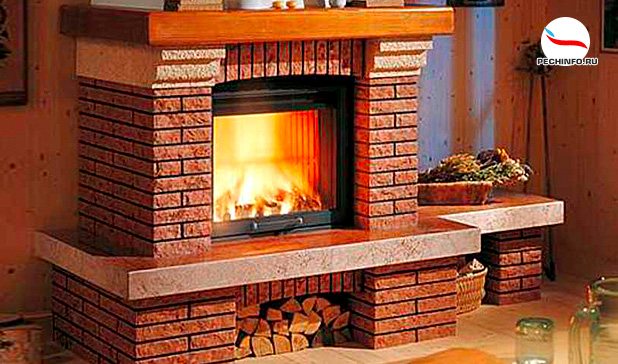

Decorating the stove with tiles is an expensive pleasure. You can replace it ceramic majolica. This tile is obtained by double firing. Due to its porous structure and small size, it firmly adheres to the brick surface of the oven. A characteristic feature of majolica is the presence of bright patterns under a thick layer of glaze. This type of finish can only be used in dry rooms. Majolica does not tolerate moisture.
The stove in the country or in the bath can be faced with non-glazed terracotta. This type of tile is more dense and is not afraid of moisture. In addition, it can have almost any texture and shape.
Choosing a finish
As mentioned above, the stove is considered the center of the house both for its own practical purpose (as a heat source) and in a spiritual project. After all, the whole family gathers near the warm stove, it is so nice to fill dark evenings in winter! Thanks to this, it has long been customary to decorate the brick stove with a variety of decorative materials. The following materials are classically used:
- natural stone;
- ceramic tiles;
- majolica;
- tiles.
This choice is not accidental, all these materials have refractory qualities and a high level of heat capacity. Now new, modern ones have been added to them, thanks to which you can now incredibly beautifully overlay a brick stove. These are ceramic granite and heat-resistant brick-like facade tiles. Consider any of the furnace facing materials separately. Recall that today they produce tiles with a notch on the other side to strengthen the hitch, and also with grooves and ridges for a lock hitch, in which seams are not noticeable.
to come back to the beginning
Decorative finishing
Building materials make it possible to finish the stove in a variety of styles. In addition, they have a beneficial effect on the stability of bricks, as well as mortars used in its laying to various negative influences.
Truly Russian style: hut and tiles
In the old days, one material was traditionally used - this is a hut (clay-based plaster). Then it was covered with the usual whitewash. This method of finishing is not durable, since during the kindling, the smoke settles on the surface, making the whitewash gray.Although it is necessary to highlight the beauty of the painting of such stoves, the attractiveness and the truly Russian style. Nowadays, rarely anyone uses this method of decoration, as more and more they prefer practicality.
.
Features:
Modern materials
A variety of materials makes it possible to decorate a Russian stove in any style. All this allows her to harmoniously fit into absolutely any interior. Among the most common, it is worth highlighting:
These materials are very practical and reliable. To give them a new look, it is enough to wipe the surfaces with a damp cloth. However, they are not without drawbacks. Some, such as ceramic tiles or granite, cannot harmoniously fit into any style.
Plaster and paint
Plaster and paint look very nice. This way of finishing for interiors in a minimalist style. In this case, the choice of color and texture is limited only by the flight of imagination and the general style of the room. With the help of paint and plaster, you can visually reduce the size of the oven or, on the contrary, increase it. Plaster and paint are often used to create decor in the Russian style. It allows you to make various drawings and patterns on its surface.
Natural stone
The scheme of finishing the stove with natural stone.
It is the oldest of the materials used for facing brick ovens. For the most part, sandstone and shell rock are used. They are inexpensive materials with good heat storage properties.
They will give the stove a special, slightly wild look, as if time turned back and outside the window again the Middle Ages with knights, castles and magical stories.
Also, now the decoration of a brick stove with a coil has come into fashion. It is an attractive natural stone of greenish-gray color with a high coefficient of heat capacity.
The more traditional material is marble, a reliable and attractive natural material. This finish will add a noble and representative look to the stove.
to come back to the beginning
Russian stoves in the interior
Despite the development of technologies and the appearance on the market of fashionable cast-iron furnaces, which are framed in various decorative portals, the Russian stove still remains popular. Of course, it has changed not only externally, but also structurally. It has become more practical, convenient and safe, in addition, when it is designed, construction technologies and materials are used that can increase efficiency, as well as an aesthetic component.
Benefits
Wooden houses are the basis of the architecture of ancient Russia. And, despite the development of technologies and the emergence of building materials from which buildings are erected, wood still occupies a special place. Such houses are filled with comfort, and the Russian stove only complements the extraordinary emotional atmosphere. The installation of a Russian stove in a wooden house must be carried out in compliance with the safety requirements established by our legislation.
Brick
Brick is a classic. Previously, such structures were erected from homemade clay bricks, which went through the process of firing at a stake. Products are large due to the presence of a hob, baking compartment, lounger for rest.
Benefits:
Unfortunately, like others, brick is not without its drawbacks. The main one is the fact that a powerful foundation will have to be erected for a brick structure. It can be a monolithic or reinforced concrete structure. If you install a brick without a foundation, the floor under its mass may sag.
Precautions
The Russian brick stove can not be installed in all parts of the house. The place directly depends on the structural features of the building. It is better when the idea of construction appears at the design stage of the house. Then it is possible to correctly calculate the location, as well as make an appropriate foundation.
Other options
Among the variety of options for installing heating systems in wooden houses, it is worth highlighting two main ones:
Recently, these options have become less common for installation in private homes. Despite their attractiveness, they are inferior in many respects to traditional Russian ovens.
Ceramic tiles
Mankind has been using baked clay tiles since ancient times, also as an insulator. Ceramics are used for the stove, which has a number of specific qualities:
- thermal stability;
- fortress;
- dense structure.
The latter is important due to the fact that through the wide pores, the material quickly loses the heat received from the bricks.
The strength of the tiles is achieved due to the thickness. For finishing, experts advise using products with a thickness of at least 8 millimeters. All these requirements are met by a terracotta made of baked clay, not covered with glaze. Terracotta was used to decorate ovens made of bricks back in Greece.
to come back to the beginning
Furnace decoration with tiles
There are a lot of varieties of the mentioned material. Let's dwell on some of them.
Tiles
This finishing method is suitable for those who have the opportunity to fork out. This is not a standard flat tile, but a special kind of material. Each tile looks like a plate, supplemented on the reverse side with a tiller. Such a protrusion provides a very reliable fastening of the tile to the base and allows you to keep the heat given off by the stove for longer.
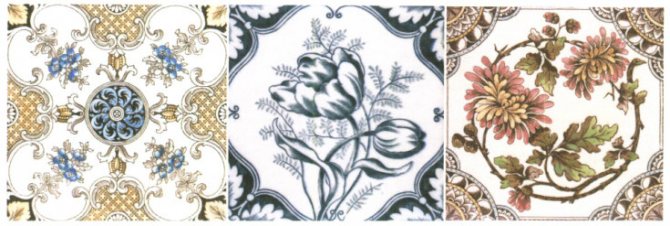
Tiles are a material that was held in high esteem by people back in Russia. A variety of shades, an interesting relief, an original drawing (usually done by hand) - all this cannot but attract. The tiled stove brings an element of luxury to the interior
Tiled stove - chic in the interior
Majolica
Facing with majolica
The tiles came to us from the distant Mediterranean, those places where the masters of painting create magnificent masterpieces. Colored clay serves as a raw material for the manufacture of plates. After pressing and two-stage firing, it becomes very strong. The top of the blanks is then glazed and decorated with a spectacular pattern. A stove decorated in this way will indicate the wealth of the owners.
Terracotta tiles
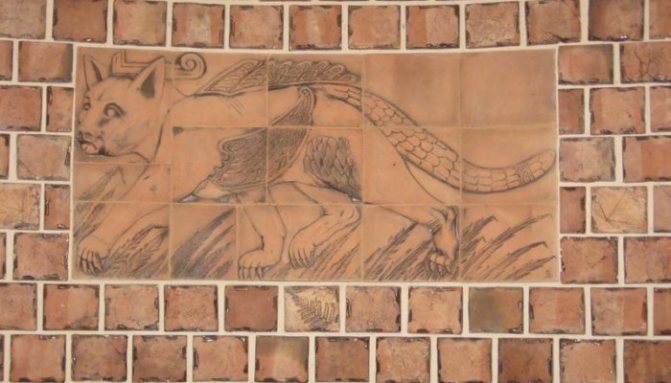
The material allows you to improve the stove at a lower cost, but it has many advantages. Terracotta tiles, in particular, are not inferior in strength to the above-described option - majolica. It is also renowned for its exceptional resistance to extreme heat. The tiles are not glazed. Meanwhile, the pores in its structure perfectly store the heat of the stove. The color of this material - from beige to orange - is pleasing to the eye, as it echoes the natural shades.
Terracotta tiles on the stove facade
Clinker
This is another decent material for decorating a home stove. The tile has a very dense structure, so it is resistant to damage. Such decorative flaws as scratches and chips are not terrible for this material. Among the properties of clinker tiles is unhurried heating, but then it also gives off heat to the room for a long time. From a design point of view, the decorative qualities of the clinker are important. And this is a variety of colors and a variety of textures. Among the offered products you can find smooth glazed, rough and untreated clinker.
Clinker tiles - strength and charm
The oven is not always completely tiled. Often, only the part where the ignition is performed is designed in this way. Beautiful stove design - a few more ways From tiles, let's move on to other facing materials, each of which is remarkable in its own way.
Majolica and tile
Installation diagram of tiles.
Majolica is a bright tile, painted with paints and covered with glaze, which came to us from antiquity.The inhabitants of Rome exported it from the island of Mallorca to the Mediterranean, however, only successful people could afford to finish the oven with majolica.
The glazed layer on the tiles was created for a reason. It is considered to be an additional layer of insulation that retains heat in the middle of the tile. Due to this property, majolica has become a very popular facing material for ovens made of bricks. It gives the stove a bright and festive look.
Tiles have long been used in cold countries. By their own design, the old tiles were quite different from the tiles. They were made in the form of rectangular ceramic boxes attached to the brick wall of the furnace with metal pins.
The void between the brick and the surface of the tile served as an air cushion, which accumulated heat and gave it away little by little. Thanks to this, tiled stoves have gained their popularity in northern Russia, Germany and Holland. It is not just that the stoves laid out with tiles have received the name "Dutch women".
to come back to the beginning
Majolica beauty
The tiles, painted with bright fire colors, covered with a durable layer of glaze, came from the Mediterranean. Ancient Roman traders brought it from Mallorca.
The area was famous for its tin-lead painting on ceramic tiles and earthenware.
Glazing serves as another layer that retains heat inside the finishing material, so majolica was in demand as an excellent type of cladding.
Only wealthy people could decorate their stoves with such beauty.
Facade tiles for brick and ceramic granite
Brick facade tiles are made from a mixture of chamotte, clay and mineral dyes. The resulting mass is compressed under high pressure, after which it is fired at high temperatures.
The resulting tile stands out for its strength, heat capacity and low porosity. With the help of various additives, it takes on very, very different shades. Thanks to this, brick-like facade tiles have become a very popular facing material for stoves made of bricks, capable of matching almost any design.
The scheme of finishing the stove with tiles.
Porcelain stoneware is a composite-based material that emerged in the 1980s and immediately became very popular. It was invented in Italy. A mixture of clay, sand, granite and marble with the addition of natural dyes is pressed at high temperatures and under very high pressure.
In the end, a monolithic material without pores is obtained, shock-resistant and excellent heat retention. Ceramic granite can be given any color or shade, as well as texture, which makes it so popular in the field of building materials and finishing works.
Porcelain stoneware tiles copy terracotta tiles, majolica, tiles and natural stone. At the same time, it is much cheaper and more functional.
to come back to the beginning
Cladding materials
In general, the stove is considered the most important object in the house, rightfully occupying a special place. As a source of warmth, it serves as the keeper of traditions, creates an indescribable comfort. That is why you need to make every effort so that the stove acquires an attractive appearance, and also does not undergo destruction.
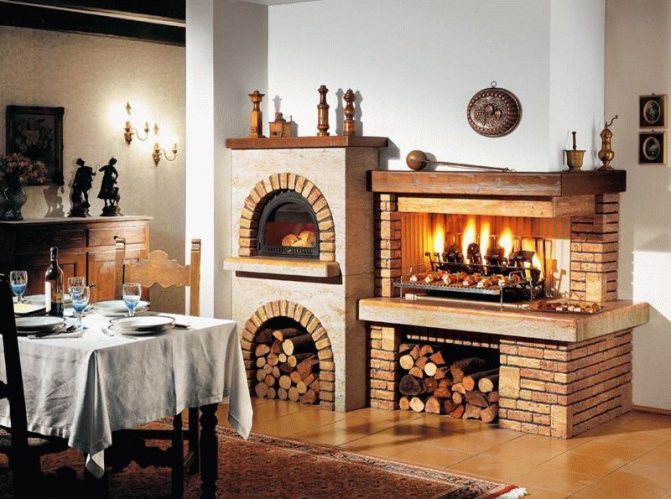

Finishing material is required to be selected with many positive qualities. First of all, it must be heat-resistant and heat-absorbing. That is, keep the surface from heating, but at the same time, evenly distribute the heat inside the room.
The walls of the stove can be refined with various types of materials. It can be elements of a coating made of special types of clay, which have been subjected to long processing, which have been known for a long time. And also more modern materials, which are made on the basis of previously used components, but subject to more substantial training. Let's take a closer look.
A natural stone
It has been known for a long time and has proven itself well as an element for finishing brick ovens. The stone has good performance properties; many of its types are quite cheap. Most often used: shell rock and sandstone. Decorating the stove with decorative stone allows you to refine the heat source. The decorative component is very original. The walls of the stove are very natural looking.
In addition to cheap materials, others are also used. Among them is marble. Lined walls, due to its external properties, acquire an individual and rather respectable look.
Talcochlorite
It has several more names (soap, pot, stove stone). It is a natural material that is formed from a combination of magnesite and talc, which is exposed to high temperatures and pressures for a long time.
According to its external data, talcochlorite is very attractive. The stone does not require additional finishing.
Ceramic tile
This material is a certain type of clay that is processed.
She acquires the following qualities:
- density;
- durability and strength;
- heat resistance.
Ceramic tiles have a significant thickness, which reaches eight millimeters. The most commonly used terracotta variety. It is preferable to choose one that has not been covered with glaze.
Tiles
The facing of the stove with tiles has been used for quite some time, and in many countries of the world. Tiles can be attributed to ceramic tiles, but they have a significant difference. The fact is that there is a bowl (rumpa) on the seamy side of such material. It is due to this that it is possible to obtain a kind of thermal pillow. It is attached to special points, deliberately left for this. The appearance of tiles for a stove can be very different.
Clinker tiles
It contains chamotte, clay and various natural dyes. This tile is characterized by:
- lack of numerous pores;
- fortress;
- good heat dissipation.
Preparing for finishing the oven
You need to understand that a brick oven needs careful preparation. Any shortcomings can lead to rather sad consequences. Among them may be the loss of heat transfer, which arises from the wrong choice of material and its application.
Required tool
It should be prepared in advance. Then you do not have to interrupt in the process of work, which is unacceptable. You may need:
- level and plumb line;
- tape measure and pencil;
- spatula and trowel;
- capacity;
- metal brush;
- brush and roller;
- a tool for cutting material (tiles);
- hammer and mallet.
It is necessary to provide for consumables, accessories, rags.
Furnace cladding material and tools
The process may require:
- plumb line;
- level;
- roulette;
- Master OK;
- putty knife;
- container for solution;
- paint brush (wide);
- tile cutter (angle grinder);
- iron brush;
- mallet (rubber or wood with a rubber top);
- hammer.
Also, when facing, you will need nails, self-drilling screws, tile crosses, clean rags.
A mortar for plastering brick kilns is prepared from cement (grade not lower than M400), clay and sand. The ratio is recommended to select the following: 1.0 part of cement to 3.0 parts of clay and 0.2 parts of sand. The sand is needed small, but the type of clay does not play a role.
to come back to the beginning
Plastering oven
Many owners of private houses increasingly prefer such types of heating as gas or steam, and if there is central heating in the village, it is easier for some to connect to the heating network.
However, in many houses, the stove heating method is retained - both as the main source of heat and as an auxiliary one.
Often the choice in favor of a conventional stove is associated with economic considerations - the best brick stove will cost less than laying a distribution pipe to connect to central heating.
Important
The stove is a fairly voluminous structure, it is almost impossible to make it invisible. Most often, red brick is used for masonry, which does not always look harmonious in the room. Therefore, the owners make an effort to ensure that the stove fits into the interior and looks neat. Often the finishing of the stove is done with plaster.
However, many are faced with such a problem - after a few years, the plaster from the brick oven begins to crumble. In fact, this can be avoided, the main thing is to correctly perform the plastering work.
In fact, even a home craftsman who does not have experience in similar work can do a high-quality plaster of a brick oven. It is important to pay close attention to the process and use high-quality materials, then the oven will retain its presentable appearance for a long time.
Before plastering the stove, you need to prepare the room. To do this, you need to free up space for work - all unnecessary items from the room must be taken out. Furniture should also be removed from the room if possible. If this does not work, then you need to cover it with a thick cloth. To protect against debris, dust and damage, windows, walls and floors - these surfaces should be covered with plastic.
Learn how to plaster a brick stove, and prepare all the necessary tools and materials in advance. You will need a set of tools, including:
- trowel or trowel;
- grater;
- hammer;
- chisel or spatula;
- nippers and pliers (they can be replaced with pliers);
- spray - it is needed to wet the surface with water (if it is not there, a paint brush will do);
- metal scissors and fabric scissors;
- coarse sieve - for sifting sand and / or clay;
- a container for a solution and a separate one for water;
- scoop for plaster mixture (or its components);
- broom or vacuum cleaner.
The list of materials for plastering the stove includes the actual mortar for plastering the stove, a reinforcing mesh with 10 x 10 mm cells (you can do with burlap), lime (or water-based paint), as well as a cement mortar (it will be needed to fix the wire - including if we are talking about an old stove).
Reinforcing mesh with cells 10 x 10 mm
Before starting the plastering work, be sure to prepare the surface of the oven. This will make the solution easier to apply and the finish will look better and last longer.
If we are talking about an old furnace, then you will need to prepare the surface according to the following scheme:
- Cleaning the oven surface from old plaster. This can be done with a spatula or chisel.
- The surface is rubbed with sandpaper - this will help eliminate minor irregularities.
- The resulting debris and dust must be removed with a vacuum cleaner or dry cloth.
In the case when you need to plaster a freshly laid oven, such work should begin about a month after the completion of the brickwork.
This period is enough for the mortar used for masonry to dry out, harden and gain strength.
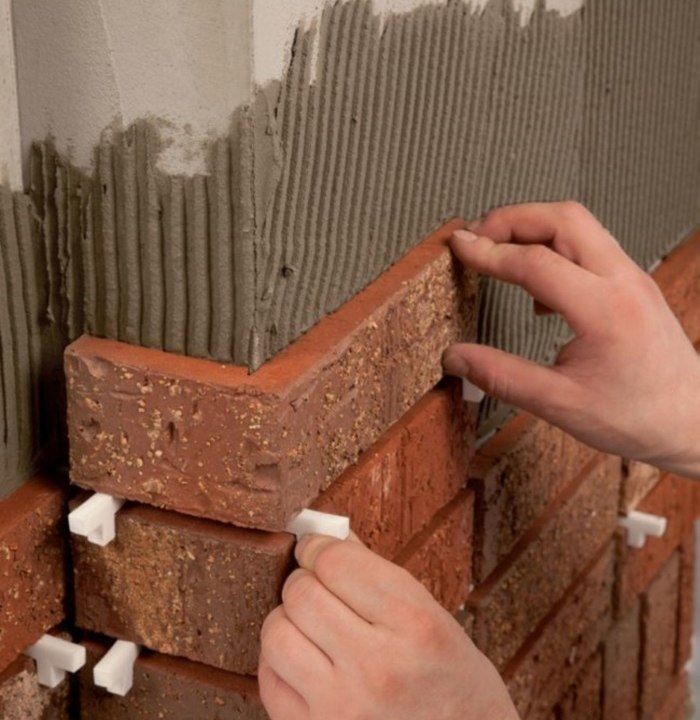

Before starting work, you need to clear the seams between the bricks that make up the furnace to a depth of about 0.5 cm - this will help the plaster mortar better lie on the masonry.
Today it is possible to choose between buying a ready-made dry mix for plastering a stove or preparing a solution on your own according to proven "folk" recipes.
To achieve a high-quality result, it is necessary to carefully observe the ratio of dry components and water, which must be either tap or technical (neither lake nor river can be taken for the solution).
Depending on the purpose of the room and its humidity, the mode of its use, the planned method of exterior decoration, as well as the climate in the region, the owner must decide how to plaster his stove.
How to prepare the “right” solution? The classic recipe includes clay and sand. If you plan to paint the stove white, then lime can be added - it must be slaked. To increase the strength of the solution, you can add crushed asbestos or fiberglass.
We offer you to familiarize yourself with How to fold a Kuznetsov oven with your own hands
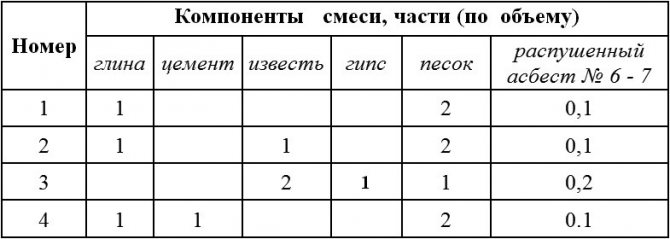
The composition of the mortar for plastering the oven may vary. The table shows the main popular options:
| Clay | Gypsum | Sand | Cement | Lime | Asbestos | Fiberglass | |
| ratio of parts in solution | |||||||
| 1 | 1 | — | 2 | — | — | 0,1 | — |
| 2 | 1 | — | 2 | — | 1 | 0,1 | — |
| 3 | — | 1 | 1 | — | 2 | 0,2 | — |
| 4 | 1 | — | 2 | 1 | — | 0,1 | — |
| 5 | — | 1 | 1 | — | 2 | — | 0,2 |
The sand content of the slurry can vary depending on the grease content of the clay to be used. If the fat content is high, then instead of two parts of sand, it is permissible to add three or even four.
To determine the correct ratio, you need to prepare a portion of the sample solution and apply it to the surface - a small area. If the plaster area is covered with cracks when the solution dries, it means that there is not enough sand and you need to add more. If the solution crumbled, this indicates that there is not enough clay in its composition.
In order to achieve good results, close attention must be paid to the process of preparing the solution itself. In this case, it is required to observe a number of simple rules, not only at the time of mixing the plaster mixture, but also during the preparation of the components.
Clay:
- clean up debris;
- place for soaking in water for several days;
- filter the resulting gruel through a coarse sieve.
Lime (work on the preparation of this material is carried out only on the street):
- pour pieces of lime into a bucket (it should only be metal) - no more than half of the bucket's volume;
- pour water (no more than 0.6 bucket volume);
- let the solution cool for a day;
- drain the solution;
- pass the lime slurry through a coarse sieve.
Sand also needs to be sieved, asbestos or fiberglass - thoroughly crushed.
To prepare a high quality solution, you need to reproduce the following sequence of actions:
- Sifted sand is added to the prepared clay.
- The remaining constituents of the solution are added (for example, fiberglass).
- The solution is thoroughly mixed. This can be done using a drill, a construction mixer, or a hammer drill with a special attachment.
A high-quality solution should not contain solid particles or lumps, it looks homogeneous and plastic.
Ready mortar for plastering the oven
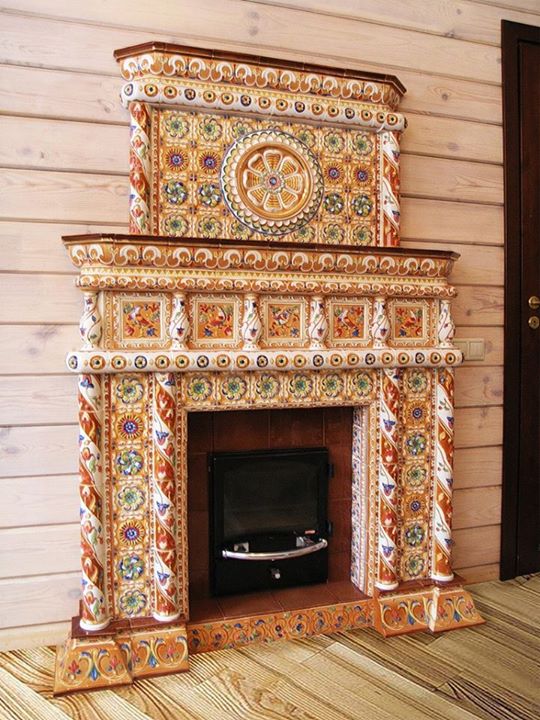

If gypsum was used as a base, such a solution hardens very quickly. It must be prepared in small portions, which must be immediately applied to the oven;
Advice
The prepared mortar with a cement base should be used within an hour after it has been diluted with water;
A clay-based mixture can be prepared in advance. It can be stored for a long time, provided the container is sealed.
After all the necessary materials and a set of tools have been prepared, you can start the process of plastering the stove with your own hands. Plastering a brick oven can be done according to a simple scheme, consisting of five basic steps:
- Heat the oven. Before starting work, the walls of the stove should warm up well. This step is mandatory even during the hot summer season.
- Surface preparation.
- Application of the first layer. It is necessary to moisten the surface to be plastered with water (with a brush or by means of a spray gun), and then apply a thin layer of liquid clay (for this, a wash brush is used). Before the next step, this plastered layer should dry out a little.
- Reinforcement.The specifics of performing this step depend on the selected material:
- Reinforcing mesh. To fix it in the center of the bricks, you need to drill holes, the depth of which should be about 5 cm. The distances between them should be no more than 0.5 m, and the holes should be staggered. In each of the holes you need to insert a wire with a diameter of 3 mm (its length should be 100 mm). Each of the pieces of wire is bent in the middle at an angle of 900, and inside the bricks they are fixed with a cement mortar. After the cement has hardened, you can lay the reinforcing mesh on top of the furnace - it must be fixed to the free ends of the wire. In order to do everything right, we advise you to watch the video on fixing the reinforcing mesh to the furnace:
- Sackcloth. The material must be cut and soaked in a solution of liquid clay. After that, it must be distributed over the oven: the laying process is carried out in the direction from top to bottom, the overlap should be about 50 mm. If such material is used for reinforcement, the furnace must be protected from overheating during operation;
After finishing the application of the plaster, it must be allowed to dry. If cracks appear, they can be widened with an ordinary knife, then moistened with water and covered with a solution (if a clay-based solution was used, for this purpose, you can use the remains of plaster, which can be stored in an airtight container).
In order for the stove to look good indoors, additional finishing can be done after the plastering is completed:
- painting with water-based paint;
- whitewashing with chalk;
- coating with milk of lime (you need to add a little salt to it, at the rate of 0.1 kg per 100 liters of solution);
- decorative plaster for stoves (a wide range of compounds can be found in hardware stores).
Brick stove decoration
Finishing work of a brick stove is carried out in stages.
Tools for finishing work.
The initial stage is cleaning the surface from dust, dirt, expanding and deepening masonry joints between bricks (up to 1 cm). Cleaning is carried out with an iron brush or an "angle grinder" with a special attachment. Then the bricks are wiped with a wet cloth.
The second stage - the surface of the furnace is covered with a mesh made of metal (the width of the cells is not more than 150 mm). It is fixed with carnations or with self-tapping screws at the discretion of the master in places where the temperature is the highest (furnace flap, surface for cooking food). A metal corner is fixed in the corners of the furnace. This frame will make it possible to avoid surface deformation during the working period and during the further operation of the brick stove.
3rd stage - application of a plaster layer to the wire frame. Its surface is carefully leveled using a level and a plumb line, so that later you can easily glue the tiles or fix the tiles. A layer of plaster is allowed to dry, after which some masters recommend to flood the stove and warm it up properly.
The fourth stage is the actual gluing of the tiles. It must be said right away: the process of fixing tiles is very peculiar, it is better to entrust it to competent specialists. For gluing, a specialized heat-resistant glue is used, produced for fireplaces and stoves. Before starting work, the tiles should be sorted out so as not to get chipped, cracked or with damaged glaze.They begin to glue the tiles from the bottom, using a level, checking and correcting each row. Masters advise first to glue tiles at the corners and lead each new row from them. To make the distances between the tiles similar, crosses are used.
The fifth stage is grouting and impregnation with a heat-resistant compound. The latter will keep the surfaces of tiles and seams from dirt. Allow the glue to dry for 3 days before grouting. Having prepared the mixture (detailed instructions are placed on the package), it is applied in an even layer. In order for the grooves of the seams to be filled in the same way, the craftsmen recommend doing this with a pistol used for the sealant. After completing the work, wash the surface and remove the remains of the mixture.
Now you can say everything, the oven is ready. And already a day after the completion of all the work, you can begin to heat it.
Clinker tiles
European material created for facing fireplaces and stoves as opposed to decorative bricks in the houses of Holland, Norway and a number of other Northern European countries.
Usually, several types of clay are pressed, with the addition of certain parts of chamotte, various dyes, and fired. The result is a tile with a pleasant shade of beige, from milky to bright orange.
It is a material with a thickness of 9-12 mm, with a microporous structure, capable of retaining heat well.
Self-lining oven
In this note, the reader can find out the answers to the questions: how to decorate a brick stove, what materials to use for this, and also learns the technological characteristics of one or another type of cladding.
In addition, detailed instructions will be presented here, which will describe how to do work on finishing the stove in a cottage with your own hands using a tried and tested technology.
A simple home oven.
Decoration without cladding
There are many design options for stoves made of brick, but here we will talk about the most popular types of cladding that combine affordability, practicality and a suitable appearance. .
One of the fairly common and cheap methods, which is very often used when building stoves in houses outside the city or building fireplaces, is considered to be decorative brickwork. In this case, the role of decorative design is played by the surface of the external bricks and the seams between them, in other words, the entire Part, which is visible from the brickwork. (See also the publication How to veneer the basement of a brick house: options.)
When choosing this option, this moment must be provided even at the construction stage and used for the outer row of brick masonry if there is a possibility of the most even brick without flaws and cracks. At the same time, great attention must be paid to observance of right angles, to prevent deviations from the vertical and horizon, and also to look at the uniformity of the joints between the bricks.
Decorative brick laying.
Further, certain tips will be offered for decorating the outer rows of brickwork in a decorative style:
- The outer wall surface should be as smooth as possible, without cracks, cracks and empty spaces, otherwise, during a certain time, dust accumulating in them when heated from the stove can emit a fetid odor.
- To give a more dramatic appearance on the corner edges of the outside of the brick, you can remove a small chamfer with a grinder.
- Use a mixture of asbestos powder with cement as a mortar for grouting joints between bricks.
- To give the grout of different colors, finely ground brick flour, black clay powder or other inorganic dyes can be added to the solution.
- After grouting, it is recommended that the joints be routed using a long flat plank and a convex jointing tool. When joining, first of all, it is necessary to process all vertical seams, and then horizontal ones.
- If you wish, you can whitewash the oven with a solution of slaked lime and salted water at the rate of 100 grams of sodium chloride per bucket of water.
- Doors, blowers and other metal elements can be painted with heat-resistant silicone enamel.
It must be said that the decoration with brickwork can also be used for metal stoves, for example, lining a stove for a bath with bricks is often used to increase safety and improve its beautiful qualities.
The photo shows a brick for masonry with decorative elements.
Advice! Before finishing the brick stove with whitewash, it is recommended to grind the surface from the outside. To do this, the wall must be carefully sanded with a half of an ordinary red brick soaked in water.
Surface plastering
If, for example, the appearance of unfinished brick does not correspond to the entire style of home decoration, the stove can be plastered with clay lime or gypsum mortar, followed by painting with interior water-dispersion paint. Also, this method is perfect for the restoration of old or decorative design of previously built stoves. (See also the publication Plaster for decorative work from putty: subtleties of decoration.)
Facing a brick stove with plaster mortar can only be done after the brickwork has completely dried.
The sequence of actions is as follows:
- It is worth removing the mortar from the external masonry seams to a depth of 10-15 mm, and cleaning the furnace surface with a metal brush.
- Fix a metal mesh with a mesh size of 10-20 mm on horizontal and vertical planes.
- To fasten the mesh during the construction of the furnace, it is necessary to provide for the laying of a whisker made of soft steel wire. If this is not possible, it can be fixed with nails with a 100 mm step, placing them like in chess.
- Before applying the solution, you need to warm up the oven to a temperature of 50 - 60 ° C.
- A ready-made plaster solution is required to be applied to a moistened heated surface in several layers with a transitional drying of each layer.
- Apply the solution by scattering it with an iron trowel or spatula. and then rubbed with plastic or wood grout.
Plastering on an iron mesh.
Advice! When preparing plaster mortar on your own, all dry important parts (sand, cement, gypsum, etc.) should be carefully sieved with a very small construction sieve.
Tile application
The most of the rather practical options for how to decorate a brick stove is the laying of tiles. Due to the fact that its outer part is covered with glaze, it has a beautiful appearance, and it also becomes much easier to care for its surface.
The main difficulty in fixing the tiles well is that the surface of the stove, while heating up, then cooling down, regularly changes its own geometric dimensions. In this case, insufficiently securely glued tiles can fall off, and firmly glued tiles can burst in two.
Facing with brick-like ceramic tiles.
As a result, ceramic tiles can only be installed on plastered furnaces with a lined combustion chamber. For lining, the combustion chamber is lined with a layer of fireclay bricks inside, thereby reducing the difference in temperature differences.
Further, certain recommendations for finishing the stove with ceramic tiles will be presented.
- It is better to use small tiles as a cladding material. In this case, the effect of different coefficient of thermal expansion of materials is less pronounced.
- Before tiling on plaster, a metal mesh with a mesh size of 10 mm should be reinforced with screws with wide washers.
- To fix the tiles, use special adhesives that are intended for finishing work on stoves.Despite the fact that their price may be slightly higher, they are specially designed for operation in very high temperatures, and after drying they have sufficient elasticity.
- Grouting of tile joints can be performed using ordinary grouting mixtures, if necessary, adding inorganic pigment dyes.
Refractory tile adhesive.
You need to pay attention! The decorative design of the stove, in addition to its beautiful qualities, also makes a useful role. no matter how to finish the brick oven. plaster or ceramic tiles, the finishing material increases its physical mass, as a result of which its heat capacity increases.
What else can you decorate the oven with?
Stove-makers are often asked the question: is it possible to take sheets of drywall as a decoration for stoves?
It is absolutely impossible to do this, since an insulating layer must be placed under the plasterboard sheathing, and in this case the stove will perform only a decorative function.
In the case of installing a false fireplace, it can be made of gypsum fiber panels, and then glue vinyl wallpaper on top under a stone or brickwork. Installing a decorative fireplace and wallpapering it is not too expensive work, it will add zest to your living room.
Recently, glass fiber or fiberglass mesh has been produced for finishing furnaces. They are fireproof and recognized as completely harmless, since they do not emit toxic substances when heated. After gluing with fiberglass or fiberglass mesh, they can be painted in any color that suits the interior of the room.
These are two different materials, but the principle of manufacture and all characteristics are suitable for finishing furnaces.
Sometimes refractory bricks are used to decorate fireplaces and stoves. It is a heat-resistant material used in blast furnace production. It is expensive and is not widely used in household brick heaters.
An article on choosing a brick for masonry can be found here: https://teplo.guru/pechi/stroim/kirpich-dlya-kladki-pechei.html
Watch a video in which the master tells how to tile a Russian stove with tiles:
Source: teplo.guru
Tile cladding and its types
Terracotta is a ceramic material that has been used in homes since the days of Ancient Greece and Rome. It is a special clay with a highly porous structure. In order to obtain a ceramic material from it, it is first pressed and then fired. Such ceramics were widely used in the houses of Ancient Greece, Rome and the states of Central Asia in the manufacture of decorative elements, tiles and other items used in the house. The stove, faced with terracotta tiles, has a bright red-brown color.
Majolica is an advanced glazed terracotta. The tile was named after the island of Mallorca. He became famous for his tin-lead painted tiles, various decorative items and tableware. Majolica products were hand-painted by artists, and ceramic tiles were considered a luxury.
Clinker tiles are building ceramics, which were created in contrast to facing bricks for decorating stoves and fireplaces in houses in Holland, Germany and other Nordic countries. The composition is pressed and fired at high temperatures. After processing, a material with a microporous structure is obtained. To decorate fireplaces and stoves with this tile, it is made with a thickness of 8-9 mm.
Porcelain stoneware is a modern type of finishing materials for home and summer cottages. It was made in Italy in the 80s. It is made from different types of clay with the addition of quartz sand, fine fractions of granite and marble, salts and metal oxides as dyes. All this composition is pressed under high pressure and temperature. Such tiles are used to decorate buildings inside and outside. And the facing of the stoves with porcelain stoneware tiles is not only not inferior to the traditional ones, but also imitates them.
Tiles are considered a unique finishing material made from ceramics. The tiles were created specifically for the tiles that cover the stoves. Their use dates back to the time of the Babylonian civilization.
Now, knowing which tile to cover the stove, you can proceed directly to the work:
- before you cover the stove with tiles, you need to prepare it for work. To do this, the surface is cleaned of dirt, and the seams formed during masonry are deepened by 10 mm;
- then a metal wire mesh is attached to the stove with nails. Moreover, nails 100 mm long are driven in between the seams;
- then the covered wire mesh is covered with cement grade M 400. When the cement is dry, tiles are applied to it;
- the tile is laid from below, and it is constantly checked whether it lays down evenly with the help of a level. The tile is fastened with cement mortar, which is spread over its reverse side with a notched trowel. Then the tile is pressed and tapped with a rubber mallet.
To overlay the stove, first a whole tile is laid out in the first rows, and then cut off. The width of the joints between the tiles will be the same if you insert plastic crosses, two on the horizontal side and two on the vertical. Seams are not completely filled with mortar to create a decorative effect. To cover the oven, its surface must be perfectly flat.
How to overlay the stove in the house: expert advice
Today, some of us can proudly say that such a heating device as a wood-burning stove has survived in their house. However, often their appearance does not match the design of the room and the stove stands out from the general interior. To eliminate this drawback, it can be overlaid with some kind of finishing material that is perfect for any decoration. Often times, finishing a stove is more than just decoration. Such a repair brings its advantages and the unit increases the heat capacity, heats up faster and retains heat for a very long time.
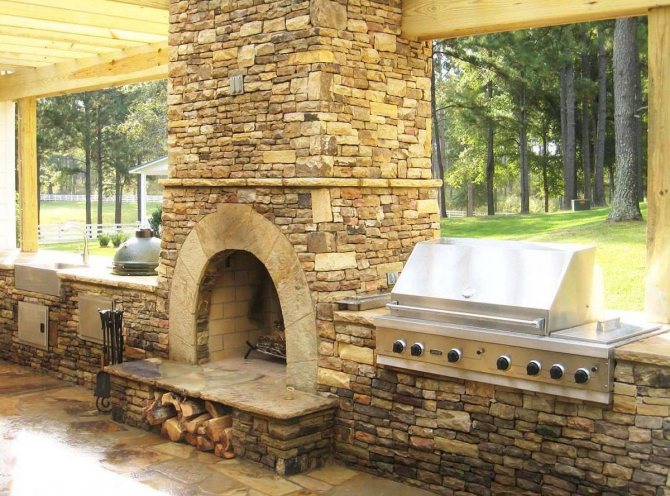

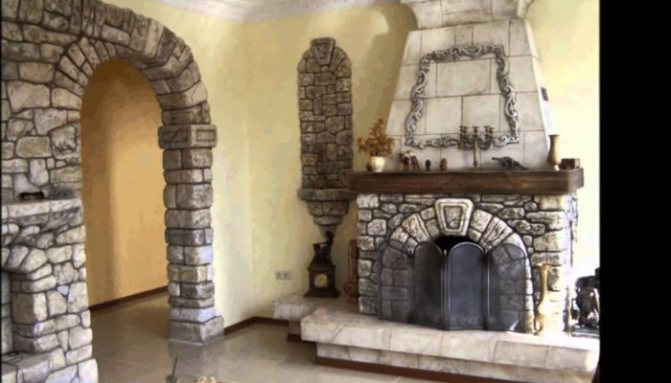
An excellent solution is to decorate the stove with decorative stone in a country-style room.
For finishing a brick oven, various types of tiles are mainly used. But lovers of bright design solutions prefer to decorate with plaster. It can be originally painted with bright colors, beautiful ornaments can be made. Moreover, this type of finish can be considered the most budgetary.
However, if you decide to decorate your stove in an exquisite and unique way, then the best option would be to use tiles. To do this, you need to figure out what kind of finishing materials can be from which the cladding is performed.
In the design of stoves and fireplaces they use:
- A natural stone;
- Bright painted majolica;
- Wooden unglazed terracotta;
- Heat-resistant clinker tiles;
- Refractory brick masonry;
- Porcelain stoneware.
These facing materials correspond to the characteristics required for finishing furnaces. They have a sufficient thickness within 5-9 mm, withstand high temperatures, prevent mechanical damage, and have a low-porous structure. Today, compositions from cullet or the so-called fiberglass mesh are used to decorate furnace structures. They are considered completely harmless materials, since when heated to a high temperature, they do not emit toxic substances, and also allow the stove to be painted in any convenient color.
Heat resistant materials
Iron stoves differ in their characteristics from brick ones. Iron furnaces, unlike brick ones, quickly heat up and cool down. To minimize this negative property, you need to know how to overlay the oven. The most suitable material is brick. Of course, ordinary brick will not work for building houses. For this, a brick made of refractory material is used that will withstand the heat of the furnace. Usually inexperienced builders, not knowing how to overlay, use slotted or hollow bricks.This cannot be done, only a special ceramic oven brick will do. To properly overlay the stove, you need to prepare materials and tools in advance:
- brick;
- solution;
- asbestos;
- metal corner;
- Master OK;
- notched trowel;
- rule;
- rubber hammer;
- building level.
If the stove will be for the home and you already know how to overlay it and how to do it, you can improve its appearance. To do this, after finishing the oven with material, it can be painted. Regular paint and whitewash will not work for this, since the oven is constantly heating up and the paint will crack and fall off. Now there is a special paint that can withstand high temperatures. This paint is called "emulsion", and it can withstand up to 600 ° C. After using such paint, the stove in the house will look nice and tidy.
The best material for decorating a stove in a home is ceramic tiles. Due to the fact that the stoves of houses are constantly at high temperatures, the materials for them must have the following properties:
- heat resistance;
- strength, which is not lost after heating;
- large thickness 6-8 mm;
- dense structure.
In addition, a special clay is used for lining the furnaces, the strength of which increases when heated. There are several types of special tiles that differ in appearance and installation. Their choice depends on the type of house and the room in which the stove is located.
Ceramic tile
Majolica, terracotta, clinker tiles - this is not so expensive to overlay the stove in the house. Before proceeding with the process of lining the stove surface, it is necessary to lining the furnace in the house to reduce temperature differences. The tiles must be laid on a plaster mesh.
you should not choose large-sized tiles for finishing, since they are not suitable for oven lining, during the use of the oven it very often cracks and collapses. Use a tile cutter when cutting tiles.
Choose a high-quality, proven adhesive base so that the tile does not fall off later.
Step-by-step actions:
- Rub the seams.
- Coat the entire surface with an organic silicon impregnation.
- Using a spatula, apply heat-resistant adhesive to the tiles and attach to the wall. Laying direction - from bottom to top.
- Insert crosses between the joining tiles. It is imperative to check the level of the horizontal rows so that the drawing does not deteriorate.
- Three days later, when the tile is completely dry and stable, you should wipe the seams with a specialized solution, you can use a color tint.
Materials for work and preparatory activities
Before covering the stove, prepare the materials necessary for work in advance. There are two ways to lay tiles: with and without glue. For the first method, you will need:
- glue that is used to work with stoves and fireplaces;
- primer;
- grout for joints;
- plinth.
If the method you have chosen does not require the use of glue, then you will need galvanized steel sheets, the thickness of which should not exceed 0.8 mm. To cover the corners, buy a steel or aluminum corner. To make the frame, you need 2 cm wide and 0.2 cm thick strips of aluminum. Whichever method you choose, the surface is carefully prepared. We do not recommend ignoring this procedure, since it depends on it how smoothly the plaster and tile adhesive will fall on the surface.
First, remove the old layer of plaster. To do this, spray the surface with water, and then proceed with cleaning immediately. Use a hammer and chisel in places where the old layer firmly "sits" on the oven. As a result of cleaning, you should see a "bare" brick in front of you. After removing the old plaster, clean the bricks with a wire brush. Then generously moisten the surface with water from a spray bottle and clean the joints between the bricks to a depth of 1 cm.
The next step will be priming. At the same time, try to apply soil not only to the surface of the bricks, but also to the seams between them. After application, leave the oven until the primer is completely dry. Then apply the composition again. Then check the flatness of the surface. There is an opinion that tiles will help hide irregularities. However, in practice, the facing material only emphasizes the surface differences. If the surface is uneven, you will need to level it before laying the tiles. For this, metal profiles are mounted on the stove, the space between which is filled with plaster.
Often, when dismantling old plaster, “broken” zones are formed at the corners of the stove. They need to be reinforced with a perforated steel corner. After the plaster has dried, a fiberglass mesh must be installed on its surface. To do this, apply a layer of glue and attach a mesh. Once the previous layer of glue is dry, grease the installed mesh again with the same adhesive.
obustroen.ru
Decorative or natural stone
Professional stove-makers recommend that before covering the stove in the house, before the main measures for laying the wall, heat and dry the stove well. The house will be decorated with an evenly laid stove, so it is necessary to strictly maintain the inter-seam distances. For stone, this is a width of 1.5 - 2 cm. Laying with stone facing material does not differ from tiling. There is a difference in the preparatory period.
- Lay the stone on the floor in such a pattern or pattern as you would like to see on the surface of the stove.
- Mark the stone.
- In the center of each stone, write its number in large size.
- On the edges, write small numbers (numbers) of the joining stones.
This approach will not allow confusion in the drawing and will significantly save not only your time, but also your nerves.
it is better to mark with small ones, since the chemical components of the marker or felt-tip pen will be absorbed into the surface of the stone.
Stir the glue base with very coarse salt, in proportions of one kilogram per bucket of diluted glue. Stones attached in this way will hold firmly and tightly.
In this article, we examined the most basic and common types of facing furnace work. We hope that we have helped you make your choice in decorating the stove for your home.
www.vashcottage.ru
How to decorate stoves in a private house with your own hands with tiles: getting ready for work
In order to properly lay a brick stove with tiles with your own hands, you need to carry out preparatory measures, as well as prepare the necessary tool for work.
We need:
- Rack level;
- Plumb line;
- Putty knife;
- Construction trowel;
- Paint brush;
- Tile cutter;
- A hammer or mallet with a rubber top;
- Brush with metal bristles;
- Solution container;
- Heat resistant refractory adhesive.
When finishing the stove with tiles, use refractory materials
To ennoble the stove with tiles is not an easy process that requires skills and knowledge. Therefore, it is better to invite professionals for such work. However, if the owner has skillful hands and, as they say, grasps everything on the fly, it will not be difficult for him to lay the tiles on the stove. This is done like this: the oven is cleaned from the solution frozen in unnecessary places after laying the solution.
It is most correct to do this with a metal construction brush, after which rubbing with a damp sponge or rag.
Then it is necessary to tighten and strengthen a metal mesh with a small mesh size (up to 20 mm) over the entire surface.
For fasteners, take nails or screws. The structure with a mesh is thrown over with a solution, then leveled and allowed to dry. After drying, the oven is well heated and the tiles are glued.
Experts recommend that you start laying tiles from both the bottom rows and corners.
In order to make the rows even, you need to use a level and "crosses". After finishing laying the tiles, grouting and covering it with a heat-resistant compound follow.Before starting the sealing of the seams, the structure must be allowed to dry for at least three days. For fire safety purposes, the floor in front of the firebox does not need to be finished with a galvanized sheet of iron. For the same purposes, do not try to glue wallpaper on the oven, or sheathe it with plastic. The use of non-heat-resistant tiles is also excluded. Only pasting of walls in the area of the furnace with glass fiber is allowed.
teploclass.ru
Tiles - handmade
If you want the stove in the interior of your private house to become a bright detail that can give comfort and emphasize individuality, then it is recommended to use tiles. These are handmade ceramic tiles, which are made especially for decorating stoves. The peculiarity of the tiles is a specific design in the form of a box-shaped protrusion on the back of the tile.
Tiles have a number of advantages:
- stylish and solid look, which gives the room where the oven is located, a special retro-style atmosphere;
- such a stove will become a key element of the interior;
- choice of tiles very wide and varied - you can choose patterns and colors to your taste;
- behind the oven easy to care for... Dust almost does not sit on such a coating, and if dirt suddenly appears, then simply deal with it with water and a sponge;
- heat capacity of the stovedecorated with handmade tiles increases significantly. Such a stove will cool down much longer than a whitewashed heating unit of a similar design and size.
Source: Unfortunately, with all the advantages, the tiled stove also has disadvantages:
- the installation process requires patience and skill;
- high price of tiles. Any handmade product will always cost more than a similar factory-made product.
Suppose that you are not embarrassed by the solid price of the tiles, and you want to decorate the stove with them in your home. Before proceeding with the installation process, preparatory work should be carried out. To begin with, you need to sort the tiles by shade so that they are harmoniously combined with each other. Then pay attention to the size of each tile, it is important to make sure that the parameters of the adjacent tiles (those that are in the same horizontal row) match each other as closely as possible.
Important: check the integrity of the tiles, for this you need to lightly bang them against each other. The sound should be clear and clear. Such tiles are free from cracks, which means that they can be safely used in decorating the stove.
The algorithm for mounting decor from tiles is as follows.
- Prepare bottom row corner tiles. Moisten them with water and place them on the stove surface using a thick clay mortar. Each next row should also begin with the installation of extreme (corner) tiles.
- Pick up the next tiles from the bottom row and first try them on to each other dry, without mortar. The accuracy of the location of the tiles must be controlled using a level and a plumb line.
- Make sure that the vertical seams are tightly adjacent to each other until the grout (the box-shaped ledge on the back of the tile) is filled with mortar. When you see that the row has been assembled correctly, the tiles should be removed. Before installation, each tile must be moistened in a container of water.
- The tiles are laid on the vertical surface of the stove using clay mortar.
- The seams between the tiles are rubbed with alabaster, which will make the structure visually integral.
In this article, the most popular stove finishing techniques were analyzed. The question of how to decorate a stove is associated not only with the aesthetics of the home. A well-chosen design will significantly increase the heat capacity of the heating structure and extend its service life without additional repairs. Of course, beautiful tiles, stones or tiles can become a real highlight of the interior of the room where your stove is located.
We recommend reading:

What to do if there is an unpleasant smell from the ventilation in the toilet: solving the problem on your own
Arrangement of ventilation in the toilet of a private house: just about the important

What to do if the boiler is leaking from the bottom or from the top: the right troubleshooting methods
It is worth noting that the methods of lining the furnace differ in both cost and time costs. So, plastering and whitewashing will not take you a lot of effort, time, money, and the installation of tiles or artificial stone will cost a pretty penny and require certain skills.
Selected videos on the topic will be able to serve as a self-instruction manual for a home craftsman who has never had to deal with finishing a home or sauna stove before.
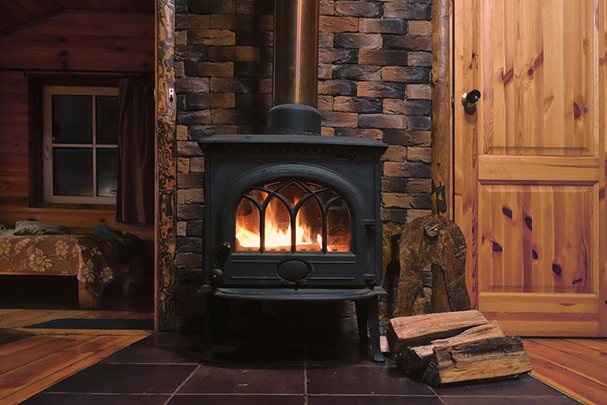

Dear friends, if you want to revive the interior of a country house and turn a modest brick oven into an atmospheric art object, then we recommend taking care of its decoration. The result of your efforts will pleasantly delight and surprise your household.
